Lenovo Thinkstation P3 Ultra Ram SSD Upgrade Guide
The Lenovo ThinkStation P3 Ultra is a powerful workstation, but upgrading its RAM and SSD can unlock even greater performance. This guide walks you through everything you need to know, from choosing the right components to installing them yourself. You will learn about compatible specs, step-by-step procedures, and expert tips to get the most out of your system.
The Lenovo ThinkStation P3 Ultra is a compact yet powerful workstation designed for professionals who need serious computing muscle. Whether you are running CAD software, doing video editing, or handling complex data analysis, this machine delivers. But even the best workstations can benefit from a Lenovo Thinkstation P3 Ultra Ram Ssd Upgrade. Upgrading your memory and storage is one of the simplest ways to breathe new life into your system.
Many users find that their workstation slows down over time. Applications take longer to open. Files load sluggishly. Multitasking becomes a frustrating experience. The good news is that you do not need to buy a brand-new machine. A Lenovo Thinkstation P3 Ultra Ram Ssd Upgrade can transform your workstation’s speed and responsiveness. In this guide, we will walk you through every step of the process.
We will cover everything from understanding your current specs to choosing the right components. You will learn how to install RAM and an SSD safely. We will also share tips to maximize performance after the upgrade. By the end of this guide, you will feel confident tackling the upgrade yourself. Let us get started.
Key Takeaways
- Easy Upgrade Path: The ThinkStation P3 Ultra supports user-accessible RAM and SSD upgrades with standard tools.
- Performance Boost: Adding more RAM and a faster SSD dramatically improves multitasking and load times.
- Compatibility Matters: Always check DDR4/DDR5 support and M.2 NVMe slot availability before buying parts.
- Step-by-Step Process: The upgrade is straightforward and does not require professional help.
- Cost-Effective: Upgrading is far cheaper than buying a new workstation.
- Warranty Consideration: Check Lenovo’s warranty terms before opening the chassis.
📑 Table of Contents
- Why Upgrade RAM and SSD on Your ThinkStation P3 Ultra?
- Understanding Your ThinkStation P3 Ultra Specs
- Choosing the Right RAM for Your Upgrade
- Selecting the Best SSD for Your Workstation
- Step-by-Step Installation Guide
- Optimizing Performance After the Upgrade
- Common Mistakes to Avoid During Upgrade
- Expert Tips to Maximize Your Workstation’s Potential
- Conclusion
Why Upgrade RAM and SSD on Your ThinkStation P3 Ultra?
Workstations like the Lenovo ThinkStation P3 Ultra are built to handle demanding tasks. Over time, however, software becomes more resource-heavy. Your current RAM and storage may no longer keep up. Upgrading both components offers significant benefits.
A RAM upgrade allows your system to handle more applications simultaneously. More memory means smoother multitasking. Your CPU does not have to wait for data to be swapped in and out of storage. This is especially important for users running virtual machines, 3D rendering, or large datasets.
An SSD upgrade replaces older, slower storage with a modern NVMe drive. The difference is night and day. Boot times shrink. File transfers fly. Applications launch almost instantly. Pairing a fast SSD with additional RAM creates a powerful combination that makes everything feel snappier.
Who Benefits Most From This Upgrade?
Many types of professionals benefit from a Lenovo Thinkstation P3 Ultra Ram Ssd Upgrade. Engineers and architects who run CAD software see smoother performance. Video editors notice faster render times. Data scientists handle larger datasets more efficiently. Even general office users enjoy faster boot and load times. If your workstation feels slow, an upgrade is likely the answer.
Understanding Your ThinkStation P3 Ultra Specs
Before you buy any components, you need to understand what your ThinkStation P3 Ultra currently has. Knowing your specs helps you choose compatible parts. It also tells you how much room you have to grow.
Start by checking your current RAM configuration. Open your system settings and look at the total memory installed. Note the type of RAM your system uses. Most ThinkStation P3 Ultra models support DDR4 memory. Some newer configurations may use DDR5. Check the maximum capacity your motherboard supports as well.
Next, look at your storage situation. The ThinkStation P3 Ultra typically uses M.2 NVMe SSD slots. Check how many slots are available and whether any are already occupied. You want to know if you can add a second drive or if you need to replace the existing one.
How to Check Your Current Specs
Checking your specs is simple. On Windows, right-click the Start button and select System. You will see your installed RAM and processor details. To check your storage, open File Explorer and look at your drives. For more detailed information, use the built-in System Information tool. Search for “System Information” in the Windows search bar and open it. Look under Components for Memory and Storage details.
Another great resource is Lenovo’s own support page. Enter your ThinkStation P3 Ultra model number on Lenovo’s website. You will find the full specifications, including maximum RAM capacity and supported storage types. This is the most reliable source for compatibility information.
Choosing the Right RAM for Your Upgrade
Selecting the right RAM is the first step in your Lenovo Thinkstation P3 Ultra Ram Ssd Upgrade journey. Not all RAM modules are the same. You need to match the type, speed, and capacity to your system.
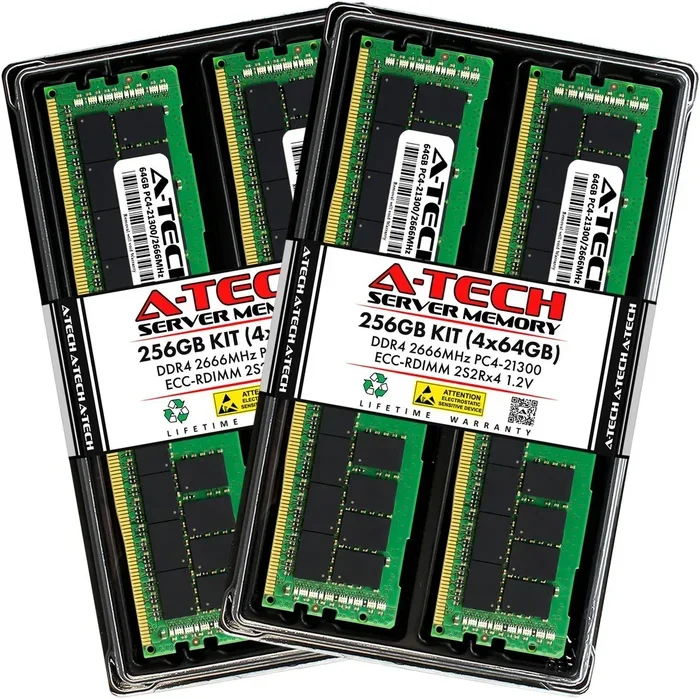
Most ThinkStation P3 Ultra models use DDR4 ECC RDIMM memory. ECC stands for Error-Correcting Code. It is a type of memory that detects and corrects data corruption. This is important for workstations that handle critical tasks. Do not mix ECC and non-ECC RAM. Always use the same type throughout your system.
Consider the capacity you need. If you currently have 16GB, upgrading to 32GB or 64GB can make a noticeable difference. For heavy workloads like 3D rendering or running multiple virtual machines, 64GB or even 128GB may be ideal. Check your motherboard’s maximum supported capacity before purchasing.
RAM Speed and Dual Channel Configuration
RAM speed matters for overall system responsiveness. The ThinkStation P3 Ultra typically supports DDR4-3200 MHz memory. Faster speeds can improve performance, but always match the speed to what your CPU and motherboard support. Mixing different speeds will cause all modules to run at the slowest speed.
Installing RAM in matched pairs enables dual channel mode. This doubles the data throughput between RAM and the CPU. For best results, install identical modules in the correct slots. Refer to your ThinkStation P3 Ultra manual for the proper slot configuration. Usually, you want to fill slots in pairs, starting with the lowest-numbered slots.
Selecting the Best SSD for Your Workstation
Choosing the right SSD is just as important as picking the right RAM. The ThinkStation P3 Ultra uses M.2 NVMe PCIe slots. These are the fastest consumer and workstation SSDs available today. NVMe drives are dramatically faster than traditional SATA SSDs or hard drives.
Capacity is your first decision. SSDs come in sizes from 250GB to 4TB and beyond. Consider what you currently store and what you plan to store. For most professionals, 1TB or 2TB provides a good balance of speed and space. If you work with large video files or datasets, consider 2TB or more.
Brand and reliability also matter. Look for SSDs from reputable manufacturers with good warranty coverage. Read reviews to understand real-world performance. Some SSDs are better for sustained write workloads, which is important for video editing and data processing.
NVMe vs SATA SSD: What Is the Difference?
NVMe SSDs connect directly to the PCIe bus. This provides much faster speeds than SATA SSDs. A typical NVMe drive can read at 3,500 MB/s or more. A SATA SSD usually maxes out around 550 MB/s. The difference is huge when transferring large files or loading applications.
For the ThinkStation P3 Ultra, always choose an NVMe M.2 SSD. This is the native storage interface for the machine. Using a SATA SSD would mean slower speeds and potentially an incompatible form factor. Stick with NVMe for the best performance.
Step-by-Step Installation Guide
Installing RAM and an SSD in the ThinkStation P3 Ultra is straightforward. You do not need to be a tech expert. With the right tools and a little patience, you can complete the upgrade in about 30 minutes.
Before you begin, gather your tools. You will need a Phillips-head screwdriver. Have your new RAM modules and SSD ready. Ground yourself by touching a metal surface to prevent static discharge. Static electricity can damage sensitive components. Work on a clean, flat surface.
Installing RAM
Start by shutting down your ThinkStation P3 Ultra completely. Unplug the power cable. Press the power button for a few seconds to discharge any remaining electricity. Open the chassis cover. The ThinkStation P3 Ultra has a tool-less or easy-access design on most models. Remove the side panel carefully.
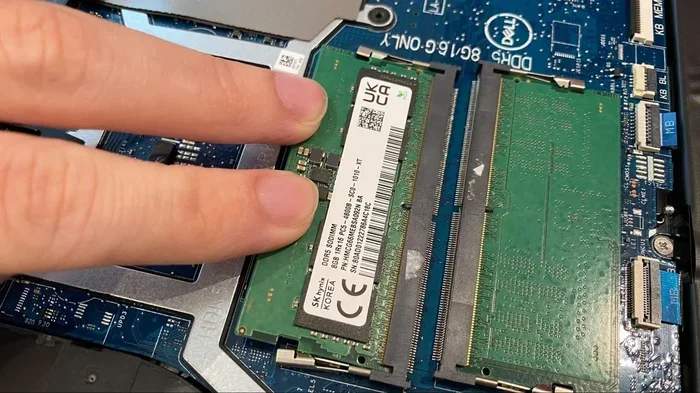
Locate the RAM slots. They are long, thin slots near the CPU area. If you are adding RAM to existing modules, make sure to install the new modules in the correct slots for dual channel mode. Press the new RAM module firmly into the slot at a 45-degree angle. Push down until the clips click into place. The module should be seated flush with no gaps.
Installing the SSD
Next, locate the M.2 NVMe slot on the motherboard. It is a small slot with a single screw holding the retention bracket. Remove the screw and set it aside. Insert the NVMe SSD at a 30-degree angle into the slot. Press it down gently and secure it with the retention bracket. Tighten the screw just enough to hold the drive in place. Do not overtighten.
Once both components are installed, reattach the side panel. Plug in the power cable. Turn on the workstation. Enter the BIOS by pressing the appropriate key during boot (usually F1 or F2). Verify that the new RAM and SSD are detected. Save and exit the BIOS. Your system should now recognize the upgraded components.
Optimizing Performance After the Upgrade
After completing your Lenovo Thinkstation P3 Ultra Ram Ssd Upgrade, there are a few steps to ensure you get the best performance. These small adjustments can make a big difference in how your workstation runs day to day.
First, make sure your operating system recognizes the full amount of RAM. On Windows, right-click This PC and select Properties. It should show the new total memory. If it does not, you may need to update your BIOS. Visit Lenovo’s support page and download the latest BIOS firmware for your model.
Second, enable XMP or DOCP profiles in the BIOS if your RAM supports it. These profiles run your RAM at its rated speed instead of the default slower speed. This alone can improve performance noticeably. Look for the memory or overclocking section in your BIOS settings.
Third, initialize and format your new SSD if you installed a fresh drive. Open Disk Management in Windows. You should see the new SSD listed as unallocated space. Right-click and format it with NTFS. Assign a drive letter. Your new storage is now ready to use.
Moving Your Operating System to the New SSD
If you replaced your boot drive, you may want to move your operating system and applications to the new SSD. You can use cloning software like Macrium Reflect or Clonezilla to copy your entire system drive to the new SSD. This preserves all your files, settings, and programs. After cloning, boot from the new SSD and enjoy the speed boost.
Another option is to perform a clean installation of Windows on the new SSD. This gives you the fastest possible performance since there is no bloat or old files slowing things down. Just make sure to back up your important data before doing a clean install.
Common Mistakes to Avoid During Upgrade
Upgrading RAM and SSD is generally simple, but mistakes can happen. Avoid these common pitfalls to ensure a smooth experience.
One common mistake is buying incompatible RAM. Not all DDR4 modules work with every ThinkStation model. Always verify the exact RAM type your system supports. Mixing different brands, speeds, or sizes can cause instability. Stick with matching modules from the same manufacturer when possible.
Another mistake is forcing RAM into the slots. RAM modules have a notch that aligns with the slot. If it does not fit easily, you may be trying to insert it the wrong way. Double-check the orientation before applying pressure. Forcing a module can damage both the RAM and the slot.
Some users forget to update their BIOS before upgrading. A BIOS update can improve memory compatibility and stability. Check Lenovo’s website for the latest BIOS version for your ThinkStation P3 Ultra model. Install it before adding new hardware.
Finally, do not skip the grounding step. Static discharge is a real risk when working inside a computer. Wear an anti-static wrist strap if you have one. At minimum, touch a grounded metal object before handling any components. This simple step protects your investment.
Expert Tips to Maximize Your Workstation’s Potential
Once your Lenovo Thinkstation P3 Ultra Ram Ssd Upgrade is complete, consider these expert tips to squeeze every bit of performance from your system.
Keep your drivers and firmware updated. Lenovo regularly releases updates that improve compatibility and performance. Check the Lenovo Vantage application for automatic updates. Updated storage drivers can improve SSD performance and reliability.
Monitor your system temperatures after the upgrade. More RAM and a faster SSD can slightly increase heat output. Make sure your workstation’s cooling system is functioning properly. Clean any dust from fans and vents regularly. Good airflow keeps components running cool and stable.
Consider your storage strategy. If you have a large SSD, you can create separate partitions for your operating system and data. This keeps your system drive clean and fast. Store large files like videos and backups on a separate drive or external storage.
Finally, take advantage of your workstation’s full potential. With upgraded RAM and a fast SSD, you can handle bigger projects and more complex workflows. Do not be afraid to push your system. The ThinkStation P3 Ultra was built for demanding work, and now it is even better equipped to handle it.
Conclusion
A Lenovo Thinkstation P3 Ultra Ram Ssd Upgrade is one of the most impactful improvements you can make to your workstation. The process is simple, affordable, and delivers immediate results. You will notice faster boot times, smoother multitasking, and quicker application loading. Whether you are a professional or a power user, this upgrade is well worth the investment.
By following the steps in this guide, you can confidently upgrade your RAM and SSD yourself. You saved money on professional installation and gained valuable knowledge about your machine. Your ThinkStation P3 Ultra is now faster and more capable than ever before. Enjoy the improved performance and take on your next big project with confidence.
Remember to keep your system updated and maintain good habits like regular cleaning and driver updates. These small efforts go a long way in keeping your workstation running at its best. Happy upgrading!
Frequently Asked Questions
What type of RAM does the Lenovo ThinkStation P3 Ultra support?
The ThinkStation P3 Ultra typically supports DDR4 ECC RDIMM memory. Some newer configurations may support DDR5. Always check your specific model’s specifications on Lenovo’s website to confirm compatibility before purchasing RAM.
Can I upgrade the SSD on my ThinkStation P3 Ultra myself?
Yes, the ThinkStation P3 Ultra is designed for user-accessible upgrades. The M.2 NVMe SSD slot is easy to access. You simply remove the side panel, install the SSD at an angle, and secure it with the retention bracket. No specialized tools are needed.
How much RAM can the ThinkStation P3 Ultra hold?
The maximum RAM capacity varies by model. Most ThinkStation P3 Ultra configurations support up to 128GB or 256GB of DDR4 memory. Check your specific model number on Lenovo’s support page to find the exact maximum capacity for your machine.
Will upgrading RAM void my Lenovo warranty?
In most cases, upgrading RAM does not void your Lenovo warranty. Lenovo generally considers RAM and SSD upgrades as user-serviceable parts. However, it is always a good idea to review your specific warranty terms or contact Lenovo support to confirm before proceeding.
How long does a ThinkStation P3 Ultra RAM SSD upgrade take?
The entire upgrade process typically takes about 30 to 45 minutes. Installing RAM takes around 10 minutes, and the SSD installation adds another 10 to 15 minutes. If you need to clone your existing drive or reinstall the operating system, add extra time accordingly.
Do I need to reinstall Windows after an SSD upgrade?
Not necessarily. If you cloned your existing drive to the new SSD, Windows and all your programs will transfer over automatically. If you installed a brand-new SSD and want a clean system, you can perform a fresh Windows installation. Back up your data before choosing this option.
=== INTERNAL LINKS ===
For more information on Lenovo RAM upgrades, check out our guide on Upgrade Ram For Lenovo Laptop to learn about general Lenovo memory upgrade principles.
Looking for a pre-configured Lenovo setup? See our selection of Lenovo Laptop With 16Gb Ram options that can serve as a reference for RAM configurations.
Want to understand the broader process? Our article on How To Upgrade The Ram Of A Laptop provides additional tips that apply to workstation upgrades as well.