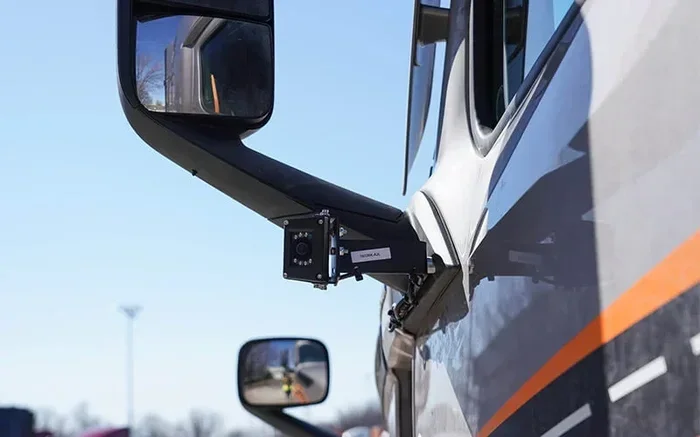
Rear View Mirror Camera Mount
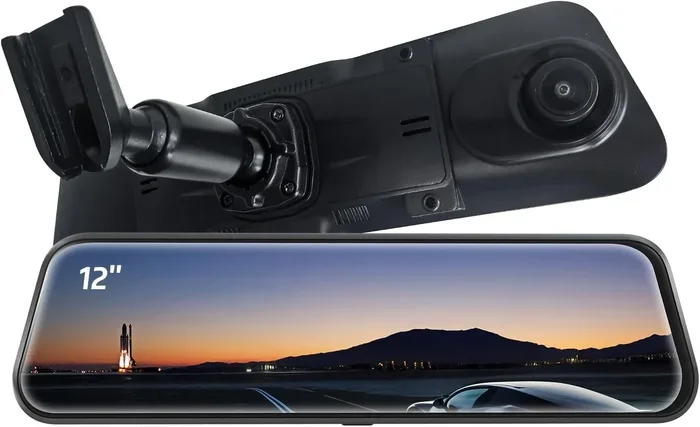
A rear view mirror camera mount is a smart way to add video recording to your car without complex wiring. It keeps your dashboard clear and gives you a stable view for safety or evidence. In this guide, you will learn how to pick the right mount, install it quickly, and avoid common setup mistakes. We also share expert tips to help you get the best footage every time.
If you want a simple way to add recording to your vehicle, a rear view mirror camera mount is one of the easiest solutions. It keeps the camera close to your eye line, which helps you capture a natural view of the road behind you. It also leaves your dashboard free for other gear. Many drivers like this setup because it feels clean, low-profile, and quick to install.
This guide will walk you through the basics. You will learn what to look for, how to install a mount, and how to get steady footage without blocking your view. We will also cover power options, lens care, and common mistakes to avoid. By the end, you will know how to choose a setup that fits your car and your goals.
Key Takeaways
- Easy installation: Most rear view mirror camera mounts attach in minutes with no drilling or heavy wiring.
- Clear visibility: A properly placed mount gives you a stable view without blocking your main mirror.
- Better safety: Recording while driving can help document incidents and improve parking awareness.
- Choose the right fit: Match the mount to your mirror shape, camera size, and desired field of view.
- Check legal rules: Some areas limit where cameras can be placed or how footage is used.
- Maintain your gear: Keep the lens clean and check the mount regularly for a loose fit.
- Plan your power: Decide between battery-powered units or a simple power connection for longer use.
📑 Table of Contents
Why Choose a Rear View Mirror Camera Mount
A rear view mirror camera mount offers a few clear benefits. First, it puts the camera in a familiar spot. You do not need to mount anything to the windshield or dashboard. That can make the setup feel less intrusive. Second, it often creates a stable platform. A solid mount reduces shake, which helps your footage stay readable.
This style of mount also works well for different goals. Some people use it for parking help. Others want a record of drives for safety or insurance reasons. A few users simply want a better view when reversing. If you are comparing options, it helps to think about your main use case first. That choice will guide the camera style, lens angle, and power setup you need.
Good Uses for This Setup
Here are a few common ways drivers use this kind of mount:
- Parking support: A camera near the mirror can help you see tight spaces and nearby obstacles.
- Drive documentation: Recording trips can help you review incidents or near-misses later.
- Rear awareness: Some setups improve visibility when backing up, especially in larger vehicles.
- Clean look: The mount hides in plain sight and keeps extra gear off the dash.
What to Consider Before Buying
Not every mirror is the same. Some are slim. Some are thick. Some have a rectangular shape, while others are more round. The best mount should grip your mirror securely without slipping. You also want to check the camera size. A bulky unit can feel awkward and may block part of your view. A compact unit is usually easier to live with day to day.
Picking the Right Mount and Camera Combo
When you shop for a rear view mirror camera mount, start with fit. The mount should match your mirror’s shape and thickness. If the grip is too loose, the unit can shift while you drive. If it is too tight, it may be hard to install or remove. A good fit keeps everything steady.
Next, think about the camera itself. You want a lens that gives you the view you need. A wide angle can show more of the area behind you. A narrower lens may show more detail in a smaller zone. The right choice depends on your goal. If you want general awareness, wider is often better. If you want a focused recording area, a tighter view may work well.
Key Features to Compare
Use this quick list when comparing products:
- Mounting style: Clip-on, strap-based, or hybrid designs.
- Camera resolution: Higher resolution can help with detail, but storage matters too.
- View angle: Wide views show more space, narrower views show more detail.
- Power source: Battery or wired power, depending on how long you want to record.
- Night visibility: Good low-light performance helps with evening driving.
- Ease of adjustment: You want a mount that lets you angle the camera without much hassle.
Simple Comparison Table
Here is a simple way to think about common setup choices:
| Setup Type | Best For | Trade-Off |
|---|---|---|
| Compact clip-on mount | Quick install and clean look | May fit only certain mirror shapes |
| Strap-style mount | Thicker mirrors and flexible fit | Can take a little longer to secure |
| Battery-powered camera | Easy setup with no cables | Limited recording time between charges |
| Wired power setup | Longer use and more consistent power | Requires routing a cable neatly |
Installing Your Rear View Mirror Camera Mount
Most rear view mirror camera mount installs are straightforward. The goal is to secure the mount, set the camera angle, and keep the view clear. You do not need fancy tools for many basic setups. A steady hand and a little patience usually do the job.
Start by cleaning the mirror and the area where the mount will sit. Dust or grime can make the grip less reliable. Then attach the mount according to the product instructions. If it uses a clip, press it into place carefully. If it uses a strap, tighten it enough so it feels secure but does not crack or distort the mirror housing.
Step-by-Step Setup Tips
Here is a simple process you can follow:
- Clean the surface: Wipe the mirror and surrounding area with a soft cloth.
- Test the fit: Place the mount without fully tightening it so you can check alignment.
- Set the angle: Aim the camera so it captures the area you want to see.
- Secure the mount: Tighten clips or straps firmly, but do not overdo it.
- Check the view: Sit in the driver seat and make sure the camera does not block your main mirror use.
- Power it up: Insert batteries or connect the cable if your model uses one.
- Do a short test: Record a quick clip to confirm the frame and focus look right.
Making the Cable Look Neater
If your setup uses a wire, neat routing matters. A loose cable can dangle or get in the way. Use simple paths along the mirror stem or vehicle interior trim, if the design allows it. Avoid sharp bends that could damage the cable over time. A tidy setup also looks better and is easier to manage when you enter and exit the vehicle.
If you need extra reach, an extension cable can help you position the camera more flexibly. That can be useful when the power source is not right next to the mirror. Just make sure the cable length matches your needs without creating clutter.
Getting the Best Camera Angle
A rear view mirror camera mount only works well if the angle is right. A good angle should show the space you care about without creating too much distortion. If the view is too high, you may miss the lane area behind you. If it is too low, you may see more pavement and less of the road. Small adjustments make a big difference.
Try to center the important area in the frame. If you want general rear awareness, include enough space to judge nearby vehicles and obstacles. If you want to monitor a specific area, aim the lens more precisely. It helps to test the view in daylight first, then recheck it at night since lighting can change how the scene looks.
Quick Angle Checks
Use these checks after installation:
- Horizon line: Make sure the horizon is where you expect it to be.
- Obstruction check: Confirm the camera does not block your normal mirror view.
- Motion test: Have someone walk behind the vehicle while you watch the feed, if possible.
- Lens cleanliness: A smudged lens can make the angle feel off even when it is not.
Adjusting for Different Drivers
If more than one person drives the vehicle, the seat position may change the view slightly. That is normal. A good mount should let you tweak the angle without starting over each time. If the camera is fixed too rigidly, it may not suit every driver. A little adjustability goes a long way.
Power, Storage, and Everyday Use
Power choice affects how practical your rear view mirror camera mount feels. Battery-powered units are easy to set up because they do not need a constant connection. They are a good fit for short trips or occasional use. Wired units can run longer and are better for drivers who want more consistent operation. The right choice depends on how often you record and how long each trip lasts.
Storage matters too. If your camera saves footage internally, make sure you have enough space for the amount you plan to record. If you use removable storage, keep a spare card handy. It is also smart to check how the device labels or saves files so you can find them later when needed.
Battery vs Wired Power
Here is a simple comparison:
- Battery power: Easy to install, portable, and good for shorter sessions.
- Wired power: More reliable for longer use, but needs careful cable placement.
- Hybrid use: Some drivers keep a battery unit for flexibility and a wired unit for regular use.
Keeping the Lens Clean
A dirty lens can ruin an otherwise good setup. Dust, fingerprints, and road grime can soften the image. Check the lens often, especially if you drive in wet or dusty conditions. Use a soft cloth and a gentle cleaning method. Avoid harsh chemicals that could leave residue or damage the lens coating.
If you want a simple routine, wipe the lens before long trips and again after messy drives. That small habit helps your footage stay clear. It also helps the camera perform better in low light, since a clean lens lets more light through.
Common Mistakes to Avoid
Even a simple rear view mirror camera mount can be set up poorly. The good news is that most mistakes are easy to prevent. A little care during installation and testing saves time later.
One common issue is a loose mount. If the clip or strap is not secure, the camera can shift and lose its framing. Another issue is a bad angle. A camera that points too far up or down may not show the area you need. A third issue is forgetting to check the view after installation. The setup may look fine from outside the vehicle but feel different once you sit behind the wheel.
Mistakes That Affect Your Footage
- Mount too loose: The camera moves and the frame drifts.
- Lens smudged: The image looks hazy even with good lighting.
- Wrong view angle: You see less of the useful area than you expected.
- Cable in the way: Wires distract you or get caught on interior parts.
- No test recording: You only discover problems after you need the footage.
Expert Insight
A good rule is to treat the mount like a tool you use every day. If it feels shaky, fix it before relying on it. If the view is slightly off, adjust it now instead of later. Small fixes are much easier than reworking the whole setup after a long drive. A careful first install usually pays off quickly.
Final Thoughts on a Rear View Mirror Camera Mount
A rear view mirror camera mount is a practical way to add recording or rear awareness without a complicated install. It keeps the camera close to your natural line of sight and leaves the dashboard open. With the right fit, angle, and power choice, the setup can be simple to use and helpful in daily driving.
Take your time when choosing the mount and testing the view. Clean the lens, secure the mount, and do a short recording check before you depend on it. If you plan ahead, you can build a setup that feels neat, stable, and ready when you need it.
Frequently Asked Questions
Can I install a rear view mirror camera mount without drilling?
Yes, many mounts attach with a clip or strap, so you do not need to drill holes. That makes the install faster and keeps the mirror intact. Just make sure the grip is secure before relying on it.
Will a mirror-mounted camera block my view?
It can if the unit is too large or placed poorly. A compact camera and careful angle adjustment usually reduce that problem. Always check the view from the driver seat after installation.
Do these setups work at night?
They can, but performance depends on the camera and lens quality. A model with decent low-light capability will show more detail after dark. Cleaning the lens regularly also helps night visibility.
How do I keep the camera steady while driving?
Start with a mount that fits your mirror tightly and securely. Then adjust the camera angle so it sits firmly in place. If the mount still shifts, tighten the attachment or try a different style that suits your mirror better.
Is a battery-powered camera better than a wired one?
It depends on how you plan to use it. Battery power is simpler and cleaner for short trips. Wired power is usually better if you want longer, more consistent use without worrying about charging.
What should I check before using the footage as evidence?
Make sure the time, date, and file storage are working properly. Test the camera before you need it so you know the view and quality are acceptable. Keep the footage backed up so it is not lost if the card fills up or gets removed.