How to Fix Startup Repair On Windows 11 Like a Pro
Startup repair on Windows 11 can feel frustrating when your PC refuses to boot properly. This guide walks you through every fix you need, from simple restarts to advanced command-line tools. You will learn how to tackle boot loops, corrupted system files, and failed automatic repairs with confidence.
Key Takeaways
- Startup Repair is a built-in Windows 11 tool that automatically fixes boot-related issues without needing technical expertise.
- Running Startup Repair from the recovery environment is the first and easiest step to resolve most boot problems.
- Command Prompt tools like SFC and CHKDSK can fix deeper issues that Startup Repair alone cannot resolve.
- Boot Configuration Data (BCD) corruption is a common cause of startup failures and can be rebuilt easily.
- Safe Mode and System Restore offer alternative recovery paths when standard repair methods fall short.
- Regular maintenance and updates prevent many startup issues from occurring in the first place.
📑 Table of Contents
- How to Fix Startup Repair On Windows 11 Like a Pro
- Understanding Startup Repair on Windows 11
- Method 1: Run Startup Repair from the Recovery Environment
- Method 2: Use Command Prompt to Fix Boot Issues
- Method 3: Use System Restore to Roll Back Your PC
- Method 4: Check for Hardware Issues
- Method 5: Reset or Refresh Windows 11
- Preventing Future Startup Issues
- When to Seek Professional Help
- Final Thoughts
How to Fix Startup Repair On Windows 11 Like a Pro
Your computer takes forever to load. Then it freezes. Or worse, it shows the dreaded “Preparing Automatic Repair” screen and never moves past it. If you have faced this, you are not alone. Startup repair on Windows 11 is one of the most common issues users run into, and it can feel really scary when your PC just will not cooperate.
The good news? You do not need to be a tech expert to fix this. Windows 11 comes with powerful built-in tools designed to diagnose and repair boot problems. Whether your PC is stuck in a boot loop, showing a black screen, or refusing to load at all, this guide has you covered. We will walk through every method step by step, so you can get back to work without pulling your hair out.
Before we dive in, let us talk about what causes these issues. Corrupted system files, faulty updates, damaged boot records, and even hardware problems can all trigger startup failures. Understanding the root cause helps you pick the right fix. And that is exactly what we will explore below.
Understanding Startup Repair on Windows 11
Startup Repair is a built-in Windows 11 recovery tool. It automatically scans your system for issues that prevent Windows from loading correctly. Think of it as a smart diagnostic tool that checks your boot files, system settings, and configuration data. When it finds a problem, it tries to fix it automatically.
Most users encounter Startup Repair after an unexpected shutdown, a failed Windows update, or a sudden power loss. The tool launches automatically in these cases. But you can also run it manually from the Advanced Startup Options menu. It is a great first line of defense when your PC will not start properly.
However, Startup Repair is not perfect. Sometimes it reports that it could not fix the problem. Other times, it fixes one issue only for another to appear later. That is where the advanced methods in this guide come in handy. They give you more control and a much better chance of a full recovery.
Common Signs You Need Startup Repair
How do you know if your PC needs Startup Repair? Here are the most common warning signs:
- Your PC gets stuck on the loading screen for a long time without progressing.
- You see the “Preparing Automatic Repair” message repeatedly after every restart.
- A black screen appears with no cursor or taskbar visible.
- Your PC restarts in a loop — it turns on, tries to load Windows, then restarts again.
- You get a blue screen error (BSOD) during the boot process.
- Windows drops you into the Recovery Environment every time you start the PC.
If any of these sound familiar, do not panic. The fixes below will help you work through them one by one.
Method 1: Run Startup Repair from the Recovery Environment
This is the most straightforward approach. Windows 11 has a dedicated Startup Repair tool built into the recovery environment. Here is how to access it and use it effectively.
Step-by-Step Guide
- Force-restart your PC three times in a row. Turn it on, wait for it to start failing, then hold the power button to turn it off. Repeat this three times.
- Windows will enter the Automatic Repair environment on the third restart. You will see a “Preparing Automatic Repair” or “Diagnosing your PC” screen.
- Click “Advanced options” when prompted.
- Select “Troubleshoot” from the menu.
- Choose “Advanced options” again.
- Click “Startup Repair.” Windows will now scan your system and attempt to fix any boot-related issues.
- Wait for the process to complete. This can take anywhere from a few minutes to over an hour, depending on the severity of the issue.
- Restart your PC and check if it boots normally.
This method works for most common startup problems. If it does not fix your issue, do not worry. We have several more methods to try.
Keep in mind that if your Windows 11 8GB RAM laptop or Windows 11 16GB RAM laptop is experiencing these issues, the repair process may take slightly longer due to the amount of data being scanned. More RAM means more system files to check, but it also means the repair process has more resources to work with.
Method 2: Use Command Prompt to Fix Boot Issues
When Startup Repair fails to fix the problem, the Command Prompt is your next best friend. It gives you direct access to powerful repair tools that can fix deeper issues. Do not worry if the command line looks intimidating. We will walk through each command carefully.
Access Command Prompt from Recovery
To open Command Prompt in the recovery environment, follow these steps:
- Restart your PC and enter the recovery environment (use the three-restart method from Method 1).
- Click “Troubleshoot,” then “Advanced options.”
- Select “Command Prompt.” Your PC will restart into a black command-line window.
Run the SFC Scan
The System File Checker (SFC) scans your Windows system files and replaces any corrupted ones. Type the following command and press Enter:
sfc /scannow
Wait for the scan to complete. It will tell you if it found and fixed any issues. If it reports that it found corrupt files but could not fix some of them, move on to the next command below.
Run the DISM Tool
The Deployment Image Servicing and Management (DISM) tool repairs the Windows system image. Type these commands one at a time, pressing Enter after each:
DISM /Online /Cleanup-Image /CheckHealthDISM /Online /Cleanup-Image /ScanHealthDISM /Online /Cleanup-Image /RestoreHealth
The last command may take 10 to 20 minutes. It downloads replacement files from Windows Update to fix any damage. Once it finishes, restart your PC and check if the boot issue is resolved.
Rebuild the Boot Configuration Data
Corrupted Boot Configuration Data (BCD) is one of the most common reasons Windows 11 fails to start. Rebuilding the BCD often fixes this. Type these commands in order:
bootrec /fixmbrbootrec /fixbootbootrec /scanosbootrec /rebuildbcd
After running these commands, restart your PC. The BCD rebuild process often resolves stubborn boot failures that Startup Repair alone could not handle.
If you are working with a Windows 11 laptop with 16GB RAM, these commands will run efficiently. The extra memory helps the system handle the repair operations smoothly.
Method 3: Use System Restore to Roll Back Your PC
Sometimes a recent change causes startup problems. A new driver, a software installation, or a Windows update can all interfere with the boot process. System Restore lets you go back in time to a point when your PC was working fine.
How to Use System Restore
- Enter the recovery environment using the three-restart method.
- Click “Troubleshoot,” then “Advanced options.”
- Select “System Restore.”
- Choose a restore point from the list. Pick one dated before the startup problems began.
- Confirm your selection and let the process run.
- Restart your PC once the restore is complete.
System Restore does not delete your personal files. It only removes system files, settings, and programs installed after the restore point. This makes it a safe and effective way to undo changes that broke your startup.
Quick Tip: If you have been putting off creating restore points, now is a good time to start. Going forward, Windows creates them automatically before major updates. You can also create them manually whenever you plan to make system changes.
Method 4: Check for Hardware Issues
Software fixes work great, but sometimes the real problem is hardware. A failing hard drive, loose RAM stick, or overheating component can all cause startup failures. Before you spend hours on software repairs, it is worth checking the physical side of things.
Common Hardware Culprits
- Failing hard drive or SSD: Clicking sounds or extremely slow boot times often point to a dying drive. Use the CHKDSK command to check for disk errors.
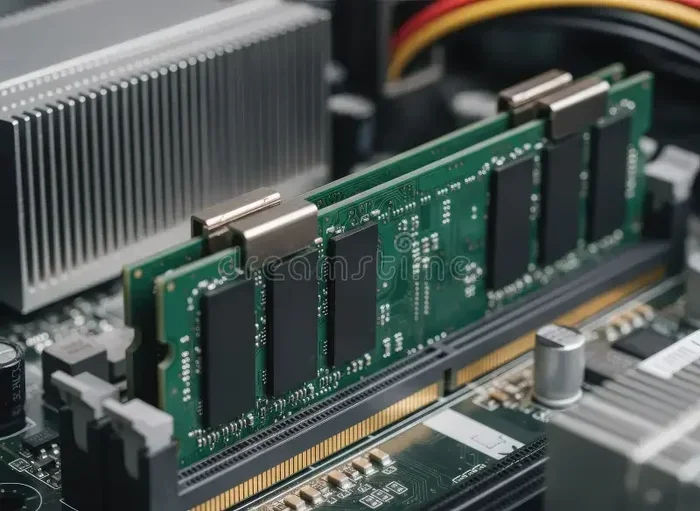
- Loose RAM: If your PC recently experienced a bump or jolt, a RAM stick may have come loose. Reseating the RAM can sometimes fix boot issues.
- Overheating: Dust buildup inside your PC can cause overheating, which leads to unexpected shutdowns and startup failures. Clean your fans and vents.
- Faulty power supply: If your PC powers on but shuts off randomly, the power supply might not be delivering stable power.
Run CHKDSK to Check Your Disk
Open Command Prompt from the recovery environment and type this command:
chkdsk C: /f /r /x
This command checks your C: drive for file system errors and bad sectors. It can take a while to run, especially on larger drives. Let it complete and then restart your PC.
For users with a Windows 11 laptop 16GB RAM and 1TB SSD, hardware issues are less common but not impossible. SSDs are more reliable than traditional hard drives, but they can still fail over time. Regular backups are your best insurance against data loss from hardware failures.
Method 5: Reset or Refresh Windows 11
If none of the above methods work, it is time to consider resetting Windows 11. This is a more drastic step, but it can save a PC that simply will not cooperate with any other fix.
Reset This PC
Windows 11 has a “Reset This PC” feature that reinstalls Windows while keeping your personal files. Here is how to access it:
- Enter the recovery environment.
- Click “Troubleshoot,” then “Reset this PC.”
- Choose “Keep my files.” This option removes apps and settings but preserves your personal data.
- Follow the on-screen instructions to complete the reset.
Important: Before resetting, make sure you have backed up any important files you can still access. Even though the “Keep my files” option is designed to preserve your data, it is always better to be safe.
Resetting Windows 11 is like giving your PC a fresh start. All the startup problems caused by software conflicts, corrupted files, or bad updates should disappear after the reset.
Preventing Future Startup Issues
Once you have fixed your startup problem, you will want to keep it from happening again. Prevention is always better than repair. Here are some simple habits that go a long way:
- Keep Windows updated. Microsoft regularly releases patches that fix known boot issues and improve system stability.
- Install updates one at a time. If a new update causes problems, you will know exactly which one to blame and can remove it more easily.
- Create regular restore points. Set a reminder to create a restore point before making any major system changes.
- Use reliable antivirus software. Malware can corrupt system files and cause startup failures. Keep your antivirus up to date and run regular scans.
- Clean your PC regularly. Dust buildup leads to overheating, which can cause all kinds of problems including startup failures.
- Back up your data frequently. Use an external drive or cloud storage to keep copies of your important files safe.
These habits take only a few minutes each month but can save you hours of frustration down the road. A little prevention goes a very long way.
When to Seek Professional Help
Most startup issues can be fixed at home using the methods above. But there are times when professional help is the right call. If your PC shows physical damage, makes unusual grinding or clicking noises, or if you have tried every method and still cannot boot, it is time to consult a professional. A certified technician can diagnose hardware failures and perform advanced repairs that go beyond what the built-in tools can handle.
Also, if your PC is still under warranty, contact the manufacturer before attempting major repairs. Opening certain components may void your warranty, and the manufacturer may offer free repair or replacement services.
Final Thoughts
Fixing startup repair issues on Windows 11 does not have to be overwhelming. You have a full toolkit at your disposal, from the simple Startup Repair tool to advanced Command Prompt commands and System Restore. Start with the easiest method and work your way down the list. Most boot issues are resolved by the first or second method.
Remember that patience is your best friend during this process. Do not rush through the steps or skip over instructions. Take your time, follow each step carefully, and your PC will likely be back to normal in no time. And once it is running smoothly again, make sure to follow the prevention tips to keep those startup gremlins away for good.
If you are shopping for a new system and want to avoid these headaches in the future, consider investing in a Windows 11 laptop with 16GB RAM for smoother performance and better reliability. A well-configured system handles updates and system changes much more gracefully.
Frequently Asked Questions
What is Startup Repair on Windows 11?
Startup Repair is a built-in Windows 11 recovery tool that automatically scans and fixes boot-related issues. It checks your system files, boot configuration, and startup settings to get your PC running again.
Why does Startup Repair keep failing on my Windows 11 PC?
Startup Repair may fail if the issue is caused by corrupted Boot Configuration Data, hardware problems, or severely damaged system files. In these cases, you will need to try the advanced methods in this guide, such as Command Prompt tools or System Restore.
How long does Startup Repair take on Windows 11?
Startup Repair can take anywhere from 10 minutes to over an hour. The time depends on the severity of the issue and the speed of your hardware. If it runs for more than two hours without progress, it is best to try a different repair method.
Can I fix Windows 11 startup issues without a USB or installation media?
Yes, you can. Windows 11 has built-in recovery tools that you can access by force-restarting your PC three times. This enters the Automatic Repair environment where you can run Startup Repair, Command Prompt tools, and System Restore without any external media.
Is it safe to reset Windows 11 to fix startup problems?
Yes, it is safe if you choose the “Keep my files” option. This reinstalls Windows while preserving your personal data. However, you should always back up important files before resetting, just to be extra safe.
How can I prevent startup issues on Windows 11 in the future?
Keep Windows updated, create regular restore points, use reliable antivirus software, and clean your PC to prevent overheating. These simple habits can prevent most startup problems from occurring in the first place.