Vivobook Asus Laptop X515jab X515ja Ram
Upgrading the RAM in your ASUS Vivobook X515JAB or X515JA is one of the most cost-effective ways to breathe new life into your laptop. These popular budget-friendly models often come with 4GB or 8GB of RAM, which can struggle with modern software and multitasking. This guide provides a complete breakdown of the compatible RAM type (DDR4), the maximum upgrade capacity for your specific model, and a detailed, step-by-step walkthrough for performing the upgrade yourself. We also explore exactly how more RAM translates to real-world performance gains in daily tasks like web browsing, office work, and light creative projects.
Let’s talk about the unsung hero of laptop performance: Random Access Memory, or RAM. If you own an ASUS Vivobook X515JAB or X515JA, you have a fantastic, portable machine for everyday computing. But maybe you’ve noticed it getting a little sluggish when you have too many browser tabs open, or it coughs and sputters when trying to juggle a Word document, a spreadsheet, and a YouTube video. The culprit is very likely the RAM. This article is your definitive, no-nonsense guide to everything you need to know about the RAM in your Vivobook X515JAB/X515JA. We’ll decode the specs, show you exactly how to find out what you have, what you can upgrade to, and walk you through the simple process of installing more memory yourself. Think of this as your personal laptop mechanic manual for one of the easiest and most rewarding upgrades you can do.
Key Takeaways
- Compatible RAM Type: Both the X515JAB and X515JA use DDR4 SDRAM, specifically the low-voltage variant (DDR4L) running at 2666MHz. Using the correct type is non-negotiable for stability.
- Critical Model Verification: The single most important step is confirming your exact model number (e.g., X515JA-BQ256T) as RAM configuration (soldered vs. slot) varies significantly between production batches.
- Max Capacity & Configuration: Most variants have one user-accessible slot alongside soldered RAM (often 4GB). The typical maximum is 12GB or 16GB total (4GB soldered + 8GB or 12GB stick), but 20GB is possible in some cases.
- Upgrade is User-Friendly: The RAM slot is easily accessible by removing the bottom cover with a standard Phillips screwdriver. No special tools or expertise are required for a basic upgrade.
- Performance Impact is Immediate: Moving from 4GB to 8GB or 12GB eliminates frustrating slowdowns, allows for dozens of browser tabs, and makes multitasking between apps like Word, Excel, and Spotify seamless.
- Check Before You Buy: Always use system information tools (like Task Manager or CPU-Z) or physically open the laptop to check existing RAM configuration before purchasing an upgrade module.
- Cost-Effective Lifespan Extension: A RAM upgrade typically costs between $25-$50 and can extend the useful life of your Vivobook by 2-3 years, making it smarter than replacing the entire machine.
📑 Table of Contents
- Understanding Your Vivobook X515JAB/X515JA: The RAM Reality
- Step 1: Identifying Your Exact RAM Configuration
- Step 2: Your RAM Upgrade Options and Compatibility
- Step 3: The Hands-On Upgrade Guide: A Detailed Walkthrough
- Real-World Performance: What Does More RAM Actually Feel Like?
- Troubleshooting: What If It Doesn’t Work After the Upgrade?
- Future-Proofing and Conclusion: Is It Worth It?
Understanding Your Vivobook X515JAB/X515JA: The RAM Reality
First, a crucial clarification: the model numbers X515JAB and X515JA refer to the same core laptop family but often denote different regional configurations or minor spec variations (like processor or storage). For our purposes regarding RAM, they are treated identically. The key thing to understand is that ASUS, to hit a certain price point, often equips these models with a limited amount of RAM—typically 4GB or 8GB—and frequently solders at least one of the memory modules directly to the motherboard. This means you can’t remove it. The good news? Almost all variants in this series also include one standard SO-DIMM slot that is completely user-accessible for an upgrade. This hybrid design (soldered + slot) is common and is the reason why the maximum upgrade isn’t simply “replace what’s there.” You have to work with what’s already soldered in place.
Decoding the Official Specs vs. Real-World Configurations
If you look at the official ASUS spec sheet for the “X515JA series,” it might list “Up to 16GB DDR4 RAM.” That’s the theoretical maximum for the platform. But it doesn’t tell you what’s in your specific unit or how to get there. You might buy an X515JA advertised with “8GB RAM” and find it has 4GB soldered + a 4GB stick in the slot. To reach 16GB total, you’d replace that 4GB stick with a 12GB one. Alternatively, a base model with 4GB might have it all soldered with an empty slot, allowing you to add an 8GB or 16GB stick for 12GB or 20GB total. This variation is why physical verification is step one. Never assume based on the box or online listing.
Step 1: Identifying Your Exact RAM Configuration
Before you even think about buying new RAM, you must become a detective and figure out exactly what your laptop currently has. There are two primary methods: software and hardware. The software method is quick and safe. The hardware method is 100% definitive.
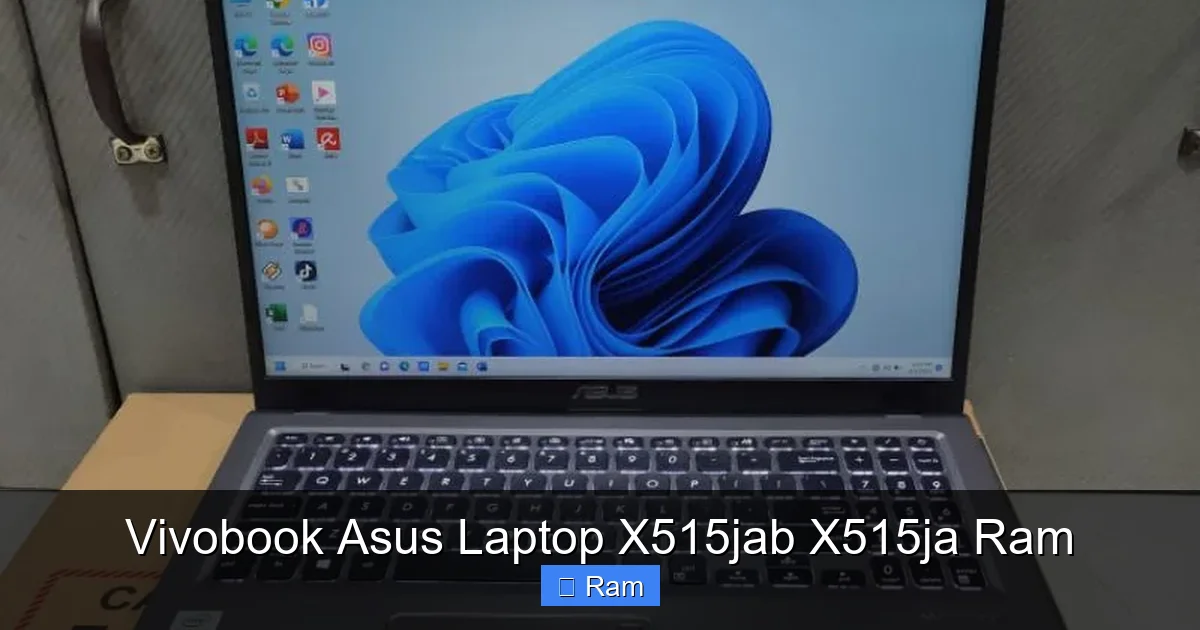
Visual guide about Vivobook Asus Laptop X515jab X515ja Ram
Image source: down-id.img.susercontent.com
The Easy Software Check: Windows Task Manager
On your Vivobook, press Ctrl+Shift+Esc to open Task Manager. Click the “Performance” tab, then select “Memory” from the left-hand list. At the bottom right, you’ll see “In use (Compressed)” and “Committed.” But the gold is at the top: “Speed,” “Form Factor,” and “Hardware Reserved.” Most importantly, look at the top: it will say something like “16.0 GB” if you have 16GB, or “4.0 GB.” But this only tells you the total. To see the configuration (how many slots are used), you need a slightly more powerful tool.
The Definitive Hardware Check: Opening the Laptop
This is the only way to know for sure if you have a slot and what’s soldered. Power down your laptop completely, unplug it, and remove the battery if it’s easily removable (in this model, it’s internal). Turn the laptop over. You’ll find 10-12 Phillips-head screws around the perimeter and sometimes in the center. Keep them in a safe place! Starting from one corner, gently pry off the plastic bottom cover using a plastic spudger or even a fingernail. It’s held by plastic clips. Work your way around. Once open, locate the rectangular RAM module(s). You’ll see one or two small black chips soldered to the motherboard (these are the soldered RAM chips, hard to identify without magnification) and one or two silver rectangles with notches on the sides—these are the SO-DIMM slots. If you see one silver stick, you have one slot. If the slot is empty, you have a golden upgrade opportunity. If it’s occupied, note the label on the stick (e.g., “8GB DDR4 2666MHz”). This tells you what you can replace it with. Take a photo for reference. Reassembly is the reverse: snap the cover back on, ensuring all clips engage, and screw everything back in tightly but not with excessive force.
Step 2: Your RAM Upgrade Options and Compatibility
Armed with knowledge, let’s talk about what you can buy. For the ASUS Vivobook X515JAB/X515JA, the rules are strict.
Visual guide about Vivobook Asus Laptop X515jab X515ja Ram
Image source: laptopbatterydirect.net
The Non-Negotiable: DDR4 2666MHz SO-DIMM
You must purchase a DDR4 (not DDR3 or DDR5) SO-DIMM (the laptop form factor) module. It must be rated for 2666MHz (sometimes labeled as PC4-21300). Using a faster 3200MHz stick will simply run at 2666MHz, which is fine, but a slower stick may not work. Also, because the laptop’s processor (Intel 10th Gen i3/i5/U-series) uses low-power DDR4L, you should use standard DDR4, which is fully backward compatible. Do not buy ECC RAM; it must be non-ECC, unbuffered. Stick to reputable brands like Crucial, Kingston, Samsung, or SK Hynix.
Figuring Out the “Magic Number”: What Size Stick to Buy
This is the calculation. Let’s assume the most common scenario: a 4GB soldered chip and one empty slot. You want a total of 12GB or 16GB.
- For 12GB Total: Buy a single 8GB DDR4 2666MHz SO-DIMM stick. 4GB (soldered) + 8GB (new) = 12GB.
- For 16GB Total: Buy a single 12GB or 16GB stick. 4GB + 12GB = 16GB. 4GB + 16GB = 20GB (if your BIOS supports addressing >16GB, which is less common on this platform—12GB is the safer 16GB-equivalent target).
If you have 8GB soldered and an empty slot, a 8GB stick gets you to 16GB total. If you have 4GB soldered and a 4GB stick already in the slot, you’d replace that 4GB stick with an 8GB or 12GB stick. The goal is to have the stick in the slot be the larger capacity to maximize the total. Always match the speed (2666MHz). Mixing speeds will cause all RAM to run at the speed of the slowest module.
Step 3: The Hands-On Upgrade Guide: A Detailed Walkthrough
You have your new, compatible RAM stick. Time to install it. This process takes 10-15 minutes and requires only a small Phillips screwdriver and patience.

Visual guide about Vivobook Asus Laptop X515jab X515ja Ram
Image source: dataspot.ro
Preparation and Safety First
1. Power Down & Unplug: Shut down Windows fully. Disconnect the charger and any USB devices.
2. ESD Protection: Work on a clean, non-carpeted surface. Ideally, use an anti-static wrist strap clipped to a grounded metal object. If not, frequently touch the laptop’s metal chassis (with the battery removed) to discharge static from your body.
3. Organize Screws: As you remove the bottom screws, keep them sorted by location. Some may be shorter. A small piece of paper with numbered positions can help.
Accessing the RAM Slot
1. With the laptop bottom-side up, remove all screws.
2. Starting at a corner, gently insert a plastic pry tool or your fingernail into the seam between the bottom cover and the chassis. You should hear a series of soft clicks as plastic clips pop open. Work your way around the edge. Don’t force it; if a section resists, check for a missed screw.
3. Once all clips are disengaged, lift the bottom cover off carefully. The internal components are now exposed.
Installing the New SO-DIMM
1. Locate the RAM slot. It’s a small bay with two gold contacts on either side. If a stick is already there, you’ll need to remove it.
2. To Remove: Gently pry the two metal retention clips on the sides outward. The stick will pop up at an angle. Pull it out straight, holding it by the edges.
3. To Install: Take your new RAM stick. Note the notch on the bottom edge—it’s not centered. This notch aligns with a protrusion in the slot. Hold the stick by the edges, align the notch, and insert it firmly but gently into the slot at a 45-degree angle.
4. Press down on the top edge of the stick until it lies flat and the two side clips snap into place automatically with a soft click. You should feel it seat fully. Give it a very gentle tug to ensure it’s secure.
Reassembly and First Boot
1. Do not reattach the bottom cover yet.
2. Reconnect the battery (if you disconnected it) and plug in the charger.
3. Power on the laptop. It should boot normally. Immediately press F2 to enter the BIOS/UEFI setup. Navigate to the “System Information” or “Advanced” tab. Here, it will explicitly state the “Total Memory” or “Installed Memory.” Verify it shows your new total (e.g., 12288MB for 12GB or 16384MB for 16GB). If it does, you’ve succeeded. Exit BIOS and let Windows load.
4. Once in Windows, go back to Task Manager > Performance > Memory to confirm the total and speed are correct.
5. Only after confirming everything works, power down, unplug, and carefully snap the bottom cover back on, ensuring all clips align. Reinstall all screws in their correct positions.
Real-World Performance: What Does More RAM Actually Feel Like?
The numbers are one thing, but the experience is everything. Let’s translate gigabytes into daily usability for typical Vivobook tasks.
The 4GB Nightmare vs. The 8GB/12GB Dream
With only 4GB of RAM, your Vivobook is in a constant state of triage. Opening 10-15 Chrome tabs, a Word doc, and Spotify will likely max out memory. Windows will then start using your slow SSD or hard drive as “virtual memory” (page file), causing severe lag, stuttering, and the infamous “spinning beach ball” or “Not Responding” messages. Even basic multitasking feels like a chore. Upgrading to 8GB total is the single most transformative upgrade you can make. It erases this daily friction. You can comfortably have 20-30 browser tabs open, work in multiple Office apps, have a music player running, and still have headroom. The system feels responsive and quick. Moving to 12GB or 16GB is about future-proofing and handling heavier workloads like photo editing in GIMP or light video editing, where large files and multiple layers consume memory voraciously. For 95% of Vivobook users (students, home users, office workers), 12GB is the sweet spot of ample headroom and cost-effectiveness.
Specific Use Case Scenarios
- The Student: Researching with 30+ Chrome tabs (Google Scholar, JSTOR), a PDF reader, Word, Zoom in the background, and Spotify. 8GB is passable; 12GB is blissfully smooth.
- The Casual Creative: Editing photos in a tool like Paint.NET or GIMP while having reference images open in a browser. 12GB prevents slowdowns when applying filters or working with high-resolution images.
- The Home User/Retiree: Web browsing, email, YouTube, video calls with family. 8GB is more than sufficient, eliminating any chance of slowdowns.
- The Lightweight Developer: Running a code editor (VS Code), a local server, a browser with documentation, and a terminal. 12GB provides a comfortable environment without constant swapping.
Troubleshooting: What If It Doesn’t Work After the Upgrade?
Don’t panic. A failed boot or no display after a RAM upgrade is almost always a simple fix.
Common Issues and Fixes
Symptom: Laptop powers on, shows ASUS logo, then black screen or restarts loop.
This usually means the new RAM module is not seated properly, is incompatible, or is faulty.
Fix: Power down, unplug, open the case. Reseat the RAM stick: remove it, blow out the slot with compressed air, reinsert it firmly at 45 degrees, and press down until the clips click. Try booting again. If it fails, try the old stick (if you kept it) to confirm the laptop itself still works. If the old stick works, the new stick is likely DOA or incompatible—contact the seller for a replacement.
Symptom: Windows boots but shows less RAM than you installed (e.g., 8GB installed, 7.9GB usable).
This is often normal, as some RAM is reserved for hardware (graphics). A small discrepancy (0.5-1GB) is standard. A large discrepancy (e.g., 16GB installed, 8GB shown) is a problem.
Fix: This can indicate a bad RAM stick or a slot issue. Reseat the stick. Try the new stick in the other slot if you have two (though X515JA usually has one). Run Windows Memory Diagnostic (search in Start menu) to test for errors.
Symptom: System is unstable, blue screens, or crashes under load.
This points to a compatibility issue, often related to timing or voltage, or a faulty module.
Fix: Ensure you bought the correct 2666MHz speed. Enter the BIOS (F2 on boot) and look for memory settings. If there’s an option for “Memory Frequency” or “DRAM Voltage,” ensure it’s set to Auto or the correct value (1.2V for DDR4). If instability persists, the stick may be defective.
Future-Proofing and Conclusion: Is It Worth It?
For the ASUS Vivobook X515JAB/X515JA, a RAM upgrade is almost always a resounding yes. These are capable machines held back by a single, inexpensive component. Spending $30-$45 on a quality 8GB or 12GB DDR4 stick can transform your computing experience from frustrating to fluid. It delays the need for a completely new laptop, saving you hundreds of dollars and electronic waste. The process is straightforward, reversible, and empowers you as a user. Before you go, remember the golden rule: verify your exact soldered configuration first. A quick peek inside or a software check saves you from buying the wrong stick. In a world of ever-more demanding web apps and operating systems, ensuring your laptop has ample RAM is the single most important thing you can do to keep it feeling fast and capable for years to come. Your Vivobook deserves that second wind—give it more memory and watch it soar.
Frequently Asked Questions
Can I upgrade the RAM on my ASUS Vivobook X515JA myself?
Yes, absolutely. The X515JA series is designed for user upgrades. The RAM slot is accessible by removing the bottom cover, which is held by standard Phillips screws. No soldering or advanced technical skill is required to replace or add the SO-DIMM stick in the available slot.
What is the maximum RAM I can put in my Vivobook X515JAB?
The maximum depends on your specific model’s soldered RAM. The most common configuration is 4GB soldered. With an empty slot, you can add an 8GB stick for 12GB total or a 12GB/16GB stick for 16GB/20GB total (16GB total is the practical, widely-supported maximum). If you have 8GB soldered, adding an 8GB stick gives you 16GB total. Always verify your current setup first.
Will a 3200MHz RAM stick work in my X515JA that supports 2666MHz?
Yes, but with a caveat. The RAM will downclock and run at the system’s supported speed of 2666MHz. It will work perfectly fine. There is no performance benefit to buying faster RAM for this laptop, as the chipset and processor are limited to 2666MHz. You should prioritize compatibility and cost over speed.
Is it better to have 8GB of faster RAM or 12GB of slower RAM?
For this laptop, capacity is king. The speed difference between 2666MHz and 3200MHz is negligible in real-world use on this platform. The performance jump from 8GB to 12GB is enormous, as it eliminates memory swapping. You should always choose the higher capacity module at the correct 2666MHz speed over a higher-speed, lower-capacity module.
My laptop came with 4GB RAM. Should I upgrade to 8GB or 12GB?
If your budget allows, aim for 12GB total (by adding an 8GB stick to the 4GB soldered). This provides excellent headroom for modern multitasking and light creative work for the next few years. An 8GB total (4GB soldered + 4GB stick) is the bare minimum for comfortable use today and may feel limited in 1-2 years. The small extra cost for the 8GB stick is highly recommended.
Will upgrading my RAM void my ASUS warranty?
Generally, no. ASUS, like most manufacturers, does not void the entire warranty for user-performed RAM upgrades, as the RAM slot is intended for user access. However, if any damage occurs during your upgrade (e.g., a bent pin in the slot), that specific damage would not be covered. Keep your old RAM in case you need to revert the system for a warranty claim. Always check your specific regional warranty terms for absolute certainty.