Waterproof Camera Tips for Underwater Use
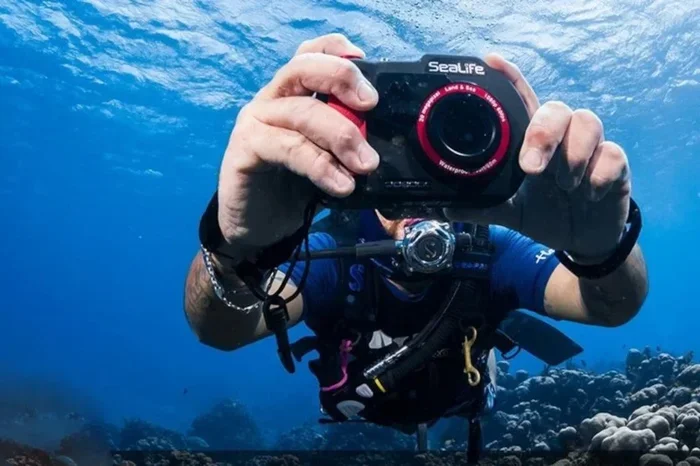
Waterproof camera tips for underwater use are essential for protecting your gear and capturing stunning shots beneath the waves. Whether you are snorkeling in clear reefs or diving into deep blue waters, proper preparation makes all the difference. In this guide, you will learn how to check seals, manage buoyancy, adjust camera settings, and maintain your equipment after every dive. These practical insights will help you shoot confidently and keep your camera safe in challenging aquatic environments.
Taking your camera beneath the surface opens up a whole new world of colors, shapes, and movement. Waterproof camera tips for underwater use matter because water is unforgiving. A single loose seal or a moment of carelessness can ruin an expensive lens or destroy your favorite memories. The good news is that you do not need a marine biology degree to shoot safely underwater. You just need a clear routine, a few smart habits, and the right mindset before you dip below the waves.
This guide walks you through everything from pre-dive checks to post-dive care. You will learn how to protect your housing, tune your settings for underwater light, and move with confidence in the water. We will also cover common mistakes that catch even experienced shooters off guard. By the end, you will have a simple checklist you can use every time you pack your gear for a beach trip, a snorkeling adventure, or a full dive trip.
Key Takeaways
- Check seals and gaskets before every dive: Inspect O-rings, lens covers, and battery compartments for sand, hair, or wear to prevent leaks.
- Test your housing in a controlled environment: Submerge the sealed camera in a bucket or tub before heading to open water to catch hidden issues.
- Adjust white balance and exposure for water: Water filters light, so tweak your settings to reduce blue or green casts and preserve true colors.
- Manage buoyancy and movement carefully: Keep your gear streamlined and avoid sudden jerks that can damage lenses or disturb marine life.
- Rinse and dry your equipment after each use: Freshwater rinses remove salt, sand, and chlorine that can corrode seals and electronic contacts.
- Use appropriate lighting and accessories: Add underwater flashes, red filters, or wide-angle lenses to improve clarity and reach in deeper water.
- Store your camera correctly between dives: Keep it in a dry, ventilated case and avoid leaving it in hot cars or damp bags.
📑 Table of Contents
- Waterproof Camera Tips for Underwater Use: Start With a Solid Pre-Dive Check
- Adjust Camera Settings for Underwater Light and Color
- Handle Your Gear With Care While in the Water
- Use the Right Accessories for Better Underwater Shots
- Practice Good Post-Dive Care and Storage
- Avoid Common Mistakes That Lead to Leaks and Lost Shots
- Expert Insights and Quick Tips for Better Underwater Results
Waterproof Camera Tips for Underwater Use: Start With a Solid Pre-Dive Check
The most important waterproof camera tips for underwater use all begin before you ever touch the water. A careful inspection takes only a few minutes, but it can save you from a flooded housing and a dead camera. Start by laying out every part of your setup on a clean towel. Look at the lens cover, battery door, memory card slot, and any buttons or dials that seal against the body. Even a tiny grain of sand can break a seal and let water sneak in.
Inspect O-Rings and Gaskets Carefully
O-rings are the silent heroes of any underwater housing. They sit in grooves and create the tight barrier that keeps water out. Before each dive, remove the O-rings and check them for nicks, twists, or flattening. Wipe them gently with a soft, lint-free cloth. If you see damage, replace the ring before you go any further. A fresh O-ring costs very little compared to the price of a soaked camera.
Clean Seals and Flanges Thoroughly
Seals and flanges need a clean surface to do their job. Use a dry cotton swab or a soft brush to remove dust, lint, or old lubricant from the groove. Avoid harsh chemicals because they can dry out rubber and make it crack over time. If the housing feels gritty or rough when you close it, stop and clean it again. Smooth, clean surfaces are one of the simplest underwater photography tips you can follow.
Test the Housing in a Safe Setting
Never trust a housing for the first time in open water. Fill a bucket, bathtub, or large basin with fresh water and submerge the sealed camera for a few minutes. Watch for bubbles, which often signal a leak. Afterward, open the housing carefully and check the interior for moisture. This quick test is one of the most reliable camera maintenance tips you can use at home. It gives you peace of mind before you head to the beach or dive boat.
Adjust Camera Settings for Underwater Light and Color
Water changes the way light behaves. Red, orange, and yellow tones disappear quickly as you go deeper, while blue and green tones take over. That is why waterproof camera tips for underwater use always include setting adjustments. If you shoot with default settings, your images may look flat, murky, or overly blue. A few simple changes can bring back the rich colors you see with your eyes.
Tune White Balance for True Colors
White balance tells your camera how to interpret the light around it. Underwater, auto white balance can struggle because the water itself acts like a filter. Try setting a custom white balance before the dive if your camera allows it. You can also carry a small white slate or even a white piece of plastic to use as a reference. This simple step is one of the most effective underwater photography tips for getting natural-looking skin tones and coral colors.
Control ISO and Shutter Speed Wisely
Underwater light can shift fast, especially near the surface or when clouds move overhead. Keep your ISO as low as possible to reduce noise, but raise it when the light drops. Pair your ISO with a shutter speed that freezes motion without letting too much light flood the sensor. If you are shooting active fish or swimming subjects, a faster shutter helps keep details sharp. If you are capturing still reefs, you can slow down a bit and let more color come through.
Use Exposure Compensation When Needed
Water can trick your camera into underexposing the scene. The surface reflects light, and the deeper water absorbs it, so your meter may not read the scene correctly. Use exposure compensation to brighten or darken the image as needed. Check your histogram often and adjust in small steps. This habit keeps your shots balanced and reduces the need for heavy editing later.
Handle Your Gear With Care While in the Water
Once you are in the water, movement becomes just as important as settings. Waterproof camera tips for underwater use are not only about sealing the camera. They are also about how you hold it, where you point it, and how you move through the environment. Rough handling can scratch lenses, dislodge seals, or startle the very creatures you want to photograph.
Keep a Streamlined Grip
Hold your camera close to your body and keep your arms relaxed. A compact grip reduces drag and helps you move smoothly. If you use a tray or handles, make sure they fit your hands comfortably. A good grip also helps you stabilize the camera when a wave passes or a current picks up. The steadier you are, the sharper your shots will be.
Watch Your Fins and Surroundings
Fins can easily bump a lens or kick up sand that settles on your gear. Be mindful of where your feet are moving, especially in shallow water or around reefs. Give yourself extra space when you turn or back up. If you are shooting near coral, move slowly and avoid touching the structure. Protecting the environment also protects your equipment from scratches and debris.
Manage Buoyancy and Pressure Changes
If you dive, pressure changes can affect your housing and any attached accessories. Make sure valves, vents, and purge systems are used correctly if your setup includes them. Check that your camera does not shift inside the housing during descent. A loose camera can press against the seal and create a leak path. Good buoyancy control is one of the most overlooked underwater photography tips because it keeps both you and your gear stable.
Use the Right Accessories for Better Underwater Shots
Accessories can make a huge difference underwater. They help you control light, widen your field of view, and protect your gear in tougher conditions. Choosing the right add-ons is a key part of waterproof camera tips for underwater use because the wrong accessory can cause more problems than it solves.
Add Lighting for Depth and Clarity
As you go deeper, natural light fades quickly. A small underwater flash or video light can bring back color and reveal details that would otherwise disappear. Position the light carefully to avoid backscatter, which happens when particles in the water reflect the beam back into the lens. Soft, angled lighting often works better than a harsh direct beam. If you are shooting close-up subjects, a focused light can make textures pop.
Choose Wide-Angle or Macro Lenses Based on Your Subject
Wide-angle lenses are great for reefs, schools of fish, and large scenes. They let you get close to the subject while still capturing the environment around it. Macro lenses work best for small creatures, fine details, and textured surfaces. Pick the lens that matches your goal for the day. If you are unsure, start with a versatile setup and adjust as you learn what your camera handles best underwater.
Use Filters and Protective Covers When Needed
Red filters can help restore some warm tones in shallow water when you do not want to use a light. Protective covers can shield your lens from scratches when you are moving through rough entry points or boat decks. Just make sure any cover or filter is designed for your setup and does not interfere with seals. A useful accessory should make your shoot easier, not add another point of failure.
Practice Good Post-Dive Care and Storage
What you do after the dive matters just as much as what you do before it. Salt, sand, chlorine, and humidity can all wear down seals and electronics over time. Following solid camera maintenance tips after each trip keeps your gear ready for the next one.
Rinse With Fresh Water Immediately
As soon as you can, rinse your camera housing, tray, and accessories in fresh water. Focus on moving parts, buttons, and crevices where salt can hide. Do not spray water directly into any openings that are meant to stay dry. A gentle rinse removes residue without forcing moisture into the wrong places. If you used your camera in chlorinated water, rinse it even more carefully because chlorine can be harsh on rubber and plastic.
Dry the Gear Thoroughly
Shake off excess water and wipe the exterior with a soft towel. Leave the housing open in a dry, shaded place so any trapped moisture can escape. Avoid direct sunlight or hot surfaces, which can warp plastic and weaken seals over time. If you notice water trapped in a groove or around a button, let the gear air out before you close it up again. Patience here prevents mold, corrosion, and unpleasant surprises later.
Store in a Clean, Dry Case
When everything is dry, pack your camera in a ventilated case with soft padding. Keep silica packs or other moisture absorbers in the storage area if your environment is damp. Do not leave your gear in a hot car or a sealed bag that traps humidity. Proper storage is one of the simplest waterproof camera tips for underwater use because it extends the life of seals, straps, and electronic contacts.
Avoid Common Mistakes That Lead to Leaks and Lost Shots
Even careful photographers can slip up when they are excited to get in the water. Knowing the common mistakes helps you avoid them. These underwater photography tips focus on the little habits that often cause the biggest problems.
Skipping the Pre-Dive Test
It is easy to assume that a housing worked last time, so it will work again. That assumption is risky. Seals can shift, O-rings can collect debris, and buttons can wear differently after repeated use. Always do a quick check, even if you are in a hurry. A short inspection is much faster than dealing with a flooded camera.
Overfilling the Housing or Misplacing the Camera
If your housing has a tight fit, forcing the camera in can bend a seal or put pressure on the lens. Seat the camera gently and close the housing according to the manufacturer’s design. If something feels stuck, stop and reassess. Forcing parts is a common cause of leaks and mechanical damage.
Ignoring Small Changes in Performance
If a button feels sticky, a seal looks stretched, or the housing does not close as smoothly as usual, pay attention. Small changes often warn of bigger issues. Address them early instead of waiting for the next dive. This habit is one of the most practical camera maintenance tips because it helps you catch problems before they become expensive.
Expert Insights and Quick Tips for Better Underwater Results
Experienced underwater shooters often say the best results come from simplicity. You do not need the most complicated setup to get beautiful images. You need a reliable routine and a calm approach. Here are a few expert-friendly ideas to keep in mind.
- Keep your setup simple: Fewer parts mean fewer seals, fewer connections, and fewer chances for something to go wrong.
- Practice in shallow water first: A calm shallow area lets you test your gear, your buoyancy, and your settings without deep-water pressure.
- Get close to your subject: Water reduces clarity, so shorter distances often produce sharper, more colorful images.
- Shoot in bursts when movement is fast: A short burst can help you catch the best moment when fish or currents are moving quickly.
- Review your shots when you can: If your setup allows it, check a few images between dives so you can adjust white balance, exposure, or framing.
- Respect the environment: Slow movements and careful positioning help you get better shots while protecting reefs and marine life.
These waterproof camera tips for underwater use are meant to make your dives safer and your images stronger. The more often you follow them, the more natural they become. Soon, your pre-dive check, your setting adjustments, and your post-dive rinse will feel like a normal part of the adventure instead of extra work.
Frequently Asked Questions
What should I check before taking a waterproof camera underwater?
Check the seals, O-rings, battery compartment, and memory card slot for debris or damage. It also helps to test the housing in a bucket of fresh water first so you can catch leaks before the real dive.
How do I keep my underwater photos from looking too blue?
Adjust your white balance and use exposure compensation to brighten the scene. A red filter or an underwater light can also help restore warm tones, especially as you go deeper.
Do I need special lenses for underwater photography?
Not always, but the right lens helps a lot. Wide-angle lenses work well for reefs and large scenes, while macro lenses are better for small subjects and fine details.
What is the best way to clean a waterproof camera after a dive?
Rinse the housing and accessories gently in fresh water, then dry everything with a soft towel. Leave the gear open in a shaded, dry place so trapped moisture can escape before you store it.
Can I use my regular camera with a waterproof housing?
Yes, many shooters use a standard camera inside a housing made for underwater use. Just make sure the housing fits your model, seals properly, and does not block buttons or lenses you need to use.
How can I avoid damaging my camera while moving in the water?
Keep a streamlined grip, move slowly, and watch your fins and surroundings. Good buoyancy control and careful positioning reduce the risk of bumps, scratches, and sudden jerks that can stress the housing.
=== CONCLUSION ===
Waterproof camera tips for underwater use come down to preparation, patience, and smart habits. When you inspect your seals, test your housing, adjust your settings, and move carefully in the water, you give yourself a much better chance of capturing clear, colorful images. Good post-dive care and thoughtful storage keep your gear ready for the next adventure, while a few simple accessories can make each shot stronger and more reliable. If you build these steps into your routine, you will spend less time worrying about leaks and more time enjoying the view beneath the surface.