Fix Windows Push Notifications User Service Has Stopped
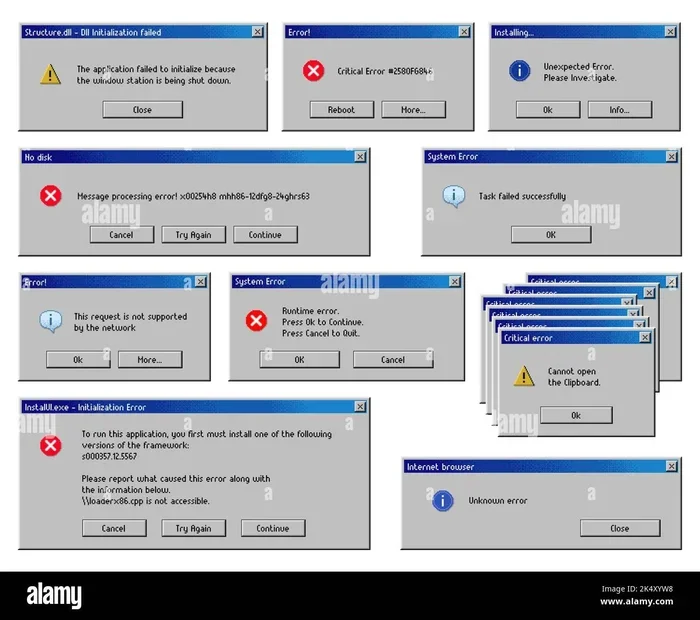
The Windows Push Notifications User Service stopping is a common and frustrating issue on Windows 11. This error blocks notifications from apps, breaks the Settings app, and disrupts live tiles. The good news is that you can fix it with simple steps like restarting the service, clearing the cache, or running the Windows troubleshooter. This guide walks you through every solution in plain language so you can get back to normal quickly.
Nothing is more annoying than when your Windows Push Notifications User Service suddenly stops working. You stop getting alerts from your favorite apps, the notification center goes blank, and the Settings app refuses to open properly. This is a real headache for anyone using Windows 11.
The good news is that this is a well-known issue with clear solutions. Whether you are a casual user or someone who relies heavily on notifications for work, you can fix this problem without calling a technician. In this guide, we will walk you through every method step by step. You will learn how to restart the service, clear the cache, run troubleshooters, and much more.
By the end of this article, you will have the knowledge to tackle the Windows Push Notifications User Service has stopped error with confidence. Let us get started.
Key Takeaways
- Restart the Service: Simply restarting the Windows Push Notifications User Service often resolves the issue immediately.
- Clear the Cache: Deleting the notification cache files can fix corrupted data causing the service to stop.
- Run Built-In Troubleshooters: Windows 11 has built-in tools that can automatically detect and fix notification problems.
- Check Windows Update: Outdated system files are a common cause, and installing the latest updates can resolve the error.
- Reset the Settings App: Resetting the Settings app through PowerShell can restore broken notification functionality.
- Re-register Apps: Re-registering UWP apps through PowerShell fixes many notification-related errors.
📑 Table of Contents
What Is the Windows Push Notifications User Service?
The Windows Push Notifications User Service is a background process in Windows 11. It handles all notifications from apps like Mail, Calendar, Teams, and even system alerts. Think of it as the bridge between your apps and your screen. When this service works, you get timely alerts without any effort.
When the service stops, several things break at once. The notification center stops showing alerts. Live tiles on the Start menu stop updating. The Settings app may fail to open. Some apps simply refuse to send you any notifications at all. It is a domino effect that can disrupt your entire workflow.
This service is part of the Windows 11 system services group. It runs in the background and usually operates silently. You rarely think about it until it stops working. That is when the error message pops up, and suddenly everything feels broken.
Why Does the Windows Push Notifications User Service Stop?
Understanding the cause helps you pick the right fix. Several factors can trigger this error. Here are the most common reasons:
Corrupted System Files
Windows 11 relies on thousands of system files. Sometimes these files get corrupted due to abrupt shutdowns, disk errors, or failed updates. When files related to the notification service become damaged, the service fails to start or crashes unexpectedly.
Outdated Windows Version
Microsoft regularly releases updates that fix bugs and improve stability. If you have not updated your system in a while, you may be running into a known issue that has already been patched. Keeping your system current is one of the best ways to prevent this error.
Third-Party App Conflicts
Some apps installed on your PC can interfere with the notification service. Antivirus programs, optimization tools, or even certain games can block or disrupt background services. This is especially common after installing new software.
Corrupted Notification Cache
Windows stores notification data in a local cache. Over time, this cache can become corrupted. When that happens, the service may stop responding or refuse to start altogether.
Services Set to Manual or Disabled
Occasionally, a Windows update or a user action changes the startup type of the notification service. If it is set to manual or disabled, the service will not run when needed, causing the error.
How to Fix Windows Push Notifications User Service Has Stopped
Now let us get into the solutions. We have organized these methods from the simplest to the most advanced. Start with the first one and work your way down. Most users find a fix within the first few steps.
Method 1: Restart the Windows Push Notifications User Service
This is the easiest and most effective fix. Restarting the service clears temporary glitches and forces a fresh start.
- Press the Windows key and R simultaneously on your keyboard.
- Type services.msc and press Enter.
- Scroll down the list until you find Windows Push Notifications User Service.
- Right-click on it and select Restart.
- Wait a few seconds and check if notifications are working again.
If the Restart option is grayed out, try stopping the service first and then starting it again. This simple trick resolves the issue for many users. If you have been dealing with the push notifications not working Windows problem, this should be your first attempt.
Method 2: Clear the Notification Cache
Corrupted cache files are a leading cause of this error. Clearing them forces Windows to rebuild fresh notification data.
- Open the Run dialog by pressing Windows key + R.
- Type %LocalAppData% and press Enter.
- Navigate to the Packages folder.
- Look for folders starting with Microsoft.Windows.ContentDeliveryManager.
- Delete the entire folder or rename it as a backup.
- Restart your computer and check if the service starts properly.
This method works because it removes the corrupted data that the service is trying to read. After deletion, Windows creates a new cache folder automatically. This is one of the most reliable fixes for the notification center Windows 11 not showing alerts.
If you are using a Windows 11 8GB RAM laptop or a Windows 11 16GB RAM laptop, this fix applies equally. The cache issue is not related to your RAM size but rather to the local data Windows stores for notifications.
Method 3: Run the Windows Notification Troubleshooter
Windows 11 comes with built-in troubleshooters that can automatically detect and fix common issues. The notification troubleshooter is specifically designed for this type of problem.
- Open Settings by pressing Windows key + I.
- Go to System and then select Troubleshoot.
- Click on Other troubleshooters.
- Find Notifications and click Run.
- Follow the on-screen instructions and apply any fixes suggested.
The troubleshooter will check your notification settings, service status, and app permissions. It often finds issues that you might not notice manually. This is a great no-risk way to diagnose the problem without changing any system settings.
Method 4: Check for Windows Updates
As mentioned earlier, outdated files can cause this error. Running a full update check ensures you have all the latest patches and fixes.
- Open Settings and go to Windows Update.
- Click Check for updates.
- Install any pending updates.
- Restart your computer after the updates are complete.
Microsoft frequently releases cumulative updates that address service-related bugs. If you have been putting off updates, this could be the fix you need. Keeping your system updated also improves overall Windows 11 troubleshooting readiness for other issues.
Method 5: Reset the Settings App Using PowerShell
The Settings app is closely tied to the notification service. If the app is corrupted, it can cause the service to stop. Resetting it through PowerShell can restore both.
- Right-click the Start button and select Terminal (Admin) or Windows PowerShell (Admin).
- Type the following command and press Enter:
Get-AppxPackage Microsoft.Windows.Settings | Reset-AppxPackage
- Wait for the command to complete.
- Restart your computer.
This command resets the Settings app to its default state. It does not delete any personal data or settings. It simply refreshes the app files. This is a safe and effective method for fixing the fix notification center Windows problem when other methods fail.
Method 6: Re-Register UWP Apps
Universal Windows Platform apps depend on the notification service. If these apps become unregistered, the service may fail to start.
- Open PowerShell as Administrator.
- Paste the following command and press Enter:
Get-AppXPackage | Foreach {Add-AppxPackage -DisableDevelopmentMode -Register "$($_.InstallLocation)\AppXManifest.xml"}
- Wait for the process to finish. It may take a few minutes.
- Restart your PC.
This command re-registers all UWP apps on your system. It is a thorough fix that addresses many notification-related errors. Users who have been struggling with the Windows Push Notifications User Service has stopped error often find relief with this method.
How to Prevent This Issue From Happening Again
Once you fix the error, you want to make sure it does not come back. Prevention is always better than cure. Here are some simple habits that keep your notification service running smoothly.
- Keep Windows Updated: Always install updates when they become available. Updates contain fixes for known bugs.
- Avoid Force Shutting Down: Sudden power-offs can corrupt system files. Always shut down properly.
- Be Careful With New Software: Some apps can interfere with background services. Research before installing unfamiliar programs.
- Run Regular Maintenance: Use the built-in Disk Cleanup tool to remove old files and cache data.
- Monitor Your Services: Occasionally check the Services app to make sure critical services are running properly.
Following these simple tips can save you hours of frustration. A little maintenance goes a long way in keeping your Windows 11 notification center working without interruptions.
When to Seek Professional Help
Most users can fix this issue using the methods above. However, there are situations where professional help is the right choice. If none of the solutions work after trying all of them, there may be a deeper system issue at play. Similarly, if you notice the error appearing frequently, it could indicate a hardware problem or a more serious corruption in your Windows installation.
Do not hesitate to contact Microsoft Support or visit a certified technician if you feel uncomfortable working with system files and PowerShell commands. It is always better to ask for help than to risk making things worse. If you are using a Windows 11 16GB RAM laptop or a Windows 11 8GB RAM laptop, the troubleshooting steps remain the same regardless of your RAM configuration.
Final Thoughts
The Windows Push Notifications User Service has stopped error is annoying, but it is far from unsolvable. You have several powerful tools at your disposal, from simple service restarts to PowerShell commands. The key is to work through the methods in order and not skip steps.
Start with the easiest fix and move forward. Most people resolve the issue within the first two or three methods. The important thing is not to panic. This is a known Windows 11 issue, and Microsoft is aware of it. With the right approach, you can get your notifications back and your Settings app working again.
Take action today. Try these steps and enjoy a notification-free frustration experience on your Windows 11 PC. Your system is capable of working smoothly, and with the right fix, it will.
Frequently Asked Questions
What causes the Windows Push Notifications User Service to stop?
The service can stop due to corrupted system files, outdated Windows versions, third-party app conflicts, or corrupted notification cache. Sometimes a Windows update changes the service startup type, causing it to disable itself. Identifying the exact cause helps you choose the right fix.
Is it safe to restart the Windows Push Notifications User Service?
Yes, it is completely safe. Restarting the service simply stops and starts it again. It does not delete any data or change any settings. This is the first recommended fix and works for most users experiencing the push notifications not working Windows error.
Can I fix this issue without using PowerShell?
Yes, several methods do not require PowerShell at all. Restarting the service through the Services app, running the notification troubleshooter, and clearing the notification cache are all PowerShell-free solutions. PowerShell methods are only needed for more advanced fixes.
Will clearing the notification cache delete my personal data?
No, clearing the notification cache does not delete personal data. It only removes stored notification history and temporary files. Your apps, settings, and personal files remain untouched. Windows will rebuild the cache automatically after deletion.
How do I know if the Windows Push Notifications User Service is running?
Open the Run dialog by pressing Windows key + R, type services.msc, and press Enter. Scroll down to find the service in the list. Check the Status column to see if it says “Running.” If it says “Stopped,” that confirms the issue and you should try restarting it.
Why do I still not get notifications after fixing the service?
If the service is running but notifications still do not work, check your app notification settings in Windows Settings. Go to System, then Notifications, and make sure notifications are enabled for the apps you want to receive alerts from. Sometimes the service works fine but individual app permissions are turned off.