512gb M 2 Nvme Ssd
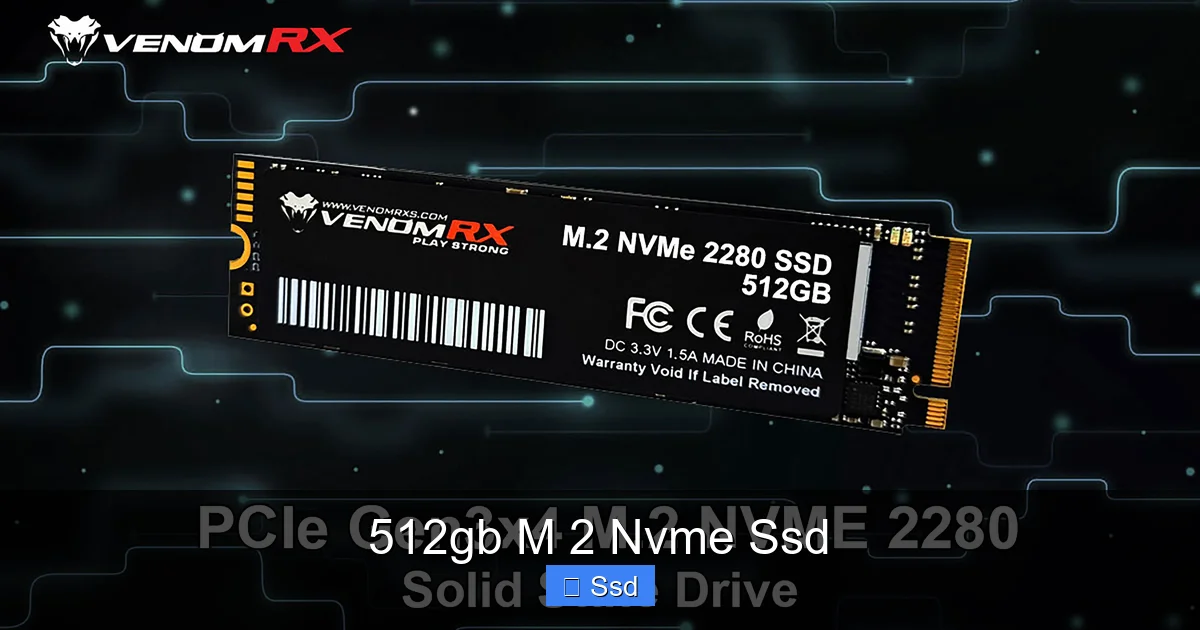
A 512GB M.2 NVMe SSD is a compact powerhouse that delivers blazing-fast storage for your PC or laptop. Ideal for gamers, content creators, and anyone tired of slow load times, it offers a massive speed boost over traditional drives in a tiny, efficient package.
Remember that agonizing feeling? You press the power button on your computer, go make a coffee, and it’s still loading. Or you fire up your favorite game, and the “Loading…” screen becomes your new screensaver. That was life with a hard disk drive (HDD). Then came the SATA SSD, which was a revelation. But now, there’s a new champion in town, and it’s rewriting the rules of speed: the NVMe SSD, specifically in the incredibly popular 512GB M.2 form factor. This isn’t just an incremental upgrade; it’s a quantum leap in how your computer feels and performs. Whether you’re building a new gaming rig, reviving an old laptop, or powering a professional workstation, understanding this little stick of silicon is crucial. Let’s dive deep into everything you need to know about the 512GB M.2 NVMe SSD.
Key Takeaways
- Revolutionary Speed: NVMe drives use the PCIe bus, offering 5-7x faster read/write speeds than SATA SSDs and up to 50x faster than hard drives.
- Ultra-Compact Form Factor: The M.2 “gumstick” design saves space, eliminates cables, and is perfect for slim laptops and modern PC builds.
- Sweet Spot Capacity: 512GB is the ideal balance for installing your OS, essential applications, and a healthy library of games or projects without overspending.
- Compatibility is Key: Ensure your motherboard or laptop has an available M.2 slot that supports NVMe (PCIe), not just the slower SATA protocol.
- Heat Management Matters: High-performance NVMe SSDs can throttle under load. A motherboard heatsink or a simple aftermarket cooler sustains peak speeds.
- Plug-and-Play Installation: Installing a 512GB M.2 NVMe SSD is often a simple screw-in process, but always check your device’s manual for specific steps.
- Best for Responsiveness: The real-world benefit is near-instant system boot, app launches, and game level loading, transforming daily computer use.
📑 Table of Contents
- What Exactly Is an NVMe SSD? Demystifying the Tech
- Why 512GB is the “Sweet Spot” Capacity
- The Performance Leap: What Speeds Can You Actually Expect?
- Buying Your 512GB M.2 NVMe SSD: A Practical Guide
- Installation & Setup: From Box to Boot in Minutes
- Ideal Use Cases: Who Benefits Most from a 512GB NVMe?
- Thermals and Longevity: Keeping Your SSD Healthy
- The Verdict: Is a 512GB M.2 NVMe SSD Right for You?
What Exactly Is an NVMe SSD? Demystifying the Tech
To appreciate the 512GB M.2 NVMe SSD, we need to break down its name. It’s a three-part descriptor of its identity and capabilities.
The “NVMe” Part: The Brain and Nervous System
NVMe stands for Non-Volatile Memory Express. This is the most important part. It’s a communications protocol, a set of rules, designed from the ground up for flash memory (like SSDs). The older SATA protocol was originally created for slow, spinning hard drives. It’s like comparing a modern fighter jet (NVMe) to a World War II biplane (SATA) – they both fly, but the technology and purpose are worlds apart.
NVMe connects directly to the PCI Express (PCIe) lanes on your motherboard. These are the same high-speed highways your graphics card uses. This direct link bypasses the old, slower controller bottleneck. The result? Drastically lower latency (the delay before data transfer begins) and massively higher throughput (how much data can move at once). A typical SATA III SSD is capped at about 550 MB/s. A PCIe 3.0 x4 NVMe SSD, which most 512GB drives are, can easily hit 3,000-3,500 MB/s read speeds. PCIe 4.0 drives double that again.
The “M.2” Part: The Physical Form Factor
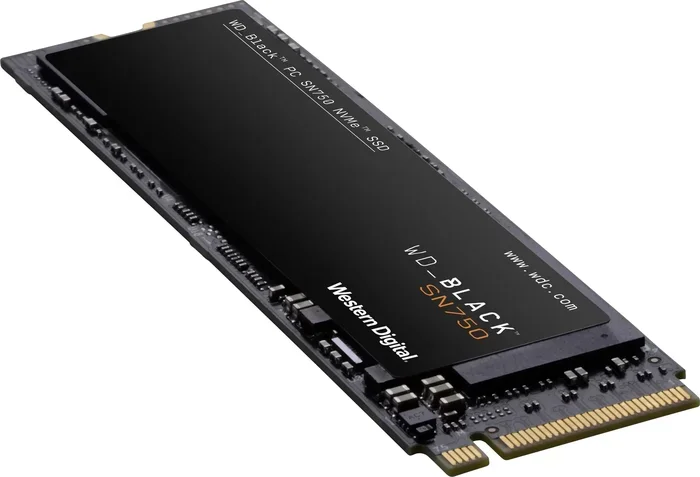
M.2 is simply the shape and size of the drive. It’s a small, flat card that slides into a dedicated slot on your motherboard. It’s about the size of a stick of gum. This design is a huge leap forward from the 2.5-inch SATA SSDs that look like small laptop hard drives. The M.2 form factor saves immense space inside a case, eliminates the need for power and data cables (it gets both through the slot), and allows for thinner laptop designs. It’s the future of internal storage.
The “512GB” Part: The Capacity Equation
This is the storage space. 512 gigabytes. For decades, we thought in terms of gigabytes, then terabytes. So why is 512GB such a common and popular size? It’s the sweet spot. It’s large enough to comfortably hold a modern operating system (Windows or macOS), a full suite of essential applications (Office, Adobe Suite, Steam), and a respectable collection of games or project files. It’s also typically the capacity where the price per gigabyte becomes very attractive compared to smaller 256GB drives, without the premium cost of 1TB or larger models. For the vast majority of users, 512GB offers the best balance of performance, capacity, and value.
Why 512GB is the “Sweet Spot” Capacity
You might be wondering: should I get 256GB, 1TB, or even 2TB? Let’s break down why 512GB is the undisputed champion for most upgrades.
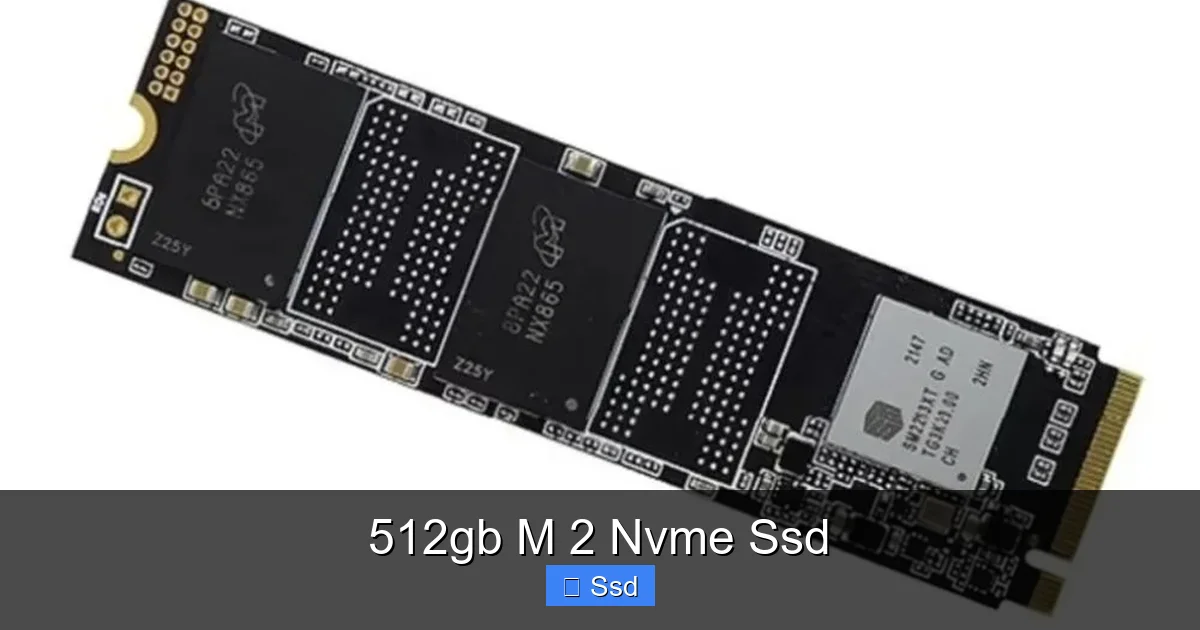
Visual guide about 512gb M 2 Nvme Ssd
Image source: images.kabum.com.br
The Math of Modern Software and Games
A fresh Windows 10 or 11 installation, with all updates, will consume about 40-50GB. Your core productivity suite—Microsoft Office or essential creative apps—can easily add another 20-30GB. Now, let’s talk games. A modern AAA title like Call of Duty: Modern Warfare II, Cyberpunk 2077, or Starfield can require 150GB or more of space. Indie titles are smaller, but your library grows. With a 256GB drive, you’d constantly be juggling installations, uninstalling one game to play another. It’s a management headache. A 1TB drive offers breathing room, but you pay a significant premium. 512GB gives you that OS and core apps (≈80GB), plus room for 4-8 large modern games or dozens of smaller ones, plus project files. It’s a comfortable, manageable library.
The Price-Performance-Capacity Curve
If you look at the market, the cost per gigabyte isn’t linear. The jump from 256GB to 512GB is usually very cost-effective. The jump from 512GB to 1TB often sees a more noticeable price increase. For example, a quality 512GB drive might cost $60-$70, while the 1TB version of the same model might be $100-$120. You’re paying a 70-100% premium for 100% more space. The 512GB model sits at the optimal point where you get a huge capacity increase over 256GB for a modest price bump, without the steep cost of 1TB+. For a primary drive where your OS lives, 512GB is the smart choice.
Future-Proofing Without Overkill
Storage needs grow, but not exponentially. While video editors and data scientists may need multiple terabytes, the average power user, gamer, or student will find 512GB sufficient for 3-5 years. By then, faster PCIe 5.0 drives will be standard and more affordable. Buying a 1TB drive you’ll never fully utilize is wasted money today. That budget is better spent on a faster 512GB NVMe drive, more RAM, or a better GPU. You can always add a secondary, cheaper SATA SSD or a high-capacity HDD for bulk storage (media libraries, old projects) later. Use your fast, premium NVMe space for what matters most: the OS and active projects.
The Performance Leap: What Speeds Can You Actually Expect?
Spec sheets are great, but what does all this speed mean for you when you’re actually using your computer?
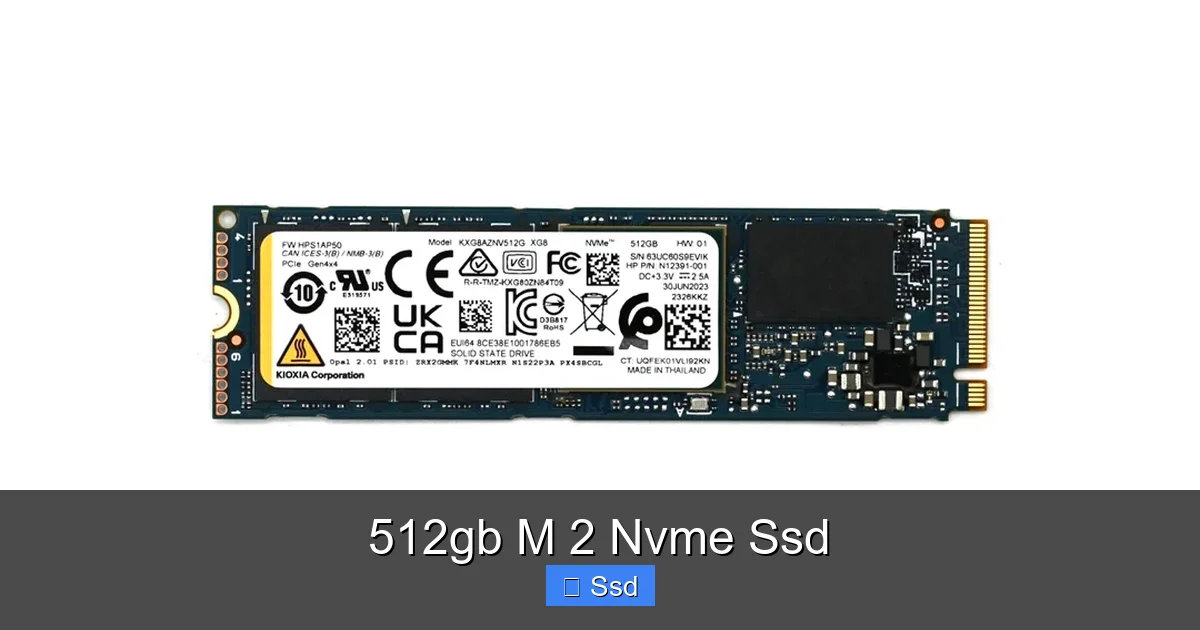
Visual guide about 512gb M 2 Nvme Ssd
Image source: trivico.la
Sequential vs. Random Read/Write: The Real Differences
Manufacturers advertise “sequential read/write” speeds—how fast the drive can read or write one large, contiguous file (like copying a big video file). This is where you see those monstrous numbers: 3,500 MB/s, 5,000 MB/s. This matters for large file transfers.
But the real magic for system responsiveness is in “4K random read/write” speeds. Your operating system is constantly loading thousands of tiny files—system files, program snippets, game assets. A fast 4K random read speed makes your OS feel instant. Here, the gap between a SATA SSD (maybe 500-800K IOPS) and an NVMe SSD (2-5M+ IOPS) is even more dramatic. This is why Windows boots in 5-10 seconds on NVMe vs. 15-25 on SATA, and why applications launch almost immediately.
Real-World Benchmarks: Boot Times, Game Loading, File Transfers
Let’s get practical. On a typical mid-range system:
- Windows 11 Boot to Desktop: HDD: 45-60 seconds. SATA SSD: 12-18 seconds. NVMe SSD: 5-9 seconds.
- Loading a Game (e.g., Red Dead Redemption 2): HDD: 60-90 seconds to main menu. SATA SSD: 25-35 seconds. NVMe SSD: 12-18 seconds.
- Opening a Large Photoshop Project (2GB): HDD: 15-20 seconds. SATA SSD: 4-6 seconds. NVMe SSD: 1.5-3 seconds.
- Copying a 50GB Folder: HDD: 8-12 minutes. SATA SSD: 1.5-2 minutes. NVMe SSD: 25-40 seconds.
These are tangible, everyday improvements. The difference between a SATA and NVMe SSD in daily use is less dramatic than SATA vs. HDD, but it’s absolutely noticeable. That fraction-of-a-second delay when opening a program or switching tasks? Gone. The system just feels fluid.
Does Your Motherboard/Laptop Support NVMe? The Compatibility Check
This is the most critical step before you buy. Not all M.2 slots are created equal. There are two types of M.2 drives: SATA-based (using the old SATA protocol over the M.2 connector) and NVMe-based (using PCIe). Your motherboard or laptop’s M.2 slot could support one or both. You must check:
- Your Motherboard/Laptop Manual: This is the ultimate authority. It will list the M.2 slots and specify “PCIe” or “NVMe” support.
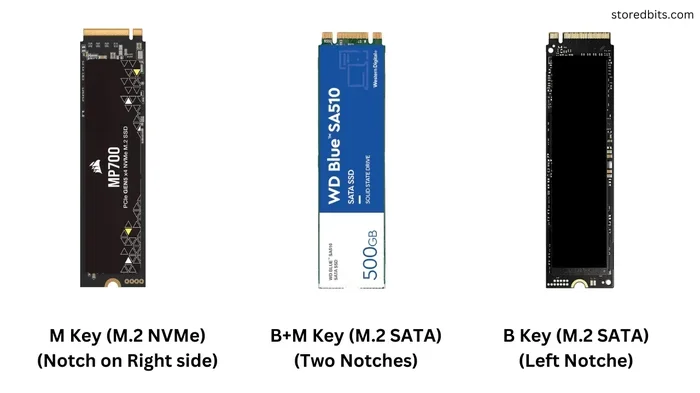
- Physical Keying: M.2 slots and drives have a “key” (a gap in the connector). An NVMe drive uses an “M” key (one gap on the right). A SATA M.2 drive uses a “B” key (one gap on the left). Most modern NVMe drives are M-key. Most modern M.2 slots are M-key and support NVMe. But some older or budget boards have B+M key slots that may only support SATA. Don’t rely on keying alone; check the specs.
- BIOS/UEFI Support: Very old systems (pre-2014/2015) may not have the necessary firmware to boot from an NVMe drive. You can often update the BIOS, but it’s a risk on very old platforms.
Quick Tip: If you’re buying a 512GB M.2 NVMe SSD for a laptop upgrade, search for your laptop’s exact model number + “M.2 upgrade.” Tech forums are full of people who have already done it and will tell you if the slot is NVMe-capable.
Buying Your 512GB M.2 NVMe SSD: A Practical Guide
The market is crowded. Here’s how to cut through the marketing and pick the right drive for your needs and budget.
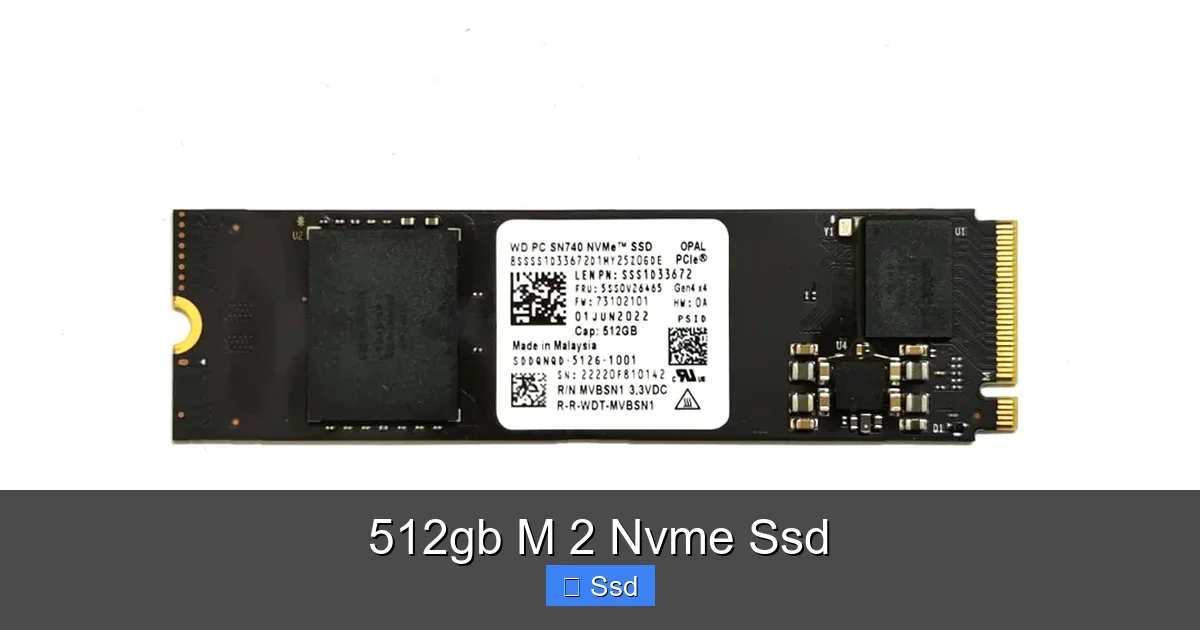
Visual guide about 512gb M 2 Nvme Ssd
Image source: trivico.la
Top Brands and Their Strengths
- Samsung (970 EVO Plus, 980): The perennial leader. Excellent all-around performance, superb reliability, great software (Samsung Magician). Often the price premium is worth it for peace of mind and top-tier speeds.
- Western Digital (WD Black SN770, SN850X): Samsung’s closest rival. WD’s Black series are performance kings, especially the SN850X (PCIe 4.0). The SN770 (PCIe 3.0) is a fantastic value-driven performer. WD also owns SanDisk, offering great budget options.
- Crucial (P5 Plus, P3): Micron’s consumer brand. The P5 Plus is a stellar PCIe 4.0 performer. The P3 is a more budget-friendly PCIe 3.0 drive. Crucial is known for using high-quality Micron NAND flash memory.
- Sabrent (Rocket 4 Plus): A fan favorite for offering incredible performance (often matching or beating the big names) at aggressive prices. Their drives frequently come with a large heatsink pre-installed, which is a huge plus for thermal management.
- SK Hynix (Gold P31): The OEM behind many other brands’ memory. Their own drives are exceptionally well-regarded for power efficiency and consistent performance, often ranking at the very top for laptops.
Key Features to Look For: DRAM Cache, NAND Type, Controller
Don’t just look at the advertised max speed. The internal architecture matters for sustained performance.
- DRAM Cache: Think of this as a super-fast buffer. The drive’s controller uses a small, fast DRAM chip to map where data is stored, speeding up access. Most good 512GB drives have a DRAM cache. Some ultra-budget “DRAM-less” designs rely on system RAM (HMB – Host Memory Buffer), which works but can lead to slower speeds after the cache is full. For a primary OS drive, a drive with its own DRAM is preferable.
- NAND Flash Type (TLC vs. QLC): This is the actual memory cell. TLC (Triple-Level Cell) stores 3 bits per cell. It’s the standard for performance and endurance. QLC (Quad-Level Cell) stores 4 bits, making it cheaper and higher density, but it’s slower, especially when writing large amounts of data (the “SLC cache” fills up). For a 512GB boot drive, stick with TLC-based drives for the best experience. QLC is better suited for secondary, bulk storage drives.
- Controller: The drive’s processor. Brands like Samsung (in-house), Phison, and Silicon Motion make excellent controllers. You don’t need to pick based on this, but it’s good to know that a reputable brand pairs good NAND with a good controller.
PCIe 3.0 vs. PCIe 4.0: Do You Need the Newer Standard?
This is a common question. PCIe 4.0 offers double the bandwidth of PCIe 3.0. But do you need it?
- For a 512GB NVMe SSD, the answer is likely no, but it’s nice to have. Most real-world tasks (booting, launching apps, game loading) are not limited by the sequential speed of your SSD. They are limited by other factors (CPU, GPU, game engine asset streaming). The jump from a good PCIe 3.0 drive (3,500 MB/s) to a great PCIe 4.0 drive (7,000 MB/s) is imperceptible in these tasks.
- When PCIe 4.0 matters: If you frequently work with massive, sustained file transfers (e.g., moving 100GB+ video project files) or use professional applications that can leverage the extra bandwidth, then PCIe 4.0 is beneficial.
- The Catch: Your motherboard must support PCIe 4.0. This is only available on AMD Ryzen 3000/5000/7000 series and newer, and Intel 11th/12th/13th/14th Gen Core platforms and newer. If you have an older system, PCIe 3.0 is your max, and a high-quality PCIe 3.0 drive is still a phenomenal upgrade.
Recommendation: If your platform supports PCIe 4.0 and the price difference is small ($10-$20), get a PCIe 4.0 drive like the WD SN770 or Samsung 980. It gives you headroom. If you’re on an older platform or on a tight budget, a top-tier PCIe 3.0 drive like the Samsung 970 EVO Plus or Crucial P5 is still an incredible performer and will feel just as fast for daily use.
Installation & Setup: From Box to Boot in Minutes
One of the best parts of the M.2 form factor is how easy it is to install. But “easy” doesn’t mean “no steps.”
Desktop Installation: A Simple Screwdriver Job
1. Power Down & Unplug: Shut down your computer and disconnect the power cable. Press the power button once to discharge residual power.
2. Open the Case: Remove the side panel (usually two thumbscrews at the back).
3. Locate the M.2 Slot: It’s a short, horizontal slot, often found between the PCIe slots and the CPU, or near the bottom of the board. Consult your motherboard manual.
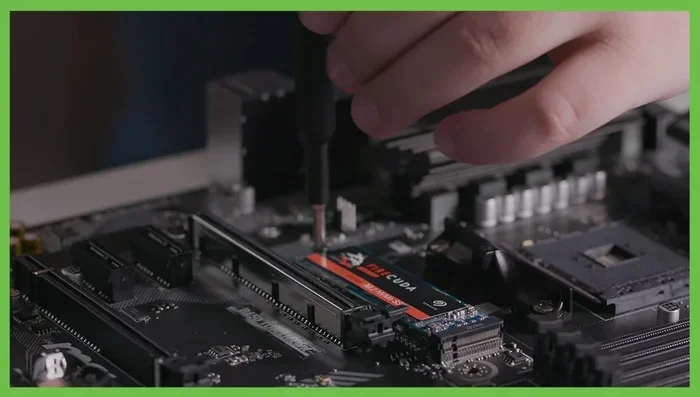
4. Unscrew the Mounting Screw: There’s a small screw at the far end of the slot holding a standoff. Remove it.
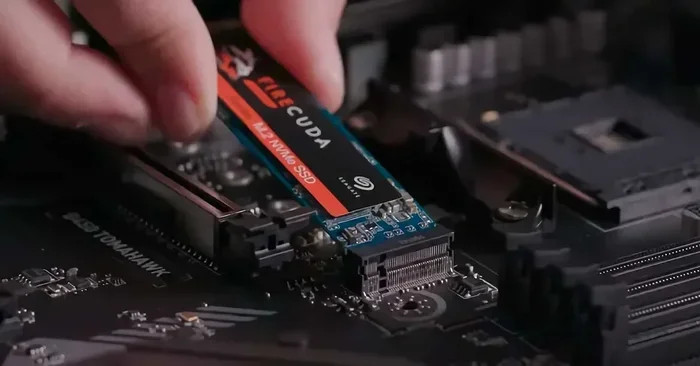
5. Insert the Drive: Hold the SSD by the ends. Align the notch on the drive’s connector with the key in the slot. Insert it at a slight angle (about 30 degrees) until it clicks firmly into place.
6. Secure the Drive: Push the drive down flat against the motherboard/spacer. Use the screw you removed to secure the other end of the SSD. Do not overtighten! Snug is enough.
7. Reassemble & Power On: Close the case, plug in, and boot. Your new drive should appear in Windows as an uninitialized disk.
Laptop Installation: Varies by Model
Laptop upgrades can be trickier. Some have easy bottom panels; others require complete disassembly. Always search for your specific laptop model’s service manual (PDF) online (e.g., “Dell XPS 13 9310 service manual”). Steps generally involve:
- Removing the bottom cover (often many small screws, some hidden under rubber feet).
- Locating the M.2 slot (often under a small heatsink or shield).
- Unscrewing and removing the existing SSD (if present).
- Repeating the desktop insertion steps above with the new 512GB drive.
- Reassembling the laptop in reverse order.
Critical Note: Some ultra-thin laptops solder the SSD directly to the motherboard and are not upgradeable. Confirm your laptop has a removable M.2 slot before purchasing.
Initial Setup in Windows: Initialization, Formatting, Cloning
Once booted, you need to prepare the drive.
- Open Disk Management: Right-click the Start menu and choose “Disk Management.”
- Initialize the Disk: You’ll see a pop-up. Choose “GPT” (GUID Partition Table) – this is required for modern systems with UEFI BIOS to boot from it. Click OK.
- Create a New Simple Volume: Right-click the “Unallocated” space and follow the wizard. Assign a drive letter (e.g., D:), choose NTFS as the file system, and perform a quick format. Your drive is now ready for files.
- To Use as a Boot Drive: If you’re replacing your old boot drive, you must either clone the old drive using software like Macrium Reflect Free or Samsung Data Migration, or do a clean install of Windows from a USB installer. A clean install is always recommended for best performance and stability.
Ideal Use Cases: Who Benefits Most from a 512GB NVMe?
This isn’t just for enthusiasts. The benefits are universal, but some users will feel the impact more acutely.
The Competitive Gamer & Streamer
For a gamer, every second counts. Shorter load times mean less time staring at screens and more time in the action. In competitive multiplayer games like Valorant or CS:GO, loading into the map faster can mean securing the best starting position. For streamers, having the OS, streaming software (OBS), game, and capture files all on one fast drive prevents stuttering and dropped frames. The 512GB capacity is perfect for keeping your current game library of 5-10 titles installed and ready to go.
The Content Creator (Video, Photo, Music)
Working with large media files is a constant struggle against I/O bottlenecks. A 512GB NVMe SSD as your scratch disk or active project drive is transformative. Importing 4K/8K video footage, applying effects in After Effects, or loading dozens of high-resolution photos into Lightroom happens with near-instantaneous feedback. The sustained write speeds (especially on drives with good thermal management) prevent timeline playback stutters. You can keep your current project on the NVMe and archive finished work on a larger, slower SATA SSD or HDD.
The General User & Professional
Even if you just browse, use Office, and have a few Chrome tabs open, the difference is palpable. Your computer will feel snappy and responsive for years to come. Opening Excel, Word, or PDFs is instant. Windows Updates install in minutes, not tens of minutes. For professionals in fields like data analysis, software development, or CAD, the ability to compile code or load complex models faster directly improves productivity. The 512GB size ensures your OS and all your core tools are on the fastest possible storage.
Thermals and Longevity: Keeping Your SSD Healthy
Two often-overlooked aspects of NVMe SSDs are heat and endurance.
Why NVMe SSDs Get Hot (and Why It Matters)
All that speed consumes power and generates heat. When an NVMe drive gets too hot (typically above 70-80°C), it will throttle—intentionally slow down to protect its components. This means your blistering 3,500 MB/s speeds can drop to SATA SSD levels during a long file copy or heavy game load. This is most common on drives without a heatsink and in poorly ventilated cases.
Solutions:
- Motherboard Heatsink: Many modern motherboards come with an M.2 heatsink (a metal plate with thermal pads). Always use it if provided.
- Aftermarket Heatsink: Simple, inexpensive aluminum heatsinks with thermal pads can be purchased and stuck on the drive. Drives like the Sabrent Rocket come with one pre-installed.
- Case Airflow: Ensure your case has good airflow. A fan blowing air across the M.2 slot area (often near the GPU) helps immensely.
For most users in a typical case, throttling is rare during normal use. But for sustained workloads, it’s a consideration.
Understanding TBW and Endurance
SSDs wear out. Every time data is written to a NAND cell, it degrades slightly. The total amount of data you can write over the drive’s life is its endurance, measured in TBW (Terabytes Written). A typical 512GB TLC NVMe SSD will have a TBW rating of 300-600 TBW. What does that mean?
Let’s do the math. If you write 50GB of data to your drive every single day (a huge amount for a typical user), it would take:
(400 TBW * 1024) / 50 GB/day ≈ 8,192 days, or over 22 years to hit the limit.
For the vast majority of users, the drive will become obsolete due to capacity or technology long before it wears out. TBW is a useful spec for professional, write-heavy workloads (video editing, database servers), but for general use, it’s not a primary concern. Focus on the warranty period (usually 5 years) and the brand’s reputation for reliability.
The Verdict: Is a 512GB M.2 NVMe SSD Right for You?
After all this, let’s bring it home. If your computer has an available NVMe-compatible M.2 slot, and your budget allows for a $60-$120 upgrade, the answer is a resounding yes.
The 512GB M.2 NVMe SSD represents the best possible upgrade for the vast majority of users. It delivers a night-and-day improvement in system responsiveness that you will feel every single time you use your computer. The 512GB capacity is the practical sweet spot, offering enough space for a modern operating system, your essential software suite, and a solid library of games or project files without the cost bloat of larger capacities. It’s easy to install, sips power (great for laptops), and is future-proofed for years of use.
You will not regret this upgrade. The frustration of waiting for your computer will be replaced by the satisfaction of a system that feels instantly ready for whatever you throw at it. Whether you’re a student, a professional, a gamer, or just someone who values their time, moving your primary storage to a 512GB M.2 NVMe SSD is one of the most impactful and cost-effective upgrades you can make.
Frequently Asked Questions
Will a 512GB M.2 NVMe SSD work in my older desktop or laptop?
It depends entirely on whether your device has an M.2 slot that supports the NVMe (PCIe) protocol. Many older systems (pre-2016) only have SATA M.2 slots or no M.2 slot at all. You must check your motherboard manual or laptop specifications online. If it only mentions “M.2 SATA” or “SATA SSD,” it will not work with an NVMe drive.
Do I need to buy a separate heatsink for my 512GB NVMe SSD?
Not always. Many modern motherboards include an M.2 heatsink. Some aftermarket drives (like Sabrent) come with one attached. For general use and gaming in a case with decent airflow, a heatsink is often not strictly necessary. However, if you do sustained heavy workloads (video rendering, large file transfers) or have poor case airflow, a heatsink is a cheap and effective way to prevent thermal throttling and maintain top speeds.
Is 512GB enough storage for a gaming PC in 2023?
For a primary drive holding your OS and your active game library, 512GB is a viable and popular starting point. It can comfortably hold Windows, core apps, and 4-8 modern AAA games (which can be 150GB+ each). However, if you have a massive library of modern games, you will quickly run out of space. The solution is to use the 512GB NVMe as your boot and primary game drive, and add a secondary 1TB+ SATA SSD or HDD for your entire game library and media storage.
What are the best 512GB M.2 NVMe SSD brands to buy?
Stick with reputable brands known for quality controllers and NAND flash. Top recommendations include Samsung (970 EVO Plus, 980), Western Digital/SanDisk (WD Black SN770, SN850X), Crucial (P5 Plus), and Sabrent (Rocket 4 Plus). SK Hynix (Gold P31) is also excellent, especially for laptops due to its power efficiency. Always check recent reviews for the specific model, as the market changes quickly.
How do I transfer my existing Windows installation and files to the new 512GB SSD?
You have two main options. First, cloning: Use free software like Macrium Reflect Free or the tool provided by your SSD manufacturer (e.g., Samsung Data Migration) to make an exact copy of your old drive onto the new one. This requires both drives to be connected simultaneously (e.g., old drive in old bay, new drive in M.2 slot). Second, a clean install: Create a Windows USB installer, boot from the new SSD, and install Windows fresh. This is often the better option for performance and reliability, but you’ll need to reinstall all your programs and copy files over manually.
How long will a 512GB NVMe SSD last?
For typical consumer use, the drive will likely last longer than the rest of your computer. Modern TLC-based NVMe SSDs have TBW (Total Bytes Written) ratings of 300-600 TBW. If you write 50GB to the drive every day, it would take over 15-30 years to reach that limit. NAND flash wears out from writes, not time or power-on hours. The more relevant failure point is usually obsolescence due to capacity or technology, or a rare electronic fault. Most drives come with a 5-year warranty, which is a good indicator of the manufacturer’s confidence in its longevity.