Upgrading your laptop’s RAM is one of the most effective and affordable ways to breathe new life into an aging machine. This guide walks you through every step, from checking compatibility to physically installing the new modules. You’ll learn how to safely open your laptop, avoid static damage, and troubleshoot common issues, ensuring a smooth and successful upgrade that dramatically improves multitasking and overall speed.
Key Takeaways
- Compatibility is King: Your laptop’s motherboard, CPU, and BIOS dictate the maximum RAM type (DDR3/DDR4/DDR5), speed, and total capacity it supports.
- Know Your Slots: Most laptops have 1-2 accessible RAM slots. Some have one slot soldered, limiting upgrade potential. Always check before buying.
- Tools & Safety First: You typically only need a small screwdriver, but a plastic spudger and an anti-static wrist strap are highly recommended to prevent damage.
- Performance Gain is Real: Adding RAM directly helps if you regularly run many browser tabs, applications, or heavy software like photo/video editors.
- It’s Often Simpler Than You Think: For many modern laptops, accessing the RAM bay involves just removing a few screws from the bottom panel—no full disassembly required.
- Backup Your Data: While RAM upgrades rarely cause data loss, it’s a critical best practice to back up important files before opening any electronic device.
- Verify Post-Upgrade: After installation, enter your BIOS/UEFI or check your OS system info to confirm the new RAM is recognized and running at the correct speed.
📑 Table of Contents
- Why Upgrade Your Laptop’s RAM? The Performance Boost You Can Feel
- Phase One: Preparation & Compatibility—Don’t Skip This!
- Gathering Your Tools and Workspace
- The Step-by-Step Disassembly and RAM Installation
- Troubleshooting: What If My Laptop Doesn’t Boot or Recognize the RAM?
- Post-Upgrade Optimization and Verification
- Advanced Considerations and When NOT to Upgrade
Why Upgrade Your Laptop’s RAM? The Performance Boost You Can Feel
Is your laptop feeling sluggish? Do you cringe every time you open more than a couple of browser tabs or try to work on a document while a video plays in the background? Before you consider a costly new machine, there’s a powerful and often overlooked upgrade that can transform your computing experience: adding more Random Access Memory (RAM). Think of your laptop’s RAM as its immediate workspace. The more workspace you have, the more tasks it can handle actively and smoothly without constantly shuffling data back and forth to the much slower hard drive or SSD. Upgrading your RAM is frequently the single most cost-effective hardware modification you can make to speed up an older laptop, improve multitasking, and eliminate annoying slowdowns. It’s a hands-on project that demystifies your device and puts you in control of its performance.
The beauty of a RAM upgrade lies in its simplicity and dramatic impact. For many everyday tasks—web browsing with dozens of tabs, working with large spreadsheets, basic photo editing, or running a few applications simultaneously—4GB or 8GB of RAM is simply not enough. Your system starts to rely heavily on virtual memory (using your storage drive as pretend RAM), which is orders of magnitude slower. This causes the spinning wheel of death, long load times, and general frustration. By increasing your RAM to 16GB or even 32GB (if your laptop supports it), you give your operating system and applications ample breathing room. The result is a snappier, more responsive system that feels years younger. This guide will take you from a curious beginner to a confident DIY upgrader, ensuring you get that performance boost safely and correctly.
Phase One: Preparation & Compatibility—Don’t Skip This!
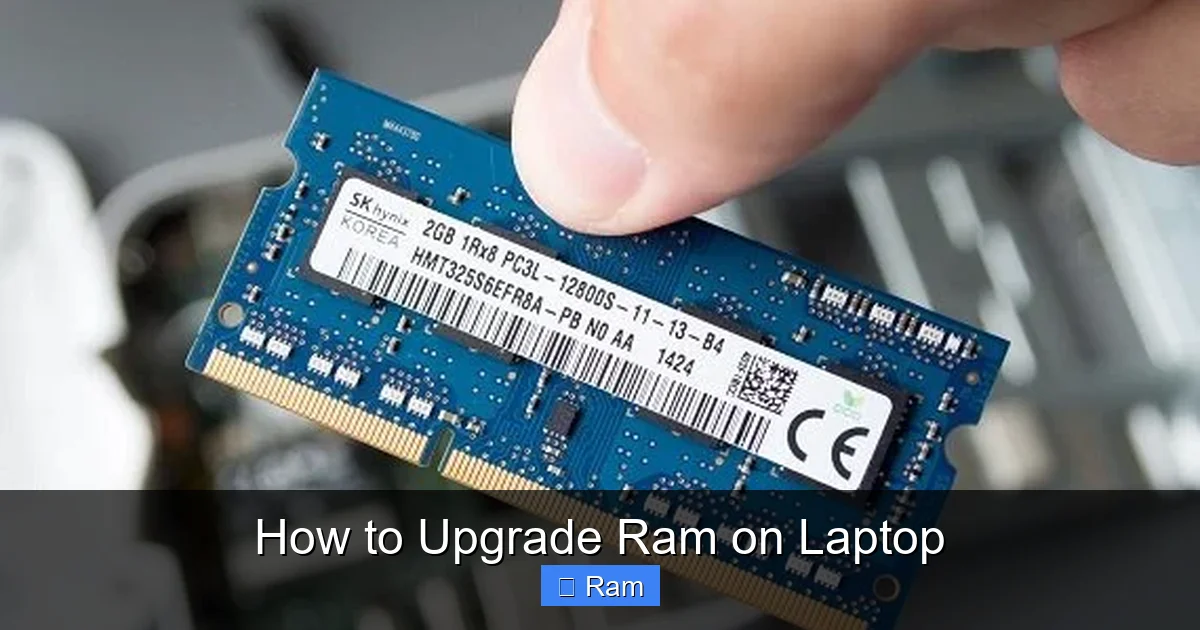
Rushing to buy new RAM sticks without doing your homework is the #1 reason for failed upgrades or wasted money. This phase is all about gathering information. You need to become a temporary detective about your laptop’s specifications. The goal is to answer three critical questions: What type of RAM does my laptop use? How many slots are available? What is the maximum amount of RAM it can support?
Visual guide about How to Upgrade Ram on Laptop
Image source: arenalaptop.com
How to Identify Your Current RAM Configuration
First, let’s see what you already have. You don’t even need to open the laptop yet. On Windows, the easiest method is to use the built-in Task Manager. Right-click your taskbar and select “Task Manager,” then go to the “Performance” tab and click on “Memory.” Here, you’ll see the total amount of RAM, its speed (e.g., 3200 MHz), and its form factor (likely SODIMM for laptops). It might also say something like “DDR4.” This is your starting point.
For even more detail, you can use a free, trusted system information tool like CPU-Z. Download it from the official website, run it, and check the “Memory” and “SPD” tabs. The SPD tab will show details for each individual RAM slot, which is crucial if you have two sticks. Alternatively, you can visit the manufacturer’s support website for your exact laptop model (e.g., Dell XPS 13 9310, HP Pavilion 15-ek1xxx) and look up the technical specifications or maintenance manual. This official doc will list the supported RAM types, speeds, and maximum capacity.
The Crucial Scan: Your Best Friend for Compatibility
If the manual is vague or you can’t find your model, there’s a fantastic tool: the Crucial System Scanner. Go to Crucial.com and run their online scanner. It analyzes your system and provides a list of guaranteed compatible RAM upgrade options. This is not an ad for Crucial; their scanner is universally respected because it cross-references a massive database of motherboard and laptop compatibility. It will tell you exactly how many slots you have, what’s currently installed, and what you can upgrade to. You can then use this information to buy from Crucial or any other retailer, as you now know the precise specs (e.g., DDR4-3200 SODIMM, 16GB, CL22).
Pro Tip: When buying, consider matching the specifications of your existing RAM if you are adding to it (same speed, voltage, timings). For best results, especially in dual-channel mode (which boosts performance), it’s ideal to install a matched kit (two identical sticks purchased together). If you are replacing the old stick entirely, just buy the new, higher-capacity module that meets your laptop’s max specs.
Gathering Your Tools and Workspace
Now that you know what to buy, let’s get the toolkit ready. The good news is that the tool list is short. The better news is that creating a safe, clean workspace is half the battle.
Visual guide about How to Upgrade Ram on Laptop
Image source: wepc.com
The Essential Toolkit
- Small Phillips Head Screwdriver (#0 or #1): This is your primary tool. Laptop screws are tiny and often have a star-shaped head. A precision screwdriver set is a worthwhile investment for any electronics tinkerer.
- Plastic Spudger or Pry Tool: You’ll use this to gently pry open plastic clips holding the bottom cover. Never use a metal tool for this, as it can easily scratch or crack the casing.
- Anti-Static Wrist Strap (Highly Recommended): Static electricity is the silent killer of computer components. This strap, with a clip that attaches to a grounded metal object (like the unpainted screw on a light switch plate), safely discharges any static from your body.
- Small Container or Magnetic Mat: To hold the tiny screws you remove. Keeping them organized by location prevents confusion during re-assembly.
- Can of Compressed Air: Use this to blow out any dust from the RAM slots and internal components before and after the upgrade. Dust can cause overheating and poor contact.
Setting Up Your Static-Safe Workstation
Find a large, flat, well-lit surface—a kitchen table or desk works fine. Clear it of any clutter, especially plastics, papers, or fabrics that generate static. Before you touch anything inside the laptop, put on your anti-static wrist strap and clip it to a grounded metal object. If you don’t have a strap, frequently touch the unpainted metal part of your laptop’s chassis (the exposed aluminum or steel) to discharge static. Another trick is to work on a simple cotton cloth, as natural fibers generate less static than synthetics. Handle the new RAM modules by the edges, avoiding the gold contacts and chips on the stick itself.
The Step-by-Step Disassembly and RAM Installation
With your new RAM in hand and your tools ready, it’s time for the main event. The process varies slightly by laptop brand and model, but the core principles are universal. Always consult your laptop’s specific service manual (search “[Your Laptop Model] service manual” online) for the most accurate instructions and diagrams.
Visual guide about How to Upgrade Ram on Laptop
Image source: cdn.mos.cms.futurecdn.net
Step 1: Power Down and Unplug Completely
This is non-negotiable. Shut down your laptop fully—do not just put it to sleep or hibernate. Unplug the charger. If your laptop has a removable battery, take it out. For modern laptops with internal batteries, you must open the case to disconnect the battery, which we’ll do next. This step prevents any power from flowing through the circuits while you work.
Step 2: Removing the Bottom Cover
Flip the laptop over. You’ll see a panel secured by multiple screws. These are often marked with small icons next to them (like a keyboard or cylinder). Start by removing all the screws. Pay close attention to their lengths and positions; some laptops use screws of different lengths in different holes. Use your container to sort them. Once all screws are out, gently pry around the edges of the bottom panel with your plastic spudger. It may be held by plastic clips; you’ll hear a series of small snaps as they release. Start at a corner and work your way around. Be patient. If it’s stuck, double-check for any hidden screws under rubber feet or labels.
Step 3: Locating and Releasing the RAM Modules
Once the bottom is off, you’ll see the internal components. The RAM sticks are small circuit boards, usually about 1.5 inches wide and 2 inches long, lying flat, often held down by small metal clips on either side. They are typically located near the center or a corner of the motherboard. Before touching anything, locate the battery connector (a white plug with a black tab) and gently unplug it from the motherboard. This is your final safety step against any residual power.
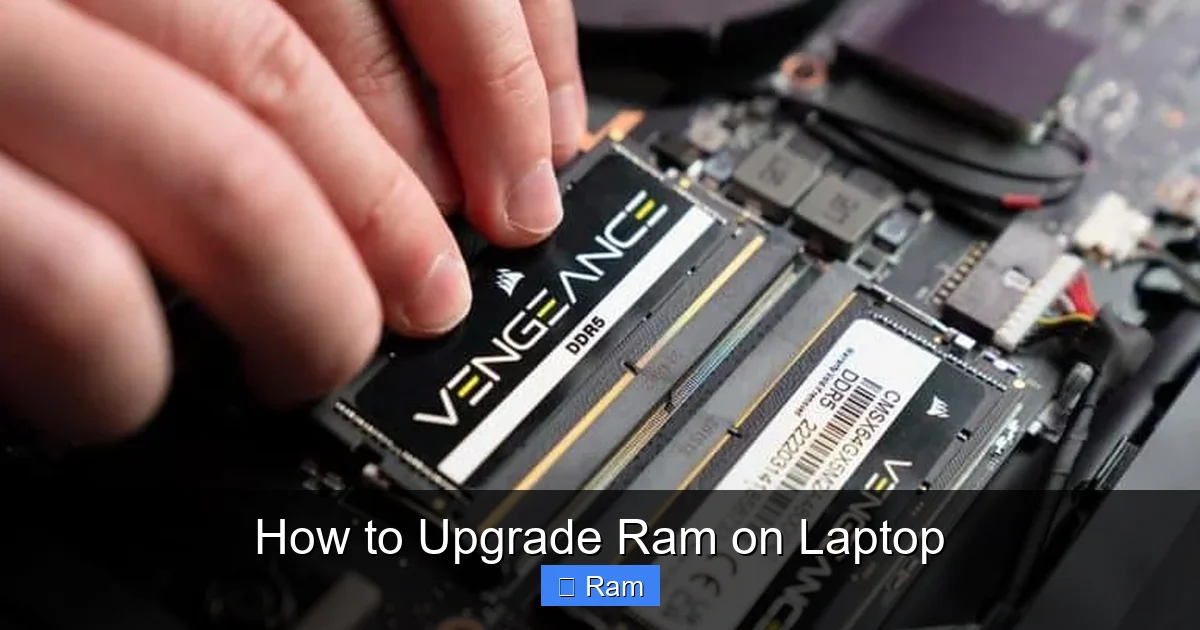
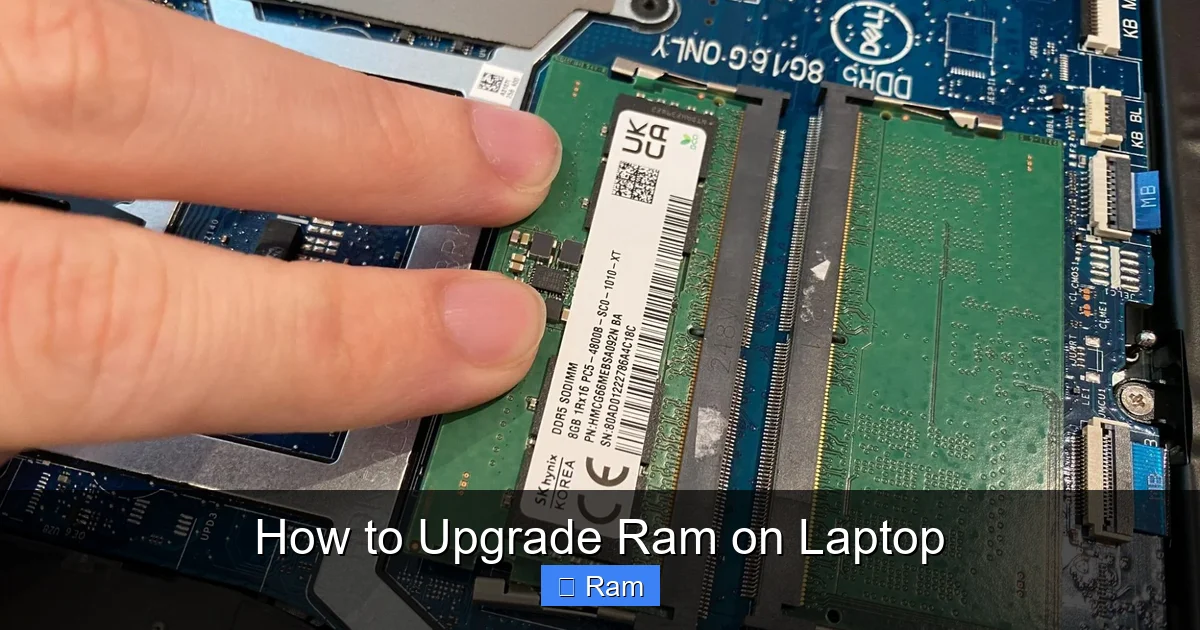
To remove the old RAM, gently pry the two metal retention clips outward (away from the RAM stick). They will pop up, and the stick will tilt up at about a 45-degree angle. Gently pull the stick straight out by holding the edges. Do not touch the gold contacts. Place the old RAM aside in an anti-static bag if you plan to keep it.
Step 4: Installing the New RAM
Take your new RAM module. Notice the notch on the bottom edge—it’s not centered. This key ensures the RAM can only go in one way. Align this notch with the corresponding ridge in the slot. Insert the stick into the slot at the same 45-degree angle, making sure it’s seated fully and evenly. Now, press down firmly but gently on the top edge of the stick until the retention clips snap back into place, locking it flat. You should hear/feel two distinct clicks. If you have a second slot and are adding a second stick, repeat the process for that slot. Ensure both sticks are in the same color-coded slots if your motherboard has them (usually labeled A1/B1 or Channel 1/Channel 2 for optimal dual-channel performance).
Step 5: Reassembly and First Boot
Double-check that nothing is loose, no tools are left inside, and the RAM is securely clipped. Reconnect the battery plug first. Then, carefully align the bottom cover and press it down around all edges until the clips snap back into place. Don’t force it. Reinstall all the screws, using the correct ones in the correct holes. Tighten them snugly but do not over-tighten and strip the threads. Plug in the charger and power on your laptop.
Troubleshooting: What If My Laptop Doesn’t Boot or Recognize the RAM?
So you followed all the steps, but after booting, you get a black screen, a series of beeps, or your operating system only shows the old amount of RAM. Don’t panic. This is a common hurdle and usually has a simple fix.
The “No Boot” Scenario: Beeps or Black Screen
This is the most alarming symptom. A continuous beeping or complete failure to show any sign of life (no lights, no fan) typically means the new RAM is not seated properly or is incompatible. First, power down and unplug the laptop again. Open the case and reseat the RAM. Remove it, blow out the slot with compressed air, and reinsert it, pressing down more firmly to ensure the clips are fully locked. If you have two sticks, try booting with only the new one installed (removing the old one). If it works, the issue might be a faulty stick or an incompatibility between the two modules. If it still doesn’t boot with the new stick alone, try the old stick alone. If the old stick works, the new one is likely defective or incompatible. If nothing works, you may have a deeper hardware issue, but RAM problems are the prime suspect.
The “RAM Not Fully Recognized” Scenario
Your laptop boots to Windows, but when you check System Information, it shows less RAM than you installed (e.g., you installed 16GB but only 15.9GB shows). This is usually normal. Your system reserves a small amount of RAM for its own use (the integrated graphics chip is a common culprit). A discrepancy of 100-500MB is typical. However, if it shows only 8GB when you installed 16GB, something is wrong. First, ensure you are looking at the correct total in Task Manager > Performance > Memory. If it’s truly half, power down and reseat the modules. If you have two slots, try swapping the sticks (put stick A in slot B and vice versa). A faulty slot on the motherboard is a possibility, though less common. Also, ensure you haven’t accidentally installed a 32-bit version of Windows, which cannot utilize more than ~4GB of RAM. You must be running a 64-bit OS to use more than 4GB.
BIOS/UEFI Settings and Compatibility Issues
Sometimes, especially with faster RAM speeds, the motherboard’s default settings might not automatically run the new module at its advertised speed (e.g., it runs at 2133 MHz instead of 3200 MHz). You can often fix this by entering your BIOS/UEFI setup during boot (usually by pressing F2, F10, or Del). Look for an “XMP” (Extreme Memory Profile) or “DOCP” (Direct Over Clock Profile) setting and enable it. This tells the system to use the RAM’s optimized timing and voltage. If your BIOS doesn’t have this, the RAM will run at the base JEDEC speed, which is still functional, just slower. Also, if you mix RAM of drastically different speeds, the system will run all modules at the speed of the slowest one.
Post-Upgrade Optimization and Verification
Assuming your laptop boots and the OS sees the full amount of RAM, your hardware upgrade is essentially complete. But a few final steps will ensure everything is perfect and help you enjoy the benefits immediately.
Verifying the Upgrade in Your Operating System
Don’t just take the boot screen’s word for it. In Windows, right-click the Start button and select “System.” Here, under “Device specifications,” it will show “Installed RAM.” For more detail, press Ctrl+Shift+Esc to open Task Manager, go to the Performance tab, and click Memory. It will show the total, speed, and form factor. On a Mac, click the Apple menu > About This Mac > Memory. On Linux, you can use the `free -h` command in the terminal. Confirm that the speed (MHz) matches what you bought. If it’s lower, you may need to enable XMP in your BIOS as mentioned.
Cleaning Up and Enjoying the Benefits
Now, close up the laptop for good. Give the exterior a quick wipe down. You’re done with the hardware! The software side is handled automatically by your operating system. You don’t need to install drivers for RAM. The system will immediately begin using the additional memory. To feel the difference, try a task that previously struggled. Open 20 Chrome tabs, launch your photo editor, and have a music player running. You should notice the system remains responsive, with minimal lag when switching between windows. The “working set” of RAM in Task Manager will now be much larger without constantly hitting 100% usage. This is your payoff.
Pro Tip: While more RAM helps with multitasking and heavy applications, it won’t fix a slow traditional hard drive (HDD). If your laptop still feels slow after a RAM upgrade, the single best next upgrade is swapping the HDD for a Solid State Drive (SSD). The combination of an SSD and ample RAM is transformative for old laptops.
Advanced Considerations and When NOT to Upgrade
A RAM upgrade is powerful, but it’s not a magic bullet for every performance issue. Understanding its limits and other potential bottlenecks will help you make the smartest decision.
Understanding the RAM Law of Diminishing Returns
For general web browsing, office work, and media playback, 8GB is the modern practical minimum. 16GB is the sweet spot for most power users and will remain so for years. 32GB is excellent for serious content creation (4K video editing, large 3D renders), virtual machines, or scientific computing. For the average user, jumping from 4GB to 16GB will feel like a rocket ship. Going from 16GB to 32GB, unless you’re in the above specialized fields, will likely yield no perceptible benefit in daily use. Your money is better spent elsewhere if you’re already at 16GB and just feel “slightly slow.”
The Soldered RAM Problem
This is the biggest limitation today. Many ultra-thin laptops, particularly from Apple (all modern MacBooks) and some Windows ultrabooks (like many Dell XPS 13 models, some Microsoft Surfaces), have the RAM chips soldered directly onto the motherboard. This means there are no user-accessible slots. If your laptop has soldered RAM, you cannot upgrade it. The RAM amount is fixed at purchase. The Crucial scanner or your service manual will clearly state “No user-accessible slots” or show only one slot with the other memory listed as “soldered.” In this case, your upgrade path is limited to an SSD or, ultimately, a new laptop.
When the Real Bottleneck is Something Else
If your laptop has a traditional spinning hard drive (HDD), it is almost certainly the main cause of slowness. The OS will constantly swap data to this slow drive. Upgrading RAM will help, but replacing the HDD with an SSD will provide a far more dramatic and noticeable improvement in boot times, application launches, and overall system feel. Similarly, an old, underpowered CPU (like a dual-core Intel from 8+ years ago) will struggle regardless of RAM amount. Use the Task Manager’s Performance tab to check. If your CPU is consistently at 100% during simple tasks, more RAM won’t help. Finally, ensure your laptop isn’t overheating. Dust clogged heatsinks and dried-out thermal paste cause thermal throttling, where the CPU and GPU deliberately slow down to cool off. Opening the laptop for a RAM upgrade is a perfect time to gently clean out dust with compressed air.
Frequently Asked Questions
Can I upgrade the RAM on any laptop?
No. While many laptops have user-accessible RAM slots, an increasing number—especially slim ultrabooks and all modern MacBooks—have the RAM soldered to the motherboard, making it impossible to upgrade. You must check your specific model’s manual or use a tool like the Crucial System Scanner to confirm upgradeability before purchasing any RAM.
Will adding more RAM make my laptop faster?
Yes, but only if the slowdown is caused by insufficient memory. If you regularly see your RAM usage at or near 100% in Task Manager when doing normal tasks, adding more will allow your system to keep more data in fast RAM instead of swapping to the slow hard drive, resulting in smoother multitasking and faster app switching. It will not fix a slow CPU or a traditional hard drive.
What tools do I actually need to upgrade laptop RAM?
At a minimum, you need a small Phillips head screwdriver to remove the bottom panel screws. For best results and safety, also use a plastic pry tool to avoid damaging clips, a can of compressed air to clean dust, and an anti-static wrist strap to protect components from electrostatic discharge. A small container for screws is also very helpful.
How do I know what type of RAM (DDR3, DDR4, DDR5) to buy?
Use the built-in Windows Task Manager (Performance > Memory tab) to see your current RAM type and speed. For absolute certainty, use the free Crucial System Scanner online, which analyzes your system and lists the exact compatible RAM modules you can purchase, including type (DDR4, etc.), speed, and maximum capacity for your specific laptop.
Is it normal for the system to show slightly less RAM than I installed?
Yes. Your operating system and hardware (especially the integrated graphics processor) reserve a small portion of the installed RAM for their own use. Seeing 15.9GB out of a 16GB install is perfectly normal. A discrepancy of a few hundred megabytes is expected. If you see a major loss (e.g., only 8GB of a 16GB kit is recognized), there may be a seating or compatibility issue to troubleshoot.
What should I do if my laptop doesn’t turn on after installing new RAM?
First, power down and unplug the laptop. Open it back up and firmly reseat the RAM modules, ensuring the retention clips are fully locked. Try booting with only one stick installed (testing each stick individually in each slot). This process isolates whether a stick or a slot is faulty. If the old RAM still works alone, the new module is likely defective or incompatible with your laptop.