Connecting a wireless mouse to your laptop is a straightforward process that typically takes under two minutes. The two main methods are using a small USB receiver (often called a dongle) or pairing via your laptop’s built-in Bluetooth. This guide covers detailed, OS-specific instructions for both connection types, comprehensive troubleshooting for common issues like lag or disconnection, and advanced tips to optimize your mouse’s performance and battery life.
There’s a certain freedom that comes with ditching the cord. A wireless mouse untethers your workspace, reduces cable clutter, and makes moving your laptop between rooms—or even to a café—infinitely simpler. Yet, that first moment of unboxing a new wireless mouse can be tinged with a tiny bit of anxiety. “How do I connect wireless mouse to laptop?” you might wonder. Is it complicated? Will it work? The truth is, manufacturers have made the process incredibly user-friendly. Whether you’re on a Windows PC, a MacBook, or a Chromebook, getting your new pointer companion up and running is typically a matter of a few clicks or a simple plug-in. This comprehensive guide will walk you through every single method, from the dead-simple to the slightly more involved, and equip you with the knowledge to solve any hiccup along the way.
We’ll start by understanding the two fundamental wireless technologies you’ll encounter. Then, we’ll dive into detailed, step-by-step instructions for each operating system. A significant portion of this guide is dedicated to troubleshooting, because even the best connections can sometimes falter. We’ll cover everything from dead batteries to signal interference. Finally, we’ll explore some pro-tips to customize your mouse and get the most out of its battery. By the end, you won’t just know how to connect a wireless mouse; you’ll know how to master it.
Key Takeaways
- Two Primary Technologies: Wireless mice connect either through a proprietary USB receiver (RF) or via standard Bluetooth. The method you use depends entirely on your mouse’s design.
- Plug-and-Play for Receivers: Most USB receiver mice are instantly recognized by modern operating systems (Windows, macOS, ChromeOS) without needing driver installation.
- Bluetooth Requires Pairing: Connecting a Bluetooth mouse involves putting it in pairing mode and selecting it from your laptop’s Bluetooth settings menu, a slightly more manual but equally simple process.
- Troubleshooting is Systematic: Always start with the basics: check batteries/charging, ensure the mouse/ receiver is powered on, restart your laptop, and try a different USB port if using a receiver.
- Interference is a Common Culprit: Other wireless devices, metal objects, and even USB 3.0 ports can cause lag or disconnects. Repositioning the receiver with an extender often solves this.
- Software Unlocks Advanced Features: Manufacturer-provided software (like Logitech Options or Razer Synapse) allows you to reprogram buttons, adjust DPI sensitivity, and create custom profiles.
- Battery Management Varies: Some mice use replaceable AA/AAA batteries, others have internal rechargeable batteries (often via USB-C), and some feature ultra-long battery life measured in months or years.
📑 Table of Contents
- Understanding Your Wireless Mouse: RF vs. Bluetooth
- How to Connect a Wireless Mouse with a USB Receiver
- How to Connect a Bluetooth Wireless Mouse
- Troubleshooting: When Your Wireless Mouse Won’t Connect
- Advanced Tips and Optimizations
- Special Considerations for Gaming and Productivity Mice
- Conclusion: Freedom at Your Fingertips
Understanding Your Wireless Mouse: RF vs. Bluetooth
Before you start clicking, it’s crucial to know what kind of wireless mouse you have. This isn’t about brands; it’s about the underlying technology that creates the connection between your mouse and laptop. There are two primary camps: Radio Frequency (RF) mice with a USB receiver, and Bluetooth mice. Some modern mice even support both, giving you a choice.
RF (Radio Frequency) Mice with a USB Receiver
This is the most common type you’ll find in office and gaming environments. The mouse communicates with a small plastic dongle—often called a USB receiver, transceiver, or sometimes a “nano receiver”—that plugs into one of your laptop’s USB ports. This dongle is a dedicated radio transceiver paired specifically with your mouse. They use a frequency, typically 2.4 GHz, to communicate. The pairing is usually done at the factory, meaning the mouse and receiver are already “friends” when you take them out of the box. Your laptop simply sees the receiver as a standard Human Interface Device (HID), like a keyboard. The main advantage of this system is reliability and often lower latency, which is why many gaming mice use it. The downside is that the dongle occupies a USB port and can be easily lost.
Bluetooth Mice
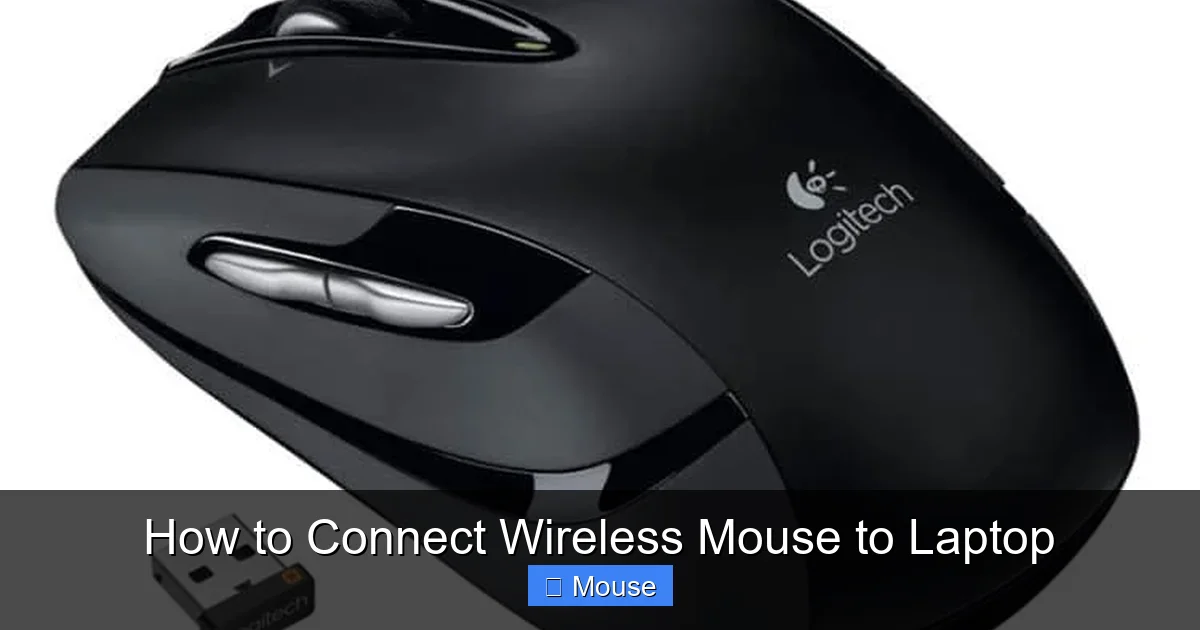
Bluetooth mice leverage the Bluetooth radio that is already built into virtually every modern laptop. There is no separate dongle required. Instead, you put the mouse into “pairing” or “discoverable” mode and then tell your laptop’s operating system to search for and connect to it. This saves a USB port and is the more “integrated” solution. Bluetooth versions have improved dramatically, with Bluetooth Low Energy (BLE) offering excellent battery life. However, in some demanding scenarios like fast-paced gaming, a high-quality RF connection might still feel slightly more responsive, though for general productivity and most gaming, the difference is negligible. A key benefit is that you can often pair the same Bluetooth mouse to multiple devices (like a laptop and a tablet) and switch between them with a button press.
Hybrid Mice: The Best of Both Worlds?
Many premium mice from brands like Logitech (MX series) and Razer offer both connection methods. They come with a USB receiver but also have Bluetooth capability. This gives you ultimate flexibility: use the potentially more stable RF connection for gaming or intensive work, and switch to Bluetooth to save a USB port when you’re on the go. The mouse will have a physical switch or a button combination to toggle between the two modes. Understanding which mode your mouse is currently in is the first step to successful connection.
How to Connect a Wireless Mouse with a USB Receiver
This is, in most cases, the simplest method. The pairing is pre-done. Your job is to provide the receiver with power (via the USB port) and ensure the mouse itself is powered on.
Visual guide about How to Connect Wireless Mouse to Laptop
Image source: i.ytimg.com
Step-by-Step for Windows 10 & 11
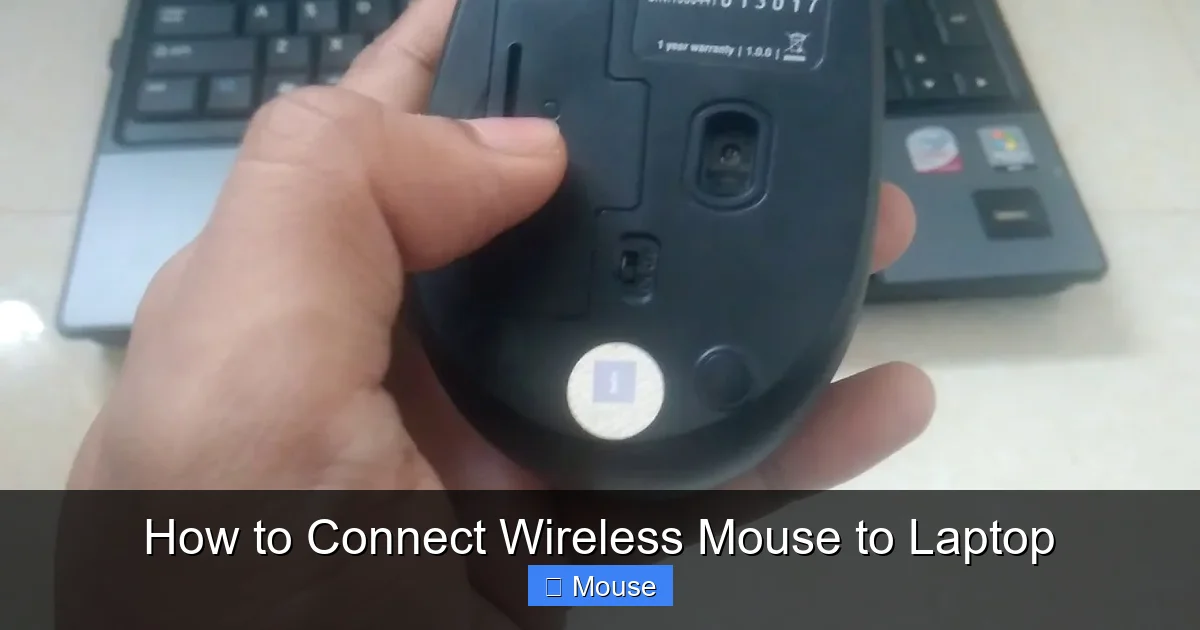
- Power On Your Mouse: Flip the mouse over and locate the power switch. It’s often on the bottom. Slide it to the “On” position. Some mice lack a switch and turn on automatically when you move them or press a button, but most have a clear on/off toggle to conserve battery.
- Insert the USB Receiver: Take the small dongle from the mouse’s packaging or from a storage compartment on the mouse itself. Plug it into an available USB-A port on your laptop. If your laptop only has USB-C ports, you will need a simple USB-A to USB-C adapter or a different cable if your receiver is built into a cable.
- Wait for Recognition: Windows should automatically detect the new hardware. You might see a notification in the bottom-right corner that says “Setting up a device” or “Your device is ready to use.” This process usually takes 5-15 seconds. No driver installation is typically required for basic functionality.
- Test the Connection: Move the mouse on your mouse pad or desk. The cursor on your screen should move correspondingly. Click the left and right buttons to ensure they register. If it works, you’re done!
Step-by-Step for macOS
- Power On the Mouse.
- Plug in the Receiver. macOS, like Windows, has excellent built-in support for standard USB HID devices. Simply plug the receiver into a USB port (you may need an adapter for newer MacBooks).
- Check System Preferences: The mouse should work immediately. However, you can adjust tracking speed, scrolling direction, and double-click speed in System Settings > Mouse (or System Preferences > Mouse on older macOS versions).
- Test It. Give it a few waves and clicks.
Important Note for macOS: Some advanced features of certain mice (like special gaming buttons or hyperscroll wheels) may require you to download the manufacturer’s software (e.g., Logitech Options) from their website to unlock full functionality.
Step-by-Step for ChromeOS
- Power On.
- Plug in the Receiver. ChromeOS is designed to be plug-and-play. Insert the dongle into a USB port.
- Automatic Setup: The cursor should appear instantly. You can adjust pointer speed in Settings > Device > Mouse and touchpad.
How to Connect a Bluetooth Wireless Mouse
Connecting via Bluetooth requires a few more manual steps but eliminates the need for a dongle. The process is very similar across Windows, macOS, and ChromeOS, with minor menu differences.
Visual guide about How to Connect Wireless Mouse to Laptop
Image source: pcguide.com
Preparing Your Mouse for Pairing
This is the most critical step. Your mouse must be in “discoverable” or “pairing” mode. The method varies by manufacturer:
- Dedicated Pairing Button: Many mice have a small button, often on the bottom, with a Bluetooth symbol (B) or a pairing icon (two arrows forming a circle). Press and hold this button for 3-5 seconds. A light (usually blinking blue) will indicate the mouse is in pairing mode.
- Power-On Pairing: Some mice automatically enter pairing mode the first time you turn them on if no previous connection is found. Others require you to hold the power button for a few seconds after turning it on.
- Multi-Device Switching Button: Mice that connect to multiple devices often have a button (sometimes the scroll wheel or a dedicated button) that you press to cycle through paired devices or initiate pairing for a new one. Consult your mouse’s manual if you’re unsure. This is the one step where the manual is your best friend.
Pairing on Windows 10 & 11
- Open Bluetooth Settings: Click the Start Menu and go to Settings (the gear icon). Navigate to Devices > Bluetooth & other devices. Alternatively, click the Action Center/Notification Center icon in the system tray and click Bluetooth to turn it on, then select Bluetooth settings.
- Add a Device: Click the “Add Bluetooth or other device” button at the top.
- Select Bluetooth: In the pop-up window, choose Bluetooth.
- Select Your Mouse: Your laptop will start scanning. When your mouse appears in the list (it might show its model name, like “MX Master 3” or a generic “Mouse”), click on it.
- Wait for Connection: You’ll see a “Connecting…” message, followed by a “Your device is ready to go!” notification. The blinking light on your mouse should turn solid, indicating a successful pairing.
- Test and Configure: Test the mouse. You can then go back to Settings > Devices > Mouse to adjust pointer speed and other settings.
Pairing on macOS
- Open System Settings: Click the Apple menu > System Settings.
- Go to Bluetooth: Click on Bluetooth in the sidebar. Ensure Bluetooth is turned On.
- Put Mouse in Pairing Mode: Follow your mouse’s instructions to make it discoverable.
- Find and Connect: Your mouse should appear in the “Devices” list. Click the Connect button next to its name.
- Confirmation: The status will change to “Connected.” The mouse’s light should become solid. Test it.
- Adjust Settings: Go to System Settings > Mouse to adjust tracking and scrolling.
Pairing on ChromeOS
- Open Settings: Click the time in the bottom-right corner to open the Quick Settings panel, then click the gear icon for Settings.
- Navigate to Bluetooth: On the left sidebar, click Bluetooth.
- Enable and Pair: Make sure Bluetooth is on. Your mouse, when in pairing mode, should appear in the “Available devices” list. Click on its name to pair.
- Test.
Troubleshooting: When Your Wireless Mouse Won’t Connect
So you followed the steps, but nothing happens. The cursor isn’t moving. Don’t panic. This is the most common hurdle, and the solution is almost always something simple. Approach troubleshooting like a checklist, starting with the most obvious fixes first.
Visual guide about How to Connect Wireless Mouse to Laptop
Image source: robots.net
Check the Power Source (The #1 Suspect)
This solves over 50% of “not working” problems.
- Replaceable Batteries: If your mouse uses AA or AAA batteries, they may be dead or inserted incorrectly (check the + / – orientation). Always start with fresh batteries.
- Rechargeable Mice: Is it charged? Plug it into your laptop with its USB cable (many use micro-USB or USB-C). Let it charge for 15-30 minutes and try again. The charging light will often indicate status.
- Power Switch: Is the mouse turned on? It’s an easy oversight. Flip the switch on the bottom.
Receiver-Specific Issues (For USB Dongle Mice)
- Try a Different USB Port: Plug the receiver into another USB port. Avoid using USB hubs for the initial connection. If your laptop has both USB 2.0 (black plastic) and USB 3.0 (blue plastic) ports, try a USB 2.0 port, as some older receivers can experience interference from USB 3.0’s higher frequency.
- Check Physical Connection: Make sure the receiver is fully seated in the port. A loose connection will fail.
- Lost Receiver? If you’ve misplaced the tiny dongle, check if your mouse has a storage compartment for it. If it’s truly lost, you may need to purchase a replacement receiver specific to your mouse model (contact the manufacturer) or switch to using the mouse’s Bluetooth mode if it has one.
Bluetooth-Specific Issues
- Ensure Bluetooth is ON: Double-check that Bluetooth is enabled on your laptop.
- Mouse in Pairing Mode?: This is critical. The mouse’s light must be blinking to indicate it’s discoverable. If the light is solid, it’s already connected to a device (maybe an old computer or tablet). You must either turn that device’s Bluetooth off or put the mouse into pairing mode again.
- “Forget” and Re-pair: If the mouse was previously paired and now won’t connect, go to your Bluetooth settings, find the mouse in the list of paired devices, and select Remove or Forget This Device. Then, go through the full pairing process again from scratch.
- Check Compatibility: While rare, some very old Bluetooth mice may use an older standard (like Bluetooth 2.0) that has compatibility quirks with modern OSes. Check the manufacturer’s specs for your OS version.
General System and Interference Fixes
- Restart Your Laptop: The classic “turn it off and on again” fixes a vast array of temporary software glitches in the Bluetooth stack or USB drivers.
- Update Drivers/OS: Ensure your laptop’s operating system is fully updated. Windows Update and macOS Software Update often include generic or specific driver improvements for HID devices.
- Minimize Interference: 2.4 GHz is a crowded frequency. Keep the USB receiver away from other USB 3.0 devices, Wi-Fi routers, cordless phones, and microwave ovens. If the receiver is on the back of your laptop, try using a short USB extension cable to bring it to the front and improve line-of-sight to the mouse.
- Check Battery Contacts: If using replaceable batteries, look inside the battery compartment. Clean the metal contacts with a pencil eraser if they appear tarnished.
- Test on Another Computer: If possible, try connecting the mouse to a different laptop or desktop. This will tell you if the problem is with the mouse itself or your original laptop’s settings/drivers.
Advanced Tips and Optimizations
Once your mouse is connected, you can unlock its full potential. These tips go beyond the basic connection to enhance performance, comfort, and battery life.
Installing Manufacturer Software
For mice from brands like Logitech, Razer, SteelSeries, Corsair, and others, visit the official support website and download their configuration utility. This software is a game-changer. It allows you to:
- Reassign Buttons: Make that extra thumb button perform a specific keystroke (like Ctrl+C for copy), launch an application, or perform a multimedia function.
- Adjust DPI/ Sensitivity: DPI (Dots Per Inch) determines how far the cursor moves for a given physical movement of the mouse. Higher DPI means faster cursor movement. Most mice have a dedicated DPI button to cycle through presets, but software lets you set precise values (e.g., 800, 1600, 3200) and save them to different profiles.
- Create Profiles: Save different button and DPI configurations for specific games or applications and switch between them automatically.
- Configure Scroll Wheels: For mice with free-spinning or smart scroll wheels, software lets you toggle between click-to-click (notched) and free-spin modes, and adjust scroll speed.
Multi-Device Switching
If your mouse supports connecting to multiple devices (often via Bluetooth), the setup is key. You will typically pair the mouse to Device 1 (e.g., your work laptop) and Device 2 (your personal laptop). A button on the mouse (often under the scroll wheel or on the bottom) will let you toggle between the two connections instantly. This is incredibly useful for a single-peripheral workflow across multiple computers. The pairing process for each device is the same as a standard Bluetooth pairing; you just do it twice, selecting a different “channel” or device slot on the mouse each time.
Battery Life Maximization
To avoid the dreaded “mouse died mid-presentation” scenario:
- Use the On/Off Switch: Make a habit of turning the mouse off when you know you won’t use it for a while (overnight, during a long meeting). This is the single most effective way to save power.
- Lower DPI: Higher DPI settings can draw slightly more power. If you don’t need extreme speed, a moderate DPI (like 1600) is often sufficient and more power-efficient.
- Disable RGB Lighting: Fancy lighting effects are battery hogs. If your mouse has them, turn them off or set them to a simple static color when not gaming.
- Use Replaceable Batteries for Long Hauls: If you’re a traveler, a mouse that takes standard AA batteries can be easier to manage than one with a built-in battery that needs a USB cable. You can always carry spare batteries.
- Check for Sleep Modes: All wireless mice have aggressive sleep modes that kick in after a period of inactivity (e.g., 1-5 minutes). This is normal and saves power. A slight jiggle of the mouse wakes it up instantly.
Special Considerations for Gaming and Productivity Mice
While the connection process is the same, high-performance mice have unique aspects.
Polling Rate and Latency
Polling rate is how often the mouse reports its position to the computer, measured in Hz (e.g., 125Hz, 500Hz, 1000Hz). A higher polling rate (like 1000Hz) means ultra-smooth cursor movement and lower latency, which is critical for competitive gaming. RF connections (especially those using their own protocol like Logitech’s Lightspeed or Razer’s HyperSpeed) are often marketed as having lower latency than standard Bluetooth. For casual gaming and all productivity tasks, any modern wireless connection is perfectly adequate. If you’re a competitive esports player, look for mice specifically advertised with “low-latency wireless” technology.
Receiver Placement for Optimal Performance
For gaming or precision work, the physical location of the USB receiver matters. If your laptop is on a desk, the receiver plugged into the back might have its signal partially blocked by the laptop’s metal chassis. Using a short USB extension cable to place the receiver on the front edge of the desk, in clear line-of-sight with the mouse, can provide a stronger, more consistent signal and eliminate any potential micro-stutters.
On-Board Memory
Many gaming and productivity mice have on-board memory. This means your custom button mappings, DPI settings, and RGB profiles are stored directly on the mouse itself. This is fantastic because it means your settings travel with the mouse. If you plug it into a different computer without the driver software installed, your configured settings will still work. If your mouse doesn’t have on-board memory, you may need to install the software on every computer you use it with to retain your customizations.
Conclusion: Freedom at Your Fingertips
Connecting a wireless mouse to your laptop is no longer a technical task reserved for IT professionals. It’s a simple, everyday action that unlocks a cleaner, more mobile workspace. The core principle is identifying your mouse’s technology—RF with a dongle or Bluetooth—and following the corresponding pairing steps. Remember, the vast majority of issues stem from power (batteries/switch), interference, or a simple need to restart. By methodically working through the troubleshooting checklist, you’ll resolve almost any problem.
Embrace the flexibility. Use the USB receiver for a rock-solid connection during a marathon gaming session or when presenting from your desk. Switch to Bluetooth to free up that precious USB port when you’re working from a coffee shop with your sleek, dongle-free setup. Take a few minutes to explore the manufacturer’s software; tailoring button functions and sensitivity to your personal workflow or playstyle can dramatically improve your efficiency and enjoyment. Your wireless mouse is more than just a pointer; it’s a customizable tool. Now that you know how to connect it and optimize it, you’re fully equipped to make the most of that wonderful, cord-free freedom.
Frequently Asked Questions
My wireless mouse cursor is moving erratically or lagging. What should I do?
First, check the batteries. Low power can cause inconsistent signals. Next, ensure the USB receiver (if you have one) is not in a USB 3.0 port on the back of your laptop, as this can cause interference. Try a different USB port or use a short USB extension cable to place the receiver in a clearer spot. Also, move other wireless devices (like Wi-Fi routers or phones) away from the receiver and mouse.
My Bluetooth mouse was working but now won’t connect, even after restarting.
Go to your laptop’s Bluetooth settings, find the mouse in the list of paired devices, and select “Remove” or “Forget This Device.” Then, put the mouse back into pairing mode (usually by holding a dedicated button until a light blinks) and go through the full pairing process again from scratch.
Can I use the same wireless mouse on multiple computers?
It depends on the mouse. Mice with a USB receiver are typically paired to that specific receiver, so to use it on another computer, you’d need to plug that same receiver into the other computer. Bluetooth mice can be paired to multiple devices (like a laptop and a tablet). You would pair it to each device separately and then use a button on the mouse to switch between the saved connections.
Do I need to install drivers for a wireless mouse?
For basic functionality—moving the cursor and clicking—no. Modern operating systems (Windows, macOS, ChromeOS) have generic drivers built-in that work with almost all standard mice. You only need to install the manufacturer’s software if you want to customize buttons, adjust advanced DPI settings, configure RGB lighting, or use special features like smart scrolling.
How long do wireless mouse batteries typically last?
It varies widely. Mice with replaceable AA/AAA batteries can last anywhere from 6 months to over a year with normal use. Mice with built-in rechargeable batteries often last several weeks to a few months on a single charge, depending on usage and features like lighting. Some ultra-efficient productivity mice (like certain Logitech MX models) advertise multi-year battery life on a single charge.
My laptop doesn’t have a USB-A port. Can I still use a mouse with a USB receiver?
Yes. You will need a USB-C to USB-A adapter (often called a USB-C dongle or hub). These are inexpensive and widely available. Simply plug the adapter into your laptop’s USB-C port, and then plug your mouse’s receiver into the adapter. For a more permanent and cleaner solution, you could use a small USB-C hub that provides multiple ports.