How to Format Nvme Ssd
Formatting an NVMe SSD is essential for performance, data cleanup, or preparing the drive for a new use. This guide walks you through every method on Windows and Mac, explains file systems, and highlights common pitfalls. You will learn the safest and fastest ways to format NVMe SSD drives without losing important data accidentally.
Formatting an NVMe SSD might sound intimidating, but it is actually quite simple once you know the steps. Whether you are wiping a drive for a fresh start, preparing it for a new system, or changing the file system, this guide covers everything you need. Let us walk through it together.
An NVMe SSD is a fast storage device that uses the PCIe interface. It is much quicker than traditional hard drives or even SATA SSDs. Over time, your drive may slow down, accumulate errors, or need a clean slate. That is where formatting comes in. It resets the drive and can restore peak performance. In this article, we will show you exactly how to do it on both Windows and Mac computers.
Key Takeaways
- Formatting erases all data: Always back up files before starting the format process.
- Two main methods exist: You can use built-in tools like Disk Management on Windows or Disk Utility on Mac.
- File system choice matters: NTFS, APFS, and exFAT each serve different needs and devices.
- Physical handling is important: Make sure your NVMe SSD is properly seated, just like ensuring how tight the screw should be for SSD NVMe during installation.
- Quick format vs full format: Quick format is faster, but full format checks for bad sectors.
- Third-party tools help: Tools like Samsung Magician and Crucial Storage Executive offer extra features.
📑 Table of Contents
- What Is an NVMe SSD and Why Format It?
- How to Format NVMe SSD on Windows
- How to Format NVMe SSD on Mac
- Choosing the Right File System for Your NVMe SSD
- Common Mistakes to Avoid When Formatting
- Third-Party Tools for Formatting NVMe SSDs
- How to Format NVMe SSD After Installation
- What Happens After Formatting?
- Final Thoughts on Formatting Your NVMe SSD
What Is an NVMe SSD and Why Format It?
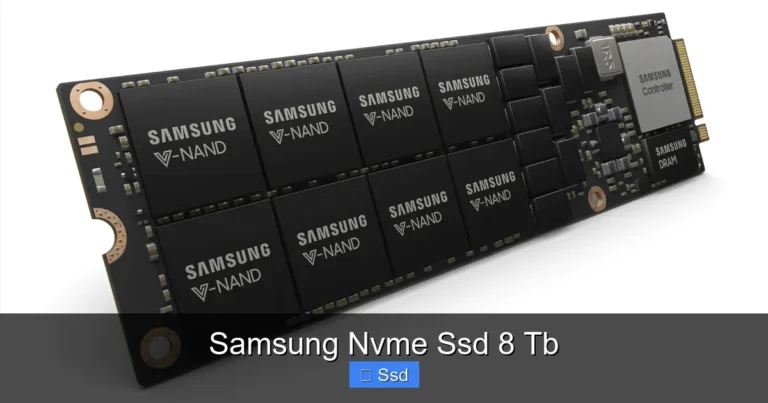
NVMe stands for Non-Volatile Memory Express. It is a protocol designed specifically for flash storage. Unlike older SATA connections, NVMe uses the PCIe bus to deliver much faster read and write speeds. These drives are commonly used as boot drives, game storage, and workstations for video editing.
There are several reasons you might need to format your NVMe SSD:
- Selling or giving away your PC: You need to erase all personal data completely.
- Drive is running slow: Formatting can remove fragmented data and reset performance.
- Changing the file system: You may need NTFS for Windows or APFS for Mac.
- Drive has errors: A format can repair minor file system corruption.
- Reinstalling your operating system: A clean format ensures a fresh install.
Before you begin, understand one critical thing. Formatting deletes all data on the drive. If you have files you want to keep, back them up to another drive or cloud storage first. There is no undo button after a format completes.
How to Format NVMe SSD on Windows
Windows offers several built-in tools for formatting your NVMe SSD. You do not need any special software. Below are the most common methods. Choose the one that feels most comfortable for you.
Method 1: Using Disk Management
Disk Management is a built-in Windows tool that lets you manage all your drives. It works well for most formatting tasks.
- Right-click the Start button and select Disk Management.
- Find your NVMe SSD in the list of drives.
- Right-click on the partition you want to format.
- Select Format… from the menu.
- Choose a file system (more on this below).
- Set the allocation unit size to default.
- Check the box for Perform a quick format.
- Click OK and confirm the warning.
The process usually takes less than a minute for a quick format. If you uncheck the quick format option, it will take longer because Windows scans the entire drive for bad sectors.
Method 2: Using File Explorer
This is the simplest method if you just want to format a drive quickly.
- Open File Explorer by pressing Windows key + E.
- Click on This PC in the left sidebar.
- Right-click your NVMe SSD drive letter.
- Select Format…
- Pick your preferred file system and cluster size.
- Leave Quick Format checked.
- Click Start and wait for it to finish.
One thing to note. You cannot format your main C: drive this way because Windows is using it. You need Disk Management or the command line for that.
Method 3: Using Command Prompt
For advanced users, the command line gives you more control over the process.
- Open the Start menu and type cmd.
- Right-click Command Prompt and select Run as administrator.
- Type diskpart and press Enter.
- Type list disk and find your NVMe SSD by size.
- Type select disk X (replace X with the disk number).
- Type clean to wipe the entire drive.
- Type create partition primary.
- Type format fs=ntfs quick (or use fat32 or exfat).
- Type assign to give it a drive letter.
The command line method is powerful but also risky. One wrong command can erase the wrong drive. Double-check every step before pressing Enter.
How to Format NVMe SSD on Mac
If you are using a Mac, the process is equally straightforward. macOS includes Disk Utility, which handles all formatting needs for NVMe SSDs.
Using Disk Utility on Mac
- Open Finder and go to Applications.
- Open the Utilities folder.
- Launch Disk Utility.
- Find your NVMe SSD in the left sidebar.
- Select the drive (not just the volume).
- Click Erase at the top of the window.
- Choose a name for the drive.
- Select a format: APFS for macOS only, or exFAT for cross-platform use.
- Choose the scheme: GUID Partition Map is recommended.
- Click Erase and confirm.
After the format completes, your NVMe SSD will be empty and ready to use. If you plan to use the drive on both Mac and Windows, choose exFAT as the file system. It works on both operating systems without any issues.
Mac users should also know that newer Macs with Apple Silicon use NVMe storage internally. If you are upgrading or replacing that internal drive, the process may differ slightly. Always refer to Apple’s official support pages for hardware-specific instructions.
Choosing the Right File System for Your NVMe SSD
When you format a drive, you must choose a file system. This determines how data is organized and which operating systems can read the drive. Picking the wrong one can cause compatibility issues later.
| File System | Best For | Windows | Mac | Max File Size |
|---|---|---|---|---|
| NTFS | Windows-only drives | Full support | Read-only | 16 EB |
| APFS | Mac-only drives | Not supported | Full support | 16 EB |
| exFAT | Cross-platform use | Full support | Full support | 16 EB |
| FAT32 | Older devices and cameras | Full support | Full support | 4 GB |
For most users formatting an NVMe SSD, NTFS is the best choice on Windows. It supports large files, has strong security features, and works reliably with modern Windows versions. On Mac, APFS is the default and best option for Apple systems.
If you need to move the drive between a Windows PC and a Mac, go with exFAT. It removes the file size limits of FAT32 and works seamlessly on both platforms. Just keep in mind that exFAT does not support journaling, which means a sudden power loss could cause data corruption.
Common Mistakes to Avoid When Formatting
Formatting seems simple, but small mistakes can lead to big problems. Here are the most common errors people make when they format their NVMe SSD and how to avoid them.
Forgetting to Back Up Data
This is the number one mistake. People rush into formatting and forget they have important files still on the drive. Always, always create a backup first. Use an external hard drive, a USB flash drive, or a cloud service like Google Drive or OneDrive.
Formatting the Wrong Drive
It happens more often than you would think. You meant to format drive D: but accidentally formatted drive E: that had your photos on it. Double-check the drive letter and name before clicking Confirm. If you are unsure, disconnect other drives temporarily so there is less confusion.
Choosing the Wrong File System
Formatting as NTFS on a drive you want to use with a Mac will cause problems. The Mac will only be able to read the drive, not write to it. Similarly, formatting as APFS means Windows cannot access the drive at all. Think about your use case before selecting a file system.
Skipping the Quick Format Without Reason
A full format takes much longer because it scans every sector for errors. For a healthy NVMe SSD, a quick format is perfectly fine. Reserve full formats for drives that are physically damaged or have known bad sectors.
Ignoring Firmware Updates
Before formatting, check if your NVMe SSD manufacturer has released a firmware update. Updated firmware can improve performance, fix bugs, and extend the lifespan of your drive. Companies like Samsung and Crucial offer free software for this purpose.
Third-Party Tools for Formatting NVMe SSDs
While built-in tools work great, third-party applications offer additional features. These tools can help you manage partitions, monitor drive health, and perform secure wipes.
Samsung Magician is a free tool for Samsung NVMe SSDs. It includes a format utility, firmware updater, and performance benchmark. If you own a Samsung drive, this is the best place to start.
Crucial Storage Executive works similarly for Crucial and Micron NVMe SSDs. It lets you format the drive, update firmware, and check the health status of your solid state drive.
MiniTool Partition Wizard is a versatile free tool that supports many drive brands. It offers a user-friendly interface and advanced partitioning features. You can resize, move, merge, and format partitions with just a few clicks.
These tools are especially helpful if the built-in Windows or Mac utilities fail to recognize your drive. Sometimes an NVMe SSD needs special handling during the initial setup phase.
How to Format NVMe SSD After Installation
If you just installed a new NVMe SSD in your computer, you may need to format it before using it. The process depends on whether the drive is a secondary drive or your primary boot drive.
For a secondary drive, the steps are the same as described above. Open Disk Management or Disk Utility, find the new drive, and format it with your preferred settings.
For a primary boot drive, you typically format during the operating system installation process. When you reach the screen where you select where to install Windows or macOS, you will see the unformatted drive. Select it and click Format. The installer handles everything from there.
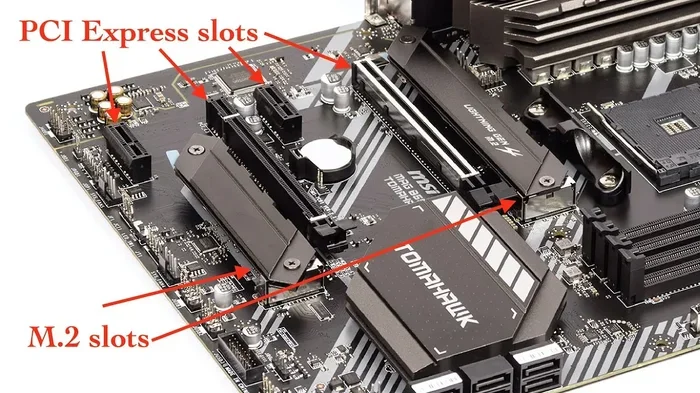
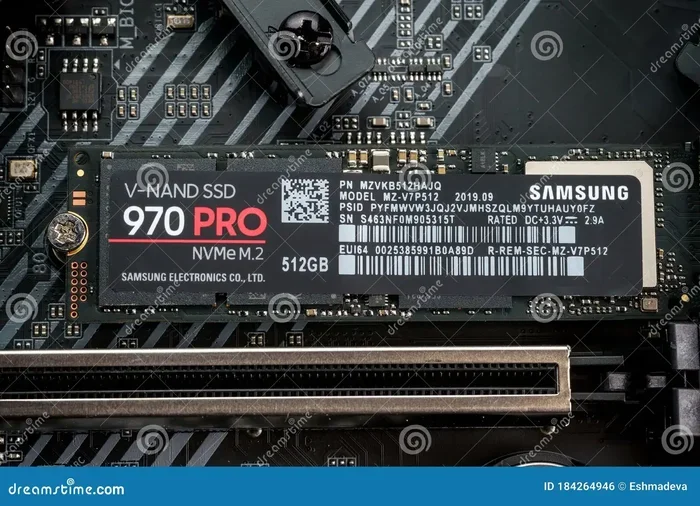
One tip that many people overlook: make sure the NVMe SSD is properly seated in its M.2 slot. If the drive is loose, it may not be recognized by the BIOS or operating system. Refer to your motherboard manual for the correct slot and orientation. Proper installation helps avoid formatting issues later on.
What Happens After Formatting?
Once the format is complete, your NVMe SSD will appear as a blank, empty drive. You can now use it to store files, install programs, or set it up as a secondary storage location.
Your computer should recognize the drive immediately. If it does not, try restarting your PC or checking the connection. Internal NVMe drives rarely have connection issues, but external NVMe enclosures can sometimes need a replug.
You may also notice that the drive is slightly slower for the first few days after formatting. This is normal. The drive needs time to optimize itself through background processes like TRIM and wear leveling. Within a week, performance should return to its peak speed.
If you are preparing the drive for a specific purpose, take a moment to set it up properly. Create folders, set up backups, and configure any software you need. A little planning now saves headaches later.
Final Thoughts on Formatting Your NVMe SSD
Formatting an NVMe SSD is one of the simplest yet most important maintenance tasks you can perform. Whether you are clearing an old drive, switching file systems, or preparing for a fresh operating system install, the process is straightforward. Use the built-in tools available on your operating system, choose the right file system, and always back up your data first.
Remember that formatting is not something you need to do often. A well-maintained NVMe SSD can last for years without needing a format. When the time does come, you now have all the knowledge to do it safely and correctly.
Take care of your drive, keep it updated, and it will serve you well for many years to come.
Frequently Asked Questions
Can I format an NVMe SSD without losing data?
No. Formatting always erases all data on the drive. You must back up your files to another location before starting the format process. There is no way to format and keep the existing data on the same drive.
How long does it take to format an NVMe SSD?
A quick format usually takes less than one minute, even on large drives. A full format can take several hours depending on the drive size and the number of bad sectors it needs to check. For most users, a quick format is sufficient and much faster.
What is the best file system for an NVMe SSD on Windows?
NTFS is the best file system for NVMe SSDs used exclusively with Windows. It supports large files, offers strong security features, and is optimized for solid state storage. If you need to share the drive with a Mac, choose exFAT instead.
Do I need special software to format an NVMe SSD?
No. Both Windows and Mac include built-in tools that handle NVMe SSD formatting perfectly. Disk Management and File Explorer work on Windows, while Disk Utility works on Mac. Third-party tools are optional and only needed for advanced features.
Should I format my NVMe SSD regularly?
No. Regular formatting is not necessary for NVMe SSDs. Formatting should only be done when you are selling the drive, experiencing errors, or changing the file system. Frequent formatting provides no performance benefit and shortens the drive’s lifespan slightly.
Can I format a boot NVMe SSD from within Windows?
No. You cannot format the drive that Windows is currently running from. You need to boot from a USB installation media or use the command line from a recovery environment to format your primary boot drive.