M 2 Nvme Ssd Usb
M 2 Nvme Ssd Usb setups let you turn a tiny solid state drive into a powerful portable ssd in minutes. You get blazing ssd speed on the go without opening your computer. Whether you need a high speed storage solution for backups or creative work, a usb c ssd enclosure makes it simple and affordable.
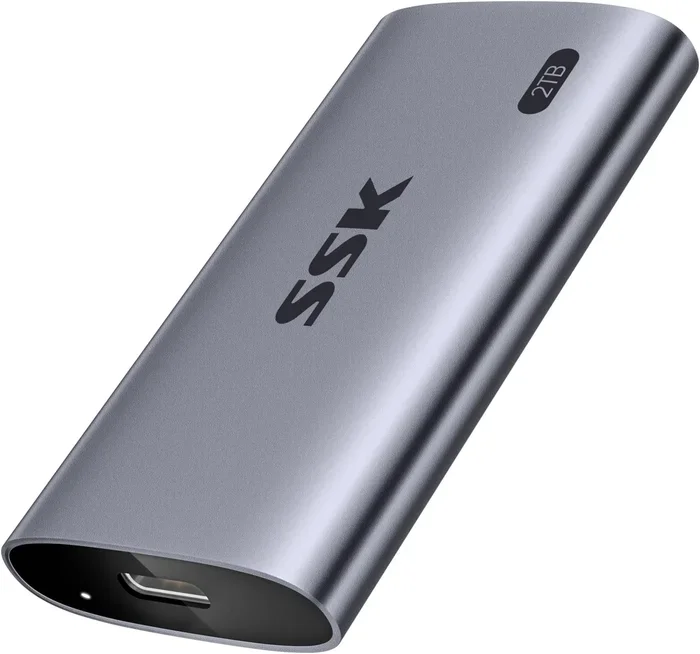
Have you ever wanted super fast storage that you can carry around in your pocket? That is exactly what an M 2 Nvme Ssd Usb setup delivers. You take a small m.2 nvme ssd stick, pop it into a tiny m.2 enclosure, and plug it into any computer using a usb c cable. It is one of the easiest upgrades you can make for extra ssd storage capacity on the go.
More people are turning to external nvme ssd solutions because they are fast, reliable, and compact. A traditional external hard drive feels slow by comparison. With an NVMe drive connected through usb c, you get speeds that rival internal drives. This guide walks you through everything you need to know about building your own M 2 Nvme Ssd Usb setup.
Whether you are a video editor, a gamer, or just someone who needs quick backups, this setup has something for you. Let us dive into the details.
Key Takeaways
- Easy Setup: An M 2 Nvme Ssd Usb setup takes minutes and needs no technical skills.
- Blazing Speed: You can reach transfer speeds up to 10 Gbps with a usb 3.2 connection.
- Affordable: A basic m.2 enclosure costs less than most external hard drives.
- Versatile Use: Great for backups, video editing, gaming, and portable storage.
- Right Enclosure Matters: Choosing the correct usb c enclosure affects performance and cooling.
- Watch for Heat: M 2 NVMe drives run warm, so proper airflow in the enclosure is key.
📑 Table of Contents
What Is M 2 Nvme Ssd Usb?
An M 2 Nvme Ssd Usb setup is simply a solid state drive that uses the M.2 form factor and NVMe protocol, connected to your computer through a USB port. The M.2 drive sits inside a small enclosure that has a usb c connector on the outside. When you plug it in, your computer sees it like any other external drive.
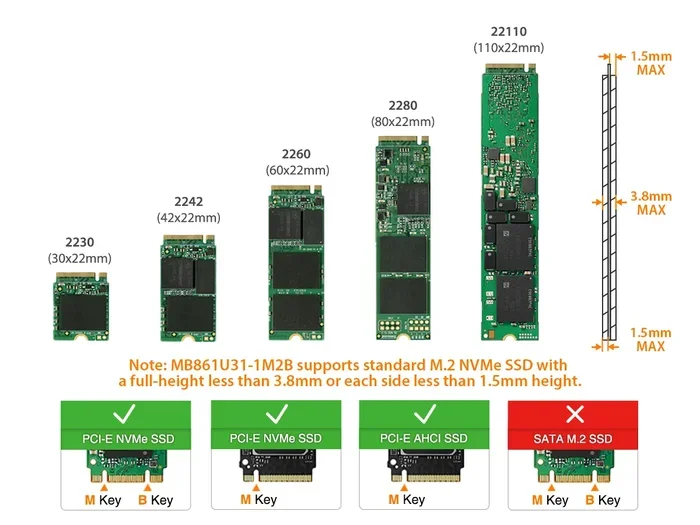
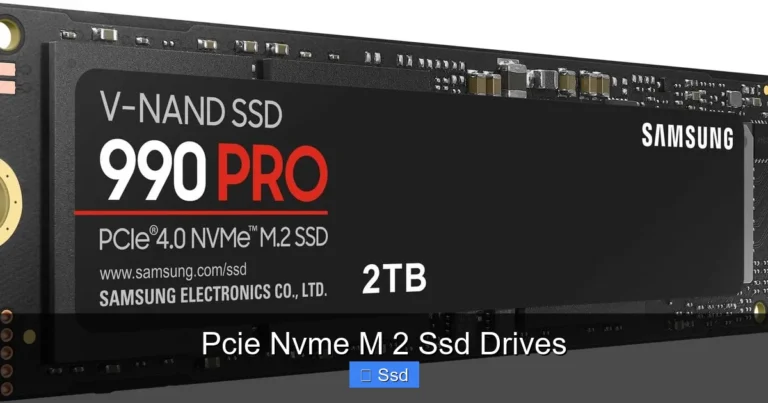
The M.2 format is tiny, usually about the size of a stick of gum. M.2 2280 is the most common size, meaning 22 millimeters wide and 80 millimeters long. These drives connect directly to the motherboard via PCIe lanes internally, which is why they are so fast. When you put one inside a usb c enclosure, you get that same speed on the outside.
There is a big difference between an NVMe drive and an older SATA drive. NVMe uses the PCIe bus, which is much faster than SATA. If you want to understand more about how NVMe M.2 PCIe drives work, check out our guide on SSD NVMe M.2 PCIe for a deeper look.
How Does the USB Connection Work?
The enclosure has a small controller board inside. This board takes the PCIe signal from the NVMe drive and converts it to a USB signal. Most modern enclosures use USB 3.2 Gen 2, which supports speeds up to 10 Gbps. Some newer ones even use USB 3.2 Gen 2×2 for 20 Gbps. The ssd data transfer speed you actually get depends on both the drive and the enclosure.
Why Use an M 2 Nvme Ssd with USB?
There are many reasons to build an M 2 Nvme Ssd Usb setup. Let us look at the biggest benefits that make this option so popular.
Speed That Beats Everything Else
This is the number one reason people choose NVMe over other options. A good external nvme ssd can hit read speeds of 1,000 MB/s or more. A standard external hard drive maxes out around 100 to 150 MB/s. That means your M 2 Nvme Ssd Usb setup is up to ten times faster. Large files copy in seconds instead of minutes.
Portability and Size
M.2 drives are incredibly small. Inside a slim m.2 enclosure, the whole setup fits in your palm. You can slip it into a laptop bag, a pocket, or even attach it to a keychain. Compare that to a 2.5-inch external drive, which is much bulkier. A portable ssd like this is perfect for people who travel often.
No Power Supply Needed
Most M 2 Nvme Ssd Usb setups draw power directly from the USB port. You do not need a separate power brick or cable. This makes the setup truly plug-and-play. Just plug it in and start working.
Great Value for the Price
A usb c enclosure costs around $15 to $30. A 1TB NVMe M.2 drive costs about $50 to $80. Together, you get a 1TB high speed storage solution for under $100. Compare that to buying a pre-built external NVMe drive, which often costs twice as much for the same capacity.
How to Choose the Right M 2 Nvme Ssd Usb Enclosure
Picking the right enclosure is the most important step. Not all enclosures are the same, and a bad choice can slow down your drive. Here is what to look for.
Check the USB Version
Look for a usb 3.2 Gen 2 enclosure if you want the best speed. USB 3.0 and USB 3.1 Gen 1 max out at 5 Gbps, which is still fast but not the maximum. USB 3.2 Gen 2 gives you 10 Gbps, and USB 3.2 Gen 2×2 gives you 20 Gbps. Make sure your computer also has a usb c port that supports these speeds.
Consider Cooling
NVMe drives run warm, especially during large transfers. Some enclosures include a ssd heatsink or aluminum shell that helps dissipate heat. Others rely on open-air design. If you plan on doing long transfers or running intensive tasks, go with an enclosure that has good ventilation.
Read Reviews Before Buying
Not every enclosure performs the same way. Some cheap ones have poor controllers that bottleneck the drive. If you want a reliable option, the Ugreen M.2 NVMe SATA SSD enclosure is a popular choice that many users trust. You can read our full Ugreen M.2 NVMe enclosure review for a detailed look at its performance and features.
Compatibility Matters
Make sure the enclosure supports your drive size. Most enclosures fit M.2 2280 drives, but some also support shorter lengths like 2242 or 2230. Check the specifications before you buy. Also confirm that the enclosure supports NVMe, not just SATA M.2 drives, since they use different protocols.
Setting Up Your M 2 Nvme Ssd Usb
Setting up an M 2 Nvme Ssd Usb system is surprisingly simple. You do not need to be a tech expert. Here is a step-by-step walkthrough.
- Buy an M.2 NVMe drive. Choose a capacity that fits your needs. A 1TB drive is a sweet spot for most users. If you need more space, a 2TB NVMe M.2 SSD gives you plenty of room for large files and projects.
- Get a compatible enclosure. Make sure it supports NVMe and your drive size. Look for a USB 3.2 Gen 2 controller for the best speeds.
- Open the enclosure. Most enclosures have a simple screw or slide-open design. Place the M.2 drive into the slot, aligning the notches correctly.
- Close the enclosure. Secure it with the screw or latch. Make sure the drive is seated firmly.
- Plug it into your computer. Use a USB C cable and connect it to a port on your computer.
- Format the drive if needed. Your computer should recognize it automatically. On Windows, you may need to format it through Disk Management. On Mac, use Disk Utility.
That is it. Your external storage device is ready to use. The whole process takes less than five minutes once you have the parts.
Tips for a Smooth Setup
- Use a high-quality USB C cable that supports data transfer, not just charging.
- Plug the enclosure directly into your computer rather than through a USB hub for the best performance.
- Keep the enclosure on a flat surface during use for proper airflow.
- Back up your data regularly, even on fast SSD storage.
Best Practices for M 2 Nvme Ssd Usb Performance
Once your setup is running, you can take a few steps to keep it performing at its best.
Keep Firmware Updated
Both your NVMe drive and your enclosure may have firmware updates. These updates often improve speed, fix bugs, and boost compatibility. Check the manufacturer website every few months.
Avoid Filling the Drive Completely
NVMe drives perform best when they have free space. Try to keep at least 10 to 15 percent of the drive empty. This helps maintain fast ssd performance and extends the lifespan of the drive.
Use the Right File System
If you use the drive on Windows only, format it as NTFS. For Mac only, use APFS. If you switch between both systems, exFAT works well and keeps things simple.
Protect the Drive
Since M.2 drives have no moving parts, they are more durable than traditional hard drives. However, they can still be damaged by static electricity or physical drops. Keep the enclosure in a safe case when you travel.
Common Mistakes to Avoid
Even with a simple setup, there are a few mistakes that can cause problems. Here is what to watch out for.
- Buying a cheap enclosure with a bad controller. This is the biggest mistake. A poor controller can cut your speeds in half. Spend a little more on a well-reviewed enclosure.
- Using an old USB port. USB 2.0 ports will severely limit your speed. Always use a USB 3.0 or newer port for good performance.
- Ignoring heat. NVMe drives get hot under heavy load. If your enclosure has no cooling, give the drive a break during long transfers.
- Forgetting to back up data. Even fast SSD storage can fail. Always keep a backup of important files.
- Choosing the wrong drive length. An M.2 2280 drive will not fit in an enclosure made for 2242 drives. Double-check the size before purchasing.
How Does M 2 Nvme Ssd Usb Compare to Other Options?
Let us put things in perspective. How does an M 2 Nvme Ssd Usb setup stack up against other storage options?
- External HDD: Much slower, around 100 MB/s. Good for bulk storage but not for active work.
- External SATA SSD: Faster than HDDs, around 500 MB/s. A solid choice but slower than NVMe.
- M 2 Nvme Ssd Usb: The fastest option, often reaching 1,000 MB/s or more. Best for demanding tasks like video editing and gaming.
If you want to learn more about how NVMe drives compare to other types, our article on SATA PCIe NVMe M.2 SSDs covers the differences in detail.
The bottom line is clear. If you want the fastest portable ssd storage available, an M 2 Nvme Ssd Usb setup is the way to go. It gives you internal drive speeds in a portable package that you can carry anywhere.
Final Thoughts
Building an M 2 Nvme Ssd Usb setup is one of the best storage upgrades you can make. It is fast, portable, affordable, and surprisingly easy to put together. You get the power of a solid state drive in a tiny package that fits in your hand.
Whether you need a portable ssd for creative work, a backup solution for your photos and videos, or a speed boost for gaming, this setup delivers. The key is choosing the right enclosure and drive combo, and following the setup steps carefully.
Start with a quality M.2 NVMe drive and a well-reviewed usb c enclosure, and you will have a high speed storage solution that outperforms most pre-built options. Give it a try, and you will wonder how you ever managed without it.
Frequently Asked Questions
Can I use any M.2 NVMe drive with a USB enclosure?
Most M.2 NVMe drives will work as long as the enclosure supports NVMe and the correct size. Always check the enclosure specifications to confirm compatibility with your specific drive model and length.
How fast is an M 2 Nvme Ssd Usb setup?
With a USB 3.2 Gen 2 enclosure, you can expect speeds up to 1,000 MB/s. The actual speed depends on both the drive and the enclosure quality. Some setups with USB 3.2 Gen 2×2 can reach even higher.
Do I need special software to use an M.2 NVMe USB enclosure?
No special software is needed. Your operating system will recognize the drive automatically. You only need formatting tools if the drive is brand new and needs to be set up.
Is an M 2 Nvme Ssd Usb setup better than a pre-built external SSD?
It can be. Building your own setup is often cheaper and lets you choose exactly the drive and enclosure you want. Pre-built options are more convenient but usually cost more for the same capacity.
How do I keep my M.2 NVMe drive from overheating?
Choose an enclosure with a metal body or built-in heatsink. Avoid using the drive for long periods on soft surfaces that block airflow. Giving the drive short breaks during heavy use also helps manage heat.
Can I use the M 2 Nvme Ssd Usb setup on both Windows and Mac?
Yes, you can. Just make sure to format the drive with a file system that works on both platforms, such as exFAT. This way you can switch between computers without any issues.