Screenshot on Acer Laptop
Taking a screenshot on your Acer laptop is simple once you know the right shortcuts and tools. You can use the Print Screen key, the Snipping Tool, or Windows shortcuts to capture your screen in seconds. This guide covers every method for all Acer models, so you will never struggle to save what is on your screen again.
Have you ever needed to capture something on your screen but did not know how? Maybe you wanted to save a funny meme, share an error message with tech support, or keep a record of something important. Whatever the reason, learning how to take a screenshot on Acer laptop is one of the most useful skills you can have.
The good news is that it is incredibly easy. Acer laptops come with multiple built-in methods that let you capture your screen in just a few seconds. Whether you are using an Acer Aspire, an Acer Nitro gaming machine, or any other model, the steps are straightforward. In this guide, we will walk you through every method, shortcut, and trick so you can screenshot like a pro.
You do not need any special software or technical skills. Just a few seconds and your keyboard. Let us dive right in and explore all the ways you can take a screenshot on your Acer laptop.
Key Takeaways
- Print Screen Key: The fastest way to capture your entire Acer laptop screen with one key.
- Windows + Shift + S: A powerful shortcut that lets you select any area of your screen to capture.
- Snipping Tool & Snip & Sketch: Built-in Windows tools that give you more control over your screenshots.
- Acer-Specific Shortcuts: Some Acer models have dedicated screenshot keys on their keyboards.
- Screenshot Location: Know exactly where your screenshots are saved so you can find them fast.
- Troubleshooting Tips: Fix common issues when your screenshot tools are not working on an Acer laptop.
📑 Table of Contents
- Why Taking Screenshots on Your Acer Laptop Is Useful
- Method 1: Use the Print Screen Key
- Method 2: The Windows Shift + S Shortcut
- Method 3: Use the Snipping Tool
- Method 4: Use the Game Bar for Gaming Screenshots
- Where Are Your Screenshots Saved?
- Troubleshooting Common Screenshot Problems
- Bonus Tips for Better Screenshots
- Screenshot Methods Comparison
- Final Thoughts
Why Taking Screenshots on Your Acer Laptop Is Useful
Screenshots serve so many purposes in everyday computing. They help you communicate faster, solve problems, and keep records without typing a single word. Here are some common reasons you might need to capture your screen:
- Technical Support: Share error messages with customer service so they can understand the problem.
- Work and School: Save important information from emails, presentations, or web pages.
- Social Sharing: Capture funny moments, memes, or conversations to share with friends.
- Tutorials and Guides: Create visual instructions for others by showing exactly what is on your screen.
- Personal Records: Keep receipts, confirmations, or important notifications for your files.
No matter what your reason is, the methods below will help you get it done quickly on your Acer laptop. And if you are running into issues with your mouse, you can still use keyboard shortcuts to take screenshots. Check out our guide on mouse not working on Acer laptop if your cursor is giving you trouble.
Method 1: Use the Print Screen Key
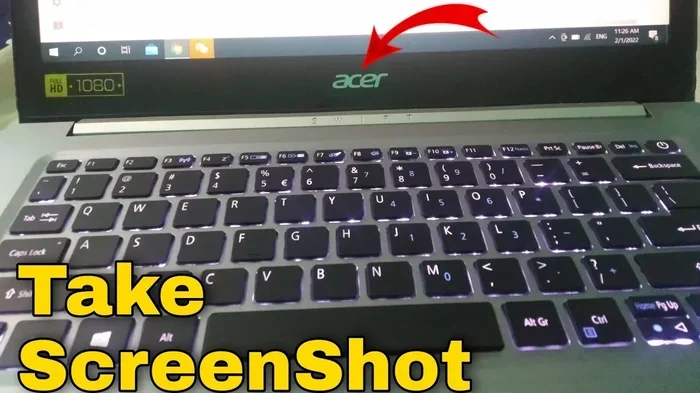
The Print Screen key is the simplest and oldest way to take a screenshot. It is usually labeled as “PrtScn,” “PrntScrn,” or “PrtSc” on your keyboard. Most Acer laptops have this key near the top right corner, often sharing space with other keys like Scroll Lock or Pause.
How to Capture Your Entire Screen
Press the Print Screen key once. This copies a full screenshot of your entire screen to your clipboard. But here is the catch — nothing will appear to happen on your screen. The image is saved in your memory, and you need to paste it somewhere to see it.
Here is what to do next:
- Open the Start menu and type “Paint.”
- Open the Paint app.
- Press Ctrl + V to paste the screenshot.
- Click File, then Save As to keep the image.
This method works on every Windows version and every Acer model. It is reliable, fast, and requires no extra tools.
Using Windows + Print Screen for Auto-Save
If you want your screenshot saved automatically without opening Paint, use this shortcut. Press Windows Key + Print Screen at the same time. Your screen will flash briefly, which means the capture worked.
The screenshot is saved in your Pictures folder, inside a subfolder called “Screenshots.” This is the easiest way to take a screenshot on Acer laptop and keep it organized. You do not need to paste or save manually.
Quick Tip: If your Print Screen key is not working, make sure you are not using a keyboard layout that remaps it. Some Acer models with compact keyboards place this key in an unusual spot. Also, check that the Fn key is not interfering — on some laptops, you may need to press Fn + Print Screen.
Method 2: The Windows Shift + S Shortcut
This is hands down the most flexible screenshot method on Windows. Press Windows Key + Shift + S, and your screen will dim slightly. A small toolbar appears at the top of your screen with four options.
Your Capture Options
- Rectangular Snip: Drag your cursor to select any rectangular area of your screen.
- Freeform Snip: Draw any shape around the area you want to capture.
- Window Snip: Click on any open window to capture just that window.
- Full-Screen Snip: Captures your entire screen, just like Print Screen.
After you select your area, the screenshot goes to your clipboard. A small notification pops up in the bottom right corner. Click on it to open the Snip & Sketch app, where you can edit, annotate, or save the image.
This method is perfect for when you only need part of your screen. It is fast, clean, and gives you more control than the basic Print Screen method. If you are using an Acer Aspire laptop, this shortcut works flawlessly. You can also check out our guide on how to upgrade RAM on your laptop if your machine is running slow and affecting your workflow.
Method 3: Use the Snipping Tool
The Snipping Tool has been a part of Windows for many years. It gives you even more control over your screenshots than the shortcut alone. You can add delays, draw on your captures, and save in different formats.
How to Open the Snipping Tool
Click the Start menu and type “Snipping Tool.” Open the app from the search results. You will see a “New” button that starts the capture process. You can also use the shortcut Windows Key + Shift + S to launch it directly.
Setting a Delay
One of the best features of the Snipping Tool is the delay option. You can set a delay of 3 or 5 seconds before the screenshot is taken. This is incredibly useful when you need to capture a dropdown menu or a tooltip that disappears when you move your mouse.
Here is how to use the delay feature:
- Open the Snipping Tool.
- Click on “Delay” in the menu bar.
- Select 3 or 5 seconds.
- Click “New” and prepare your screen.
- The tool will automatically capture the screen after the delay.
Expert Insight: Many users do not know about the delay feature. It saves a ton of time when you are capturing menus, hover effects, or animations. Once you start using it, you will wonder how you ever lived without it.
Method 4: Use the Game Bar for Gaming Screenshots
If you are gaming on your Acer Nitro or any other gaming laptop, the Game Bar is a great option. It is built into Windows and designed specifically for capturing gameplay moments.
How to Take a Screenshot with Game Bar
While in a game or app, press Windows Key + G. The Game Bar overlay appears. Click the camera icon, or press Windows Key + Alt + Print Screen. Your screenshot is saved automatically in the Videos folder, inside a subfolder called “Captures.”
This method is especially useful for gamers because it captures the screen without interrupting your game. It works with most full-screen applications and games on your Acer laptop.
Quick Tip: If the Game Bar does not open, go to Settings, then Gaming, then Game Bar, and make sure it is turned on. Some Acer models may have this disabled by default.
Where Are Your Screenshots Saved?
Knowing where to find your screenshots saves a lot of frustration. Different methods save files in different locations. Here is a quick reference:
| Method | Save Location |
|---|---|
| Windows + Print Screen | Pictures > Screenshots folder |
| Windows + Shift + S | Clipboard (paste into Paint or Word) |
| Snipping Tool | You choose the location when saving |
| Game Bar (Win + Alt + PrtSc) | Videos > Captures folder |
| Print Screen alone | Clipboard only (must paste manually) |
If you ever cannot find a screenshot, check these folders first. Most of the time, the file is there — you just need to know where to look. This is one of the most common questions people ask when learning how to take a screenshot on Acer laptop.
Troubleshooting Common Screenshot Problems
Sometimes screenshot methods just do not work. This can be frustrating, but the fixes are usually simple. Here are the most common issues and how to solve them.
The Print Screen Key Does Nothing
This is the most common problem. Try these fixes in order:
- Make sure you are pressing the correct key. Look for PrtScn, PrntScrn, or a similar label.
- Try pressing Fn + Print Screen if your keyboard has an Fn key.
- Check if your keyboard has an Fn Lock key. Press it to toggle function keys.
- Restart your computer and try again.
- Update your keyboard drivers through Device Manager.
The Snipping Tool Will Not Open
If the Snipping Tool crashes or will not launch, try these steps:
- Open the Start menu, type “cmd,” right-click Command Prompt, and choose “Run as administrator.”
- Type
sfc /scannowand press Enter. This repairs corrupted system files. - Restart your computer and try opening the Snipping Tool again.
If you are having trouble with other Acer laptop functions, you might want to check our article on mouse on laptop not working Acer for additional troubleshooting tips. Also, if your laptop is running slowly and affecting your ability to use these tools smoothly, consider checking out our guide on Acer Aspire laptop RAM upgrade to boost performance.
Bonus Tips for Better Screenshots
Once you master the basics, these tips will take your screenshot game to the next level:
- Use the Snipping Tool’s pen and highlighter: Annotate your screenshots before sharing them. This makes your images much clearer.
- Save as PNG for quality: PNG format keeps your screenshots sharp. JPEG compresses the image and may reduce quality.
- Use the Windows Clipboard History: Press Windows Key + V to access all your copied screenshots in one place.
- Capture scrolling windows: Use third-party tools like Snagit if you need to capture long web pages or documents.
- Pin the Snipping Tool to your taskbar: Right-click the app and select “Pin to taskbar” for instant access.
These small tips make a big difference. They save time and help you create cleaner, more professional-looking screenshots every time.
Screenshot Methods Comparison
With so many options available, it helps to know which method works best for each situation. Here is a quick comparison:
| Method | Speed | Flexibility | Auto-Save | Best For |
|---|---|---|---|---|
| Print Screen Key | Very Fast | Full Screen Only | No | Quick full-screen captures |
| Win + Shift + S | Fast | High (4 modes) | No | Capturing specific areas |
| Snipping Tool | Moderate | Very High | Manual | Annotated and delayed captures |
| Game Bar | Fast | Moderate | Yes | Gaming and full-screen apps |
| Win + Print Screen | Very Fast | Full Screen Only | Yes | Quick saves without editing |
Choose the method that fits your needs. For everyday use, the Windows Shift + S shortcut is the most versatile. For quick full-screen captures, Print Screen or Windows + Print Screen cannot be beat.
Final Thoughts
Taking a screenshot on Acer laptop is one of those simple skills that makes a huge difference in your daily computing. Whether you are a student, a professional, or a gamer, these methods give you the power to capture anything on your screen in seconds.
Start with the Windows Shift + S shortcut — it is the most flexible and works on every Acer model. Then explore the other methods as you get comfortable. Before long, capturing your screen will become second nature.
If you ever run into issues with your Acer laptop, remember that most problems have simple fixes. And if your mouse is not cooperating, you can always rely on keyboard shortcuts to get the job done. For more help with your Acer device, explore our other guides on Acer mouse not working on laptop and 16 GB RAM Acer laptop configurations to keep your machine running smoothly.
Now go ahead and try these methods yourself. You will be amazed at how easy and useful taking screenshots can be. Happy capturing!
Frequently Asked Questions
What is the easiest way to take a screenshot on an Acer laptop?
The easiest way is to press Windows Key + Shift + S. This opens the snipping toolbar and lets you select any area of your screen. The screenshot is copied to your clipboard, and you can paste it anywhere by pressing Ctrl + V.
Where do screenshots get saved on an Acer laptop?
If you use Windows Key + Print Screen, the screenshot is saved automatically in the Pictures folder under a subfolder called Screenshots. If you use the Print Screen key alone, the image goes to your clipboard and you need to paste and save it manually.
Why is the Print Screen key not working on my Acer laptop?
This usually happens because the Fn key is interfering. Try pressing Fn + Print Screen together. You can also check your keyboard settings in Windows or update your keyboard drivers through Device Manager.
Can I take a screenshot on an Acer laptop without using the mouse?
Yes, absolutely. All the keyboard shortcuts like Windows + Shift + S and Print Screen work without a mouse. You can also use the Snipping Tool with just the keyboard by pressing Alt + N to start a new capture.
How do I capture a specific window on my Acer laptop?
Press Windows Key + Shift + S and select the Window Snip option from the toolbar. Then click on the window you want to capture. It will be saved to your clipboard for pasting elsewhere.
Is there a free tool for better screenshots on Acer laptops?
Yes, the built-in Snipping Tool and Snip & Sketch app are free and come with Windows. For more advanced features like scrolling captures, you can try tools like Snagit or Greenshot, both of which are popular and reliable.