How To Make A Foldable That Fits Anywhere In Your Home
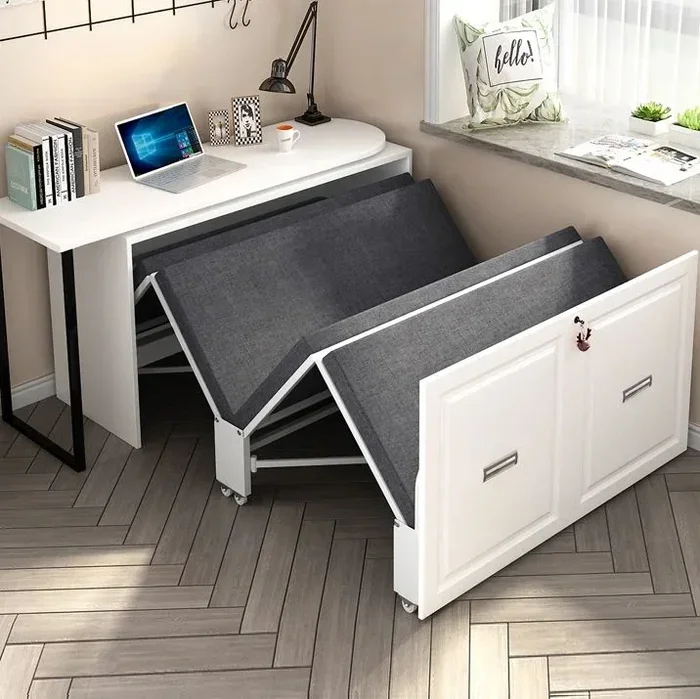
Want a foldable workspace that saves space? This guide shows you exactly how to make a foldable stand or desk that fits anywhere in your home. You will learn simple DIY techniques, the best materials to use, and pro tips for building a portable laptop stand or foldable desk that looks great and works perfectly.
Have you ever wished you had a foldable stand that could disappear when you are not using it? Maybe your living room doubles as your office, and you need a portable laptop stand that does not take up permanent space. Or perhaps you want a foldable desk that you can tuck away after your Zoom call ends.
Building your own foldable workspace is easier than you think. With a few basic tools and some simple materials, you can create a space-saving design that fits perfectly in any room. This guide walks you through every step of the process, from choosing materials to adding the finishing touches.
Whether you need a foldable monitor stand for your second screen or a compact laptop cooling stand for late-night work sessions, this article has you covered. Let us dive in and build something useful together.
Key Takeaways
- Foldable stands save space: A compact workspace setup helps you work efficiently in small homes, apartments, or bedrooms.
- Basic materials are all you need: Wood, hinges, and a few tools are enough to build a sturdy DIY foldable stand.
- Adjustability matters: Building an ergonomic laptop stand with adjustable angles reduces neck and back strain.
- Portability is key: A well-built foldable tech gear setup lets you move your workspace anywhere in your home.
- Customization adds value: You can personalize your stand with cable management, storage, and color choices.
- Safety first: Always secure hinges and test stability before placing heavy devices on your stand.
📑 Table of Contents
Why Build a Foldable Stand for Your Home?
More people are working from home than ever before. A portable workstation gives you the freedom to move around and set up wherever you feel most comfortable. But fixed desks take up valuable floor space. A foldable stand solves this problem beautifully.
Space-Saving Benefits
Small apartments and shared rooms demand smart solutions. A foldable desk or stand folds flat against a wall or slides into a closet when not in use. This means you get a fully functional compact workspace without sacrificing your living area.
- Folds flat for easy storage
- Fits behind furniture or in tight corners
- Perfect for studio apartments and bedrooms
- Great for guest rooms that double as offices
Ergonomic Advantages
Using your laptop flat on a table or couch is hard on your neck and back. An ergonomic laptop stand raises your screen to eye level. This reduces strain and helps you maintain a healthy posture throughout the day. When your stand folds away, you can still enjoy these benefits whenever you need them.
Materials You Will Need
Before you start building, gather your supplies. The good news is that you do not need expensive or hard-to-find materials. Most of what you need is available at any local hardware store or online.
Essential Materials
- Wood planks or plywood (½ inch to ¾ inch thick)
- Heavy-duty hinges (2 to 3 depending on your design)
- Wood screws and a screwdriver
- Sandpaper (medium and fine grit)
- Wood glue for extra stability
- Measuring tape and pencil
- Saw (hand saw or power saw)
- Paint or wood stain (optional, for finishing)
Recommended Tools
You do not need a professional workshop to build a DIY foldable stand. A basic drill, a level, and clamps will make the job much easier. If you want a polished look, consider a router for smoothing edges. But even with minimal tools, you can create something sturdy and functional.
Step-by-Step Guide to Making Your Foldable Stand
Now comes the fun part. Follow these steps to build your own foldable stand that fits anywhere in your home. Each step is simple and straightforward, so even beginners can follow along.
Step 1: Plan Your Design
Start by measuring the space where your stand will live. Do you want it to fit behind a couch? Next to a bed? Measure that spot carefully. Then decide on the dimensions of your foldable desk or stand. A typical laptop stand works well at about 12 inches wide and 10 inches deep. Adjust these measurements based on your device size and available space.
Sketch your design on paper. Include the fold line, hinge placement, and any support braces. A simple plan saves time and prevents mistakes later. Think about how the stand will look in your room too. A clean, minimal design blends well with most home office setups.
Step 2: Cut Your Wood
Using your measurements, cut the wood planks to size. You will need two main pieces for the top surface and two side pieces for support. If you are building a foldable monitor stand, make the top piece wider to hold your screen securely.
Always measure twice and cut once. Use a straight edge to guide your saw for clean lines. After cutting, sand all edges and surfaces with medium-grit sandpaper first, then finish with fine-grit for a smooth feel. This step matters more than you might think — splinters ruin a good project.
Step 3: Attach the Hinges
Hinges are the heart of any foldable stand. Place them along the fold line, spacing them evenly. Typically, two hinges work well for most designs. Use wood screws to attach each hinge firmly to both pieces of wood.
Test the fold mechanism before moving on. Open and close the stand several times. It should move smoothly without wobbling. If something feels loose, tighten the screws or add a small amount of wood glue around the hinge edges.
Step 4: Add Support Braces
A portable laptop stand needs support to stay stable. Attach small wooden braces to the underside of the top piece. These braces prevent the stand from collapsing under the weight of your device. You can also add a small lip at the front to keep your laptop from sliding off.
For extra stability, consider adding a small triangle support on each side. This is a classic woodworking technique that adds strength without adding bulk. Your foldable tech gear will feel solid and dependable.
Step 5: Finish and Customize
Now it is time to make your stand look great. Apply wood stain or paint in a color that matches your room. A matte black finish works well in modern spaces, while a natural wood tone adds warmth to a cozy setup. Let the finish dry completely before moving to the next step.
Want to add a personal touch? Consider painting a subtle pattern or adding a small shelf underneath for your wireless mouse or keyboard. If you plan to use this stand as part of your home office setup, you might also want to add cable management clips to keep cords tidy.
Best Practices for Using Your Foldable Stand
Building the stand is only half the battle. Using it correctly ensures it lasts longer and keeps your devices safe. Here are some practical tips to get the most out of your foldable workspace.
Place It on a Flat Surface
Always set up your stand on a flat, stable surface. Uneven tables or couches can cause your stand to tip. If you are using it on a soft surface like a bed, place a flat board underneath to create a stable base.
Do Not Overload
Check the weight limit of your stand before placing heavy devices on it. Most DIY wooden stands handle laptops and tablets easily. But if you plan to use it for a heavy desktop monitor, reinforce the braces and use stronger hinges. This is especially important if you are using the stand to support a secondary monitor for a dual-screen home office setup.
Keep It Clean
Dust and debris can build up in the hinges over time. Wipe down your stand regularly and apply a light lubricant to the hinges every few months. This keeps the folding mechanism smooth and extends the life of your project.
Quick Tips for a Better Build
- Use a level to make sure your top surface is perfectly flat.
- Pre-drill holes before inserting screws to prevent wood from splitting.
- Test the fold multiple times during construction, not just at the end.
- Add rubber feet to the bottom of your stand to prevent slipping.
- Use a wireless mouse like those described in how to use a mouse on a laptop for a clean, cord-free workspace.
- Pair your stand with a second monitor — check out how to buy a secondary monitor for the best options.
- Consider your RAM setup if you are building a serious workstation — learn how to upgrade the RAM of a laptop for better performance.
Common Mistakes to Avoid
Even simple DIY projects have pitfalls. Knowing what to avoid saves you time, money, and frustration.
- Skipping the plan: Jumping straight to cutting wood often leads to uneven pieces and wasted material. Always sketch your design first.
- Using weak hinges: Flimsy hinges cannot support the weight of a laptop or monitor. Invest in sturdy, heavy-duty hinges for lasting stability.
- Ignoring the fold mechanism: If the stand does not fold flat, it defeats the purpose. Test the fold before adding any finish or paint.
- Forgetting weight distribution: Place the heaviest part of your device near the center of the stand. This prevents tipping and adds structural strength.
- Neglecting surface protection: Without a soft pad or felt feet, your stand can scratch your desk or table. Add protective pads to all contact points.
Expert Insights: Making Your Foldable Stand Work for You
Building a foldable stand is just the beginning. The real value comes from how you integrate it into your daily routine. Here are some expert-backed tips to maximize your setup.
First, position your stand at a comfortable height. Your eyes should align with the top third of your screen. This is true whether you are using a laptop or an external display. If you use your stand with a wireless mouse, make sure there is enough desk space below for your hand to move freely.
Second, think about airflow. Laptops generate heat, especially during demanding tasks. A wooden stand with open space underneath allows air to circulate. This keeps your device cool and extends its lifespan. For more tips on optimizing your setup, explore how to connect a wireless mouse to a laptop and how to use a laptop without a mouse for touchpad alternatives.
Third, consider the room where you use your stand most. A bedroom setup might need a different style than a living room setup. Choose finishes and designs that complement your existing decor. A well-integrated foldable workspace looks intentional, not improvised.
Finally, remember that your stand can evolve. Add a small shelf for a tablet. Attach a clip for headphones. The beauty of a DIY project is that it grows with your needs. A foldable technology setup should be flexible, just like the stand itself.
Conclusion
Building a foldable stand that fits anywhere in your home is a rewarding and practical project. You do not need advanced woodworking skills or expensive tools. With the right materials, a simple plan, and a little patience, you can create a portable workspace that transforms any room in your home.
From choosing the best wood and hinges to adding custom finishes and support braces, every step brings you closer to a functional and stylish foldable desk or stand. The result is a space-saving design that adapts to your life, not the other way around.
Start small if you are new to DIY. Build a simple laptop stand first. Then, as your confidence grows, experiment with larger designs like a foldable desk or monitor stand. The skills you learn along the way will serve you well for future projects too.
Now you know exactly how to make a foldable that works beautifully in any space. Grab your tools, gather your materials, and start building. Your perfect compact workspace is just a few steps away.
Frequently Asked Questions
What is the best wood for a foldable stand?
Plywood and poplar wood are excellent choices for a foldable stand. They are lightweight, easy to cut, and strong enough to support laptops and tablets. If you want a premium look, oak or maple works well too, though they are heavier.
Can I make a foldable stand without hinges?
Yes, you can use elastic bands or magnetic closures instead of traditional hinges. However, hinges provide the most stable and reliable folding mechanism. They allow the stand to hold its position at different angles, which is essential for an ergonomic laptop stand.
How much does it cost to build a DIY foldable stand?
A basic DIY foldable stand costs between $15 and $40 in materials. Wood planks, hinges, screws, and sandpaper make up the bulk of the expense. You likely already have tools like a drill and screwdriver at home, which keeps costs even lower.
Can I use a foldable stand for a desktop monitor?
Absolutely. Reinforce your design with thicker wood and heavier-duty hinges to support a desktop monitor. Check the weight specifications of your monitor before building. For dual-monitor setups, consider pairing your stand with tips from guides on how to buy a secondary monitor.
How do I make my foldable stand more stable?
Add rubber feet or felt pads to the bottom of the stand to prevent slipping. Use triangle support braces on the underside for extra strength. Also, always place the stand on a flat, hard surface for the best stability.
Can children help build a foldable stand?
Children can help with sanding, painting, and assembling simple parts. However, cutting wood and using power tools should always be done by an adult. It is a great family project that teaches basic woodworking skills and encourages creativity.