How To Clone Ssd And Transfer Everything To A New Drive
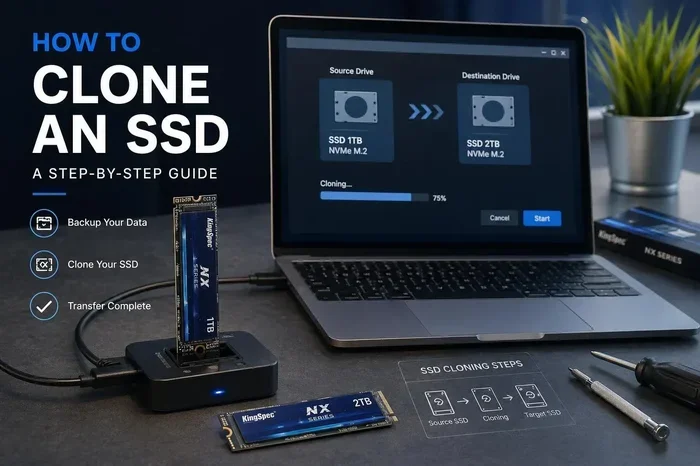
Cloning your SSD lets you copy your entire drive — OS, apps, and files — to a new drive without reinstalling everything. Whether you are upgrading to a larger SSD or replacing a failing drive, this guide walks you through every step. You will learn the best cloning software, how to prepare both drives, and how to verify your clone works perfectly.
Have you ever needed to move everything on your computer to a new drive? Maybe your old SSD is running out of space, or you just bought a faster one. Either way, cloning your SSD is the smartest way to go. It copies every single bit of data — your operating system, applications, settings, and personal files — to the new drive. You wake up one morning, swap in the new drive, and everything works exactly as it did before. No reinstalling. No losing data. No headaches.
In this guide, I will show you exactly how to clone SSD setups and transfer everything to a new drive. I will cover the best software tools, how to prepare both your old and new drives, and what to do if something goes wrong. By the end, you will feel confident doing this yourself. Let us get started.
Key Takeaways
- SSD cloning saves hours: You avoid reinstalling Windows, programs, and drivers by copying your entire drive exactly.
- Choose the right cloning software: Tools like Macrium Reflect, Clonezilla, and AOMEI Backupper make the process simple and reliable.
- Prepare both drives first: Connect the new drive, check its health, and make sure it has enough space for all your data.
- Verify your clone after finishing: Always boot from the new drive and confirm everything works before wiping the old one.
- Physical installation matters: Properly mounting and connecting your new SSD prevents performance issues and data loss.
- Format the new drive if needed: After cloning, you may need to format partitions to get the full capacity of your new SSD.
📑 Table of Contents
- What Does It Mean to Clone an SSD?
- Before You Start: What You Need
- Best Cloning Software for SSD Migration
- Step-by-Step Guide to Cloning Your SSD
- Installing the New SSD Into Your PC
- What to Do After Cloning
- Common Cloning Mistakes and How to Avoid Them
- Expert Tips for a Flawless SSD Clone
- When Should You Clone Your SSD?
- Conclusion
What Does It Mean to Clone an SSD?
SSD cloning means creating an exact copy of your entire drive onto another drive. This is different from simply copying files. When you clone a drive, you copy the hidden partitions, the boot sector, the file system, and every byte of data. The result is a bootable duplicate of your original drive.
Think of it like taking a photograph of your entire hard drive. Every folder, every setting, every hidden system file — all of it gets copied over. The new drive becomes a perfect twin of the old one. This is why cloning is so popular for SSD upgrades and data migration projects.
Why Clone Instead of Reinstalling?
There are several reasons people choose to clone rather than start fresh. First, it saves a ton of time. Reinstalling Windows, all your apps, and restoring your settings can take an entire day. Cloning takes a fraction of that. Second, you do not risk losing any files or forgetting a program license key. Third, your system stays exactly the way you configured it — all your preferences, bookmarks, and custom settings remain intact.
Before You Start: What You Need
Preparation is the most important part of any cloning job. Skipping this step causes most cloning failures. Here is what you need before you begin.
1. Your New Drive
Make sure your new SSD has enough space to hold everything on the old drive. You can check this by going to This PC and looking at your C: drive size. Your new drive should be equal to or larger than the used space on your old drive. For example, if you use 400 GB of a 1 TB drive, your new drive needs at least 400 GB — though bigger is always better.
2. A Way to Connect the New Drive
You need to connect the new drive to your computer. You can do this by installing it inside your PC if you have a free drive bay or M.2 slot. Alternatively, you can use an external enclosure or adapter to connect the new drive via USB. This works great if you are cloning a laptop or do not want to open your PC case.
3. Cloning Software
You need a reliable disk cloning tool. There are many free and paid options available. I will cover the best ones below.
4. A Stable Power Source
Never clone while running on battery power. A sudden power loss during cloning can corrupt your data. Plug your laptop into the wall or make sure your desktop is on a UPS.
Best Cloning Software for SSD Migration
Not all cloning tools are created equal. Some are free, some cost money, and some are better for certain situations. Here are the top options I recommend.
Macrium Reflect (Free Version)
Macrium Reflect is one of the most trusted cloning tools available. The free version offers a straightforward disk clone feature. It works well for most users and supports both HDD and SSD cloning. The interface is clean and easy to follow, even for beginners.
Clonezilla
Clonezilla is a free, open-source tool that is incredibly powerful. It clones at the sector level, meaning it copies every single sector on the drive. The downside is that the interface is not as friendly. It uses a text-based menu system that can feel intimidating. But it gets the job done reliably.
AOMEI Backupper (Free Edition)
AOMEI Backupper is a popular choice because it is simple and beginner-friendly. The free version includes a disk clone function that works well for most SSD migration tasks. It also lets you resize partitions during the clone, which is handy if your new drive has a different size.
Samsung Data Migration
If you are upgrading to a Samsung SSD, this tool comes free with the drive. It is designed specifically for Samsung drives and makes the process very easy. It handles the entire clone in just a few clicks.
| Software | Price | Ease of Use | Key Feature |
|---|---|---|---|
| Macrium Reflect | Free | Easy | Reliable and trusted |
| Clonezilla | Free | Moderate | Sector-level cloning |
| AOMEI Backupper | Free | Very Easy | Resize partitions while cloning |
| Samsung Data Migration | Free | Very Easy | Built for Samsung SSDs |
Step-by-Step Guide to Cloning Your SSD
Now for the part you have been waiting for — actually doing the clone. Follow these steps carefully and you will have a perfect copy of your drive in no time.
Step 1: Connect the New Drive
Install the new SSD into your computer or connect it externally. If you are using an M.2 drive, you will need to access the M.2 slot on your motherboard. For external connections, a USB-to-SATA adapter or enclosure works perfectly. Make sure the drive is recognized by Windows before you start cloning.
Step 2: Download and Install Cloning Software
Download your chosen cloning tool and install it on your computer. Launch the application and look for the “Clone” or “Disk Clone” option. Most tools will detect both your old and new drives automatically.
Step 3: Select Source and Destination Drives
This is the most critical step. Select your old SSD as the source drive and the new SSD as the destination drive. Double-check these selections. If you swap them, you could overwrite your old drive with the new one and lose data. The software will warn you about this, but it is always better to be careful.
Step 4: Adjust Partition Settings (If Needed)
Some cloning tools let you resize partitions during the clone. If your new drive is larger, you can choose to extend the partitions to use the extra space. If the drives are the same size, you can usually leave the settings as default.
Step 5: Start the Clone
Click the “Start Clone” or “Clone Now” button and wait. The process can take anywhere from 15 minutes to a few hours depending on how much data you have and the speed of your drives. Do not use your computer for heavy tasks during this time. Let it run undisturbed.
Step 6: Verify the Clone
Once the clone finishes, do not shut down yet. If possible, boot from the new drive and check that Windows starts properly. Open your files, launch your apps, and make sure everything looks right. This verification step is crucial before you retire the old drive.
Installing the New SSD Into Your PC
After cloning, you need to physically move the new drive into position if you used an external connection during cloning. Here is how to do it properly.
For Desktop PCs
Open your PC case and locate an available drive bay or M.2 slot. Remove the old SSD and install the new one securely. Connect the power and data cables if you are using a SATA drive. If you are using an M.2 NVMe drive, simply insert it into the M.2 slot at a 30-degree angle and press it down firmly. Secure it with the small screw.
If you need detailed guidance on installing an M.2 NVMe SSD in your desktop, check out our guide on how to install M.2 NVMe SSD in PC. It covers every step from accessing the M.2 slot to securing the drive with a screw.
For Laptops
Laptop SSD installation requires a bit more care because space is tight. Remove the bottom panel, disconnect the old drive from its connector, and slide the new drive in at the correct angle. Secure it with any mounting screws that came with your laptop. Be gentle with the connectors — they are fragile and expensive to replace.
If you need step-by-step instructions for laptops, our article on how to install M.2 NVMe SSD in laptop walks you through the entire process with clear photos and tips.
What to Do After Cloning
Cloning is not quite done once you swap in the new drive. There are a few post-clone steps that ensure everything runs smoothly.
Format and Optimize the New Drive
After cloning, you may want to format any leftover unallocated space on your new drive. If your new drive is larger than your old one, you will have extra space that is not part of your cloned partition. You can format this extra space using Windows Disk Management. This gives you a clean partition you can use for storing files.
For detailed instructions on formatting your new drive after cloning, see our article on how to format new NVMe SSD. It covers every scenario, including GPT vs MBR and formatting through Disk Management and command line.
Check Your Boot Order
After installing the new drive, you may need to change the boot order in your BIOS or UEFI settings. This tells your computer to start from the new SSD first. Restart your PC, press the BIOS key (usually F2, Del, or F12), and move the new drive to the top of the boot priority list.
Update Drivers and Firmware
Once your new SSD is running as your primary drive, check for the latest firmware updates from the manufacturer’s website. Also update your storage drivers through Device Manager. This ensures your new SSD runs at peak performance.
Keep the Old Drive as a Backup
Do not wipe or throw away your old drive right away. Keep it connected or stored safely for at least a few weeks. This gives you a fallback if you discover any issues with the clone. Once you are completely satisfied, you can repurpose the old drive as external storage or wipe it clean for reuse.
Common Cloning Mistakes and How to Avoid Them
Even experienced users make mistakes during cloning. Here are the most common ones and how to avoid them.
- Skipping the backup: Always back up important files before cloning. Even though cloning is generally safe, unexpected errors can happen.
- Choosing the wrong destination drive: Always double-check which drive is source and which is destination. A simple mix-up can erase your data.
- Using a drive that is too small: If your new drive is smaller than the used space on your old drive, the clone will fail. Always check sizes first.
- Interrupting the clone process: Never power off or restart during cloning. This can corrupt both drives.
- Forgetting to change the boot order: After cloning, your PC may still try to boot from the old drive. Change the BIOS settings to boot from the new one.
- Not verifying the clone: Always test the new drive before wiping the old one. Boot into Windows and check your files and apps.
Expert Tips for a Flawless SSD Clone
Here are some insider tips that make the cloning process smoother and more reliable.
Turn off antivirus software temporarily. Some antivirus programs interfere with cloning tools by locking files that the software needs to copy. Disable your antivirus before starting the clone and re-enable it afterward.
Close all unnecessary programs. The fewer programs running, the faster and smoother the clone will be. Close browsers, media players, and any background apps before you start.
Use a sector-by-sector clone for damaged drives. If your old drive is failing or has bad sectors, use a sector-by-sector clone option. This copies every sector including the damaged ones, which can help data recovery tools work better on the destination drive.
Align partitions for SSD optimization. Most modern cloning tools automatically align partitions for SSD performance. If your tool has an alignment option, make sure it is turned on. This improves read and write speeds on your new SSD.
Consider cloning to a larger drive for future headroom. SSD prices have dropped significantly. Buying a slightly larger drive gives you room for future growth and better performance. SSDs tend to slow down when they get too full, so having extra space helps maintain speed.
When Should You Clone Your SSD?
There are several situations where cloning makes the most sense. Here are the most common scenarios:
- Upgrading to a larger SSD: You are running out of space and want a bigger drive without reinstalling everything.
- Replacing a failing drive: Your current SSD is showing signs of failure and you need to move your data quickly.
- Building a new PC: You want to transfer your entire system to a new computer without starting from scratch.
- Creating a backup: You want an exact copy of your system drive as an emergency backup.
- Switching from HDD to SSD: You are upgrading from a slow hard drive to a fast SSD and want to keep everything intact.
Conclusion
Cloning your SSD is one of the best things you can do when upgrading or replacing a drive. It saves time, protects your data, and keeps your system exactly the way you set it up. With the right software, a little preparation, and careful attention to each step, anyone can clone their drive successfully.
Remember to back up your important files first, choose a reliable cloning tool, verify the clone before wiping the old drive, and take your time with the physical installation. Follow these steps and your new SSD will feel like a perfect copy of your old one — just faster and with more space.
Now that you know how to clone SSD setups and transfer everything to a new drive, you are ready to tackle your own upgrade. Happy cloning!
Frequently Asked Questions
Can I clone an SSD to a smaller drive?
Yes, but only if the used space on your old drive is smaller than the total capacity of the new drive. You cannot clone a 500 GB drive with 400 GB of data to a 256 GB drive. Always check your used space before starting the clone.
How long does it take to clone an SSD?
The time depends on the amount of data and the speed of your drives. A typical clone takes anywhere from 15 minutes to 2 hours. Larger drives with more data will take longer, especially if you are using a USB connection instead of an internal SATA or NVMe connection.
Do I need to format the new SSD before cloning?
No. Most cloning software will format and prepare the destination drive automatically during the cloning process. You do not need to format it beforehand. The cloning tool handles everything for you.
Will my cloned SSD be bootable?
Yes, if you clone correctly. A proper sector-by-sector or partition clone creates a bootable copy of your drive. After cloning, you should be able to start Windows from the new drive without any issues. Always verify this by booting from the new drive before removing the old one.
What is the difference between cloning and imaging?
Cloning copies your drive directly to another drive so it is ready to boot immediately. Imaging creates a compressed backup file that you can store and restore later. Cloning is faster for immediate use, while imaging is better for long-term backup and recovery.
Can I use the old SSD after cloning?
Absolutely. After you verify that the new drive works perfectly, you can repurpose the old SSD as external storage, a secondary drive, or wipe it clean and reuse it. Many people keep the old drive as a backup or use it in another computer.