Fixing Laptop Ports Usb and Power Jack Replacement
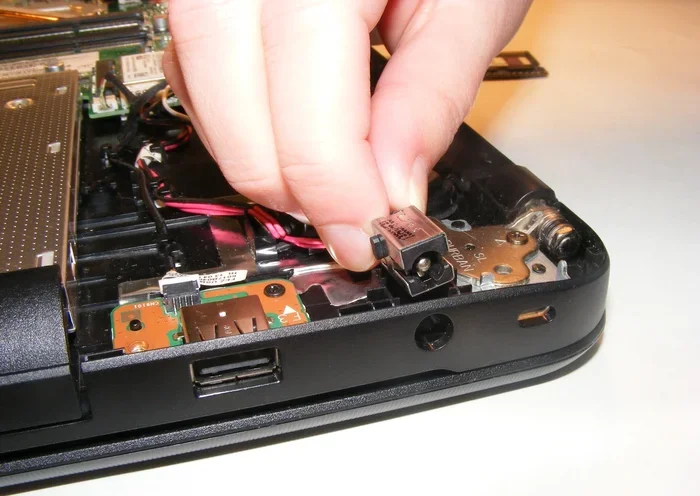
Fixing laptop ports for USB and power jack replacement is easier than you think. This guide walks you through every step, from spotting the problem to completing the repair. You will learn the tools you need, the common causes of port failure, and how to decide between a DIY fix and professional help.
Laptop ports are the unsung heroes of our daily tech lives. We plug in chargers, connect mice, and transfer files without a second thought. But when a port stops working, it can bring your whole workflow to a halt. A loose USB port or a failing power jack can turn a reliable machine into a frustrating paperweight. The good news is that you can often fix these problems yourself with the right guidance.
This guide covers everything you need to know about fixing laptop ports, USB and power jack replacement. We will walk you through identifying the problem, gathering your tools, and completing the repair step by step. Whether your USB port is wobbly or your laptop will not charge at all, you will find practical solutions here. Let us get your laptop back in working order.
Key Takeaways
- Loose or damaged USB and power ports are common issues that can often be fixed at home with basic tools.
- Identifying the root cause saves time and prevents unnecessary part replacements.
- Soldering skills are helpful but not always required for a successful port replacement.
- Using a surge protector can prevent future power jack damage.
- Knowing when to call a pro protects your laptop from further harm.
- Regular cleaning and gentle handling of cables extends port life significantly.
📑 Table of Contents
- Signs Your Laptop USB or Power Port Is Failing
- Tools and Materials You Will Need
- How to Fix a Loose or Broken USB Port
- Power Jack Replacement Step by Step
- When to Seek Professional Help
- Preventing Future Port Damage
- Quick Tips for a Successful Port Repair
- Common Mistakes to Avoid
- Expert Insights on Laptop Port Repair
- Final Thoughts
Signs Your Laptop USB or Power Port Is Failing
Spotting a failing port early can save you from bigger problems down the road. Many people ignore the early warning signs until the port stops working entirely. Learning to recognize these signs gives you a head start on the repair.
Loose or Wobbly USB Connectors
Does your USB cable feel loose when plugged in? A wobbly connection is one of the first signs of port wear. Over time, the plastic housing inside the port can crack or loosen. This happens from frequent plugging and unplugging. You might notice your USB mouse disconnects randomly or your external hard drive keeps falling out. These are clear signals that the port needs attention.
Charging Intermittency or Failure
If your laptop only charges when you hold the plug at a certain angle, the power jack is likely damaged. A failing DC jack often shows intermittent charging behavior. Sometimes it charges fine, and other times it does not. This happens because the internal connections are worn or broken. Ignoring this sign can lead to a completely dead charging port.
Physical Damage or Burn Marks
Visible damage is hard to miss. Look for bent pins, scorch marks, or cracked plastic around the port. Burn marks near the power jack often indicate an electrical short. If you see any of these signs, stop using the port right away. Continuing to use a damaged port can harm your laptop’s motherboard.
Data Transfer Errors on USB Ports
Slow file transfers or error messages when plugging in devices point to a USB port problem. Your device might work on another computer but fail on your laptop. This suggests the port itself is faulty rather than the device. A USB port troubleshooting session can confirm this quickly.
Tools and Materials You Will Need
Before you start the repair, gather everything you need. Having the right tools makes the job smoother and safer. You do not need expensive equipment for most port replacements.
Essential Tools
- Small Phillips-head screwdriver for opening the laptop casing
- Soldering iron and solder for securing new ports
- Multimeter to test continuity and voltage
- Plastic spudger or pry tool for gentle case removal
- Isopropyl alcohol and cotton swabs for cleaning
- Anti-static wrist strap to protect sensitive components
Replacement Parts
You will need the exact replacement port for your laptop model. Search for your laptop brand and model number online to find compatible parts. Many repair shops and online retailers sell individual ports. Make sure the replacement matches the original in size and pin layout. Using the wrong part can cause further damage.
How to Fix a Loose or Broken USB Port
A loose USB port is one of the most common laptop problems. The good news is that fixing it is straightforward if you follow the right steps. Here is how to do it.
Step 1: Disconnect Power and Remove the Battery
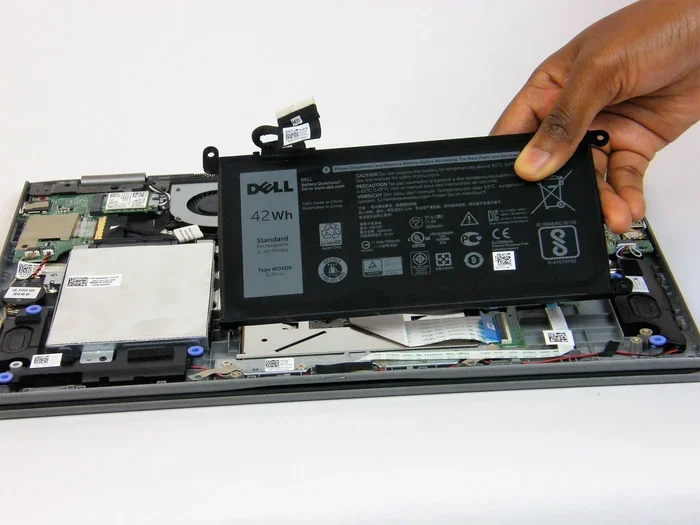
Always start by turning off your laptop and unplugging it. Remove the battery if it is removable. This protects you from electrical shock and prevents damage to the motherboard. Working on a powered device is dangerous and can ruin components.
Step 2: Open the Laptop Casing
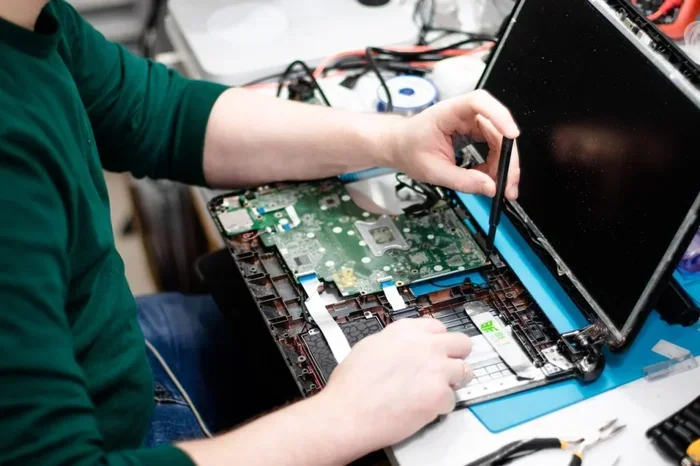
Use your screwdriver to remove the screws on the bottom of the laptop. Keep all screws in a safe place. Use the plastic spudger to gently pry open the case. Avoid metal tools that can scratch or short-circuit parts inside.
Step 3: Locate the USB Port
Find the USB port on the motherboard. Look for the connecting pins or solder points. Take a photo before you disassemble anything. This reference will help you reassemble everything correctly later.
Step 4: Remove the Old Port
Use your soldering iron to heat the solder joints holding the port in place. Gently wiggle the port free once the solder melts. Do not force it. If the port is stuck, apply a little more heat and be patient.
Step 5: Install the New Port
Position the new port in the same place. Align the pins carefully. Apply solder to each joint one at a time. Use just enough solder to create a smooth, shiny connection. Too much solder can cause short circuits.
Step 6: Test Before Reassembly
Before you put the laptop back together, test the new port. Plug in a USB device and check for a solid connection. If you have a multimeter, test for continuity across the pins. Once everything works, reassemble the laptop.
Power Jack Replacement Step by Step
The power jack, also called the DC jack, is the port where you plug in your charger. When it fails, your laptop loses its main power source. Replacing it follows a similar process to USB port repair, but with a few extra precautions.
Step 1: Identify the Power Jack Type
Laptops use different power jack designs. Some are soldered directly to the motherboard. Others connect through a cable or a separate board. Check your laptop service manual online to identify your specific type. This determines how you approach the replacement.
Step 2: Desolder the Old Jack
Apply heat to the solder points with your iron. Use a solder pump or wick to remove old solder. Be gentle with the motherboard. Excessive heat can damage nearby components. Let the board cool between applications if needed.
Step 3: Install the New Power Jack
Place the new jack in position. Solder each pin carefully. Check that the jack sits flush with the motherboard surface. A crooked jack can cause connection problems later.
Step 4: Test the Charging Function
Reconnect the battery and plug in the charger. Check that the charging light turns on. Use a multimeter to verify the correct voltage at the jack. If the laptop charges normally, you have completed the repair successfully.
Common Power Jack Problems
- No charging at all: The jack is completely disconnected or broken.
- Intermittent charging: The solder joints are weak or cracked.
- Charging only at a certain angle: The jack is physically damaged or loose.
- Burning smell: There may be a short circuit on the motherboard.
When to Seek Professional Help
Not every port repair is a DIY project. Some situations call for a trained technician. Knowing when to stop and call for help saves you time and money.
If your laptop has suffered liquid damage, the motherboard may have additional issues beyond the port. In this case, a professional can diagnose hidden problems. Similarly, if you are uncomfortable using a soldering iron, it is perfectly fine to seek help. Many local repair shops offer port replacement services at reasonable prices.
You should also consider professional help if your laptop is still under warranty. Opening the case yourself may void the warranty. Check with the manufacturer before attempting any repairs. Sometimes the cost of professional repair is worth the protection of your warranty.
Another reason to call a pro is when the port damage extends to the motherboard trace. A broken trace requires advanced repair skills. A technician with board-level experience can repair these traces safely. Trying this yourself without experience can make the damage worse.
Preventing Future Port Damage
Once you have fixed your laptop ports, you want to keep them working. Prevention is always easier than repair. A few simple habits can extend the life of your ports significantly.
Use a Surge Protector
Power surges are a leading cause of power jack damage. Plug your laptop charger into a surge protector. This simple step shields your laptop from electrical spikes. It costs very little but adds valuable protection.
Handle Cables Gently
Never yank a cable out of a port by pulling on the cord. Grip the connector itself and pull straight out. Yanking puts stress on the solder joints inside the port. Over time, this weakens the connection and leads to failure.
Keep Ports Clean
Dust and debris can accumulate inside ports over time. Use compressed air to blow out dust regularly. A soft brush can also help dislodge particles. Clean ports maintain better connections and last longer.
Avoid Cheap or Incompatible Chargers
Using a charger that does not match your laptop’s voltage and amperage can damage the power jack. Always use the charger that came with your laptop or a certified replacement. Cheap knockoff chargers may save money upfront but can cause costly damage later.
Store Your Laptop Properly
When transporting your laptop, make sure cables are not under pressure. A loose charger plug rattling around in a bag can stress the port. Use a laptop backpack with compartments to keep everything secure. This small habit goes a long way toward preventing damage.
Quick Tips for a Successful Port Repair
- Take photos at every step. You will thank yourself during reassembly.
- Use a magnifying glass or lamp. Small solder joints are easier to see with good lighting.
- Clean the motherboard before soldering. Isopropyl alcohol removes old flux and grime.
- Do not overheat components. Too much heat can lift pads off the board.
- Test each port individually. Do not assume everything works just because one port is fixed.
- Keep a notebook of screw locations. Different screws often go in different places.
Common Mistakes to Avoid
Even experienced repair enthusiasts make mistakes. Here are common errors that can ruin your repair job.
- Using too much solder. This creates bridges between pins and causes short circuits. Use a thin layer and build up only as needed.
- Skipping the anti-static wrist strap. Static electricity can fry sensitive components. Always ground yourself before touching the motherboard.
- Forcing a stuck port out. This can crack the motherboard. Apply more heat instead and be patient.
- Using the wrong replacement part. Always double-check compatibility before purchasing. A mismatched port will not work properly.
- Reassembling before testing. Always test the new port before closing the case. Finding a problem after reassembly doubles your work.
Expert Insights on Laptop Port Repair
Experienced repair technicians agree that most port issues stem from one of two causes: physical wear or electrical stress. Physical wear comes from years of plugging and unplugging cables. Electrical stress comes from power surges, cheap chargers, or liquid exposure.
One technician shared that the most common mistake users make is ignoring early symptoms. “A wobbly USB port today is a broken port next month,” they noted. “Catching it early means a simple five-minute fix instead of a full replacement.”
Another expert emphasized the importance of quality replacement parts. “Cheap ports may fit, but they often fail within weeks. Invest in a genuine or high-quality aftermarket part. It saves time and frustration in the long run.”
For those dealing with a USB mouse not working on laptop, the port itself is often the culprit before the mouse fails. Always test the device on another computer first to rule out a faulty peripheral. Similarly, if you are experiencing issues where your USB mouse stopped working on laptop, a dead port is a prime suspect before assuming the mouse is broken.
Final Thoughts
Fixing laptop ports, USB and power jack replacement is a skill anyone can learn with patience and practice. You do not need to be a tech expert to handle these common repairs. With the right tools and a careful approach, you can save hundreds of dollars in repair costs.
Start with simple fixes like cleaning a loose port or replacing a worn USB connector. As your confidence grows, you can tackle more complex repairs like power jack replacement. Always prioritize safety and take your time. The reward is a fully functional laptop that works like new again.
Remember, every repair you complete builds your skills and knowledge. Do not be afraid to learn from mistakes. Each repair teaches you something new about how your laptop works inside. Share what you learn with friends and family. You never know when your new skills might save someone from an expensive repair bill.
Frequently Asked Questions
How much does it cost to replace a laptop USB port?
A DIY USB port replacement costs only the price of the replacement part, usually between $5 and $15. Professional repair shops may charge $50 to $150 depending on the laptop model and labor rates. The wide price range depends on the complexity of the repair and your location.
Can I fix a loose USB port without soldering?
Yes, in some cases. You can apply a small amount of hot glue or use a USB port adapter to stabilize a loose connection. However, soldering provides the most reliable and long-lasting fix. If the port is severely damaged, replacement is the best option.
Why does my power jack keep breaking?
Power jacks break most often from yanking the charger cable or using a heavy charger that pulls on the port. A loose jack also indicates worn solder joints. Using a surge protector and handling the charger plug gently can prevent repeated damage.
How long does a power jack replacement take?
A skilled person can replace a power jack in 30 to 60 minutes. Beginners may take longer, especially if they are learning soldering techniques. Allow extra time for your first repair and do not rush the process.
Is it safe to use my laptop with a damaged power jack?
It is not recommended. A damaged power jack can cause inconsistent charging or even electrical shorts. In worst cases, it can damage the motherboard. If you notice any signs of power jack failure, stop using the laptop and repair it as soon as possible.
What should I do if my USB ports stopped working after a repair?
First, check that all solder joints are solid and there are no bridges between pins. Use a multimeter to test continuity. If the ports still do not work, the issue may be on the motherboard rather than the port itself. In this case, consult a professional technician.