How to Insert Laptop Ram
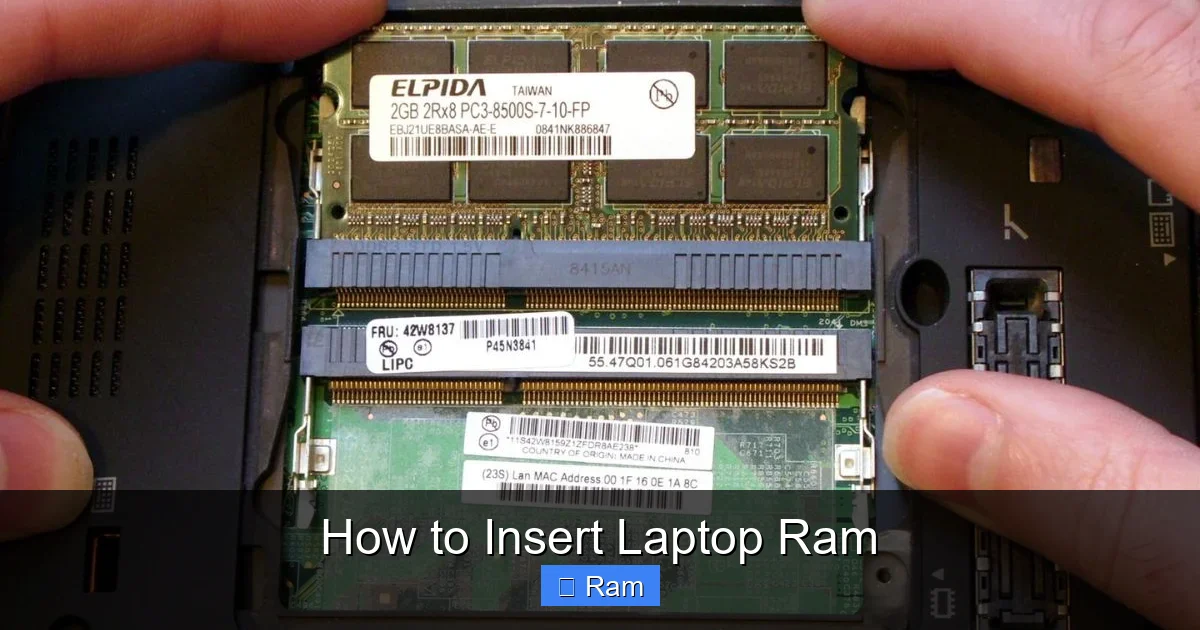
Upgrading your laptop’s RAM is one of the most effective ways to improve its speed and multitasking ability. This guide walks you through the entire process, from identifying the correct memory type to safely installing it. You’ll learn essential preparation steps, how to physically access the memory slots, and how to verify the upgrade was successful. Always prioritize compatibility and static safety to avoid damaging your laptop. With the right tools and careful attention, most users can complete this upgrade in under 30 minutes.
Key Takeaways
- Compatibility is King: Your laptop’s motherboard, CPU, and BIOS dictate the maximum RAM type (DDR3/DDR4/DDR5), speed, and total capacity supported. Never assume.
- Static Electricity is the #1 Enemy: Always discharge static by touching a grounded metal object and work on a non-carpeted surface. Use an anti-static wrist strap if possible.
- Tools are Simple but Specific: You typically need only a small Phillips-head screwdriver and a plastic spudger or pry tool. The correct screwdriver size prevents stripped screws.
- Location Varies by Model: The RAM access panel is usually on the laptop’s bottom, but some models require removing the entire bottom case or even the keyboard.
- Installation Requires Gentle Force: RAM modules click into place. Apply even pressure straight down on both ends until the retention clips snap back. Do not force it.
- Always Test After Installation: Reassemble, power on, and check system properties (Windows) or About This Mac (macOS) to confirm the new RAM is recognized before closing everything up.
- When in Doubt, Research: Use your laptop’s exact model number (found on a sticker on the bottom) to search for its service manual or official upgrade guide before starting.
📑 Table of Contents
- Why Upgrade Your Laptop’s RAM? Understanding the “Why” Before the “How”
- Phase One: The Critical Preparation & Compatibility Check
- Phase Two: Gaining Access to the RAM Slots
- Phase Three: Removing the Existing RAM Modules
- Phase Four: Installing the New RAM Modules
- Phase Five: Reassembly and The All-Important Test
- Phase Six: Troubleshooting Common Post-Upgrade Issues
- Conclusion: The Satisfaction of a Successful DIY Upgrade
Why Upgrade Your Laptop’s RAM? Understanding the “Why” Before the “How”
Before we dive into the nuts and bolts of how to insert laptop RAM, it’s crucial to understand why you’re doing this. Random Access Memory (RAM) is your laptop’s short-term working memory. It’s where data sits temporarily for the CPU to access quickly while you’re actively using programs. When you open a browser with multiple tabs, a word processor, and a music player, all that active data lives in RAM. If your RAM is full, your laptop starts using a portion of your much slower solid-state drive (SSD) or hard drive as “virtual memory,” which causes a noticeable slowdown. Upgrading from, say, 4GB to 8GB or 16GB can feel like giving your laptop a new lease on life. You’ll experience faster boot times, smoother multitasking, reduced lag when switching between applications, and better performance in memory-intensive tasks like photo editing, light video work, or running virtual machines. It’s a cost-effective way to extend the useful life of a perfectly good machine that’s just struggling under the weight of modern software.
The process of physically installing the RAM module is often straightforward, but the critical work happens *before* you even pick up a screwdriver. Rushing into the installation without proper planning is the fastest route to a broken component or a non-booting laptop. This guide will prioritize safety and preparation as much as the mechanical steps. Remember, the goal isn’t just to insert a stick of memory; it’s to successfully achieve a stable, recognized, and performance-boosting upgrade.
Phase One: The Critical Preparation & Compatibility Check
This phase is non-negotiable. Skipping it risks buying incompatible RAM or damaging your laptop. Think of it as studying a map before a road trip.
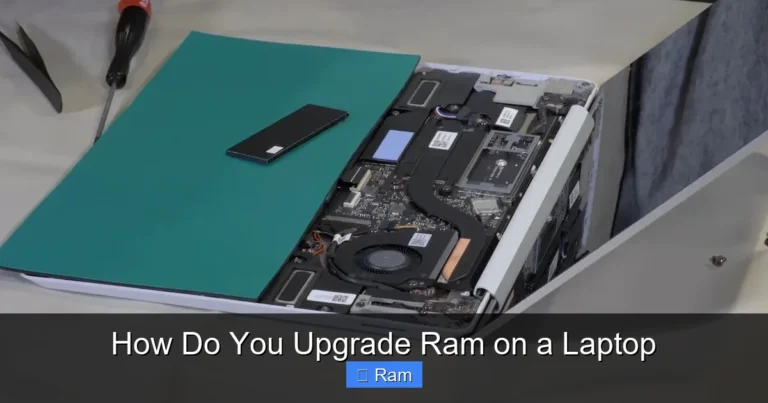
Visual guide about How to Insert Laptop Ram
Image source: brik.co
Step 1: Identify Your Laptop’s Exact Model
Flip your laptop over. You’ll find a sticker, usually on the bottom or sometimes under the battery, with a model number. It might look like “Dell XPS 13 9310,” “HP Pavilion 15-ek1xxx,” “Lenovo ThinkPad T14 Gen 3,” or “Apple MacBook Pro 13-inch, 2020.” This exact model string is your golden ticket. Write it down or take a photo. This is what you’ll use to search for specifications.
Step 2: Research Maximum Supported RAM and Type
Take your exact model number to the manufacturer’s support website. Look for the ” specifications,” “tech specs,” or “upgrade guide” page. Here you will find the definitive answers to three questions:
- What type of RAM? It will be DDR3, DDR4, DDR4L (low voltage), DDR5, or for Apple, sometimes proprietary modules. This is the most basic compatibility factor.
- What is the maximum supported RAM? Your laptop’s chipset and BIOS have a hard limit. Common limits are 16GB, 32GB, 64GB, or even 128GB. You cannot exceed this, even if you install a larger module.
- How many slots are available? Most laptops have two slots. Some ultrabooks have one slot with one module soldered to the motherboard. Some gaming laptops have four. Knowing the slot count tells you if you can add to existing RAM or must replace it.
Pro Tip: Use a trusted system information tool like CPU-Z (for Windows) or check “About This Mac” (for macOS). These tools can often tell you the current RAM type, speed, and slot configuration *before* you open the laptop. However, always cross-reference with the official manual.
Step 3: Purchase the Correct RAM Module(s)
Armed with your laptop’s specs, you can now buy with confidence. You need to match:
- Form Factor: Laptops use SO-DIMM modules, which are smaller than desktop DIMM sticks. Ensure you are buying “Laptop RAM” or “SO-DIMM.”
- Generation (DDR Type): DDR4 and DDR5 are not physically compatible. The notches are in different places. Match exactly.
- Speed (MHz): RAM is rated in megahertz, e.g., 3200MHz, 4800MHz. Your laptop will run all RAM at the speed of the slowest module. It’s best to match the speed of your existing RAM if you’re adding to it. If replacing, get the highest speed your laptop supports.
- Voltage: Standard DDR4 is 1.2V, DDR4L is 1.35V but often works at 1.2V. DDR5 is 1.1V. Mismatched voltage can cause instability.
- Capacity per Stick: Common sizes are 4GB, 8GB, 16GB, 32GB. Ensure the combination (e.g., 1x16GB or 2x8GB) does not exceed your laptop’s maximum.
Buy from reputable brands (Crucial, Samsung, SK Hynix, Micron, G.Skill) and authorized retailers. For peace of mind, use a configurator tool on sites like Crucial.com or Kingston.com where you select your laptop model, and they guarantee compatible RAM.
Step 4: Gather Your Tools and Prepare Your Workspace
You will need:
- A set of small, precision Phillips-head screwdrivers (#0 or #00 are most common for laptops). A good quality set with magnetic tips is invaluable.
- A plastic spudger, pry tool, or even a old credit card. This is for prying open plastic clips without scratching.
- Two small, clean containers or a magnetic parts tray to hold screws (they are often different sizes).
- A soft, lint-free cloth to lay the laptop on.
- Optional but highly recommended: An anti-static wrist strap clipped to a grounded metal object (like a radiator or the center screw of a desktop PC’s power supply).
Your workspace should be clean, well-lit, and non-static. Avoid carpet. Close all programs and shut down your laptop completely. Unplug the charger and any peripherals. If your laptop has a removable battery, remove it now. This is a critical safety step to prevent any electrical current from flowing through the components while you work.
Phase Two: Gaining Access to the RAM Slots
This is where the physical work begins. The method to access the RAM varies significantly by laptop design. Patience is your most important tool here.

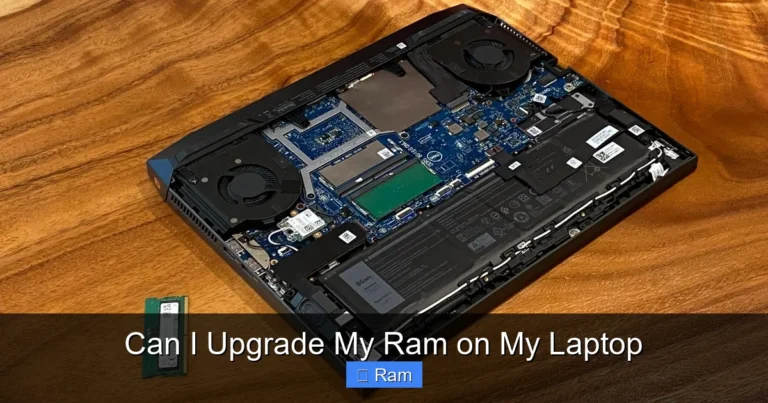
Visual guide about How to Insert Laptop Ram
Image source: down-id.img.susercontent.com
The Easy Path: The Dedicated RAM Access Panel
Many business laptops (Dell Latitude, Lenovo ThinkPad, HP EliteBook) and some consumer models have a small, rectangular access panel on the bottom, secured by one or two screws. This panel is often labeled with a memory module icon (a rectangle with lines). This is the ideal scenario.
- Place the laptop upside-down on your soft cloth.
- Locate the panel. It’s usually near the center or a corner.
- Using the correct Phillips screwdriver, carefully remove the screws. Note their length and position; keep them in your labeled container.
- Gently pry the panel upward with your plastic spudger. It may have clips around the edges. Start at a corner and work your way around. It should pop free with a gentle snap.
Once the panel is off, you should see the RAM modules lying flat, held down by small metal or plastic clips on either side.
The Moderate Path: Removing the Entire Bottom Case
This is common on many modern ultrabooks (Apple MacBooks, some Dell XPS, Microsoft Surface, many ASUS Zenbooks). The entire bottom is one piece, and the RAM is soldered or located under a shield.
- Check for hidden screws: Look carefully. Often, rubber feet hide screws, or there are screws under warranty stickers. Remove all rubber pads (they can be pried up with a spudger). Look for any stickers—if your laptop is under warranty, breaking a sticker might void it, so proceed with caution.
- Remove all visible screws. Again, note their locations and lengths. They are often different.
- Pry gently and evenly. Starting at a seam (often near the hinge or the front edge), insert your plastic spudger and gently rotate to pop the first clip. Work your way around the perimeter. The plastic clips are fragile. Use steady, even pressure. If you feel a solid resistance, you’ve likely missed a screw.
- Once all clips are disengaged, the bottom case should lift off. Be mindful of any ribbon cables (like for the keyboard or touchpad) that might be connected to the bottom case. If you see a cable, do not lift further; you must disconnect it carefully by releasing the connector’s latch.
Warning: On some models, the battery is glued in place. If you see a large, rectangular component with a black casing and wires, that’s the battery. Do not pry it up. If it’s glued, your laptop likely does not have user-upgradeable RAM. Stop here and research further.
The Advanced Path: Keyboard Removal
A few older or specific designs (some older ThinkPads, certain gaming laptops) require removing the keyboard to access the RAM. This is more invasive.
- After removing the bottom case (or a top bezel), locate the keyboard. It is usually held by screws *under* a top cover or secured by clips around the edges.
- Carefully pry the keyboard upward. It will be connected by a delicate ribbon cable to the motherboard.
- Once you have enough slack, flip the keyboard over onto the palm rest or set it aside carefully. Do not strain the ribbon cable.
- The RAM slots are now exposed.
Reinstalling the keyboard can be tricky. Ensure the ribbon cable is perfectly aligned and seated in its connector before snapping the keyboard back into its clips.
Phase Three: Removing the Existing RAM Modules
With the slots visible, the next step is to remove the old memory if you are replacing it or adding to a full slot.
Visual guide about How to Insert Laptop Ram
Image source: guidingtech.com
Understanding the Retention Mechanism
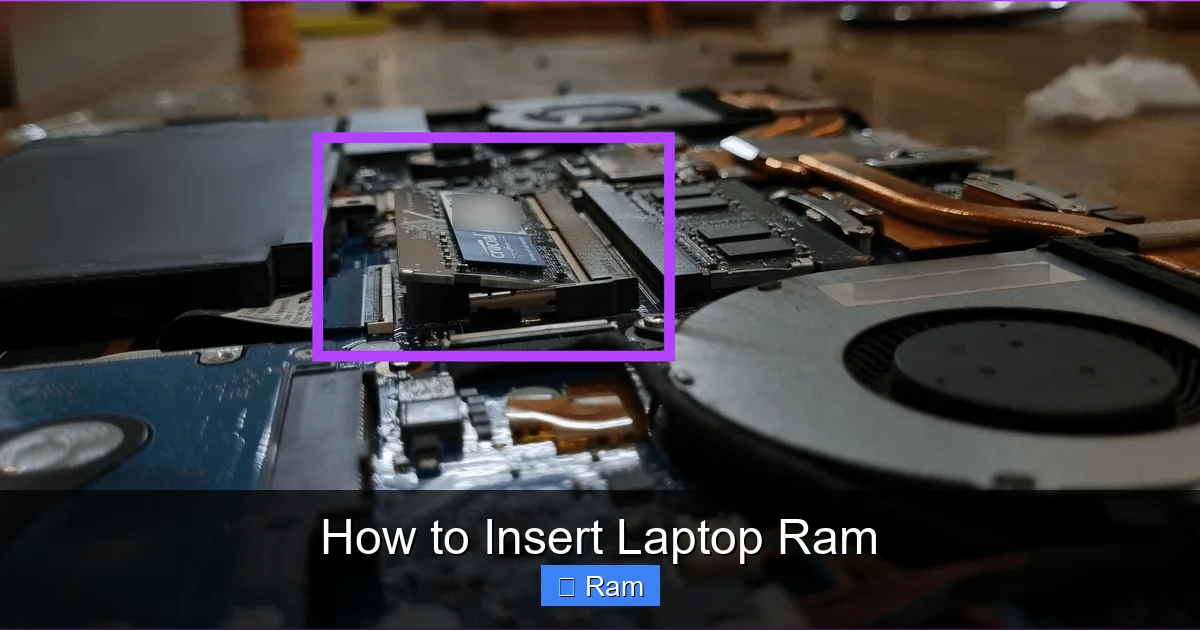
Laptop RAM is held in place by small metal clips on either side of the module. These clips have two functions: they grip the notches on the sides of the RAM stick and, when pushed outward, they release the stick. The module sits at a slight angle in the slot and is then pressed down flat, where the clips snap back into place.
The Safe Removal Process
- Observe the clips: Note their position. They are usually gold or silver metal arms.
- Push the clips outward, away from the module, on both sides simultaneously. Use your fingers or the tip of your plastic spudger. You need to apply gentle but firm pressure. The clips will move outward and away from the sides of the RAM stick. You should feel a slight give.
- The module will pop up: As the clips disengage, the module will spring upward from the angled position to a roughly 45-degree angle. It will now be loose in the slot.
- Grasp the module by its edges: Do not touch the gold contacts (the bottom edge) or the chips on top. Hold it firmly by the non-contact sides.
- Pull it straight out: Gently and steadily pull the module out of the slot at that same 45-degree angle. It should come out easily. If it resists, double-check that both clips are fully disengaged.
Place the removed module on an anti-static bag or your cloth, label it with the laptop model, and store it safely. If you are adding RAM and there is an empty slot, you can skip this removal step for that slot.
Phase Four: Installing the New RAM Modules
This is the moment of truth. The process is essentially the reverse of removal, but precision is key.
Aligning the Module Correctly
This is the most common point of failure. Look at the notch on the bottom of the RAM module (the part with the gold contacts). There is a corresponding key—a slightly raised, non-conductive plastic block—in the RAM slot on the motherboard. The notch on the RAM must align perfectly with this key. You cannot force it. If it doesn’t line up, rotate the module 180 degrees. It will only fit one way. Forcing a misaligned module will bend the pins in the slot, causing permanent damage.
The Seating Process
- Hold the new RAM module by the edges, at a 45-degree angle, with the gold contacts pointing toward the slot.
- Gently insert the module into the slot. The gold contacts should slide smoothly into the slot’s grooves. Do not force. If it resists, pull it out and check the alignment again.
- Once the contacts are fully inserted (the module is about 1/2 to 2/3 in the slot), press down firmly and evenly on the top edge of the module. Your goal is to press it straight down until it lies flat against the laptop’s chassis or the slot’s housing.
- Listen and feel for the click: As you press the module down, the two retention clips on the sides will automatically pivot inward and snap into the small notches on the sides of the RAM stick. You should hear and feel a distinct, satisfying click on both sides. This is the confirmation that it’s properly seated and locked.
- Visually inspect. The module should be lying flat, parallel to the motherboard, with no gaps. The clips should be fully closed and gripping the notches.
Important: If you are installing two modules (for dual-channel mode, which boosts performance), install them in the correct slots. Usually, the slots are color-coded (e.g., one black, one blue) or labeled A1/B1 or Channel 1/Channel 2. Consult your laptop’s service manual for the correct pairing. If unsure, install them in the two slots; the BIOS will usually sort it out, but following the manufacturer’s recommendation is best.
Phase Five: Reassembly and The All-Important Test
Do not celebrate and close up the laptop yet. You must verify the RAM is recognized before final reassembly.
Initial Power-On Test (No Full Reassembly)
At this point, you likely have the bottom panel off or the case open.
- If you removed the battery, reinsert it now (or ensure it’s properly connected if it’s internal).
- Connect the AC adapter.
- Do NOT close the case yet. Keep it open so you can easily re-access the RAM if there’s a problem.
- Power on the laptop.
If it powers on normally, great. If it beeps in a pattern or fails to power on, you likely have a loose connection or incompatible RAM. Immediately power off, disconnect the charger, and re-check the installation.
Verifying the RAM in the Operating System
Once the laptop boots to your desktop:
- On Windows: Right-click the Start button and select “Task Manager.” Go to the “Performance” tab and click on “Memory.” At the top right, it will show the total installed RAM (e.g., “16.0 GB”). It should match your new total. You can also go to Settings > System > About > Device specifications.
- On macOS: Click the Apple menu > About This Mac. The memory line will show the total RAM (e.g., “16 GB 3200 MHz”).
- Use a diagnostic tool: Download and run CPU-Z (free). Go to the “Memory” and “SPD” tabs. The SPD tab will show details for each individual slot, confirming each module’s size, type, and speed. This is the most thorough check.
If the system shows the correct total RAM and no errors, you’re good. If it shows less than you installed (e.g., you installed 16GB but it shows 8GB), one module may not be seated properly. Power down, re-seat the modules, and try again.
Final Reassembly
Once the RAM is confirmed working:
- Power down and disconnect the charger.
- Carefully route any cables you may have disconnected (keyboard, battery) back into place. Ensure they are not pinched.
- If you removed the entire bottom case, align it carefully. Start by snapping the clips around the edges into place. Do not screw it down yet.
- Apply even pressure around the perimeter to ensure all clips are engaged. You should hear a series of small clicks.
- Once the case is flush, reinsert all screws in their correct holes. Do not overtighten; snug is sufficient. Plastic threads can strip easily.
- If you had a dedicated RAM access panel, simply place it back and screw it in.
- Reattach any rubber feet.
Reconnect the charger and power on your laptop for a final test. Let it boot fully and check the RAM information again to be absolutely certain.
Phase Six: Troubleshooting Common Post-Upgrade Issues
Even with careful work, you might encounter a hiccup. Here’s a guide to the most common problems.
Issue: Laptop Powers On But Shows No Display (Black Screen)
Likely Cause: RAM not properly seated is the #1 culprit. Incompatible RAM is the second.
Solution: Power down, disconnect, open the case. Remove *both* new modules. Reinstall the old RAM you saved. If the laptop now boots, the new RAM is either faulty, incompatible, or not seated correctly. Re-seat the new modules one at a time, testing after each. If one module causes the black screen when installed alone, that module is defective. If both work individually but not together, you may have a dual-channel compatibility issue, or one slot is faulty.
Issue: System Recognizes Less RAM Than Installed
Likely Cause: Most common with 4GB+ modules in older systems with a 32-bit OS or BIOS limitation. A 32-bit Windows can only use ~3.2GB of RAM total. Also, some older systems have a “memory hole” issue where certain memory addresses are reserved for hardware.
Solution: Ensure you are running a 64-bit operating system (almost all modern Windows and macOS are). Check your laptop’s official specs for the *usable* RAM limit, not just the maximum supported. Sometimes a BIOS update from the manufacturer’s website can increase the recognized limit.
Issue: System Instability, Crashes, or Blue Screens After Upgrade
Likely Cause: Incompatible speed/timings, faulty RAM, or insufficient voltage (if mixing low-voltage and standard modules).
Solution: Boot into BIOS/UEFI settings (usually by pressing F2, Del, or F12 during startup). Look for memory settings. You may need to manually set the RAM speed to a lower, compatible frequency (e.g., from 3200MHz to 2666MHz). Run a memory diagnostic tool: Windows has “Windows Memory Diagnostic” (search for it in the start menu). For a more rigorous test, use MemTest86 (create a bootable USB). A failing test indicates bad RAM.
Issue: Laptop Won’t Power On At All (No Lights, No Fans)
Likely Cause: A static discharge during handling damaged the motherboard or a component. Or, a critical cable (like the battery connector) was not reconnected properly.
Solution: Double-check all internal connections, especially the main battery connector. It must be fully seated and locked. Disconnect the charger and battery, hold the power button for 30 seconds to drain residual power, then reconnect and try again. If it still doesn’t power on, the damage may be more severe.
Conclusion: The Satisfaction of a Successful DIY Upgrade
Learning how to insert laptop RAM is a fundamental skill for any tech-savvy user. It demystifies your device and gives you direct control over its performance. The process, while methodical, is not inherently difficult. Its success hinges 90% on preparation: knowing your laptop’s limits, buying the right parts, and creating a static-safe workspace. The physical act of clicking the module into place is quick, but the knowledge you gain is permanent.
By following this guide, you’ve not only saved money on a professional service call but also gained a deeper connection to your machine. You’ve overcome the initial hesitation of opening your valuable laptop and emerged with a faster, more responsive tool. Remember the core principles: compatibility first, static safety always, and gentle, patient force. Now, close up your laptop, boot it up, and feel the difference. That faster load time, that seamless switch from your browser to your document—that’s your handiwork. You’ve successfully inserted new life into your laptop.
Frequently Asked Questions
Can I mix RAM brands and sizes?
Technically yes, but it’s not recommended for optimal performance. Mixing sizes (e.g., 8GB + 16GB) will work in flex mode, but you lose the performance benefit of dual-channel mode for part of the memory. Mixing speeds will cause all RAM to run at the speed of the slowest module. For best results, use identical modules from the same kit (same brand, model, size, speed).
What happens if I install RAM that’s too fast for my laptop?
The RAM will simply downclock itself to the highest speed your laptop’s memory controller (integrated into the CPU) supports. For example, installing 4800MHz DDR5 in a laptop that only supports 3200MHz will result in the RAM running at 3200MHz. It won’t damage anything, but you’ll be paying for speed you can’t use.
Do I need to update my BIOS before installing new RAM?
It’s a good practice, but not always mandatory. Check your laptop manufacturer’s support page. Sometimes a BIOS update adds support for higher-capacity modules or newer memory standards. Updating the BIOS *with the old RAM still installed* is the safest procedure, as a failed BIOS update with new, untested RAM can be riskier.
Can I upgrade RAM on a laptop with a soldered module?
If one RAM module is soldered to the motherboard, you can only upgrade if there is also a free SO-DIMM slot. You can add a module to that slot, but it must match the type, speed, and ideally capacity and timings of the soldered RAM for best stability. If *all* RAM is soldered (common in many modern ultrabooks), the RAM is not upgradeable.
How much performance gain can I realistically expect from a RAM upgrade?
If you are upgrading from 4GB to 8GB or 16GB, the difference is night and day. The system will stop swapping to disk constantly. If you are already at 16GB and upgrade to 32GB, you’ll only see a benefit if you regularly run heavy applications like virtual machines, large Photoshop files, or video editing projects. For general web browsing and office work, 16GB is often sufficient.
Is there any software to configure the new RAM after installation?
No. RAM configuration (speed, voltage, timings) is handled automatically by the motherboard’s BIOS/UEFI based on the SPD (Serial Presence Detect) data stored on the RAM module itself. You should not need to adjust anything manually unless you are overclocking, which is not recommended or often possible on most laptops. Just ensure it’s recognized correctly in your OS.