How to Upgrade Laptop Ram
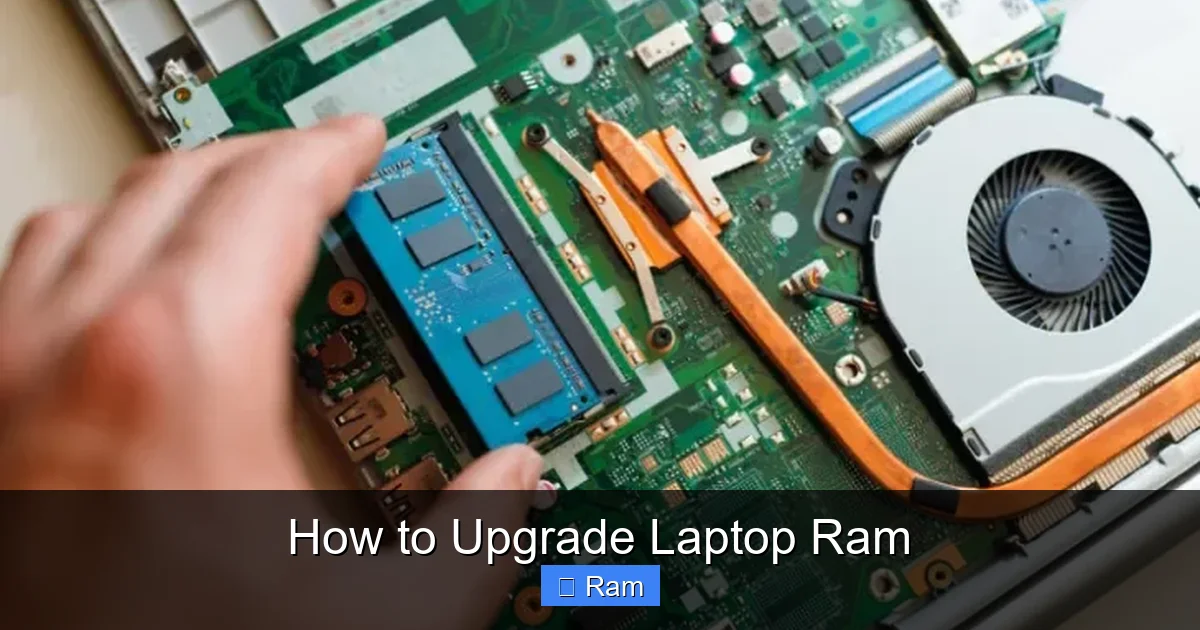
Upgrading your laptop’s RAM is one of the most effective and affordable ways to improve performance, especially for multitasking, gaming, and demanding applications. The process is generally straightforward: you must first verify your laptop’s compatibility, acquire the correct RAM modules, and then carefully install them. Most modern laptops have accessible panels, but some ultrabooks have soldered memory. Always power down, unplug, and ground yourself to prevent static damage. After installation, your operating system should automatically recognize the new memory, often leading to a noticeably snappier system. This guide walks you through every critical step, from checking your current setup to confirming the upgrade succeeded.
Have you ever felt your laptop grumble and groan when you have a dozen browser tabs open, a spreadsheet, and a video call running simultaneously? That frustrating lag is often your system hitting its memory ceiling. The good news? You can often fix this with a simple, cost-effective hardware upgrade. Learning how to upgrade laptop RAM is a valuable skill for any computer user wanting to extend their device’s life and performance. This isn’t just for tech geeks; with the right guidance, almost anyone can do it. Think of RAM as your laptop’s short-term workspace. The more you have, the more tasks it can juggle at once without slowing down. This comprehensive guide will take you from a curious beginner to a confident do-it-yourselfer, covering every single step, nuance, and potential pitfall.
Key Takeaways
- Compatibility is King: The single most important step is confirming your laptop supports a RAM upgrade and identifying the exact type (DDR3, DDR4, DDR5), speed, and maximum capacity it accepts.
- Not All Laptops Are Upgradable: Many modern ultra-thin laptops and some business models have RAM soldered directly to the motherboard, making an upgrade impossible. Always check before buying parts.
- Tools Are Simple: You typically only need a small Phillips-head screwdriver and a plastic pry tool. An anti-static wrist strap is highly recommended for safety.
- Safety First: Always shut down the laptop completely, unplug the charger, and remove the battery if possible. Discharge static by touching a grounded metal object before touching internal components.
- Installation Is Careful, Not Complex: The physical act of installing RAM involves releasing clips, aligning the notch, and pressing firmly until the clips snap back. It requires gentle, even pressure, not force.
- Verification is Crucial: After booting, use system tools (like Windows Task Manager or macOS About This Mac) or third-party software (CPU-Z) to confirm the new RAM is recognized and running at the correct speed.
- Upgrades Have Limits: Adding RAM helps when your system is memory-starved. It won’t fix a slow processor, an old hard drive (HDD), or a failing battery. Consider a full SSD upgrade for a more dramatic overall speed boost.
📑 Table of Contents
- Understanding RAM and Your Laptop’s Limits
- Pre-Upgrade Checklist: Research and Compatibility
- Tools, Safety, and Preparation
- Step-by-Step Disassembly and Installation
- Post-Upgrade: Verification and Optimization
- Advanced Tips, Troubleshooting, and Common Pitfalls
- Conclusion: Your Laptop’s New Lease on Life
Understanding RAM and Your Laptop’s Limits
Before you even think about opening your laptop, you need to understand what RAM is and, more importantly, what your specific laptop can handle. Random Access Memory (RAM) is volatile memory used to store data that the CPU needs quick access to. Unlike your hard drive or SSD, which stores data permanently, RAM is cleared when you power off. More RAM means your laptop can keep more application data “in the ready,” reducing the need to constantly swap information to the slower storage drive.
DDR Generations: DDR3, DDR4, DDR5, and Beyond
RAM technology evolves in generations. DDR (Double Data Rate) SDRAM is the standard for laptops. You cannot mix generations; a DDR4 slot will only accept DDR4 modules, and they are physically incompatible. DDR4 is the most common in laptops from about 2015 to 2022. DDR5 is the latest, found in high-end 2022+ models, offering higher speeds and efficiency. Your laptop’s generation is dictated by its motherboard and processor. Using the wrong type simply won’t work. This is why the first step is always identification.
Form Factors: SO-DIMM for Laptops
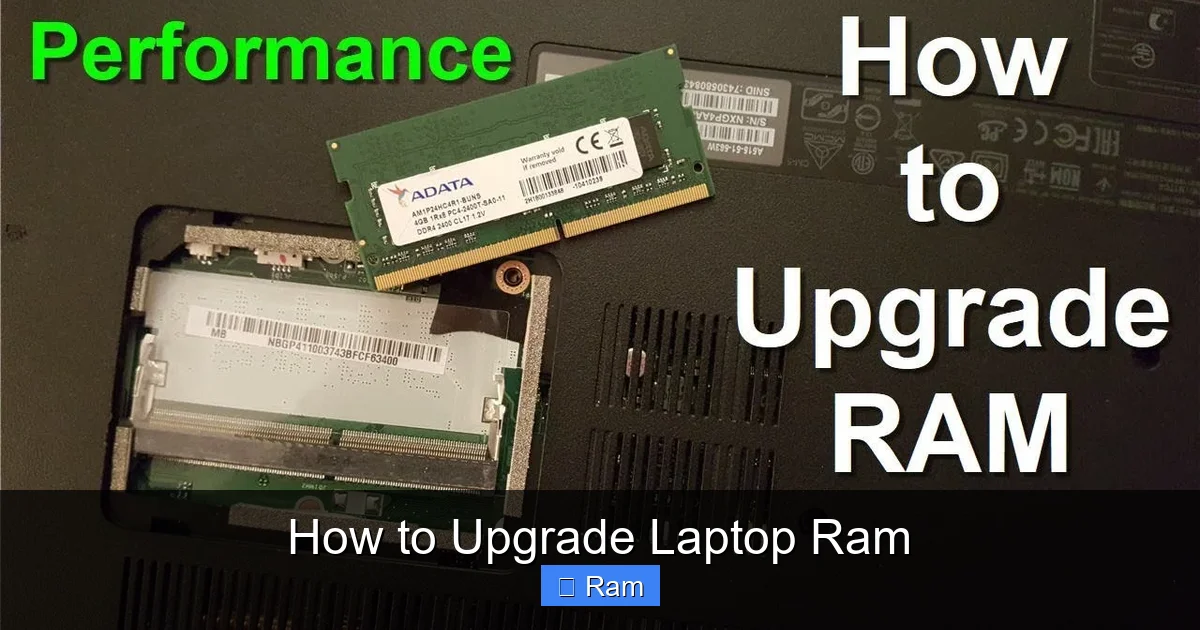
Desktop computers use standard DIMM modules, which are longer. Laptops use SO-DIMM (Small Outline DIMM) modules. They are shorter, about 67mm long, and have a different notch position to prevent accidental insertion into a desktop slot. When you buy laptop RAM, you must specify “SO-DIMM.” All the RAM we discuss for laptops is this form factor.
Speed (MHz) and Timings (CL)
RAM is rated by speed in megahertz (MHz), like 2666MHz, 3200MHz, or 4800MHz. It also has timings, often represented as CL (CAS Latency) numbers like CL16 or CL22. Lower timings are generally better, but speed has a more noticeable impact. Your laptop’s motherboard and CPU will support a maximum speed. If you install faster RAM, it will default to the system’s maximum supported speed (this is called downclocking). It’s usually safe to install faster-rated RAM, as it’s backward compatible, but you won’t get the full speed benefit if your system doesn’t support it.
The Hard Truth: Soldered vs. Slot Memory
This is the make-or-break factor. In the past, almost all laptops had at least one accessible RAM slot. Today, to achieve thinner designs, many manufacturers solder the RAM chips directly onto the motherboard. If your laptop’s RAM is soldered, you cannot upgrade it. There are no slots. The only way to get more memory is to replace the entire motherboard, which is not cost-effective. Typically, budget and ultra-thin laptops (like many Intel “Y-series” or Apple’s M1/M2 MacBooks except the M3 Pro/Max models) have soldered RAM. Gaming laptops, business-class laptops (Dell Latitude, HP EliteBook, Lenovo ThinkPad), and many mainstream consumer models still offer at least one upgradeable slot. You must verify this first.
Pre-Upgrade Checklist: Research and Compatibility
Rushing to buy new RAM is the #1 mistake. You must become a detective and gather three critical pieces of information: your laptop’s exact model, its current memory configuration, and its maximum supported specifications. Here’s your investigative toolkit.
Visual guide about How to Upgrade Laptop Ram
Image source: blog.atdoorstep.ae
Step 1: Identify Your Laptop’s Exact Model
This is non-negotiable. “Dell Inspiron” is not enough; you need “Dell Inspiron 15 5510.” The model number is usually on a sticker on the bottom of the laptop, under the battery (if removable), or in the system information. On Windows, press Windows Key + R, type msinfo32, and hit Enter. The “System Model” field is your goldmine. On a Mac, click Apple Menu > About This Mac. Write this down verbatim.
Step 2: Check Current RAM Configuration
You need to know how many slots are occupied and with what size/speed RAM. On Windows, open Task Manager (Ctrl+Shift+Esc), go to the “Performance” tab, and click “Memory.” Here you’ll see the total speed (e.g., 3200MHz), the form factor (should say ” SODIMM”), and the “In use (Compressed)” vs. “Committed” numbers. For a clearer picture of slots and size, use a free tool like CPU-Z. Go to the “Memory” and “SPD” tabs. The “SPD” tab will list each slot individually. If a slot says “None,” it’s empty and available for an upgrade. If both slots show a module, your only upgrade path is replacing the existing modules with higher-capacity ones (e.g., swapping two 8GB sticks for two 16GB sticks).
Step 3: Find Official Specifications & Maximum Limits
Now, take your exact model number to the manufacturer’s support website. Look for the “Specifications” or “Tech Specs” page, often under a “Support” or “Drivers & Downloads” section. Search for “Memory” or “RAM.” It should list:
- Type: e.g., DDR4 SDRAM
- Speed: e.g., 3200 MHz
- Configurations: e.g., 8GB, 16GB, 32GB
- Maximum Memory: This is the most critical number. e.g., “Up to 64GB.” This tells you the total RAM your laptop’s memory controller can address. If you have 8GB, you can likely install up to 56GB more, but check if it’s two slots (often max is 32GB per slot). Some older systems cap at 16GB or 32GB total.
If the manufacturer’s site is vague, turn to the community. Search for “[Your Exact Laptop Model] RAM upgrade” or “[Your Exact Laptop Model] maximum RAM.” Forums like Reddit’s r/laptop and Lenovo/ Dell/ HP community forums are treasure troves of user-reported successful upgrades. Users will often post exactly what RAM they installed. This is your best source for real-world compatibility, especially for speeds. Sometimes a laptop officially supports 2666MHz but users successfully run 3200MHz modules without issue.
Step 4: Purchasing the Correct RAM
Armed with the knowledge that you need, for example, “DDR4 SO-DIMM, 3200MHz, CL22, 16GB (1x16GB),” you can shop. Buy from reputable brands like Crucial (Micron), Kingston, G.Skill, Corsair, or Samsung. These brands have compatibility tools on their websites (Crucial System Scanner is excellent). It’s safest to buy a single kit (e.g., a 2x16GB kit) rather than two separate sticks, as kits are matched and tested to work together in dual-channel mode. Dual-channel mode (where two identical sticks work in tandem) provides a significant performance boost for integrated graphics and some applications. Ensure the kit is non-ECC, unbuffered memory—standard for consumer laptops. Check the return policy before purchasing.
Tools, Safety, and Preparation
You have your compatible RAM. Now, prepare your workspace and yourself. A clean, well-lit, static-free area is essential.
Visual guide about How to Upgrade Laptop Ram
Image source: i.ytimg.com
The Essential Toolkit
- Small Phillips-head screwdriver (#0 or #1): This is your primary tool. Some laptops use Torx screws; check your laptop’s screws first.
- Plastic pry tool or spudger: For carefully prying open plastic clips on the bottom cover without scratching. A old credit card can work in a pinch.
- Anti-static wrist strap (Highly Recommended): Connects to a grounded metal object (like an unpainted radiator or the metal frame of a desktop PC) to discharge any static electricity from your body. Static discharge can instantly and silently destroy sensitive electronics.
- Small container or magnetic mat: To keep screws organized and prevent them from rolling away.
- Can of compressed air: To blow out dust from the RAM slots and heatsink fins while you’re inside. Dust buildup is a major cause of overheating.
The Golden Rules of Laptop Safety
- Power Down Completely: Do not just sleep or hibernate. Shut the laptop down fully via the operating system.
- Unplug EVERYTHING: Remove the charger, any USB devices, docks, external monitors, and SD cards.
- Remove the Battery if Possible: This is the single best way to ensure zero power. If the battery is internal and not easily removable, this step is skipped, but the next steps become even more critical. If it’s a removable bay-style battery, take it out.
- Discharge Static: Before touching any internal components, press the power button for 5-10 seconds after unplugging. This drains residual power from capacitors. Then, touch a grounded metal object (like the metal screw on a light switch plate) or wear your anti-static strap.
- Work on a Non-Conductive Surface: A wooden table or a rubber mat is ideal. Avoid carpets and metal surfaces.
- Handle RAM by the Edges: Never touch the gold contacts (the bottom edge) or the black chips on the stick. Oils from your fingers can corrode contacts over time. Hold it by the top, non-contact edges.
Step-by-Step Disassembly and Installation
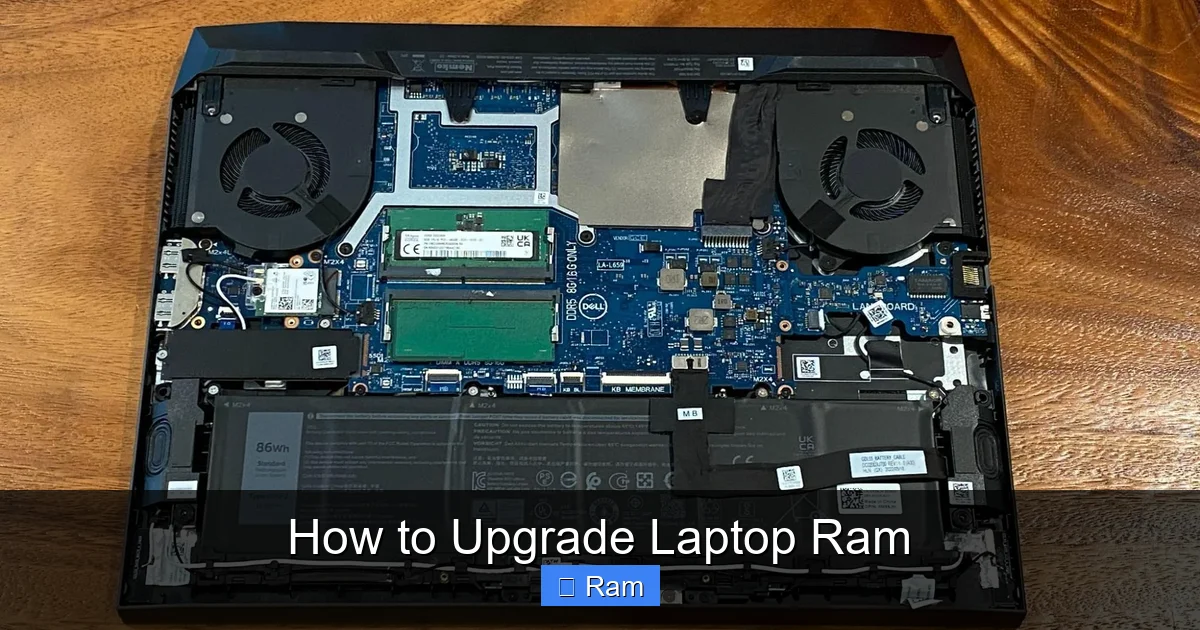
Now, the moment of truth. Every laptop is different, but the general principles are the same. We’ll focus on the most common scenario: a bottom access panel with a dedicated RAM slot.
Visual guide about How to Upgrade Laptop Ram
Image source: cdn.mos.cms.futurecdn.net
1. Locate and Remove the Bottom Access Panel
Flip the laptop over. Look for a large rectangular or square panel, often held by 6-10 screws. Sometimes it’s a smaller panel specifically over the RAM/SSD area. The panel may have small icons embossed next to screws (a cylinder for HDD, a memory chip for RAM). Important: Before unscrewing anything, note the length and position of each screw. Screws in different locations can be different lengths. Using a long screw where a short one belongs can damage the motherboard. A trick: place the removed screws on a piece of paper and draw a simple map of their holes.
Gently insert your plastic pry tool into the seam around the panel. Work your way around, releasing plastic clips. They will make a popping sound. Be patient; force will crack the plastic. Once all clips are free, lift the panel off. You may need to wiggle it slightly.
2. Locate the RAM Slots
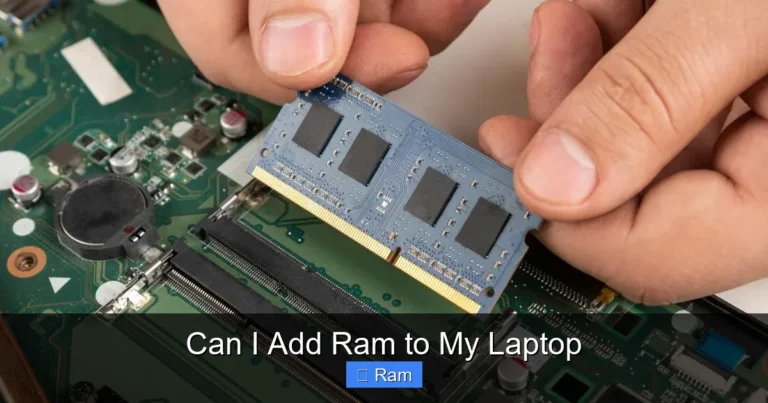
Inside, you’ll see the motherboard. The RAM slots are easy to spot: they are small, about 1.5 inches long, with two small notches on the bottom and metal clips on either side. They are often located near the center or a corner, sometimes under a small piece of shielding tape or a metal bracket. If you see two slots, both may be occupied, or one may be empty. If you see no slots but see small, square chips soldered next to each other, your RAM is soldered—stop here. You cannot proceed.
3. Remove Existing RAM (if replacing or freeing a slot)
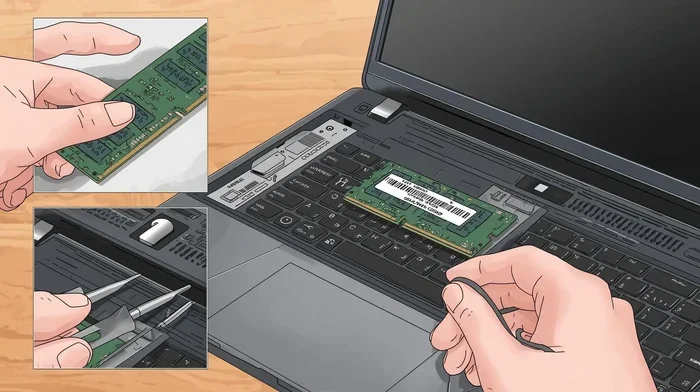
To remove a RAM stick, you must pry the two metal retention clips on either side outward. They are usually spring-loaded. Gently and evenly pry both clips away from the module. The stick will pop up at an angle, usually about 30 degrees. Grasp it by the edges and pull it straight out. Place it in your anti-static bag. If you are adding to an empty slot, skip this step.
4. Install the New RAM Module
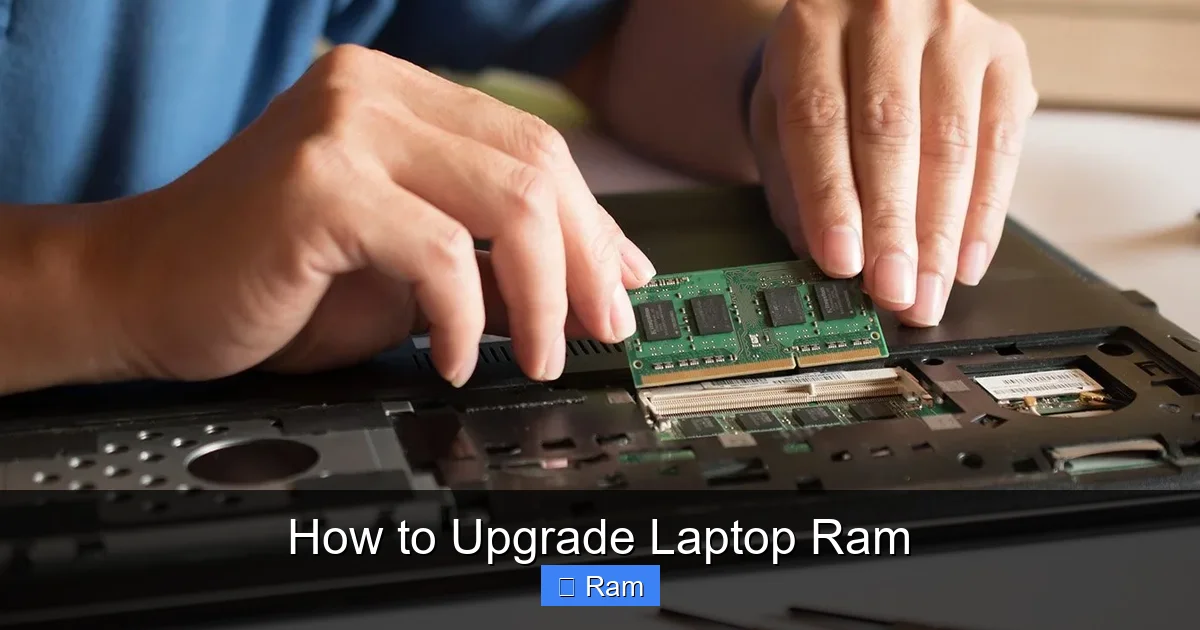
This is the delicate part. Take your new RAM stick. Look at the bottom edge. You’ll see one or two notches. These notches must align perfectly with the raised keys in the RAM slot. Do not force it. Hold the stick by the edges, align it, and place it in the slot at the same 30-degree angle the old one came out at. Press down firmly and evenly on the top edge of the module until the retention clips snap into place and lock the stick flat. You should hear/feel two distinct clicks. If it doesn’t go all the way down, realign it—the notches are probably misaligned. Never use excessive force.
5. Reassemble and Power On
Double-check that the RAM is seated flat and the clips are fully engaged. If you removed any shielding, put it back. Carefully place the bottom panel back on, aligning it with the screw holes. Press around the edges to reseat all the plastic clips. Reinstall all screws, using your map to ensure the correct screws go in the correct holes. Don’t overtighten; snug is sufficient. If you removed the battery, reinstall it now. Plug in the charger, but don’t connect any other peripherials yet. Press the power button.
Post-Upgrade: Verification and Optimization
If your laptop powers on normally, great! But the job isn’t done. You must confirm the system sees and is using the new memory correctly.
Initial Boot and BIOS/UEFI Check
On the first boot after an upgrade, the system may perform a memory check (which can take a minute). This is normal. To enter the BIOS/UEFI settings (where hardware is initialized), press the designated key (often F2, F10, F12, Del) during startup. Once in the BIOS, navigate to the “System Information,” “Main,” or “Advanced” tab. You should see the total memory listed correctly (e.g., “System Memory: 16384 MB” for 16GB). This is the most fundamental confirmation that the hardware is recognized at the firmware level.
Verification in the Operating System
Boot into your OS. On Windows 10/11, right-click the Start button and select “Task Manager.” Go to the “Performance” tab and click “Memory.” The top right should show the correct total (e.g., 16.0 GB). It will also show the “Speed” (e.g., 3200 MHz) and “Form factor” (SODIMM). If the speed is lower than your RAM’s rated speed, your system may be downclocking it, which is normal if your CPU/motherboard doesn’t support the higher speed. On macOS, click Apple Menu > About This Mac > Memory. It will list the total memory and sometimes the type/speed. For a deep dive, use CPU-Z (free download). Go to the “Memory” and “SPD” tabs. The “SPD” tab will show details for each individual slot, confirming each stick’s size, speed, and manufacturer.
Running a Memory Test
While rare, faulty RAM or a bad installation can cause system instability—crashes, blue screens, random reboots. To be thorough, run a memory diagnostic. Windows has a built-in tool: search for “Windows Memory Diagnostic,” run it, and choose “Restart now and check for problems.” It will reboot and run a test, which can take 10-20 minutes. For a more rigorous test, use MemTest86 (free). You create a bootable USB drive with it, boot from that USB, and let it run for several hours. A clean run with zero errors is the gold standard for a successful upgrade.
Performance Expectation and Monitoring
What difference should you expect? If you were previously maxing out your RAM (Task Manager showed 90-100% usage constantly), you should see a dramatic improvement. Applications will launch faster, you can keep more browser tabs open without slowdowns, and large files (like video projects or huge spreadsheets) will be more responsive. For general web browsing and office work, the difference might be subtle but still present in smoothness. Use Task Manager to monitor your “Memory” usage during your typical workflow. You should now see a much lower percentage used for the same tasks. If you still see high usage, your bottleneck might be your storage drive (upgrade to an SSD!) or your processor.
Advanced Tips, Troubleshooting, and Common Pitfalls
Even with careful preparation, things can go wrong. Here’s how to diagnose and fix common issues, and some pro-tips for the ambitious.
“My Laptop Won’t Boot After Installing RAM”
This is the most common panic. First, don’t panic. Power off immediately. The most likely cause is that the RAM isn’t fully seated. Reseat the module: remove it, blow out any dust from the slot with compressed air, and reinstall it with firm, even pressure until the clips click. If you have two new sticks, try installing only one at a time in each slot to identify a potentially faulty module. Also, ensure you didn’t accidentally disconnect a tiny ribbon cable (like for the keyboard or touchpad) while opening the case.
“The System Only Sees Part of the RAM”
For example, you installed 32GB (2x16GB), but Windows only shows 16GB. Causes: 1) One stick is not properly seated. Reseat both. 2) You have a 32-bit version of Windows (extremely rare on modern laptops). A 32-bit OS can only address ~3.5GB. You must install a 64-bit OS. 3) A hardware limitation. Re-check your laptop’s maximum RAM specification. You may have exceeded it. 4) A faulty RAM stick. Test one stick at a time.
“The RAM Speed is Lower Than Advertised”
As mentioned, this is often normal. The memory controller (in your CPU) has a maximum supported speed. If you buy 4800MHz RAM but your CPU only supports 3200MHz, it will run at 3200MHz. In rare cases, especially with older systems, you may need to manually enable an XMP/AMP profile in the BIOS to achieve the rated speed. However, most modern laptops run JEDEC standard speeds automatically and do not support XMP profiles. Buying faster RAM is mainly for future-proofing or if you know your specific model can run it.
Upgrading When All Slots Are Occupied
If your laptop has two slots and both are filled (e.g., with 2x4GB = 8GB total), your path is to replace both modules with a higher-capacity matched kit (e.g., 2x16GB = 32GB total). You cannot simply add another stick to a full system (unless it has a third slot, which is very rare). Always replace in pairs for dual-channel performance. Sell the old sticks on eBay or keep them as spares.
The “No Access Panel” Scenario: Clamshell or Ultrabook
Some laptops, particularly Apple’s MacBooks with Retina displays or certain ultrabooks, require removing the entire bottom case, which is glued or has many more screws. This is a much more invasive and risky procedure. If you are not extremely confident, seek professional help. The risk of breaking plastic clips or damaging internal components is high. For glued-bottom models (like many MacBooks), you need a heat gun or iOpener to soften the adhesive, and specialized tools like suction cups and plastic cards. This is not a beginner project.
When to Consider a Professional or a New Laptop
If your laptop is very old (more than 7-8 years), has a slow dual-core processor, or a mechanical hard drive (HDD), adding RAM will help but won’t make it feel like a new machine. The biggest single upgrade for an old, slow laptop is replacing an HDD with a SATA or NVMe SSD. If your laptop has soldered RAM and you need more memory, your only options are to sell it and buy a new one with more RAM or, in extreme cases, replace the entire motherboard—a cost that approaches buying a new laptop. Also, if your laptop is still under warranty, opening it will likely void that warranty. Check the warranty terms first.
Conclusion: Your Laptop’s New Lease on Life
Learning how to upgrade laptop RAM empowers you as a computer owner. It demystifies one of the most common hardware upgrades and saves you money compared to buying a new machine or paying a shop. The process is a logical sequence: research your exact model, buy the right parts, prepare your workspace with safety in mind, execute the physical swap with care, and verify the results. The feeling of hearing your laptop boot faster, seeing more browser tabs stay responsive, and experiencing smoother multitasking is incredibly rewarding. You’ve not only saved money; you’ve gained a deeper understanding of your tool and reduced electronic waste. Remember the golden rule: compatibility comes first. Take your time with the research phase, and the physical installation will be a simple, satisfying step. Now, go forth and give your laptop the memory boost it deserves!
Frequently Asked Questions
Can I upgrade the RAM on any laptop?
No. Many modern ultra-thin laptops and some business models have RAM soldered directly to the motherboard, which cannot be upgraded. You must check your specific laptop model’s specifications before purchasing any RAM.
How much RAM can my laptop support?
This limit is set by your laptop’s motherboard and processor. You can find the official maximum in your manufacturer’s specifications sheet. For example, it might state “64GB max.” Community forums are also excellent sources for real-world reports of successful higher-capacity installations.
What’s the difference between DDR4 and DDR5 laptop RAM?
DDR5 is the newer, faster generation offering higher speeds and improved efficiency. However, it is physically and electrically incompatible with DDR4 slots. Your laptop’s CPU and motherboard dictate which generation it supports. You must match the generation exactly.
Do I need to worry about static electricity?
Absolutely. Static discharge can permanently damage RAM and other components. Always shut down, unplug, remove the battery if possible, and discharge static by touching a grounded metal object before touching internal parts. Using an anti-static wrist strap is the safest practice.
Will my operating system automatically recognize the new RAM?
Yes, in almost all cases. Modern operating systems like Windows and macOS have plug-and-play support for memory. After a successful physical installation and boot, the OS will detect the new total memory automatically. You may need to enter the BIOS/UEFI once to confirm the change, but no driver installation is typically needed.
Will adding more RAM make my laptop faster for games?
It can, but only if your game is being held back by lack of memory (causing stuttering or long loading times). If your laptop has a weak integrated GPU (like Intel UHD Graphics) or a low-end dedicated GPU, more system RAM can significantly improve performance because integrated graphics share the system RAM. However, if your bottleneck is an old or slow CPU or GPU, more RAM will have little to no effect on game frame rates.