How to Install Ram in Laptop
Upgrading your laptop’s RAM is one of the most cost-effective ways to boost its performance, and you can often do it yourself in under 30 minutes. This guide walks you through every critical step, from identifying the correct memory type to safely installing the new modules. By following proper procedures for preparation, static safety, and physical installation, you can breathe new life into an older machine or optimize a new one for demanding tasks without paying for a professional service.
Is your laptop feeling sluggish? Do you wait impatiently for web browsers with dozens of tabs to respond or for large files to finish processing? Before you start saving for a brand-new computer, there’s a powerful and surprisingly affordable upgrade you can often perform yourself: installing more RAM. Random Access Memory, or RAM, is your system’s short-term workspace. The more you have, the more applications and data your laptop can juggle at once without slowing down to a crawl. Knowing how to install RAM in a laptop is a valuable skill for any tech-savvy user, saving you money and extending the useful life of your device by years. This comprehensive guide will take you from a curious beginner to a confident upgrader, covering every detail you need to know to complete this task successfully and safely.
Key Takeaways
- Compatibility is King: Your laptop requires specific RAM types (DDR3, DDR4, DDR5), speeds (MHz), and form factors (SODIMM). Always verify your laptop’s exact specifications before purchasing any memory.
- Static Electricity is a Silent Killer: Always use an anti-static wrist strap or frequently touch a grounded metal object to discharge static electricity before handling RAM modules or touching internal components.
- Access Varies Drastically: Some laptops have a simple bottom panel secured by screws, while others require complete disassembly or have soldered RAM. Research your specific model’s teardown process beforehand.
- Installation is Delicate, Not Difficult: The physical act of seating RAM involves aligning a notch and applying even, firm pressure until the side clips lock. Never force the module.
- Verification is Mandatory: After installation, always check the system BIOS/UEFI and your operating system’s task manager to confirm the new RAM is recognized and running at the correct speed.
- One Module at a Time: If adding to an existing stick, install the new module in the second slot first, then power on to verify before installing in the primary slot if needed, to isolate potential issues.
📑 Table of Contents
- Understanding Your Laptop’s Memory: The Foundation Before You Start
- Gathering Your Tools and Creating a Safe Workspace
- Step-by-Step: Accessing the Memory Compartment
- The Critical Moment: Installing the RAM Modules
- Closing Up and First Power-On: Verification
- Troubleshooting Common Installation Problems
- Conclusion: Your Laptop’s New Lease on Life
Understanding Your Laptop’s Memory: The Foundation Before You Start
You cannot simply buy any stick of RAM and expect it to work. Laptop memory is highly specific. Jumping into the physical installation without this groundwork is the most common cause of failed upgrades or damaged components. This phase is all about research and compatibility.
Decoding RAM Types: DDR3, DDR4, and DDR5
The first gatekeeper is the RAM generation. DDR (Double Data Rate) technology has evolved through several versions. DDR3 is found in laptops from roughly 2007 to 2015, DDR4 from 2014 to 2020, and the latest DDR5 is now appearing in high-end 2021+ models. They are not physically compatible. A DDR4 slot will not accept a DDR3 module and vice versa. The notches on the modules are in different positions to prevent this mistake. Your laptop’s user manual or a tool like the Crucial System Scanner or CPU-Z (run it on your current system) will instantly tell you which type you need.
SODIMM: The Laptop’s Memory Form Factor
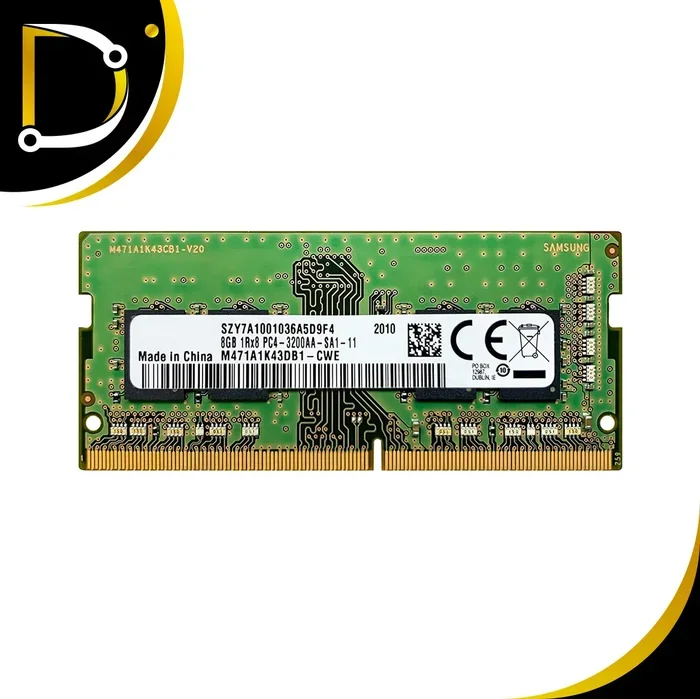
Forget the long, standard DIMM sticks used in desktop PCs. Laptops use SODIMM (Small Outline DIMM) modules. They are about half the length, with a different pin count and notch position. When purchasing, you must select “Laptop Memory” or “SODIMM.” This is non-negotiable.
Capacity, Speed, and Channel Configuration
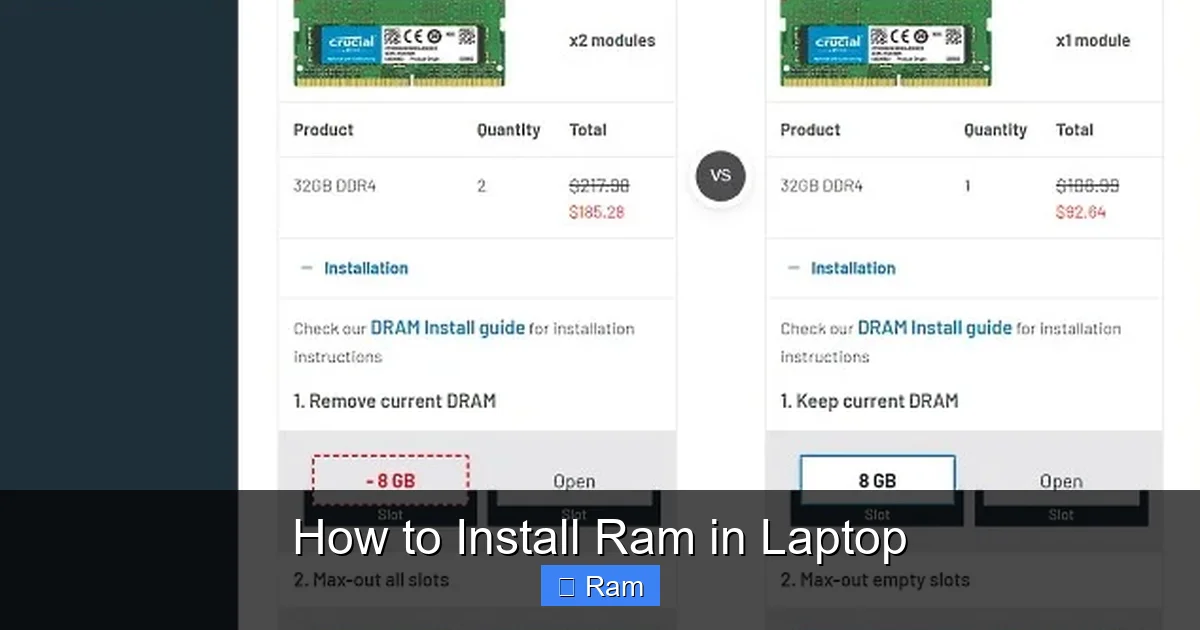
Next, consider capacity. Common sizes today are 8GB, 16GB, 32GB, and 64GB per module. Check your laptop’s maximum supported RAM. A budget ultrabook from 2018 might max out at 16GB total, while a modern mobile workstation could support 64GB or more. Speed, measured in MHz (e.g., 2666MHz, 3200MHz), should ideally match your existing RAM if you are adding to it. A faster module will downclock to the speed of the slowest module in a mixed setup. Finally, understand dual-channel mode. For optimal performance, it’s best to install identical RAM modules (same size, speed, brand) in pairs. If you have one 8GB stick, adding a second identical 8GB stick will enable dual-channel, significantly improving memory bandwidth.
How to Find Your Laptop’s Specifications
So, how do you find this information? Here is your action plan:
- Check the User Manual: The definitive source. Look for the “Memory” or “Specifications” section.
- Use System Information Tools: Press Windows Key + R, type msinfo32, and hit Enter. Look for “Installed Physical Memory (RAM)” and “System Model.” The model name (e.g., Dell XPS 15 9510) is your key to finding official specs online.
- Visit the Manufacturer’s Support Site: Go to the website for your laptop brand (Dell, HP, Lenovo, ASUS, etc.), enter your exact serial number or model, and find the technical specifications or upgrade guide. This will list the maximum RAM, supported types, and often the number of slots.
- Physical Inspection (If Comfortable): If you’re already opening it up, the existing RAM module will have its size and type printed on the label (e.g., “8GB DDR4 2666MHz SODIMM”).
Invest 20 minutes in this research. It will save you from a $100 mistake and a frustrating afternoon.
Gathering Your Tools and Creating a Safe Workspace
With the correct RAM in hand, preparation shifts to tools and environment. A cluttered, static-filled workspace is an invitation for disaster. This section ensures you have everything you need to execute a clean, safe installation.
The Essential Toolkit
You don’t need a full workshop. Here’s what to gather:
- Correct RAM Modules: Your newly purchased, compatible SODIMM sticks.
- Small Phillips Head Screwdriver: The #1 or #0 size is most common for laptop bottom screws. Have a set of precision screwdrivers if possible.
- Anti-Static Wrist Strap (Highly Recommended): This is the single best investment for protecting sensitive electronics. Clip the alligator clip to a grounded metal part of your desk or the laptop’s chassis (once the battery is disconnected, if possible).
- Plastic Pry Tools or a Guitar Pick: For prying open plastic chassis clips without marring the surface. A old credit card can work in a pinch.
- Small Container or Magnetic Mat: To hold screws. Laptop screws are tiny and easy to lose. A compartmentalized parts tray is ideal.
- A Good Light Source: A desk lamp or flashlight to illuminate the often-cramped interior.
- Can of Compressed Air: To gently blow out any dust bunnies from the memory slots and heatsink fins before you begin.
Creating the Ideal Static-Free Zone
Static electricity discharge (ESD) can instantly fry a memory controller or RAM chip without leaving a visible mark. Prevention is absolute.
- Unplug Everything: Disconnect the AC adapter and remove any external devices (USB drives, docks, monitors).
- Remove the Battery (If Possible): This is the most critical safety step. On many modern laptops, the battery is internal and glued in. For those, proceed with extreme caution and ensure the laptop is completely powered off and unplugged. For laptops with a removable battery, take it out. This cuts all primary power.
- Work on a Non-Carpeted Surface: Opt for a wood, glass, or laminate tabletop. Carpets generate static.
- Wear Natural Fibers: Avoid wool or synthetic sweaters that generate static. Cotton is best.
- Use the Wrist Strap: Don’t just have it; use it correctly. Clip it to an unpainted, grounded metal object. If you don’t have a strap, frequently touch the laptop’s bare metal chassis (with the battery removed) to discharge any static buildup from your body.
Documentation and Backup
Before you touch a screw, take two final preparatory steps. First, find and download the official Hardware Maintenance Manual (HMM) or service guide for your exact laptop model from the manufacturer’s support site. It contains the precise, model-specific disassembly instructions and torque specifications for screws. Second, while not always necessary for a RAM upgrade, it is a golden habit to back up your important data before performing any hardware work. The risk is minimal, but it eliminates all worry.
Step-by-Step: Accessing the Memory Compartment
Now, the physical work begins. The process of opening your laptop varies wildly by manufacturer and model. Some are designed for easy user upgrades, while others are sealed fortress-like. Your research from Section 2 will tell you which category yours falls into.
Visual guide about How to Install Ram in Laptop
Image source: robots.net
The “Good” Scenario: A Simple Access Panel
Many business laptops (Dell Latitude, Lenovo ThinkPad) and many consumer models feature a single, large bottom cover secured by 8-12 Phillips screws. There is often a small RAM icon (two stick figures) next to the panel. Here’s the process:
- Remove the Screws: Work systematically. Remove all screws and keep them safe in your labeled container. Note any screws that are different lengths or have a “head” mark; they go back in specific places.
- Pry Gently: Insert your plastic pry tool into the seam along one side. Work your way around the perimeter. You will hear a series of small clicks as plastic retaining clips release. Be patient and firm, but not violent. If a clip breaks, you’ve learned a costly lesson about model selection for your next laptop.
- Lift the Panel: Once all clips are disengaged, the panel should lift off easily. Be mindful of any cables (like for a Wi-Fi antenna) that might be attached to the underside of the panel. If present, they will have tiny connectors; disconnect them carefully by pulling on the plastic tab, not the wire.
The “Challenging” Scenario: Full Disassembly Required
For many ultrabooks, Apple MacBooks, and sleek consumer laptops (like some ASUS Zenbooks or HP Envys), the RAM is under the keyboard or requires removing the entire bottom shell, which is often glued. This is more complex. The HMM is your bible here. The general flow often involves:
- Removing the bottom screws (sometimes hidden under rubber feet).
- Prying off the bottom plate, which may require heat (a hairdryer on low) to soften adhesive.
- Removing the keyboard (often held by more screws and fragile ribbon cables).
- Finally, revealing the motherboard and RAM slots.
If you are uncomfortable with prying glued components or handling delicate ribbon cables, stop. Forcing a glued cover can crack it. For these sealed units, professional installation is often the wisest and safest choice.
Locating the RAM Slots
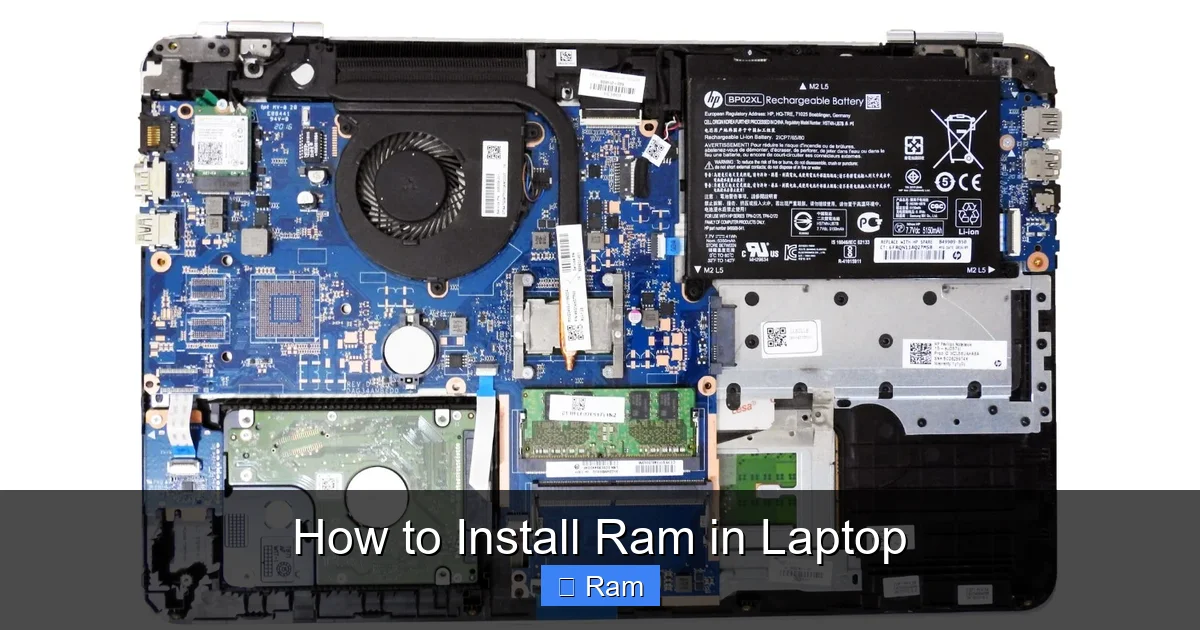
Once inside, locate the RAM. It’s almost always held down by one or two small metal retaining clips on either side of the SODIMM module. The module itself is a green (or black) circuit board with chips on it, held at a 45-degree angle in the slot. There is a key—a small notch in the bottom edge of the module—that must align with a raised bump in the slot. This ensures it only fits one way.
The Critical Moment: Installing the RAM Modules
With the compartment open and the old RAM (if any) visible, we move to the core task. The method differs slightly depending on whether you are replacing old RAM or adding to existing RAM.
Visual guide about How to Install Ram in Laptop
Image source: robots.net
Removing Existing RAM (If Replacing)
If you are swapping out old sticks for new, you must first remove the old ones.
- Fling the Clips Open: Use your fingertips or a plastic tool to gently pry the two retaining clips on either side of the module outward and away from the module. They should pop up to a nearly vertical position. This action physically ejects the module by raising the edges of the slot.
- Tilt and Remove: The module will now pivot up to about a 45-degree angle. Grasp it by the edges (avoid touching the gold contacts or chips) and pull it straight out. It should come free easily. If it resists, ensure the clips are fully disengaged.
- Store the Old RAM: Keep it in its anti-static bag as a backup or for resale.
Installing New or Additional RAM
This is the moment of truth. Handle the new RAM module by the edges. Do not touch the gold contacts or the black chips.
- Align the Notch: Hold the new SODIMM module at a 45-degree angle. Look at the notch on the bottom edge and align it perfectly with the key (the raised bump) in the slot. It will only fit one way. Do not force it.
- Insert with Firm, Even Pressure: Gently slide the module into the slot. The gold contacts should disappear fully into the slot. You will feel a slight resistance as the contacts engage.
- Press Down and Lock: Now, apply firm, even pressure straight down on the top edge of the module until the retaining clips snap back into place, locking the module flat against the motherboard. You should hear/feel two distinct clicks—one from each side. The module should now be parallel to the motherboard and held securely. Do not rock it side-to-side.
Pro-Tip for Adding RAM: If you are adding a second stick to an existing one, consult your laptop’s manual. Often, the second slot is labeled “DIMM 2” or is the slot farthest from the CPU. Install the new module in the empty slot first, power on to verify it works, and then if needed, install the second module in the other slot. This helps diagnose if a bad slot or a bad module is the culprit.
Closing Up and First Power-On: Verification
The hardware work is done. Now, we reverse the disassembly and verify the upgrade worked.
Reassembly: The Reverse Process
Carefully put everything back in the reverse order you removed it.
- Ensure no tools or foreign objects are left inside.
- If you removed a keyboard or other sub-assembly, reconnect any ribbon cables by aligning the connectors and pressing down until they click. Do this before screwing anything down.
- Place the bottom panel back, starting by aligning any screw holes or clip tabs. Press around the edges to seat all plastic clips. You should hear consistent clicking around the perimeter.
- Reinstall all screws. Do not overtighten, especially on plastic parts. Snug is sufficient. Use the correct length screws in the correct holes as noted during removal.
- Reconnect the battery (if you disconnected it) and then the AC adapter.
The First Power-On and BIOS Check
Do not just boot into Windows. Your first boot should be to enter the system BIOS/UEFI. This is the firmware screen that loads before your operating system. Here’s how:
- Power on the laptop and immediately start pressing the designated key repeatedly. Common keys are F2, F10, F12, DEL, or ESC. The correct key is often shown on the splash screen (“Press F2 to enter Setup”).
- Once in the BIOS, navigate using the arrow keys to the “System Information,” “Memory,” or “Advanced” tab.
- Verify that the “Total Memory” or “Installed RAM” reflects your new total capacity (e.g., 16GB instead of 8GB). Also, check the “Memory Speed” to ensure it matches your module’s rated speed (e.g., 3200MHz). If it shows a lower speed like 2666MHz, it may be limited by your laptop’s chipset or an existing slower module.
- If the new capacity is not shown, power off, unplug, and reopen to reseat the module. A poor connection is the most common reason for non-detection.
- Save and exit the BIOS (usually F10). The laptop will reboot.
Verification in the Operating System
Once in Windows, perform a final check:
- Right-click the Start button and select Task Manager.
- Go to the Performance tab.
- Click on Memory in the left pane.
- The top right will show “In use (Compressed)” and “Committed.” More importantly, the bottom right will show “Speed,” “Form factor” (should be SODIMM), and “Hardware reserved.” The “Total” should match your expectation. This confirms the OS sees and is using the new RAM.
Troubleshooting Common Installation Problems
What if it doesn’t work? Don’t panic. Most issues are simple to fix. Here is a diagnostic flowchart for the most common post-upgrade problems.
Problem: The Laptop Won’t Power On At All (No Lights, No Fans)
Diagnosis: This is almost always a short circuit or improperly seated component from the reassembly process.
- Solution: Immediately unplug the AC adapter and remove the battery. Reopen the case. Check that no tools are left inside causing a short. Reseat the RAM modules firmly. Check all cable connections, especially the display and keyboard ribbons. A pinched cable can prevent power-on. Reassemble carefully, ensuring the bottom panel isn’t pinching any wires.
Problem: Laptop Powers On But Shows a Black Screen or Beep Codes
Diagnosis: This is the classic “POST (Power-On Self-Test) failure.” The system detects a critical hardware fault. Beep codes (a series of short/long beeps) are a diagnostic language—look up your laptop manufacturer’s beep code meaning. It usually points to memory.
- Solution: Reseat the RAM. Power off, remove battery, open case, remove the new module, blow out the slot with compressed air, reinsert the module with extra care, ensuring it’s locked down. Try booting with only one module installed (try each slot with each module individually) to identify a bad stick or a bad slot.
Problem: The Laptop Boots But Windows Reports Less RAM Than Installed
Diagnosis: The system sees the physical RAM but reserves some for hardware. However, a significant discrepancy (e.g., you installed 16GB but Windows shows 7.9GB) indicates a problem.
- Solution: First, check the BIOS. If the BIOS shows the correct total, the issue is likely a Windows limitation or driver. Ensure you are running a 64-bit version of Windows (32-bit OS cannot use more than ~4GB). Update your BIOS to the latest version from the manufacturer’s site. If the BIOS also shows incorrect capacity, reseat the RAM. If you have an older laptop with a dedicated graphics card, it may be using a portion of your system RAM as video memory (shared memory), but this is usually only 512MB-2GB, not 8GB.
Problem: The Laptop Runs but is Unstable (Crashes, Blue Screens)
Diagnosis: This often points to a memory timing or voltage incompatibility, especially when mixing old and new RAM.
- Solution: Enter the BIOS. Look for settings related to memory, such as “XMP” (Extreme Memory Profile) or “DOCP.” If you enabled this for high-speed RAM, try disabling it to run at the default JEDEC speed. You can also try manually setting the DRAM voltage slightly higher (e.g., from 1.2V to 1.25V) if comfortable. The best solution is to use a matched pair of RAM modules. If mixing, try running with only the new module to see if the old one is failing.
Conclusion: Your Laptop’s New Lease on Life
Congratulations! By following this guide, you have successfully navigated the entire process of how to install RAM in a laptop, from the initial compatibility research to the final verification in your operating system. You have not only saved yourself a significant service fee but have also gained a deeper understanding of your machine and a valuable, repeatable skill. A RAM upgrade is transformative. That old laptop that struggled with a web browser and a word processor can now smoothly handle photo editing, light video projects, and dozens of browser tabs. It’s the most accessible and impactful performance boost available. Remember the core principles: always prioritize compatibility, never underestimate static safety, and work methodically. Your laptop is now more capable than it was yesterday. Use it well. And if you ever feel in over your head with a particularly sealed chassis, there is no shame in consulting a professional—the goal is a working, faster laptop, not a broken one.
Frequently Asked Questions
Can I install RAM in any laptop?
No. Many modern ultrabooks and some business laptops have the RAM soldered directly to the motherboard, making upgrades impossible. You must first verify your specific model has accessible, user-upgradable SODIMM slots by checking the manufacturer’s specifications or service manual.
Do I need to install RAM in pairs?
For optimal dual-channel performance, installing identical RAM modules in pairs (e.g., two 8GB sticks) is recommended. However, you can install a single module to increase capacity (e.g., adding a 16GB stick to an existing 8GB for a total of 24GB). The system will run in single-channel or asymmetric dual-channel mode, which is still faster than having less total RAM.
What happens if I install RAM that’s too fast for my laptop?
If the RAM’s rated speed (e.g., 3200MHz) exceeds what your laptop’s chipset supports, the module will simply downclock and run at the maximum supported speed (e.g., 2666MHz). It will work perfectly fine, but you won’t get the full advertised speed. You can sometimes force the higher speed in the BIOS if XMP is supported.
Is it safe to install RAM with the laptop plugged in?
It is highly unsafe. You must always disconnect the AC adapter and, if possible, remove the battery. This eliminates all risk of shorting components with live power. Working on a powered or plugged-in laptop can cause immediate and permanent damage to the motherboard or RAM.
How can I tell if my laptop’s RAM is upgradeable without opening it?
Check the official hardware maintenance manual for your exact model number from the manufacturer’s support website. Alternatively, use a system scanner tool like the one from Crucial.com, which will tell you your current RAM configuration and the maximum upgradeable capacity for your specific system.
Will adding more RAM always make my laptop faster?
Not always. If your laptop is slow because it has an old, slow hard drive (HDD) or a weak processor, adding RAM may have minimal effect. RAM upgrades provide the most dramatic benefit when your system is low on memory (consistently using 80%+ in Task Manager), causing it to slow down by using the hard drive as “virtual memory.” If you’re already maxed out at 16GB with light use, jumping to 32GB won’t speed things up noticeably.