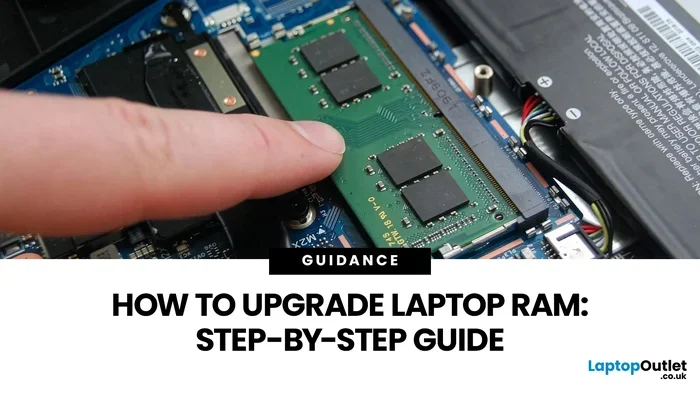
How to Install Ram Laptop
Learning how to install ram laptop is one of the easiest and cheapest ways to boost your computer’s speed. This guide walks you through every step, from choosing the right memory module to safely completing the installation. You do not need to be a tech expert to follow along and get great results.
Upgrading your laptop memory is one of the best ways to make your machine faster and more responsive. If your computer feels slow when you open apps or switch between tabs, how to install ram laptop might be the fix you need. This guide breaks everything down into simple steps you can follow at home.
You do not need expensive tools or technical training. A small screwdriver, an anti-static wrist strap, and about twenty minutes are all you need. Whether you are a student, a remote worker, or just someone who wants a smoother experience, this guide has you covered.
Key Takeaways
- Easy Process: Installing RAM in a laptop is a straightforward task most people can finish in under 30 minutes.
- Right RAM Matters: Choosing the correct type and size of memory ensures compatibility and peak performance.
- Safety First: Always ground yourself and power down your laptop before opening the back panel.
- Check Before You Buy: Use built-in tools or software to verify your current RAM and free slots.
- Common Mistakes Are Avoidable: Simple errors like forcing a module or skipping the ground step can cause problems.
- Post-Install Checks Are Key: Always verify the new memory is recognized after you close everything back up.
📑 Table of Contents
Why You Should Learn How to Install Ram Laptop
Adding memory to your laptop can completely change how it performs. Modern apps, web browsers, and operating systems use a lot of memory. When your laptop runs low, everything slows down. Upgrading gives your machine the room it needs to work smoothly.
Here are some real benefits of upgrading your memory:
- Faster multitasking — Run several apps at once without lag.
- Better browsing — Keep more browser tabs open without freezing.
- Improved video editing — Render and preview clips more quickly.
- Smoother gaming — Games load faster and run more stably.
- Longer laptop life — Delay the need to buy a new computer.
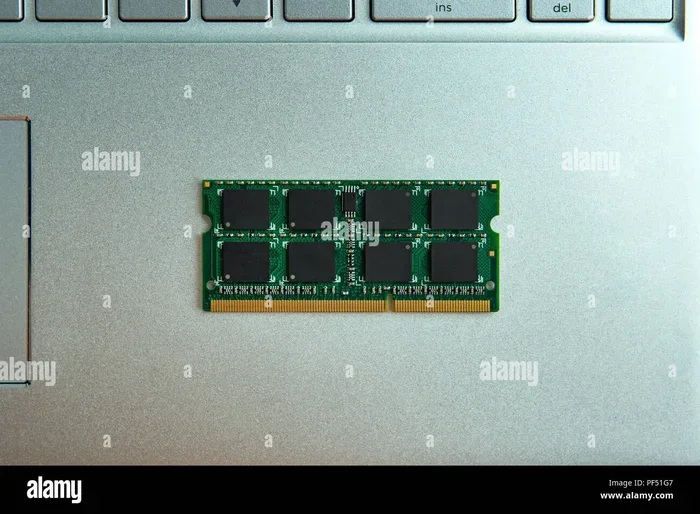
Before you dive into the process, it helps to understand what kind of memory your laptop uses. Most modern laptops use DDR4 SODIMM modules, while older models may use DDR3. The form factor is smaller than desktop RAM, so you need the right type.
Check Your Current RAM
First, find out how much memory your laptop currently has. On Windows, press Ctrl + Shift + Esc to open Task Manager. Click the Performance tab and look at Memory. This tells you your current amount and how many slots are in use.
You can also check by going to Settings, then System, then About. Look for the Installed RAM line. If you want detailed info, you can use a free tool like Crucial System Scanner or CPU-Z. These tools tell you the exact type, speed, and slots available.
Once you know your current setup, you can decide whether you need to check the RAM on your laptop more deeply or move straight to buying new modules.
What You Need Before Starting
Gathering your tools ahead of time makes the whole process smoother. You do not want to stop halfway through because you are missing something. Here is a simple checklist:
- New RAM module — Make sure it matches your laptop’s type (DDR4 or DDR3) and size.
- Small Phillips-head screwdriver — Most laptop screws are tiny, so a magnetic tip helps.
- Anti-static wrist strap — This protects your components from static damage.
- A clean, flat workspace — Use a table with good lighting.
- A soft cloth or mat — This prevents scratches on your laptop.
- Your laptop manual or online service guide — This tells you where the memory slots are.
Pro tip: Buy your RAM from a trusted brand like Crucial, Kingston, or Corsair. These brands offer reliable modules and often have compatibility tools on their websites. Enter your laptop model number and they will show you the exact modules that fit.
Step-by-Step Guide: How to Install Ram Laptop
Now comes the fun part. Follow these steps carefully and you will have your new memory installed in no time.
Step 1: Power Down and Unplug
Turn off your laptop completely. Do not just put it to sleep. Unplug the power adapter and disconnect any external devices like USB drives, mice, or monitors. Remove the battery if your laptop has a removable one. This keeps you safe and protects the internal components.
Step 2: Ground Yourself
Static electricity can damage sensitive parts. Put on your anti-static wrist strap and clip it to a metal part of the laptop frame. If you do not have a strap, touch a metal surface like a doorknob for a few seconds before handling any components.
Step 3: Find the Memory Access Panel
Flip your laptop over and look for a small panel on the bottom marked with a memory icon or labeled “RAM.” This panel is usually held by one or two screws. Use your screwdriver to remove them carefully and keep the screws somewhere safe.
Step 4: Remove the Old RAM (If Needed)
If you are replacing existing modules, gently push the side clips outward. The RAM stick will pop up at an angle. Pull it straight out and set it aside. If you are adding RAM to empty slots, skip this step.
For detailed instructions on removing memory, you can also refer to our guide on how to install ram in laptop which covers removal steps in depth.
Step 5: Insert the New RAM
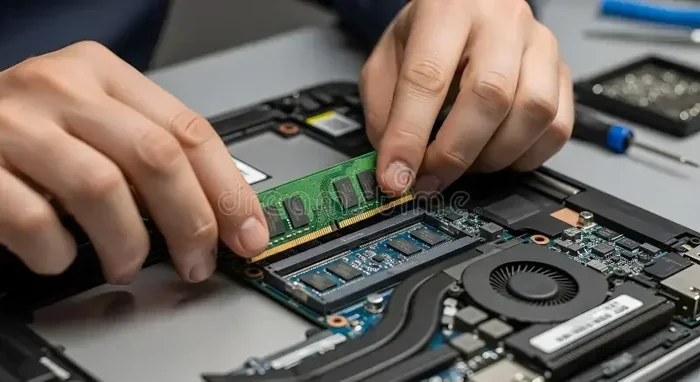
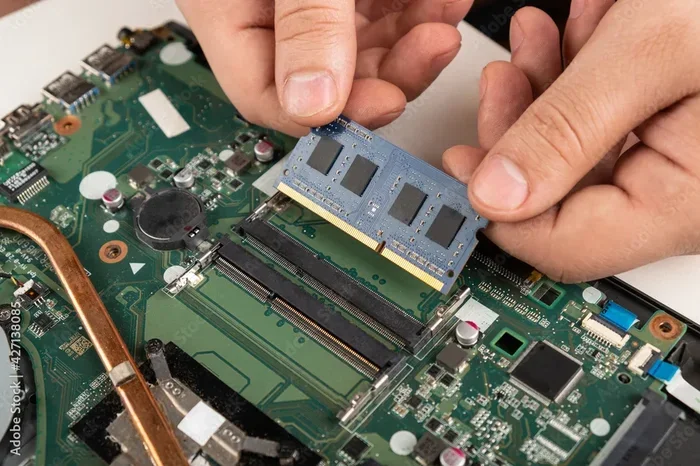
Take your new module out of its anti-static bag. Hold it by the edges — never touch the gold connectors. Align the notch on the bottom of the module with the ridge inside the slot. Insert it at a 30- to 45-degree angle and press down firmly until the side clips snap into place.
You should hear a soft click. This means the module is seated properly. Do not force it. If it does not go in easily, double-check the alignment.
Step 6: Replace the Panel and Boot Up
Put the bottom panel back on and screw it in securely. Reconnect the battery and plug in your power adapter. Turn on the laptop. Once it starts, you should see the full amount of new memory reflected in the system.
To confirm everything is working, go back to Task Manager and check the Memory section. It should now show the upgraded total. If it does, congratulations — your upgrade was a success!
Common Mistakes to Avoid When You Install RAM
Even simple tasks can go wrong if you skip important steps. Here are the most common mistakes people make and how to avoid them.
- Forcing the module in — RAM will only go in one way. Forcing it can bend the pins and ruin both the module and the slot.
- Skipping the grounding step — Static discharge can silently damage memory or other components. Always ground yourself first.
- Buying the wrong type — DDR4 will not fit in a DDR3 slot and vice versa. Always double-check compatibility before purchasing.
- Mixing RAM brands or speeds — While it sometimes works, matching the brand, speed, and size of your existing modules is best for stability.
- Forgetting to reseat the panel — A loose panel can cause rattling and even short circuits. Make sure all screws are tight.
If something goes wrong after installation, do not panic. Try reseating the module — remove it and insert it again firmly. You can also try each module individually in each slot to check for a defective stick or slot.
How to Know If Your Upgrade Worked
After you finish the installation, you want to make sure everything is recognized and running correctly. Here are a few ways to verify your upgrade.
First, check the system information. On Windows, right-click the Start button and select System. Look for the Installed RAM line. It should now show the total amount including your new module.
Second, run a memory test. Windows has a built-in tool called Windows Memory Diagnostic. Search for it in the Start menu and run it. The tool checks for errors and confirms your memory is working properly.
Third, monitor performance. Open a few heavy apps at once and see if your laptop feels snappier than before. If it does, your upgrade has made a real difference.
For more guidance on verifying your setup, you can explore how to upgrade RAM on your laptop with additional tips and tools.
When to Seek Professional Help
Most people can install RAM without any issues. But there are times when it makes sense to get help. If your laptop has a sealed bottom panel that does not come off easily, opening it yourself might void the warranty. In that case, visit a certified service center.
Also, if you try the upgrade and your laptop does not recognize the new memory, the problem might be more complex. A faulty slot or a motherboard issue could be the cause. A professional technician can diagnose this quickly and safely.
How to Get the Best Performance From Your New RAM
Installing the memory is only half the battle. Here are a few tips to make sure you get the most out of your upgrade.
- Install matching pairs — If your laptop has two slots, use identical modules for dual-channel mode. This doubles the data throughput and improves performance.
- Keep your system updated — BIOS updates sometimes improve memory compatibility and stability.
- Close unused apps — Even with more RAM, running too many programs can slow things down.
- Use a SSD — Pairing extra RAM with a solid-state drive gives you the best overall speed boost.
These small steps make a big difference. Your laptop will feel faster, more responsive, and ready to handle whatever you throw at it.
Final Thoughts
Learning how to install ram laptop is a skill that saves you money and time. You do not need to pay a technician or wait days for a repair. With the right tools and a little patience, you can upgrade your memory in under half an hour and enjoy a noticeably faster laptop.
Remember to take your time, follow each step carefully, and always ground yourself before touching any components. If you run into trouble, go back and double-check each step. Most issues are simple fixes that take just a few minutes.
Your laptop is a big investment, and keeping it running well does not have to be hard. A simple memory upgrade can breathe new life into an older machine and delay the need for a costly replacement. So go ahead, grab that new RAM, and give your laptop the boost it deserves.
Frequently Asked Questions
Can I install ram laptop myself without any tech experience?
Yes, absolutely. Installing RAM is one of the simplest laptop upgrades you can do. The process involves just a few steps and requires only a small screwdriver. As long as you follow the guide carefully, you should have no trouble at all.
How do I know which RAM is compatible with my laptop?
Check your laptop manual or visit the manufacturer’s website and enter your model number. You can also use free tools like Crucial System Scanner that automatically detect the right type and size of memory for your machine.
Will installing more RAM void my laptop warranty?
It depends on your laptop and the manufacturer. Some brands consider user-installed RAM as user modification, while others do not. Check your warranty terms before opening the back panel to be safe.
How much RAM do I actually need for everyday use?
For most people, 8 GB is the minimum for smooth everyday use. If you multitask heavily, edit photos, or play games, 16 GB or more will give you a much better experience.
What should I do if my laptop does not recognize the new RAM after installation?
First, try reseating the module — remove it and insert it again at an angle until the clips click. If that does not work, test each module individually in each slot to rule out a defective stick or slot.
Can I mix old and new RAM modules together?
You can, but it is best to match the brand, size, speed, and type of your existing modules. Mixing different RAM can sometimes cause instability or prevent dual-channel mode from working properly.