Nvme Ssd Adapter on Dell T3600 Desktop
Revitalize your aging Dell Precision T3600 workstation by adding a lightning-fast NVMe SSD through a simple PCIe adapter card. This cost-effective upgrade bypasses the slow SATA interface, delivering massive performance gains for boot times, application loading, and file transfers. While the T3600’s PCIe 2.0 bus limits peak NVMe speeds, the improvement over traditional hard drives and even SATA SSDs is profound. Success depends on selecting the correct adapter, understanding BIOS limitations, and proper installation. Follow this comprehensive guide to breathe new life into your reliable workhorse.
Let’s be honest. Your Dell Precision T3600 is a legendary beast. It’s a tank. It was built to chew through CAD, video editing, and scientific simulations a decade ago, and it’s probably still chugging along today. But if you’re reading this, you’ve likely hit the one wall that time can’t always fix: storage. That spinning hard drive or even an old SATA SSD is now the slowest part of your system. You hear about these blisteringly fast NVMe SSDs and think, “Can my old warhorse keep up?” The answer is a resounding yes, and the magic key is a small, inexpensive circuit board called an NVMe SSD adapter. This guide will walk you through everything you need to know to successfully and safely give your T3600 a modern storage heart transplant.
The concept is beautifully simple. Your T3600 doesn’t have a built-in M.2 slot for those gumstick-sized NVMe drives. But it does have a full-size PCI Express x16 slot, originally meant for a high-end graphics card. An NVMe SSD adapter is a tiny card that plugs into that slot and provides an M.2 socket. You slide your NVMe drive into it, secure it with a screw, and voilà—you’ve added the fastest storage interface available to a machine from 2011. It’s not without quirks, especially regarding booting, but as a secondary drive for your OS, games, and projects, it’s a transformative upgrade. Let’s dive into the details.
Key Takeaways
- The T3600’s PCIe 2.0 x16 slot is the key: Your desktop has a full-length PCIe 2.0 x16 slot, which is physically compatible with modern NVMe adapter cards, but it will limit theoretical speeds to about 500 MB/s.
- BIOS is the biggest hurdle: The stock Dell BIOS may not recognize an NVMe drive as a boot device without a modification or update. You’ll often use the adapter for a secondary data/gaming drive.
- Choose a PCIe 3.0 x4 adapter: Get a universal PCIe 3.0 x4 to M.2 adapter. It’s fully backward compatible with PCIe 2.0, is widely available, and supports all common NVMe drives (2280, 2260).
- Power is not an issue from the slot: The PCIe slot provides up to 75 watts. A single high-end NVMe SSD (like a Samsung 990 Pro) draws less than 8 watts under load, so no extra power cables are needed.
- Heat management matters: The T3600’s case airflow is decent, but adding a metal adapter with a heatsink is recommended. Some high-end NVMe drives throttle without adequate cooling.
- Performance gain is still dramatic: Even limited to PCIe 2.0 speeds (~500 MB/s), an NVMe SSD is 3-4x faster than a SATA SSD (~550 MB/s max) in real-world mixed workloads due to higher IOPS and lower latency.
- It’s a cost-effective life extension: For under $100 (adapter + 1TB NVMe), you can transform the storage experience of a perfectly functional 10+ year-old workstation.
📑 Table of Contents
- Why Bother? The Performance & Value Case for Upgrading
- Compatibility Deep Dive: What You Need to Know Before You Buy
- Choosing the Right NVMe SSD Adapter for Your T3600
- Step-by-Step Installation: From Box to Benchmark
- Real-World Performance: What to Actually Expect
- Troubleshooting Common Issues
- Conclusion: A Worthy and Transformative Upgrade
Why Bother? The Performance & Value Case for Upgrading
Before we talk about *how*, let’s solidify the *why*. Why go through the trouble of buying an adapter and installing it in a machine that “works”? The answer lies in the sheer magnitude of the performance gap between the storage your T3600 was designed for and what’s available today.
The Speed Chasm: SATA vs. NVMe (Even on PCIe 2.0)
The T3600’s native SATA ports are version 2.0, with a maximum theoretical bandwidth of 3 Gb/s (300 MB/s). A good SATA III SSD, which is what most people upgraded to years ago, maxes out around 550 MB/s sequential read/write. That was a revelation over a hard drive. But an NVMe SSD connected via a PCIe 2.0 x4 link (the adapter’s logical link) has a theoretical maximum of about 2000 MB/s (2 GB/s) because PCIe 2.0 x4 offers 4 lanes * 500 MB/s per lane. In reality, due to overhead, you’ll see sustained speeds around 450-500 MB/s.
So the raw sequential number might look similar to a SATA SSD. Here’s the crucial part: NVMe drives destroy SATA drives in random read/write performance (IOPS). This is what makes your system *feel* fast. Loading an operating system, launching a game, opening a large project file—these operations involve countless small, random file reads. An NVMe SSD, even on an older bus, has exponentially higher IOPS (often 50,000-100,000+ vs. SATA’s 50,000-80,000) and drastically lower latency. The result? Boot times cut in half, applications snap open, and level loading in games becomes almost instant. The user experience upgrade is palpable.
Cost-Effectiveness: The Ultimate Rationalization
Let’s do some quick math. A brand-new, entry-level business desktop with a 10th Gen Intel CPU, 16GB RAM, and a 512GB NVMe SSD might cost $800-$1000. Your T3600, with its Xeon CPU and likely 32GB+ of ECC RAM, is already a more powerful workstation in many CPU-bound tasks. By spending $30-$40 on a reliable adapter and $60-$80 on a 1TB NVMe SSD, you invest under $120 to completely eliminate the storage bottleneck. You’re getting 90% of the storage performance benefit of a new $1000 PC for 12% of the cost. For a machine with otherwise excellent CPU power and massive upgrade potential (it can take up to 128GB RAM), this is a no-brainer.
Compatibility Deep Dive: What You Need to Know Before You Buy
This is the most critical section. Not all NVMe adapters are created equal, and the T3600 has specific quirks. Buying the wrong part leads to frustration.
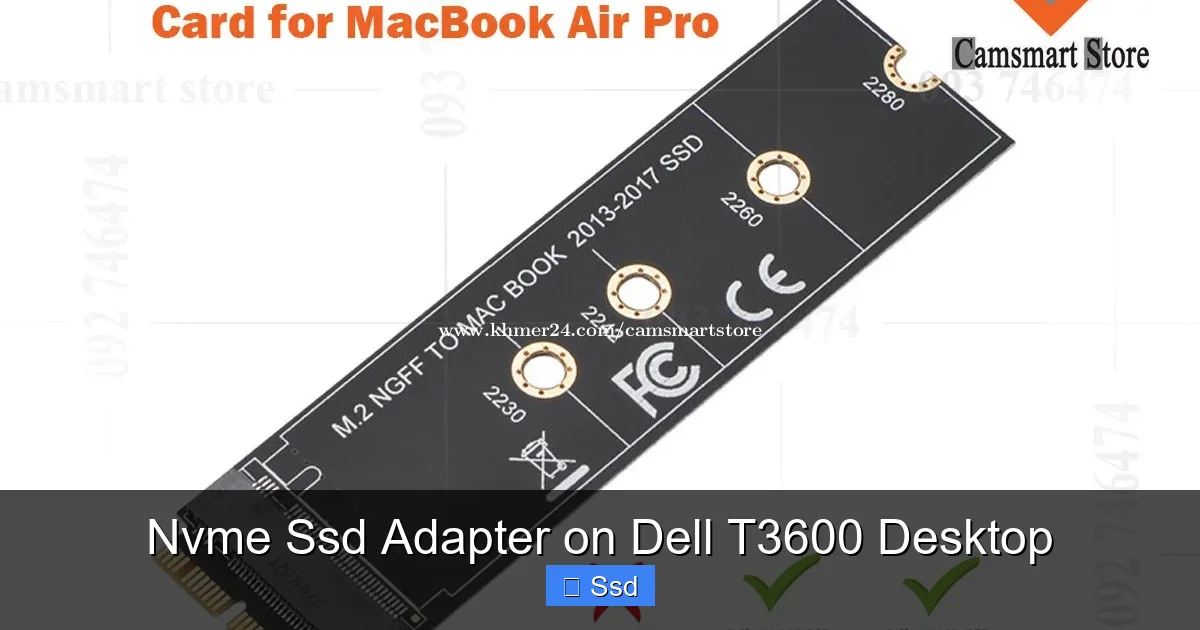
Visual guide about Nvme Ssd Adapter on Dell T3600 Desktop
Image source: maiwo360.com
PCIe Slot: You Have a Perfect x16 Home
The T3600 has one PCIe x16 slot (version 2.0) and several PCIe x8 and x4 slots (also version 2.0). Physically, an NVMe adapter card is a tiny PCIe x4 card. It will fit and work perfectly in any of these slots. However, for best results and to avoid potential issues with other cards, use the primary PCIe x16 slot. It’s usually the top one, closest to the CPU. It’s electrically x16, but a x4 card will work in it flawlessly. Don’t worry about “wasting” the slot; the card uses only the lanes it needs.
The BIOS Boot Hurdle: The Honest Truth
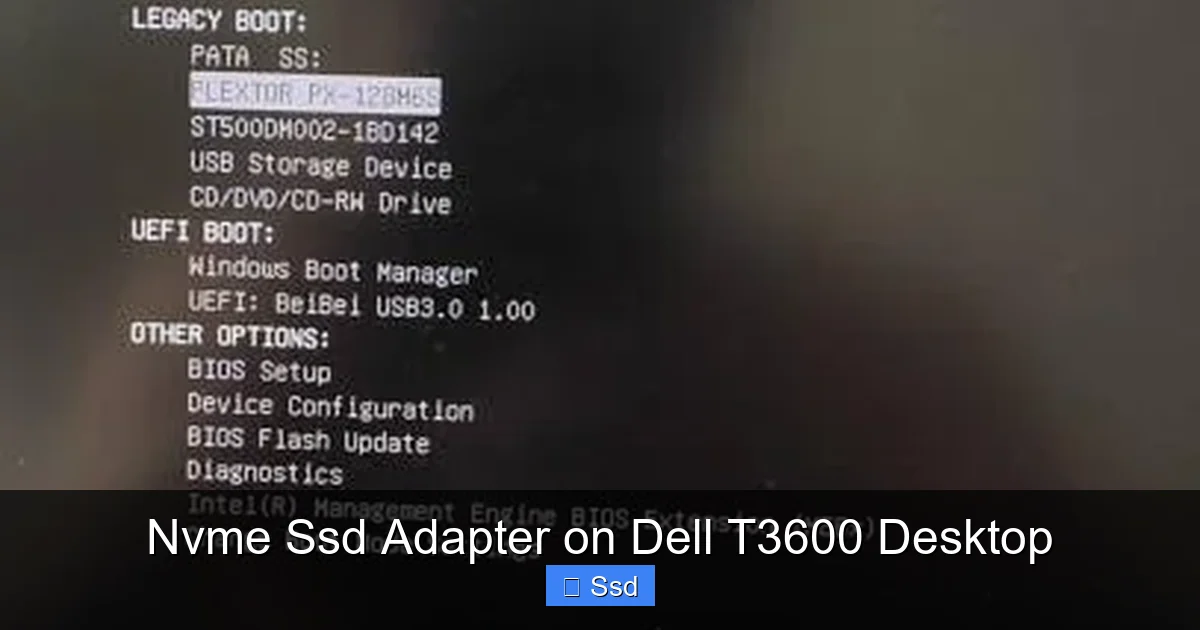
This is the biggest limitation. The Dell BIOS for the T3600 (and most motherboards from that era) predates the NVMe standard. It simply does not have the native drivers to initialize an NVMe drive as a boot device. What does this mean for you?
- You CAN use the NVMe SSD as a secondary drive without any BIOS changes. Install your OS on your existing SATA drive (SSD or HDD), and use the new NVMe drive for games, project files, and scratch disks. This is the easiest, most reliable method and provides 95% of the performance benefit.
- Booting FROM the NVMe drive is very difficult and not officially supported. It requires a complex process of modifying the BIOS image (flashing a “modded” BIOS) or using a workaround like Clover/OpenCore bootloader. This is risky, can brick your motherboard, and is generally not recommended for most users. Accept that your OS drive will remain SATA, and let the NVMe be your rocket-fueled data drive.
Always check for a BIOS update from Dell’s support site for your specific T3600 service tag. While updates won’t add NVMe boot support, they can improve overall system stability and PCIe compatibility.
Power Draw: Don’t Sweat It
A common myth is that a high-performance NVMe SSD needs extra power from a PCIe cable. This is false for virtually all consumer NVMe SSDs. The PCIe slot provides up to 75 watts of power. A power-hungry drive like a Samsung 990 Pro or WD Black SN850X might draw 7-9 watts under heavy load. Even under extreme conditions, it will not exceed 10-12 watts. The PCIe slot supplies more than enough power. You do not need a special adapter with a Molex or SATA power connector. Save those for older, more power-hungry RAID controller cards.
Choosing the Right NVMe SSD Adapter for Your T3600
Walk into an electronics store or browse online, and you’ll see a dozen NVMe adapters. For the T3600, you need to filter based on a few key criteria.
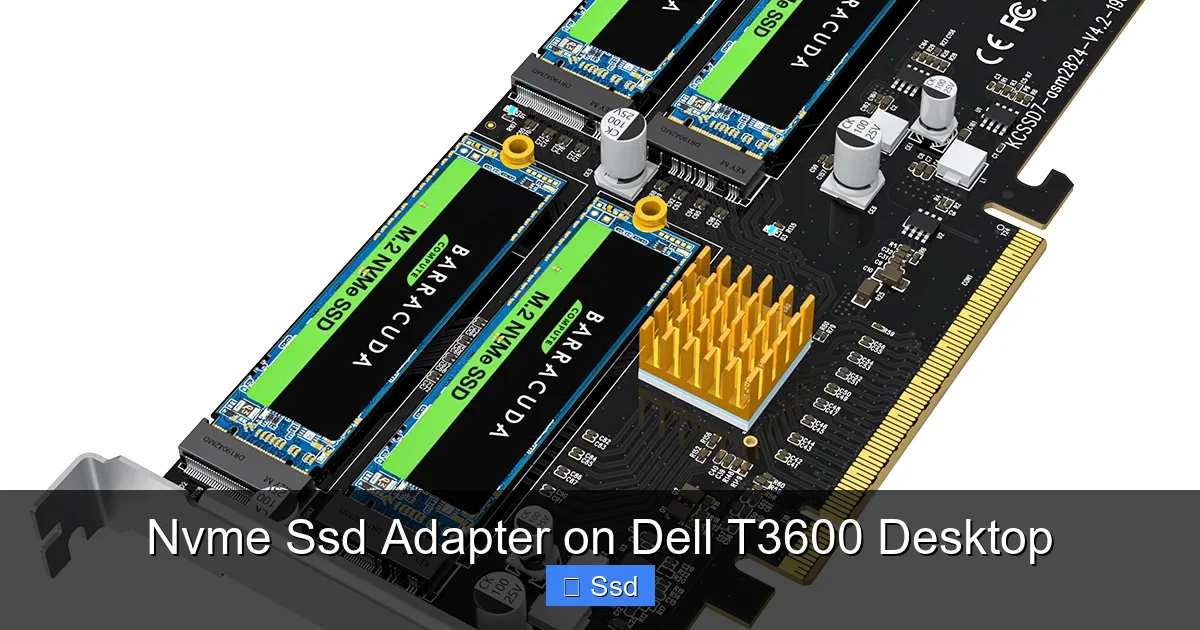
Visual guide about Nvme Ssd Adapter on Dell T3600 Desktop
Image source: winraid.level1techs.com
Form Factor & Keying: M.2 2280 is King
The vast majority of consumer NVMe SSDs are the M.2 2280 form factor (22mm wide, 80mm long). Your adapter must support this. Some adapters also support shorter 2260 or 2242 drives, but 2280 is the standard. The M.2 connector has a keying notch. NVMe drives use an “M” key (sometimes also “B+M” but they are NVMe compatible). Ensure your adapter has an M-key socket. Almost all modern adapters do.
PCIe Generation: Get a PCIe 3.0 x4 Adapter
This is a non-negotiable recommendation. Buy a PCIe 3.0 x4 adapter. Why not a PCIe 4.0 one? They are often more expensive and offer no benefit on your PCIe 2.0 bus. More importantly, some early PCIe 4.0 adapters had compatibility issues with older PCIe 2.0/3.0 systems. A standard, universal PCIe 3.0 x4 adapter is guaranteed to work, is cheap ($15-$25), and is widely available from brands like ASUS, SilverStone, Inateck, and Thermaltake. Avoid no-name brands with poor component quality and missing mounting holes.
Heatsink: Highly Recommended, Often Essential
NVMe SSDs can get hot, especially under sustained write workloads. The T3600’s case has okay airflow, but it’s not a modern gaming chassis with directed airflow. A metal adapter with a heatsink (a small aluminum fin stack or a flat plate) that makes contact with the SSD’s controller and memory chips is a smart investment. It helps maintain performance by preventing thermal throttling. Some SSDs, like the Samsung 980/990 series, come with their own heatsinks. If your SSD has one, you need an adapter that either has no heatsink of its own (a simple “PCB” adapter) or one where you can remove the adapter’s heatsink to avoid interference. For most drives, a passive aluminum heatsink on the adapter is perfect.
Brands to Consider & Models
Stick to known brands for reliability and proper engineering (correct traces, good solder joints, proper mounting). Excellent, foolproof choices include:
- ASUS Hyper M.2 x16 Card (Gen 3.0): The gold standard. It’s a x16 card with four M.2 slots (you’ll use one). It’s overkill for one drive but is exceptionally well-built and has a great heatsink. You can find it used for a good price.
- SilverStone Technology ECW21: A simple, high-quality PCIe 3.0 x4 to M.2 adapter with a robust heatsink. Perfect single-drive solution.
- Inateck PCIe 3.0 x4 to M.2 NVMe Adapter: A very popular and affordable option on Amazon. It gets the job done with a basic heatsink. Ensure you buy the PCIe 3.0 version, not the older PCIe 2.0 one.
Step-by-Step Installation: From Box to Benchmark
You have your adapter and your shiny new NVMe SSD. The installation is a 10-minute process that feels like magic when you’re done. Here’s how to do it right.
Visual guide about Nvme Ssd Adapter on Dell T3600 Desktop
Image source: cdn.myrapidtrack.com
Tools and Preparation
You’ll need: a Phillips #2 screwdriver, your NVMe SSD, the adapter, and the small mounting screw that should come with the adapter (it’s often already attached to the adapter or in the box). For the T3600, you’ll also need the key for the side panel. Work on a non-conductive surface (wood table, cardboard) and, if you’re paranoid, use an anti-static wrist strap. It’s not strictly necessary if you periodically touch the metal case to discharge static, but it’s good practice.
Physical Installation: Opening and Connecting
- Power Down and Unplug: Shut down Windows, switch the power supply off at the back, and unplug the power cord. Press the power button once to discharge any residual power.
- Open the Case: The T3600 has a tool-less design. Pull the latch on the back to release the side panel, then slide it back and lift it off.
- Locate the PCIe x16 Slot: It’s the top-most, longest slot, typically populated by your graphics card. If you have a single-wide card, it’s fine to leave it in. The NVMe adapter will go into the next available slot below it (which is also electrically x16). If your graphics card is huge and covers all slots, you may need to move it to a lower slot (like a x8), but this is rare.
- Prepare the Adapter: If your adapter has a heatsink pre-installed, ensure the thermal pad (if any) is clean. If you’re using an SSD with its own heatsink (like Samsung), you may need to remove the adapter’s heatsink or choose a different adapter. For most SSDs, leave the adapter’s heatsink on.
- Install the SSD: Locate the M.2 slot on the adapter. It’s at a 30-45 degree angle. Insert the SSD at that angle, pressing firmly but gently until you feel it click into the socket. The notch on the SSD must align with the key in the socket.
- Secure the SSD: Lay the SSD flat against the adapter. Use the tiny screw provided (usually M2x3 or similar) to secure the far end of the SSD to the standoff on the adapter. Do not overtighten; snug is enough.
- Insert the Adapter Card: Align the adapter’s gold contacts with the PCIe slot. Press down firmly and evenly until the card is fully seated. You’ll hear a click. Ensure the metal bracket on the end of the card is aligned with the case’s slot.
- Secure the Card: Find the screw hole on the case’s bracket that aligns with the hole on the adapter’s metal bracket. Screw it in to secure the card. This prevents it from vibrating.
- Cable Management (Optional): There are no cables to connect for the NVMe drive. Just tuck any loose wires away from the fan and card.
- Close Up: Slide the side panel back on until it clicks. Reconnect the power cord and switch the PSU on.
First Boot and OS Configuration
Power on your T3600. Enter the BIOS (usually by pressing F2 during the Dell logo). You likely will NOT see your new NVMe drive listed in the boot sequence. That’s expected. Save changes and exit. Windows should boot normally from your old drive.
Once in Windows:
- Right-click the Start menu and choose Disk Management.
- You should see a new disk labeled “Disk 1” or similar, with a black bar saying “Not Initialized.”
- Right-click on the disk name and choose Initialize Disk. Use GPT (GUID Partition Table) for modern Windows.
- Right-click on the “Unallocated” space and create a New Simple Volume. Follow the wizard, assign a drive letter (like D: or E:), and format it using NTFS (or exFAT for cross-platform).
- Your new drive will now appear in File Explorer, ready for use.
For best performance, ensure your chipset and storage drivers are up to date from Dell’s website. The generic Windows NVMe driver is fine, but manufacturer-specific drivers (like Samsung Magician for Samsung drives) can offer optimization tools.
Real-World Performance: What to Actually Expect
Benchmarks are fun, but what matters is how the system feels. Let’s look at realistic expectations for a T3600 with a PCIe 2.0 x4 link.
Sequential Speeds: The “On Paper” Number
Using a tool like CrystalDiskMark, you’ll see results that look like this for a good NVMe drive (e.g., WD Blue SN570):
- Sequential Read: ~480 MB/s
- Sequential Write: ~450 MB/s
Compare that to the same drive on a modern PCIe 4.0 system (which can hit 3500/3000 MB/s) or even a SATA SSD (which might hit 550/520 MB/s). The sequential number is slightly *lower* than a good SATA SSD. This surprises people. But remember, sequential speeds are for moving one huge, contiguous file (like a 50GB video file). That’s not what you do most of the time.
Random IOPS and Latency: Where the Magic Happens
Here, NVMe on PCIe 2.0 shines. The same drive might achieve:
- 4K Random Read: 50,000-70,000 IOPS
- 4K Random Write: 60,000-80,000 IOPS
A top-tier SATA SSD might manage 40,000-60,000 IOPS. More importantly, the latency (the time to access a piece of data) for an NVMe drive is typically under 50 microseconds, while SATA is often 80-100+ microseconds. This lower latency is what you feel as “snappiness.” Windows boot times, which involve thousands of small random reads, will be significantly faster. Loading a game level, which also involves scattered asset files, will be noticeably quicker.
A Practical Example: The “Project Load” Test
Imagine you’re a video editor. Your project file, media cache, and source footage are all on your new NVMe drive. Opening Adobe Premiere Pro:
- On a SATA SSD: Premiere launches in 8 seconds. Your 5-minute 4K project loads in 25 seconds. Scrubbing through the timeline has occasional hitches as it reads from disk.
- On the NVMe Adapter: Premiere launches in 4-5 seconds. The same project loads in 12-15 seconds. Timeline scrubbing is buttery smooth, even with multiple 4K streams.
The difference is not marginal; it’s a qualitative improvement in workflow fluidity. For a professional using this machine daily, that time saved adds up to hours per week.
Troubleshooting Common Issues
It usually works flawlessly, but here’s what to do if it doesn’t.
“My New Drive Doesn’t Show Up in Disk Management”
This is the most common issue. First, power down and open the case. Reseat the adapter card—remove it and plug it back in firmly. Reseat the SSD—unclip it, remove it, and reinsert it at the correct angle, ensuring it clicks. Boot into BIOS. Does the drive appear in any system information or storage configuration page? If not, the motherboard isn’t detecting it. Try a different PCIe slot (x8 or x4). If it still doesn’t show, the adapter or SSD may be defective. Test the SSD in another computer if possible.
“Windows Won’t Boot / I Get a Black Screen After Installing”
This almost always means you changed the boot order in BIOS to try and boot from the NVMe drive, which fails and causes a boot loop. You need to get back into BIOS and set your original SATA drive as the first boot device. To do this, you may need to disconnect the NVMe drive temporarily to force the system to boot from the SATA drive and enter BIOS. Once in, set the correct boot order, save, shut down, reconnect the NVMe, and boot again.
“The Drive Is Incredibly Slow / Throttling”
If your benchmark shows speeds below 200 MB/s, something is wrong. First, ensure the adapter is in a PCIe x4 or x16 slot, not an x1 slot (the T3600 doesn’t have x1, but it’s worth checking). Second, check drive temperature. Use a tool like CrystalDiskInfo. If the drive is running at 80°C+ under load, it’s thermal throttling. The solution is a better heatsink. Some users report success by adding a small 40mm fan zip-tied to the adapter’s heatsink, blowing air across it from the case’s rear exhaust fan.
Conclusion: A Worthy and Transformative Upgrade
Your Dell Precision T3600 is a testament to solid engineering. It was built to last, and with strategic upgrades, it can remain a formidable workstation for years to come. Adding an NVMe SSD via a PCIe adapter is the single most impactful upgrade you can make for day-to-day performance. It directly attacks the most persistent bottleneck in any older system: storage latency.
Yes, you won’t get the headline-grabbing 7,000 MB/s speeds of a PCIe 4.0 drive. But you will get a system that boots in seconds, launches apps instantly, and handles file operations with a responsiveness that feels like a generational leap. The process is straightforward, the cost is low, and the reward is immense. By understanding the BIOS limitations (boot from SATA, use NVMe for data) and choosing the right universal PCIe 3.0 adapter, you can confidently execute this upgrade. You’ll look at your old T3600 with renewed respect, knowing you’ve equipped it with a storage system that rivals many modern machines. It’s not just an upgrade; it’s a revival.
Frequently Asked Questions
Will my Dell T3600 boot from an NVMe SSD using an adapter?
No, not reliably or without complex, risky BIOS modifications. The stock Dell BIOS lacks native NVMe boot support. Your operating system should remain installed on a SATA drive or HDD. Use the NVMe SSD as a high-speed secondary drive for applications, games, and projects.
Do I need to update my T3600’s BIOS before installing the adapter?
It’s good practice to install the latest BIOS from Dell’s support site for your specific service tag. This ensures maximum stability and compatibility with all PCIe devices. However, a BIOS update will not add NVMe boot support. You can install the adapter with the current BIOS; it will work fine as a data drive.
What’s the best PCIe adapter to buy for a T3600?
Look for a universal “PCIe 3.0 x4 to M.2 NVMe” adapter from a reputable brand like ASUS, SilverStone, or Inateck. Ensure it supports the M.2 2280 form factor and has a metal heatsink. Avoid very cheap, no-name brands and PCIe 4.0-specific adapters, which offer no benefit and can have compatibility issues.
Will my power supply (PSU) handle an NVMe SSD on an adapter?
Absolutely. The NVMe SSD draws all its power (typically under 10 watts) from the PCIe slot itself. The T3600’s original PSU is more than sufficient. You do not need to connect any extra SATA or Molex power cables to the adapter card.
Will the NVMe SSD overheat in the T3600’s case?
It can, under sustained heavy workloads. The T3600’s airflow is decent but not exceptional. Always use an adapter with a metal heatsink that makes contact with the SSD. For the most demanding tasks (like constant 4K video rendering), monitor temperatures with software like CrystalDiskInfo. If it consistently exceeds 80°C, consider adding a small case fan directed at the adapter.
Is this upgrade really worth it for an old computer?
Yes, if your T3600 has a capable Xeon CPU and plenty of RAM (16GB+). The storage subsystem is almost always the biggest performance limiter in older systems. For under $100, you eliminate that bottleneck. The system will feel dramatically faster in daily use, making it a highly cost-effective alternative to buying a new computer for many workloads.