Polaris Ranger Rear Camera Relocation
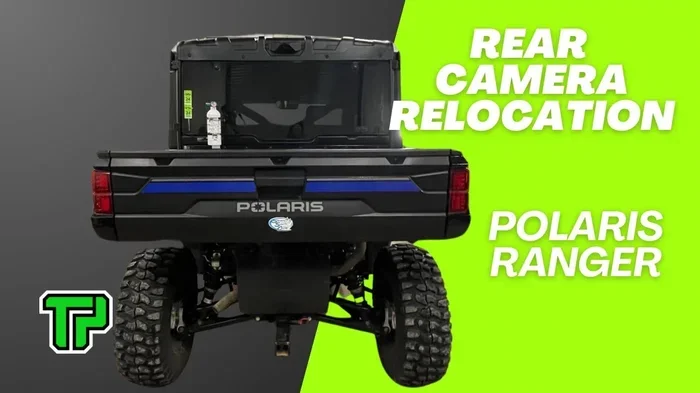
Polaris Ranger rear camera relocation helps you get better views while driving. This guide explains wiring, mounting, and common problems to avoid. Keep your trails safe with clear rear visibility.
Key Takeaways
- Safety First: Always disconnect the battery before starting any electrical work on your vehicle.
- Cable Management: Use a high-quality rear view camera extension cable to reach new locations without signal loss.
- Mounting Options: Choose a sturdy rear view camera mounting bracket for a secure fit on the frame or bumper.
- Signal Quality: Watch for interference that causes a rear view camera black screen or flickering image.
- Visibility Goals: Aim for a wide angle that shows the ground behind the vehicle for safe reversing.
- Professional Help: Consider expert installation if you are unsure about handling electrical connections.
- Testing: Test the system thoroughly before hitting the trails to ensure everything works correctly.
📑 Table of Contents
Understanding Polaris Ranger Rear Camera Relocation
Moving your backup camera can make a huge difference. The Polaris Ranger rear camera relocation process is all about finding the best spot for visibility. Many owners find the stock position blocks too much view. You want to see the ground clearly. You also want to see obstacles behind you.
This task sounds hard. But it is manageable with the right tools. You need patience and a plan. Safety is the most important thing. A clear view prevents accidents. It helps you park in tight spots too. Whether you use your Ranger for work or play, good visibility matters.
Some people want to move the camera higher. Others want it lower. The goal is a clean image. You do not want wires hanging loose. You do not want the lens dirty. Planning the route for your wires is key. You must protect them from heat and vibration.
Why Move Your Backup Camera
There are many reasons to consider this upgrade. The stock location might not work for your setup. Maybe you added a rack or a light bar. These additions can block the view. Maybe the lens gets muddy too fast. Moving it can solve these problems.
Here are common reasons for relocation:
- Obstructions: New accessories block the stock view.
- Damage Risk: The original spot is too vulnerable to hits.
- Better Angle: You want to see more of the ground.
- Aesthetics: You want a cleaner look on the vehicle.
Improving your view helps you drive with confidence. It reduces stress when reversing. You can spot kids or pets behind the vehicle. This is crucial for family safety. It also helps when loading gear. You can see exactly where the tailgate opens.
Choosing the Right Location
Picking the spot is the first real step. You need a place that is sturdy. The frame or bumper is usually best. Avoid plastic parts that might crack. You need a solid surface for the mount.
Think about the angle. You want to see the tires. You want to see the ground near the rear. If you mount it too high, you lose the close view. If you mount it too low, dirt covers the lens. Find a balance.
Consider these spots:
- Top of the Frame: High visibility but watch for debris.
- Bumper Center: Good for straight-back viewing.
- License Plate Area: Easy to wire but check local laws.
Make sure the spot does not vibrate too much. Vibration can blur the image. Tighten all bolts securely. Use lock washers if needed. You do not want the camera falling off on the trail.
Wiring and Extension Cables
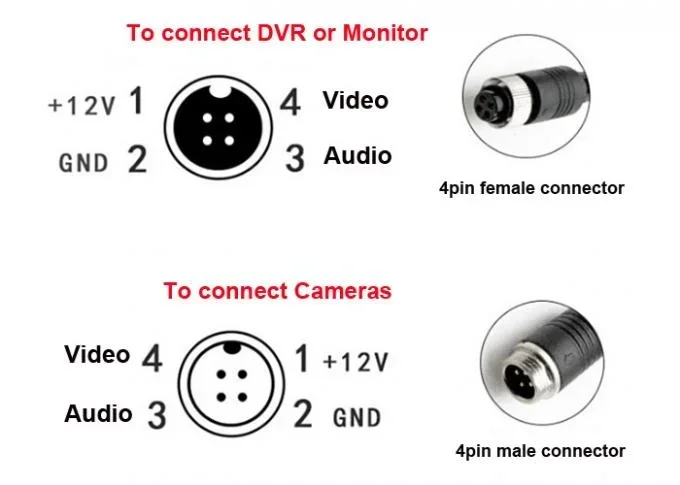
Running new wires is the hardest part. You need to connect the camera to the monitor. Sometimes the stock wire is too short. This is where a rear view camera extension cable helps. It lets you reach further without cutting wires.
Keep wires away from hot parts. Exhaust pipes get very hot. Heat can melt insulation. This causes shorts. Route wires through safe paths. Use zip ties to hold them in place. Loose wires can get caught in moving parts.
You might need to splice into power. Some cameras need constant power. Others only work when reversing. Check your camera manual. If you want an always on rear view camera, wiring is different. You need a separate switch or constant feed.
Tips for wiring:
- Protect Wires: Use conduit or loom for protection.
- Seal Connections: Use electrical tape or heat shrink.
- Test Before Closing: Check the image before sealing everything up.
Water is another enemy. Seal any holes you drill. Use silicone or gaskets. Prevent rust and corrosion. A little sealant goes a long way.
Dealing with Display Issues
Sometimes things go wrong after moving the camera. You might see a rear view camera black screen. This is frustrating. It usually means a loose connection. Check all plugs first. Make sure they click in tight.
Another issue is flickering. This can happen if the wire is too long. Signal loss occurs over distance. Use high-quality cables. Shielded cables reduce interference. Keep video wires away from power wires. This reduces noise.
If the screen stays black, check the fuse. A blown fuse stops the power. Check the monitor too. Sometimes the screen is the problem. Not the camera. Swap parts to test if you can.
Common fixes:
- Check Power: Ensure the camera gets voltage.
- Inspect Cables: Look for cuts or pinches.
- Clean Lens: Dirt can block the signal visually.
If you have a wireless rear view mirror backup camera, check the signal strength. Wireless units need a clear path. Metal parts can block the signal. Reposition the transmitter if needed.
Installation Tips and Tools
You need the right tools for the job. A basic socket set is good. Wire strippers help with connections. A drill might be needed for mounting. Use the correct bit size for your bolts.
Here is a simple list of tools:
- Socket Wrench: For removing bolts and mounting.
- Wire Cutters: For trimming cables.
- Electrical Tape: For sealing connections.
- Silicone Sealant: For waterproofing holes.
- Multimeter: For checking power and ground.
Take your time. Rushing leads to mistakes. Read the manual for your specific camera. Some cameras need specific wiring. Others are plug and play. Know what you have before you start.
If you are installing a monitor for rear view camera, place it where you can see it easily. The dashboard is common. The windshield is another spot. Make sure it does not block your forward view. Safety laws vary by location.
Common Mistakes to Avoid
Many people make simple errors. Avoid these to save time and money. Do not skip the testing phase. Do not seal everything up before checking the image. Do not use cheap wires that break easily.
Here are mistakes to watch for:
- Loose Connections: They cause intermittent failure.
- Poor Grounding: This causes noise and flickering.
- Exposed Wires: They lead to shorts and fires.
- Wrong Angle: You cannot see enough behind you.
Also, do not ignore local laws. Some places regulate where cameras can be. Some require specific fields of view. Check the rules for your area. Stay compliant while upgrading your vehicle.
Maintenance and Cleaning
Once installed, keep the camera clean. Mud and dust block the view. A dirty lens looks like a broken camera. Use a soft cloth to wipe it. Do not use harsh chemicals. They can scratch the lens.
Check the mounts regularly. Vibration can loosen bolts. Tighten them if needed. Check the wires too. Look for wear and tear. Replace damaged sections quickly.
If you have trouble keeping it clean, look at the design. Maybe a different mount helps. Some covers protect the lens. They open when you reverse. This keeps mud off the glass.
Expert Insights on Visibility
Experts say visibility is key for off-roading. You need to see obstacles. Rocks and logs can damage your vehicle. A good camera helps you avoid them. It acts like extra eyes.
Some experts suggest wide-angle lenses. They show more area. But they can distort the image. Straight lines look curved. This is normal for wide lenses. Just know what to expect.
Lighting matters too. Night driving is hard. Some cameras have infrared lights. They help you see in the dark. If you trail at night, get a camera with night vision. It makes a big difference.
Conclusion
Upgrading your vehicle is rewarding. The Polaris Ranger rear camera relocation project improves safety. It gives you confidence on the trails. You see more of what is behind you. You avoid costly damage.
Take your time with the install. Plan your wiring route. Choose a sturdy mount. Test everything before you finish. If you face a rear view camera black screen, check your connections. Most issues are simple fixes.
Enjoy your upgraded Ranger. Drive safely. Keep your view clear. Your vehicle is ready for anything now.
Frequently Asked Questions
Can I move the camera to the top of the frame?
Yes, you can mount it high on the frame. Just ensure the angle still shows the ground near the tires. High mounts offer a wider view but may miss close obstacles.
What causes a black screen after relocation?
A black screen usually means a loose connection or power loss. Check all plugs and fuses first. If the wire is too long, signal loss might also cause this issue.
Do I need an extension cable for this job?
Often yes, if the new spot is far from the original wire. A rear view camera extension cable helps you reach without cutting the original harness. Make sure it is high quality.
How do I keep the lens clean on the trails?
Wipe it with a soft cloth regularly. Some owners use protective covers that open only when reversing. This keeps mud and dust off the lens during driving.
Can I use a wireless camera for relocation?
Yes, a wireless rear view mirror backup camera is an option. It removes the need for long video cables. Just ensure the signal is strong enough for your vehicle size.
Is it hard to install a new monitor?
It depends on the type. A monitor for rear view camera can be simple or complex. Dash mounts are easier than windshield installs. Follow the manual for your specific screen.