5.1 2 Atmos Speakers

5.1 2 Atmos speakers bring immersive, three‑dimensional sound to any room, blending traditional surround with overhead effects. Learn how they work, what to look for, and simple installation tricks so you can enjoy cinema‑grade audio at home.
Key Takeaways
- True 3‑D sound: Dolby Atmos adds height channels, turning a flat 5.1 system into a spherical sound field.
- Speaker placement matters: Proper positioning of up‑firing or ceiling‑mounted speakers is crucial for the effect.
- Compatibility is key: Your AV‑receiver must support Atmos and have enough amp channels.
- Room size influences choice: Larger rooms need more powerful drivers and higher‑sensitivity speakers.
- Budget options exist: You can start with a 5.1 2 Atmos package under $500 and upgrade later.
- Calibration saves you effort: Use built‑in room‑calibration tools for balanced sound.
- Future‑proofing: Many Atmos speakers support HDR audio formats like DTS:X and Auro‑3D.
📑 Table of Contents
What Exactly Is a 5.1 2 Atmos System?
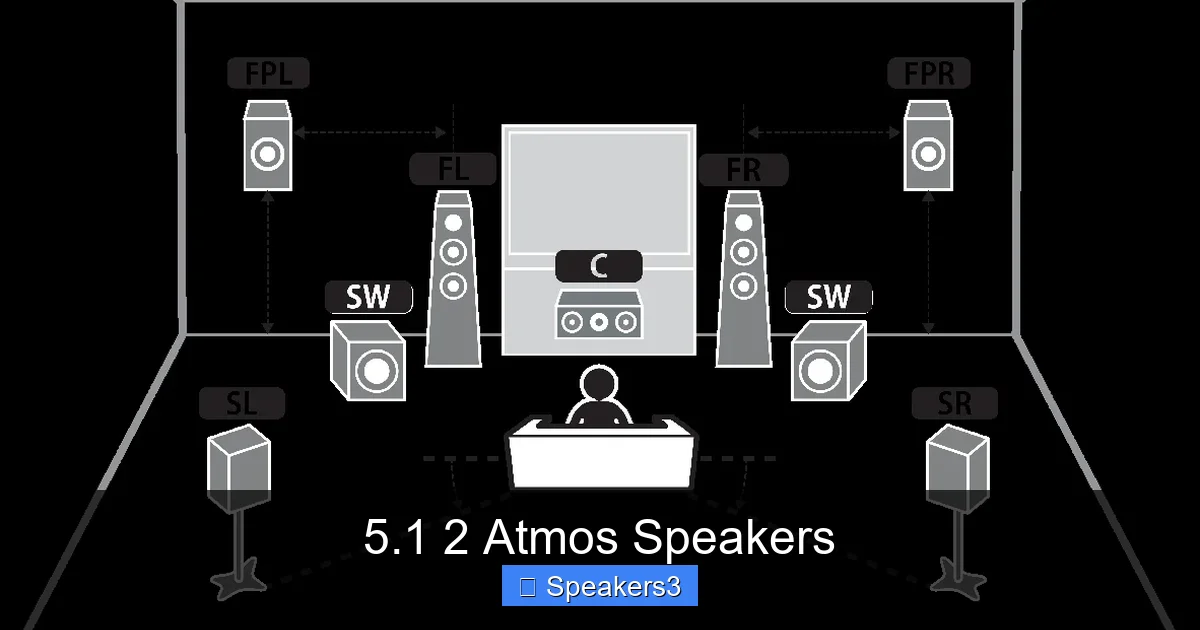
When you hear “5.1 2 Atmos,” think of a classic 5.1 surround setup with an extra two speakers that add height. The “5” are the front left, center, front right, surround left, and surround right. The “.1” is the dedicated sub‑woofer. The “2” are the Atmos‑enabled speakers, usually placed either on top of the front speakers (up‑firing) or mounted in the ceiling.
How Dolby Atmos Works
Dolby Atmos treats sound as objects instead of channel‑based audio. Each sound can move anywhere in a 3‑D space. The two height speakers bounce sound off the ceiling, creating the illusion of sounds coming from above – think of an airplane flying overhead in a movie.
Why “2” Height Speakers?
Two height speakers are the sweet spot for most living rooms. They give a balanced sense of elevation without overwhelming the front‑stage dialogue. Adding more height speakers (4 or 6) is possible, but the benefit diminishes unless you have a very large or specially designed listening area.
Choosing the Right 5.1 2 Atmos Speakers
Not every speaker set is created equal. Here’s what to focus on.
Driver Size and Sensitivity
Look for drivers that match your room size. A 5‑inch woofer with a sensitivity of 88‑92 dB is ideal for medium rooms (12‑18 ft). Larger rooms benefit from 6‑inch drivers and higher sensitivity (93 dB+).
Build Quality and Materials
Materials like woven fiberglass cones and rubber surrounds improve durability and reduce distortion. Enclosures made of MDF with internal bracing keep resonance low.
Connectivity Options
Most 5.1 2 Atmos packages use standard speaker wire (16‑gauge is fine). Some high‑end sets include bi‑wire or bi‑amp terminals, letting you send separate signals to the tweeter and woofer for cleaner sound.
Brand Reputation and Warranty
Brands such as Klipsch, SVS, and Polk Audio have solid track records. Check warranty length – three years is common, but five‑year coverage is a sign of confidence.
Internal Link Example
If you’re experimenting with speaker wiring, our guide on 2 8 Ohm speakers in series explains how to match impedance for optimal amp performance.
Setting Up Your 5.1 2 Atmos System
Installation can feel intimidating, but follow these steps and you’ll be listening in no time.

Visual guide about 5.1 2 Atmos Speakers
Image source: c8.alamy.com
1. Position the Front Speakers
Place the left and right speakers at ear level, angled slightly toward the listening spot. The center speaker should sit directly above or below the TV, aligned with the screen’s midpoint.
2. Add the Surrounds
Mount the surround speakers a little above ear level, ideally 1‑2 ft behind the primary listening position. Angle them toward the listener for a smooth “wrap‑around” effect.
3. Install the Height Speakers
Two main options exist:
- Up‑firing modules: Place them on top of the front left and right speakers. The drivers fire sound upward, reflecting off the ceiling.
- Ceiling‑mounted speakers: Install them directly in the ceiling, angled 45° toward the listening area.
For most homes, up‑firing modules are the easiest and cheapest route.
4. Connect the Sub‑Woofer
Run a dedicated RCA sub‑woofer cable from the AV‑receiver’s “LFE” output to the sub. If the sub has a built‑in amp (most do), you won’t need a separate power amp.
5. Wire Everything to the Receiver
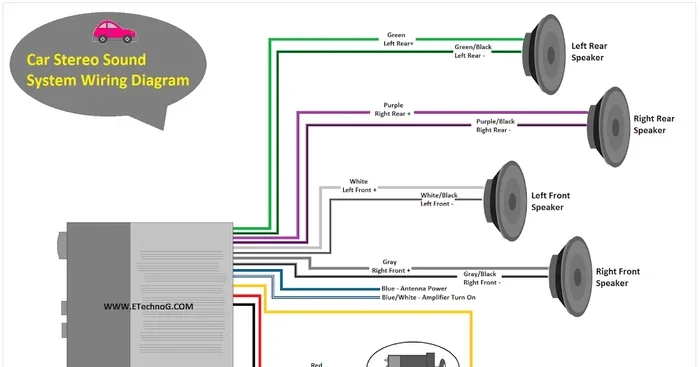
Use speaker wire of the same gauge for all channels. Connect each speaker to its corresponding output (Front L/R, Center, Surround L/R, Height L/R, Sub). Double‑check polarity – red is positive, black is negative.
6. Run Calibration
Most modern AV‑receivers have an automatic room‑calibration mic (like Audyssey, YPAO, or MCACC). Place the mic at ear level, let the receiver emit test tones, and let it adjust levels, distances, and crossover points.
7. Fine‑Tune Manually
After calibration, listen to a familiar movie scene. Adjust the height speaker level if overhead effects feel weak or overpowering. A good starting point is +2 dB for the Atmos channels.
Practical Tip
If your ceiling is low (under 8 ft), consider up‑firing modules instead of ceiling mounts. The reflection will be tighter, and you’ll avoid “blurred” overhead sounds.
Best 5.1 2 Atmos Packages on the Market (2024)
Below are three solid choices that balance price, performance, and ease of installation.
Visual guide about 5.1 2 Atmos Speakers
Image source: manual.yamaha.com
1. Klipsch Reference Premiere RP‑504C + RP‑500SA (2‑Pack)
- Price: $749 (front pair) + $399 (height pair)
- Key features: Horn‑loaded tweeters, 100 dB sensitivity, copper‑spun woofers.
- Why we like it: Punchy bass, clear dialogue, and the RP‑500SA’s up‑firing design works great in most rooms.
2. SVS Prime Satellite 5.1 2 Atmos Bundle
- Price: $699 total (includes sub‑woofer)
- Key features: Compact satellite speakers, 45 W RMS per satellite, built‑in Bluetooth.
- Why we like it: Perfect for small apartments; the height speakers are sleek and blend into décor.
3. Polk Audio Signature S55 + S60 Height Speakers
- Price: $599 (front) + $199 (height pair)
- Key features: Dynamic Balance drivers, 85 dB sensitivity, low‑profile design.
- Why we like it: Great value for larger rooms; the S60 height speakers can be ceiling‑mounted or up‑fired.
Related Speaker Articles
For more ideas on marine‑grade speakers, check out JL Audio 6‑5 Marine Speakers. If you’re curious about three‑way designs, our 6‑5 Three Way Speakers guide breaks down the basics.
Common Mistakes and How to Avoid Them
Even seasoned audiophiles slip up sometimes. Here are the pitfalls and quick fixes.
Incorrect Height Speaker Angle
Mounting height speakers too low or too steep can cause “ghost” sounds that feel detached. Aim for a 30‑45° angle toward the listening spot.
Under‑Powering the System
If your AV‑receiver’s total power is below 150 W per channel, the Atmos effects may be muted. Consider a more powerful receiver or add a dedicated external amp for the front speakers.
Neglecting Sub‑Woofer Placement
Placing the sub in a corner boosts bass, but can also cause boominess. Try the “sub‑woofer crawl” test: place the sub where the bass sounds most even while you crawl around the room.
Skipping Calibration
Manual setup without calibration often leads to uneven levels. Even a quick Audyssey or YPAO run can dramatically improve clarity.
Future‑Proofing Your Home Theater
Technology moves fast, but a well‑chosen 5.1 2 Atmos system can stay relevant for years.
Support for New Audio Formats
Most Atmos speakers also handle DTS:X, Auro‑3D, and IMAX Enhanced. Look for a receiver that advertises “HDR audio” to guarantee compatibility.
Modular Upgrades
Start with a 5.1 2 package and later add two more height speakers for a 5.1 4 Atmos setup. Because the speakers use standard connectors, upgrades are painless.
Smart Home Integration
Many modern receivers work with Alexa, Google Assistant, or Apple HomeKit. Voice control can turn the system on/off, adjust volume, or switch inputs without lifting a remote.
Conclusion
Investing in a 5.1 2 Atmos speaker system is a fantastic way to bring cinema‑quality sound into your living room without breaking the bank. By understanding how Atmos creates height, choosing speakers that match your room, and following a step‑by‑step installation plan, you’ll enjoy immersive audio that makes movies, games, and music feel truly three‑dimensional. Remember to calibrate, fine‑tune, and keep an eye on future upgrades – your home theater will thank you for years to come.
Frequently Asked Questions
What is the difference between up‑firing and ceiling‑mounted Atmos speakers?
Up‑firing speakers sit on top of your front speakers and bounce sound off the ceiling, while ceiling‑mounted speakers are installed directly in the ceiling and fire sound downward. Up‑firing is easier to install; ceiling‑mounted can be more precise in larger rooms.
Do I need a special AV‑receiver for a 5.1 2 Atmos system?
Yes. The receiver must support Dolby Atmos and have at least seven amplified channels (five main + two height). Look for models with “7.1 + 2” or “7.2” channel ratings.
Can I use my existing 5.1 speakers with new Atmos height modules?
Absolutely. Most Atmos height speakers are designed to integrate with standard 5.1 setups. Just connect the height outputs on your receiver to the new speakers.
How far should the sub‑woofer be from the walls?
Place the sub at least 6‑12 inches from any wall to avoid excessive boom. Experiment with corner placement for more bass, but use the “sub‑woofer crawl” to find the sweet spot.
Is Dolby Atmos only for movies?
No. Many streaming services (Netflix, Disney+, Amazon Prime) offer Atmos tracks for TV shows and games. Some music platforms also provide Atmos mixes for a more immersive listening experience.
Will Atmos work with a soundbar?
Some premium soundbars include virtual Atmos processing, but true object‑based height effects require separate upward‑firing or ceiling speakers. For the full effect, a dedicated 5.1 2 Atmos speaker system is recommended.