Nvme Ssd for Steam Deck

An NVMe SSD is the best way to expand storage and boost performance on your Steam Deck. Replacing or upgrading your internal drive with a compatible M.2 NVMe SSD can cut game load times dramatically and give you room for hundreds of titles. Whether you pick a 1TB or 2TB model, the right NVMe SSD for Steam Deck transforms your handheld gaming experience. We break down compatibility, speed differences, installation steps, and top recommendations so you can choose with confidence.
Steam Deck has changed the way we think about portable gaming. This handheld device from Valve lets you play your entire PC game library anywhere. But sooner or later, every Steam Deck owner hits the same problem: storage runs out fast. Modern games are huge, and the base model often comes with only 64GB or 256GB of internal storage. That fills up quickly.
The best solution is to upgrade with an NVMe SSD for Steam Deck. An NVMe solid state drive gives you more space and faster speeds. Games load quicker, the system feels snappier, and you can carry hundreds of titles wherever you go. In this guide, we walk you through everything you need to know. We cover compatibility, speed differences, installation, and the best drives to buy right now.
Key Takeaways
- Easy Upgrade Path: Swapping the NVMe SSD in your Steam Deck is straightforward and takes just a few minutes with basic tools.
- Big Storage Gains: Upgrading to a 1TB or 2TB NVMe SSD for Steam Deck gives you plenty of room for AAA titles and indie games alike.
- Faster Load Times: A PCIe Gen4 NVMe M.2 SSD delivers significantly quicker game loading compared to the stock drive or SD card.
- Compatibility Matters: The Steam Deck supports M.2 2230 NVMe drives, so always check the form factor before buying.
- Affordable Options Exist: You do not need to spend a fortune. Great budget NVMe SSDs for Steam Deck are available at various price points.
- External Enclosure Option: You can use an NVMe M.2 enclosure to expand storage externally when you need extra space on the go.
📑 Table of Contents
Why Upgrade Your Steam Deck Storage
Let us start with the basics. Why should you even bother upgrading your Steam Deck storage? The answer is simple: more room and better speed. The base Steam Deck models come with limited internal storage. Even the 512GB version fills up fast if you play a lot of modern games.
Here is a quick look at why an upgrade makes sense:
- More Game Space: AAA titles like Cyberpunk 2077 or Hogwarts Legacy take up 70GB or more each. A small drive fills up fast.
- Faster Load Times: NVMe SSDs read data much faster than the original eMMC storage found in base models.
- Better Overall Performance: A faster drive reduces stuttering and texture pop-in in open world games.
- Easy to Swap: The Steam Deck makes internal drive replacement simple. No need for a computer or special tools beyond a screwdriver.
- Future Proofing: Games keep getting bigger. A larger drive ensures you are ready for what comes next.
When you compare an NVMe SSD for Steam Deck to an SD card, the difference is clear. SD cards are slower and less reliable for heavy game installations. An NVMe drive stays inside the device and connects directly to the motherboard. This means better sustained speeds and a more stable experience.
Understanding NVMe SSD Compatibility
What M.2 2230 Means
The Steam Deck uses a specific type of NVMe drive called M.2 2230. The numbers tell you the physical size of the drive. 22 means 22 millimeters wide, and 30 means 30 millimeters long. This is a very small form factor, smaller than the M.2 2280 drives you see in many laptops and desktops.
Not every NVMe SSD will fit your Steam Deck. You must look for drives specifically built in the M.2 2230 format. Some manufacturers make drives in this size specifically for handheld devices and ultrabooks. Buying the wrong size means the drive will not fit inside your Steam Deck.
PCIe Generation: Gen3 vs Gen4
NVMe SSDs come in different PCIe generations. PCIe Gen3 and PCIe Gen4 are the two most common. Gen4 drives are faster, but the Steam Deck does not fully take advantage of Gen4 speeds because of its internal bus limitations. Both Gen3 and Gen4 M.2 2230 NVMe drives work perfectly fine in the Steam Deck.
Here is a simple comparison:
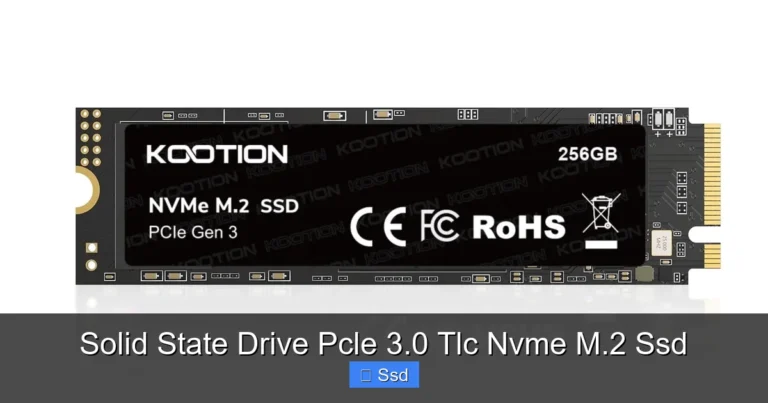
- Pcie Gen3 NVMe: Read speeds around 3,500 MB/s. More than fast enough for Steam Deck gaming. Often more affordable.
- Pcie Gen4 NVMe: Read speeds around 7,000 MB/s. Faster on paper, but the Steam Deck cannot use the full speed. Still a great choice if you want top-tier performance.
For most users, a PCIe Gen3 NVMe M.2 SSD offers the best value. You get excellent speed at a lower price. If you want the fastest possible drive and do not mind spending extra, a Gen4 model works too.
Best NVMe SSDs for Steam Deck
Choosing the right drive can feel overwhelming with so many options. Here are some of the best choices for upgrading your Steam Deck storage. These drives are proven to work well and offer a great mix of speed, capacity, and value.
The Kingston NV2 1TB NVMe SSD is a popular pick among Steam Deck users. It comes in the M.2 2230 form factor and delivers solid read speeds. It is reliable, affordable, and widely available. Many owners have swapped it into their Steam Deck with great results.
Another strong option is the Crucial P3 Plus NVMe SSD. This drive offers excellent performance and comes in 1TB and 2TB capacities. It uses a PCIe Gen4 interface, so it is future proofed even though the Steam Deck does not fully use Gen4 speeds. The 2TB version gives you plenty of room for a large game library.
If you want a high-performance drive, the Corsair MP600 Core XT M.2 NVMe SSD is worth considering. It is fast, durable, and built for enthusiasts. The 1TB model fits perfectly in the Steam Deck and handles modern games with ease.
For those who need maximum storage, a 2TB M.2 NVMe SSD is a great investment. You will never worry about running out of space again. Just make sure the drive is in the M.2 2230 form factor. Some brands offer 2TB drives in this size specifically for portable devices.
Also worth mentioning: you can always check out a 1TB NVMe M.2 SSD if 1TB feels like overkill but 512GB is not enough. The sweet spot for most Steam Deck users is between 1TB and 2TB. This gives you room for 20 to 40 large games at a time.
How to Install an NVMe SSD in Your Steam Deck
Installing a new NVMe SSD in your Steam Deck is easier than you might think. You do not need to be a tech expert. With a few basic tools and about 15 minutes, you can have your new drive up and running.
Here is a step by step guide to help you through the process:
- Gather Your Tools: You need a small Phillips head screwdriver, a plastic spudger or pry tool, and your new M.2 2230 NVMe SSD.
- Power Off Your Steam Deck: Hold the power button and select shutdown. Let the device cool down for a few minutes.
- Remove the Back Panel: Use the spudger to gently pry off the back cover. Start at the bottom edge and work your way around. Be careful not to damage the clips.
- Locate the NVMe Slot: Once the back panel is off, you will see the internal components. The NVMe SSD is held in place by a small screw.
- Remove the Old Drive: Unscrew the mounting screw and carefully pull the old drive out at an angle. Dispose of it properly or keep it as a backup.
- Install the New Drive: Insert the new NVMe SSD at an angle into the slot. Press it down gently until it clicks into place. Screw it in securely but do not overtighten.
- Put the Back Panel Back On: Snap the cover back into place. Make sure all clips are seated properly.
- Power On and Setup: Turn on your Steam Deck. Go to the Settings menu and check that the new drive is recognized. You can then format it and start moving games over.
Pro tip: before you swap drives, make sure you have backed up your save files. You can use Steam Cloud sync to keep your saves safe. This way, you never lose progress when switching to a new drive.
If you ever run into issues, check whether your new NVMe SSD is showing up properly in the system settings. Sometimes a drive needs to be initialized or formatted before Steam Deck recognizes it. The process is simple and well documented in the Steam Deck community.
NVMe SSD vs SD Card: Which Is Better for Steam Deck
A common question among Steam Deck owners is whether to use an NVMe SSD or an SD card for extra storage. Both options expand your game library, but they work very differently.
An NVMe SSD for Steam Deck goes inside the device and replaces the internal drive. This means games installed on the NVMe drive run at full speed. Load times are fast, and the experience feels just like playing on the original internal storage.
An SD card plugs into the side of the Steam Deck. It works well for storing games you do not play often. However, SD cards are slower than NVMe drives. You may notice longer load times and occasional stuttering when playing games from an SD card. Large open world games especially benefit from being on an NVMe drive.
Here is a quick comparison of the two options:
- Speed: NVMe SSDs are significantly faster than microSD cards. For gaming, this means smoother performance and shorter wait times.
- Reliability: Internal NVMe drives are more durable because they are protected inside the device. SD cards can be lost or damaged more easily.
- Convenience: SD cards are easy to swap and carry around. NVMe drives require opening the device to change.
- Cost: SD cards tend to be cheaper per gigabyte. But the performance trade off is not worth it for your main game library.
The best setup for most Steam Deck users is a combination of both. Install your most played games on the internal NVMe SSD. Use an SD card for older games or titles you rarely play. This gives you the best of both worlds.
Common Mistakes to Avoid When Upgrading
Upgrading your Steam Deck storage is fun, but there are a few mistakes you should watch out for. Avoiding these pitfalls saves you time, money, and frustration.
- Buying the Wrong Form Factor: The Steam Deck needs M.2 2230 drives. Do not buy a standard M.2 2280 drive. It will not fit inside the device.
- Forgetting to Back Up Saves: Always sync your saves with Steam Cloud or back them up manually before swapping drives.
- Overtightening the Screw: The NVMe drive screw only needs to be snug. Overtightening can damage the drive or the motherboard.
- Skipping the Formatting Step: After installing a new drive, format it through the Steam Deck settings before moving games over.
- Using a Cheap SD Card Instead: If you want the best performance, do not rely solely on an SD card. Use it as a secondary storage option, not your primary one.
- Ignoring Drive Health: After a few months, check your NVMe drive health. You can use tools like CrystalDiskInfo on a connected PC to monitor the drive status.
One more thing to keep in mind: if you ever want to use your NVMe SSD outside the Steam Deck, you can put it in an NVMe M.2 enclosure. This turns your internal drive into an external portable SSD. It is handy for transferring large game files between devices or backing up your library.
How Much Storage Do You Really Need
Capacity is one of the most important factors when choosing an NVMe SSD for Steam Deck. The right size depends on how many games you play and how large those games are.
Here is a simple guide to help you decide:
- 512GB: Enough for 10 to 15 medium sized games. Good for casual gamers or those who rotate their library often.
- 1TB: The sweet spot for most users. Holds 20 to 30 large games comfortably. This is what most Steam Deck owners choose.
- 2TB: Perfect for heavy gamers with large libraries. You can store 40 or more modern titles without worrying about space.
Keep in mind that modern games continue to grow in size. A 2TB drive today will feel much more comfortable over the next few years as new releases demand more space. If you are on the fence, going with a larger capacity now saves you from upgrading again soon.
Also consider your budget. 1TB NVMe SSDs have become very affordable in recent years. You can find reliable 1TB M.2 2230 NVMe drives for reasonable prices. The extra cost compared to a 512GB drive is well worth the peace of mind.
Final Thoughts
Upgrading your Steam Deck with an NVMe SSD is one of the best investments you can make for portable gaming. It gives you more storage, faster load times, and a smoother overall experience. The process is simple, the drives are affordable, and the results are immediate.
Whether you pick the Kingston NV2, the Crucial P3 Plus, or another M.2 2230 NVMe drive, you will notice the difference right away. Your games load faster, your system feels more responsive, and you have room to grow your library.
Take your time choosing the right drive. Consider your storage needs, your budget, and how you plan to use your Steam Deck. With the right NVMe SSD for Steam Deck, you are set up for a better gaming experience on the go.
Do not let storage limits hold you back from enjoying your favorite titles. Upgrade today and get back to doing what matters most: playing games.
Frequently Asked Questions
What NVMe SSD is compatible with the Steam Deck?
The Steam Deck uses M.2 2230 NVMe SSDs. Any drive in this form factor will work, whether it is PCIe Gen3 or Gen4. Popular choices include the Kingston NV2 1TB and the Crucial P3 Plus. Always double check the size before purchasing.
Can I use a regular M.2 2280 NVMe SSD in my Steam Deck?
No, the Steam Deck requires the M.2 2230 form factor. A standard 2280 drive is too long and will not fit inside the device. Always verify the dimensions before buying an NVMe SSD for your Steam Deck.
Is it hard to swap the NVMe SSD in a Steam Deck?
Not at all. The process takes about 15 minutes and requires only a small Phillips screwdriver and a plastic pry tool. Many users complete their first swap without any prior experience. Just follow a step by step guide and be gentle with the clips.
Do I lose my games when I replace the NVMe SSD?
Yes, all games and data on the old drive are lost during a swap. However, if you use Steam Cloud sync, your save files are safe. You can redownload your games onto the new drive from your Steam library.
Is PCIe Gen4 worth it for Steam Deck?
The Steam Deck cannot fully utilize PCIe Gen4 speeds because of its internal bus. A Gen3 NVMe drive works perfectly well and is often more affordable. Choose Gen4 only if you plan to use the drive outside the Steam Deck in a faster system.
Can I use an NVMe SSD enclosure with my Steam Deck?
Yes, you can use an M.2 NVMe enclosure to connect your drive externally. This is useful for transferring files or backing up your game library. Just keep in mind that games run faster when installed internally rather than through an external enclosure.