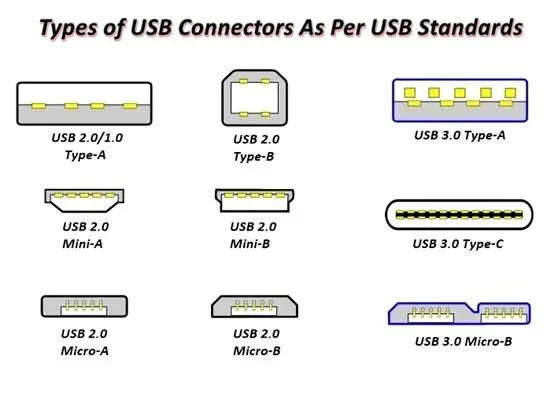
Where Is Usb Setting
Finding the USB setting on your computer is easier than you think. Whether you use Windows or Mac, this guide shows you exactly where to look. Learn how to access, adjust, and troubleshoot your USB setting in just a few clicks.
Have you ever plugged in a USB device and wondered, “Where is USB setting?” You are not alone. Many people struggle to find the right place to adjust their USB options. Whether you want to change power settings, update drivers, or fix a connection problem, knowing where to look makes all the difference.
This guide walks you through everything you need to know about your USB setting. We cover Windows and Mac computers, common problems, and easy fixes you can try right now. By the end, you will feel confident managing your USB connections like a pro.
The USB setting controls how your computer talks to USB devices. This includes flash drives, mice, keyboards, external hard drives, and even phone chargers. Without the right settings, your devices might not work properly. Let us dive in and make this simple for you.
Key Takeaways
- Windows USB settings are found in Device Manager and Control Panel.
- Mac USB settings live in System Preferences under USB options.
- Updating USB drivers can fix most connection problems quickly.
- Power management settings often cause USB ports to stop working.
- USB selective suspend is a hidden setting that saves battery but may cause issues.
- External USB devices like mice and adapters need proper configuration.
- Restarting your computer is the simplest fix for most USB problems.
📑 Table of Contents
Understanding USB Settings
What Are USB Settings?
USB settings control how your computer handles USB connections. These settings decide things like power delivery, data transfer speed, and device recognition. When you plug in a USB device, your computer uses these settings to communicate with it.
Think of USB settings as the control center for all your USB ports. They tell your computer whether to give power to a port, how fast to transfer data, and when to sleep a port to save energy. Most users never touch these settings, but they matter a lot when things go wrong.
There are two main types of USB settings. The first is the physical setting on your computer or laptop. The second is the software setting inside your operating system. Both work together to make your USB devices function properly.
Why Finding USB Settings Matters
Knowing where to find your USB setting saves you time and frustration. When a USB device stops working, the first thing you should check is the settings. Often, a simple adjustment fixes the problem without any technical knowledge.
For example, if your USB mouse not working, the issue might be in your USB settings. Maybe the port is disabled, or the driver needs updating. You can fix this in minutes once you know where to look. This is why understanding your USB setting location is so important.
Also, different computers hide these settings in different places. Windows and Mac users will find their options in different spots. We will cover both below so you can follow along no matter what you use.
Where To Find USB Settings On Windows
Through Device Manager
The fastest way to access your USB setting on Windows is through Device Manager. This tool gives you direct control over all your hardware connections, including USB ports.
Here is how to open it. First, right-click on the Start button. Then click Device Manager from the menu. You will see a list of hardware categories. Look for “Universal Serial Bus controllers” and click the arrow next to it. You will see all your USB devices and ports listed there.
From here, you can right-click on any USB device to update drivers, disable, or enable it. This is the most powerful place to manage your USB setting on Windows. If your mouse or keyboard stops working, check here first.
Through Control Panel
Another way to find your USB setting is through the Control Panel. This method works well if you want to adjust power settings for your USB ports.
Open the Start menu and type “Control Panel.” Click on it when it appears. Then go to Hardware and Sound. From there, click on Device Manager or Power Options. In Power Options, you can find USB selective suspend settings. This controls whether your computer turns off USB ports to save power.
Many users do not know this setting exists. But it can cause big problems if your USB devices keep disconnecting. Adjusting this is one of the easiest USB troubleshooting steps you can take.
Where To Find USB Settings On Mac
System Preferences
Mac users have a simpler path to their USB setting. Apple keeps things clean and easy to find. Open your Apple menu and click System Preferences. Then look for USB or Energy Saver options.
On newer Macs with macOS Ventura or later, go to System Settings instead. Scroll down and look for USB in the sidebar. You will see options for connected devices and power management.
Mac computers handle USB devices differently than Windows. They usually recognize devices automatically. But if something is not working, checking the USB settings in System Preferences is your best first step. You can also check the mouse location if your USB mouse is not responding properly.
Using Terminal for Advanced Settings
If you are comfortable with the command line, Terminal gives you deeper access to USB settings on Mac. You can use commands to reset the USB controller or check device connections.
Type “system_profiler SPUSBDataType” in Terminal to see all connected USB devices. This shows you detailed information about each device, including speed and power requirements. It is a great diagnostic tool when your USB setting seems off.
Common USB Settings Problems
USB Device Not Recognized
This is the most common USB problem. You plug in a device, and nothing happens. Your computer does not recognize it at all. This usually points to a USB setting issue or a driver problem.
First, try a different USB port. Sometimes the port itself is the problem. If that does not work, check Device Manager on Windows. Look for any yellow warning signs next to USB devices. These signs mean there is a driver or configuration issue.
Another common cause is a faulty cable. Not all USB cables carry data. Some cables only charge devices. Make sure you are using a cable that supports data transfer if you want to move files.
USB Port Not Working
When a USB port stops working completely, it can feel frustrating. You try plugging in different devices, and none of them work. Before you assume the port is broken, check your USB setting first.
Go to Device Manager and look for the USB host controller. Right-click and select “Enable device” if it is disabled. Sometimes Windows disables USB ports to save power, and you need to manually turn them back on.
Also check for Windows updates. Microsoft regularly releases driver updates that fix USB issues. A simple update might solve your problem without any other steps. This is an easy USB troubleshooting tip that many people skip.
How To Fix USB Settings Issues
Updating USB Drivers
Outdated drivers are one of the top reasons USB devices fail. Your computer relies on drivers to communicate with hardware. When those drivers get old, problems start.
To update your drivers, open Device Manager. Find your USB controller, right-click it, and select “Update driver.” Choose “Search automatically for drivers.” Windows will look for the latest version online. This simple step fixes many USB setting problems.
You can also visit your computer manufacturer’s website. They often have the latest drivers available for download. This is especially helpful for laptop users who need specific drivers for their model.
Power Management Settings
Windows has a feature called USB selective suspend. It turns off USB ports when they are not in use to save battery power. While this is great for laptop users, it can cause devices to disconnect unexpectedly.
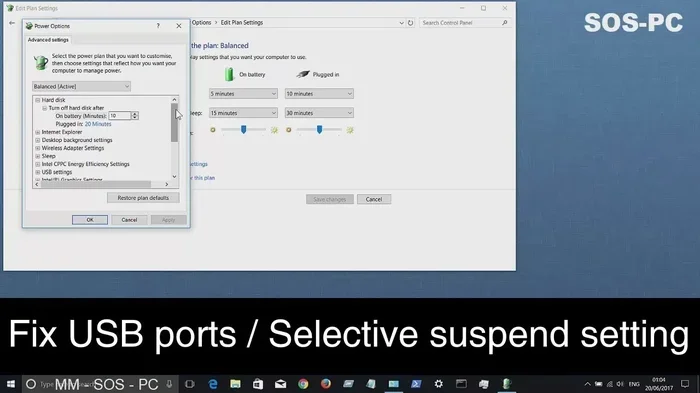
To adjust this setting, go to Control Panel and click Power Options. Find “Change plan settings” for your current plan. Then click “Change advanced power settings.” Expand the USB settings section. You can set “USB selective suspend” to disabled. This keeps your USB ports always active and powered.
This is one of the most overlooked USB settings fixes. If your external hard drive keeps disconnecting, this setting is likely the culprit. Changing it often solves the problem immediately.
Advanced USB Settings and Tips
USB Selective Suspend Explained
USB selective suspend is a power-saving feature. It puts USB ports into a low-power state when they are idle. This extends battery life on laptops significantly. However, it can interfere with devices that need constant power.
External hard drives, cooling pads, and charging hubs are most affected by this setting. If your device keeps going to sleep or disconnecting, check if selective suspend is enabled. Turning it off is the easiest fix. This is a key USB setting that many users never discover.
USB Power Delivery
Modern USB ports support USB Power Delivery, or USB PD. This technology allows ports to deliver more power to charge devices faster. Your USB setting may include options for power delivery negotiation.
Not all USB cables support USB PD. You need a cable rated for higher wattage to take advantage of this feature. If your phone or tablet charges slowly, the cable might be the problem, not your USB setting.
Also, some USB hubs do not pass through USB PD properly. If you use a hub, make sure it supports the power levels your devices need. Cheap hubs often limit the power output, which causes slow charging.
Using USB Adapters and External Devices
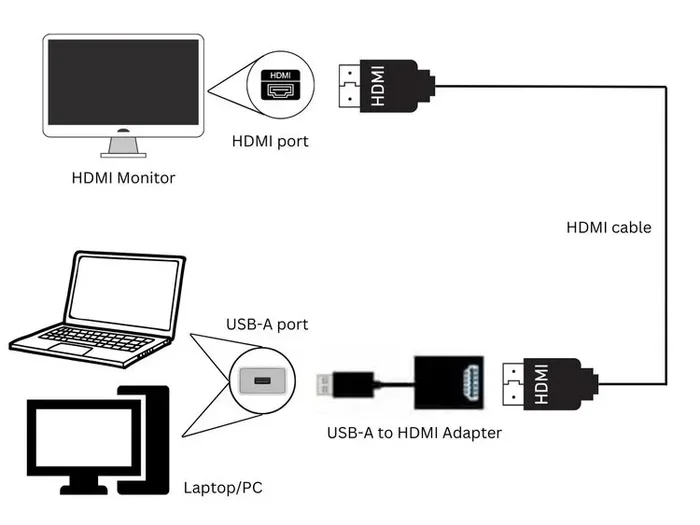
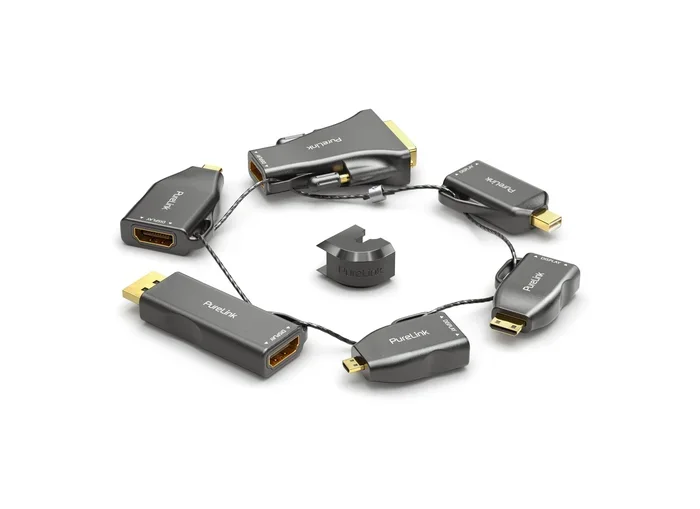
USB adapters are handy tools that expand your connectivity options. For example, an NVMe SSD USB adapter lets you connect high-speed storage to any computer. These adapters rely on proper USB settings to work at full speed.
When using adapters, always check that your USB port supports the right version. USB 3.0 and USB 3.1 offer much faster speeds than USB 2.0. If your adapter is USB 3.0 but you plug it into a USB 2.0 port, it will work slowly. This is a common mistake that causes frustration.
Similarly, if you use an external NVMe drive, make sure your USB setting supports the transfer speeds the drive offers. Check your adapter specs and your port version to get the best performance.
Quick Tips for Better USB Performance
- Restart your computer when USB devices act up. This resets all USB controllers and often fixes temporary glitches.
- Use short, high-quality cables. Longer cables can cause signal loss and slower speeds.
- Avoid USB splitters. They divide power between devices and can cause connectivity issues.
- Keep your drivers updated. Check Device Manager monthly for driver updates.
- Plug directly into your computer. Avoid hubs when possible for critical devices like external drives.
- Check for Windows or macOS updates. These often include USB driver improvements.
- Clean your USB ports. Dust and debris can cause poor connections over time.
Conclusion
Knowing where to find your USB setting is a valuable skill for any computer user. Whether you use Windows or Mac, the steps are straightforward once you know where to look. Device Manager on Windows and System Preferences on Mac are your go-to places for managing USB connections.
Most USB problems come down to a few common causes. Driver issues, power management settings, and faulty cables are the usual suspects. With the tips in this guide, you can fix most USB problems in minutes. You no longer need to worry when your devices stop connecting.
Take a few minutes to explore your USB setting options today. Familiarize yourself with Device Manager and power settings. This knowledge will save you time and frustration every time you plug in a new device. Your future self will thank you when a USB problem comes up and you know exactly what to do.
Frequently Asked Questions
How do I find USB settings on my laptop?
On Windows, open Device Manager by right-clicking the Start button and selecting it from the menu. Look for “Universal Serial Bus controllers.” On Mac, go to System Preferences and click USB or System Settings and find USB in the sidebar. These are the main places where your USB setting options live.
Why is my USB device not showing up on my computer?
This usually happens because of a driver issue or a disabled port. Open Device Manager on Windows and look for yellow warning signs. Try plugging the device into a different USB port. You can also restart your computer, which often resets the USB controllers and fixes the problem.
How do I fix USB power settings on Windows?
Go to Control Panel, then Power Options, and click “Change plan settings.” Select “Change advanced power settings.” Find the USB settings section and set “USB selective suspend” to disabled. This keeps your USB ports powered and active at all times.
Can USB settings affect data transfer speed?
Yes, absolutely. Your USB setting determines the transfer speed your computer uses. Make sure your port and cable support USB 3.0 or higher for the fastest speeds. Using an older USB 2.0 port with a modern device will slow things down significantly.
Is it safe to update USB drivers?
Yes, updating USB drivers is safe and often recommended. Go to Device Manager, right-click your USB controller, and select “Update driver.” Your computer will search for the latest version. You can also download drivers directly from your computer manufacturer’s website for the most reliable updates.
What should I do if my USB port keeps disconnecting devices?
First, check your power management settings. USB selective suspend often causes this issue. Also try a different cable or port. If the problem continues, update your USB drivers through Device Manager. Sometimes a simple restart fixes the disconnection problem too.