Why Wont My Hdmi Work on My Macbook Pro
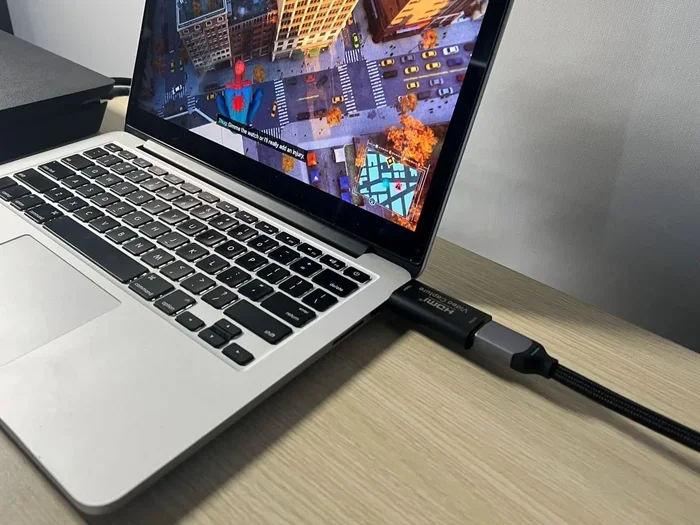
Why Won’t My HDMI Work on My MacBook Pro is a common frustration that many users face when trying to connect an external monitor. Several factors can cause this issue, including faulty cables, incompatible adapters, or incorrect display settings. This guide walks you through the most likely reasons and provides clear, actionable fixes you can try right now. Most HDMI problems on MacBook Pro are easy to solve with the right troubleshooting steps.
Key Takeaways
- Check your cable and adapter first: A damaged HDMI cable or incompatible USB-C adapter is the most common culprit.
- Verify your display settings: macOS sometimes needs manual configuration to recognize an external display.
- Restart and reset: Simple resets often resolve connection issues faster than complex fixes.
- Update your software: Outdated macOS versions can cause HDMI compatibility problems.
- Inspect your hardware: Physical damage to the HDMI port or adapter may require professional repair.
- Use certified accessories: Cheap or uncertified adapters frequently cause connection failures.
📑 Table of Contents
Common Reasons Why Your HDMI Connection Fails on MacBook Pro
You plug in your HDMI cable, excited to cast your screen onto a bigger display, and nothing happens. The question of why my HDMI won’t work on my MacBook Pro pops up, and suddenly your productive afternoon stalls. This problem is more common than you might think, and the good news is that it usually has a simple fix.
Whether you are connecting your MacBook Pro to a home theater, a second monitor for work, or a projector for a presentation, a failing HDMI connection can be incredibly annoying. The issue can stem from the cable itself, your adapter, your macOS settings, or even a hardware problem with the port. Understanding the root cause saves you time and frustration.
In this article, we break down every major reason your HDMI might not be working and give you clear steps to fix each one. You do not need to be a tech expert to work through these solutions. Let us get your external display up and running again.
Check Your HDMI Cable and Adapter First
The first thing you should do when your HDMI stops working is inspect your physical connections. This sounds obvious, but many users skip this step and jump straight to complex fixes. Start here and work your way outward before trying anything else.
Inspect the HDMI Cable
Look closely at your HDMI cable for any visible damage. Check the connectors on both ends for bent pins, dirt, or corrosion. A cable that looks fine on the outside might have internal wire damage, especially if it has been bent sharply or pinched. Try using a different HDMI cable if you have one available. This simple swap often solves the problem immediately.
Also, make sure the cable is fully inserted into both the adapter and the display. A loose connection is one of the most overlooked causes of HDMI failure. You want a snug fit with no wiggling. If the cable feels loose in the port, try a different cable or a different port on your display.
Test Your USB-C Adapter
Your USB-C adapter is the bridge between your MacBook Pro and the HDMI cable. If the adapter is faulty, no amount of cable swapping will help. Try connecting a different USB device through the same adapter to test it. If you notice that your USB mouse isn’t working either through the same hub or adapter, the adapter itself is likely the problem.
Consider using an adapter that is certified for macOS. Cheap, uncertified adapters often cause compatibility issues, including flickering screens, no signal at all, or audio problems. Apple’s own USB-C Digital AV Multiport Adapter is a reliable choice, though third-party options from reputable brands also work well. Always check the adapter’s specifications against your specific MacBook Pro model before purchasing.
Look for Cable Compatibility Issues
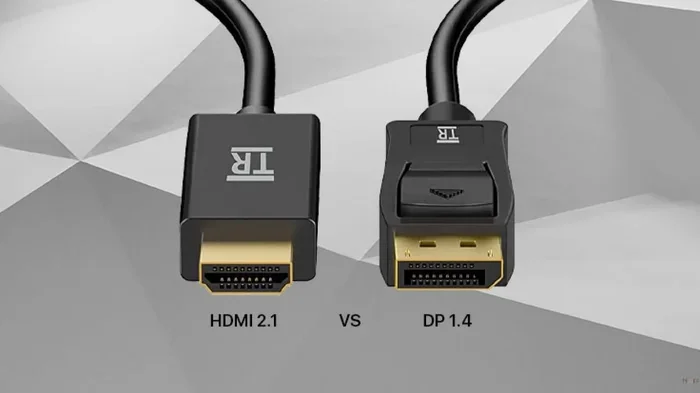
Not all HDMI cables support the same bandwidth. An older HDMI 1.4 cable might not handle the resolution your MacBook Pro is trying to output, especially if you are using a 4K or 5K display. Check the HDMI version on your cable and make sure it matches or exceeds your display’s requirements. Upgrading to an HDMI 2.0 or 2.1 cable can resolve signal issues that look like hardware failures but are really just compatibility problems.
Display Settings That Might Be Causing the Problem
Once you have ruled out hardware issues, your macOS display settings are the next place to look. Incorrect settings can prevent your external monitor from showing up, even when the physical connection is perfect.
How to Detect Your External Display in macOS
Open your System Settings and navigate to the Displays section. Your external monitor should appear in the display detection menu. If it does not show up, click the “Detect Displays” button. Sometimes macOS needs a nudge to recognize a new external screen, especially after waking your MacBook Pro from sleep.
If your display still does not appear, try disconnecting and reconnecting the HDMI cable while the Displays menu is open. This forces macOS to re-scan for connected displays. It is a simple trick that works surprisingly often. You can also try plugging the cable into a different USB-C port on your MacBook Pro if you have multiple ports available.
Adjusting Resolution and Arrangement
When your external display does show up, you may need to adjust the resolution. Go to the Displays settings and select the external monitor. Choose a resolution that matches your monitor’s native resolution for the sharpest image. If the screen looks blurry or cut off, the resolution setting is likely the cause.
You can also arrange your displays in the same menu. Drag the display rectangles to match the physical layout of your screens. This ensures your cursor moves naturally between displays and your windows appear on the correct screen. Getting the arrangement right also prevents cursor drift, which is a common annoyance when using multiple screens.
Screen Mirroring vs. Extended Display
macOS offers two modes for external displays: screen mirroring and extended desktop. In mirroring mode, your MacBook Pro screen duplicates on the external display. In extended mode, the external display acts as additional workspace. If you cannot see anything on your external monitor, make sure you have the correct mode selected.
Sometimes switching between mirroring and extended mode refreshes the connection and fixes the problem. You can toggle between these modes in the Displays settings or by holding the Option key and clicking the “Detect Displays” button. This trick forces macOS to re-evaluate the display configuration.
Refresh Rate Mismatches
Your MacBook Pro and external monitor need to agree on refresh rate settings. If your macOS pushes a signal that your monitor cannot handle, the display will go blank or show no signal. This mismatch often happens after a macOS update or when connecting a brand new monitor. Adjusting the refresh rate manually in the Displays settings usually brings the picture back.
macOS Software Fixes for HDMI Issues
Software glitches can interfere with your HDMI connection just as easily as hardware problems. Before you assume something is broken, try these macOS-specific fixes that often resolve display issues quickly.
Restart Your MacBook Pro
This sounds too simple, but restarting your MacBook Pro clears temporary glitches that can block HDMI output. A fresh restart resets the display subsystem and often re-establishes the connection to your external monitor. Shut down your MacBook Pro completely, wait about 30 seconds, and then power it back on. Plug in your HDMI connection after it boots up fully.
Think of it this way: when your connection needs a refresh, restarting usually helps. The same principle applies to your HDMI output. Your MacBook Pro’s display system is just another connection that benefits from a fresh start. Many users skip this step and jump to complex solutions when a simple restart would have done the trick.
Update Your macOS
Apple regularly releases macOS updates that fix bugs and improve compatibility with external displays. An outdated version of macOS can cause HDMI problems, especially after you connect a new monitor or adapter. Go to System Settings, then General, and then Software Update to check for the latest version.
Installing the latest update often resolves HDMI detection issues that have nothing to do with your cables or adapters. It is worth checking this before you spend money on new hardware. Apple frequently includes display driver improvements in its updates that directly address HDMI connectivity problems.
Reset the System Management Controller (SMC)
The SMC controls several hardware functions on your MacBook Pro, including display output and power management. Resetting the SMC can fix stubborn HDMI issues that other troubleshooting steps do not resolve. The process varies depending on whether you have a MacBook Pro with an Apple Silicon chip or an Intel chip.
Apple’s support website provides detailed step-by-step instructions for both types of chips. After resetting the SMC, restart your MacBook Pro and check if your HDMI connection works. This fix has helped many users who tried everything else without success. It addresses deeper system-level issues that simple restarts cannot reach.
Safe Mode Testing
Booting your MacBook Pro in Safe Mode disables third-party extensions and drivers that might be interfering with your HDMI output. To enter Safe Mode, restart your MacBook Pro and hold the Shift key during startup. If your HDMI works in Safe Mode, a third-party application or extension is likely the cause.
This troubleshooting step helps you narrow down whether the issue is software-related. Common culprits include display management apps, virtual desktop software, and certain antivirus programs. Uninstalling or updating these tools often restores normal HDMI functionality.
Hardware Problems and When to Seek Help
Sometimes the problem is not software or cables. It is a physical issue with your MacBook Pro itself. Knowing when to stop troubleshooting and seek professional help saves you from wasting time and money.
Damaged HDMI Port on Your MacBook Pro
If you have tried multiple cables, adapters, and software fixes without success, the HDMI or USB-C port on your MacBook Pro might be damaged. Physical damage can occur from dropping your laptop, inserting cables at an angle, or normal wear and tear over time. A damaged port may need professional repair or replacement.
Look for signs of physical damage like bent pins inside the port, discoloration, or loose connections that feel different from other ports on your device. If the port feels wobbly or something is visibly out of place, stop forcing cables into it and consult a professional. Continuing to use a damaged port can make the problem worse and more expensive to repair.
When Your Connection Stops Working After an Update
macOS updates occasionally introduce display compatibility issues. If your HDMI worked perfectly before an update and stopped working after, the software update might be the cause. Check online forums and Apple’s support pages to see if other users are experiencing the same issue after the same update.
In some cases, a rollback to a previous macOS version is necessary until Apple releases a fix. However, this should be a last resort. Contact Apple Support first, as they may have a patch or workaround available. Just as you might experience issues when your mouse suddenly stopped working after connecting new devices, your HDMI output can be disrupted by new hardware or software changes.
The key is to identify what changed recently and address that specific cause. Keeping a log of when problems started can help you and any support technician pinpoint the issue faster.
Graphics Card and GPU Considerations
Your MacBook Pro’s graphics processing unit handles all video output, including HDMI. While most MacBook Pro models have integrated graphics that rarely fail, extreme heat or aging can cause intermittent display problems. If your HDMI works sometimes but not others, and you also notice your system running hot or the fan constantly running, your GPU might be under stress.
Monitoring your system temperature can help identify whether heat is affecting your display output. Using your MacBook Pro on a flat, hard surface improves airflow and keeps temperatures lower. Avoid using it on soft surfaces like beds or couches for extended periods, as this can block ventilation and cause thermal throttling.
Quick Tips to Prevent HDMI Issues in the Future
Prevention is always easier than troubleshooting. Follow these simple tips to keep your HDMI connection working smoothly with your MacBook Pro for years to come.
- Use certified adapters and cables: Look for accessories that are certified for macOS or carry MFi certification. These meet quality standards and reduce compatibility issues significantly.
- Store cables properly: Coil your HDMI cables loosely and avoid bending them at sharp angles. This extends their lifespan and prevents internal wire damage.
- Keep your macOS updated: Regular updates include display driver improvements and bug fixes that prevent HDMI problems before they start.
- Inspect ports before connecting: Quickly check your HDMI port and adapter for dust or debris before plugging in. A clean connection works better and lasts longer.
- Avoid cheap adapters from unknown brands: They may seem like a bargain, but they often cause more problems than they solve. Invest in quality accessories from reputable brands.
- Disconnect gently: Pull the adapter out carefully rather than yanking the cable. This protects both the port and the adapter from physical damage.
- Keep your MacBook Pro cool: Overheating can affect GPU performance and display output. Use a cooling pad or ensure proper ventilation during intensive tasks.
Conclusion
Dealing with a non-working HDMI connection on your MacBook Pro can be frustrating, but the vast majority of cases have straightforward solutions. Start with the basics: check your cable, test your adapter, and verify your display settings. Move on to software fixes like restarting your MacBook Pro, updating macOS, or resetting the SMC. Only consider hardware failure if none of these steps work.
The question of why won’t my HDMI work on my MacBook Pro has a clear answer in most situations. With the right approach and a bit of patience, you will have your external monitor connected and working again. Do not let a simple connection issue derail your productivity. Try these fixes today and get back to the big screen experience you deserve. Most importantly, remember that prevention through quality accessories and regular software updates keeps these problems from happening in the first place.
Frequently Asked Questions
Can I use any HDMI cable with my MacBook Pro?
Most standard HDMI cables will work, but you need the right adapter to connect from your MacBook Pro’s USB-C or Thunderbolt port to the HDMI cable. Using a certified adapter ensures the best compatibility and avoids signal issues. Cheap, uncertified adapters are the most common cause of HDMI failures.
Why does my external monitor show no signal when connected to my MacBook Pro?
A no-signal error usually means your MacBook Pro is not sending a video output to the display. This can happen if the cable is loose, the adapter is faulty, or macOS has not detected the external monitor. Try disconnecting and reconnecting the cable, then check your display settings to see if the monitor appears.
Do I need to restart my MacBook Pro after connecting an HDMI cable?
Not always, but restarting can help macOS recognize a new external display, especially if the connection was made while the system was already running. A fresh restart clears temporary glitches that may be blocking the HDMI output. It is a quick and easy first step before trying more complex fixes.
How do I know if my HDMI adapter is compatible with my MacBook Pro model?
Check the adapter’s specifications against your specific MacBook Pro model and year. Apple Silicon MacBook Pros and older Intel models sometimes require different adapters. Look for adapters that explicitly list compatibility with your model, and prefer certified or brand-name options over generic ones.
Can a macOS update break my HDMI connection?
Yes, occasionally a macOS update can introduce display driver changes that affect HDMI output. If your HDMI worked before an update and stopped after, check for newer patches or updates from Apple. You can also try resetting your SMC as a potential fix for post-update display issues.
Is it possible the HDMI port on my MacBook Pro is physically damaged?
Yes, physical damage to the HDMI or USB-C port can prevent any external display from working. Signs include loose connections, visible damage inside the port, or issues that persist across multiple cables and adapters. If you suspect hardware damage, contact Apple Support or an authorized repair center for professional assessment.