How To Draw A Computer Mouse And Make It Look Real
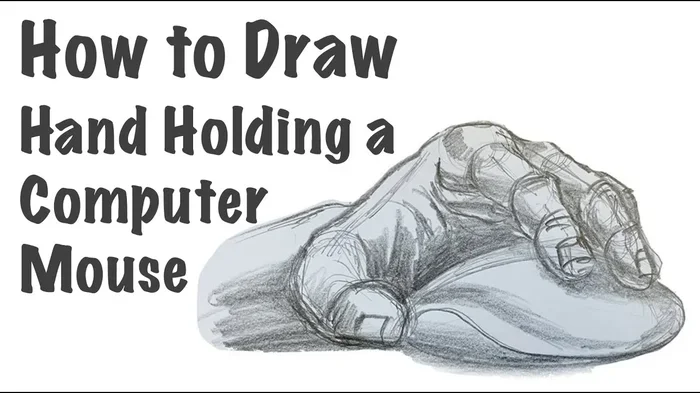
Want to learn how to draw a computer mouse that looks real? This step-by-step tutorial covers everything from basic shapes to advanced shading techniques. You will discover the simple methods to create a lifelike mouse sketch, whether you prefer pencil and paper or digital tools. By the end, you will have the skills to draw a detailed, realistic computer mouse with confidence.
Key Takeaways
- Start with basic shapes: Every realistic mouse drawing begins with simple geometric forms that define the overall silhouette.
- Understand mouse anatomy: Knowing the key parts of a mouse helps you add accurate details like buttons, scroll wheel, and sensor.
- Shading is everything: Proper lighting and shadow techniques transform a flat sketch into a realistic mouse illustration.
- Choose the right tools: Both traditional and digital mediums work well for drawing a computer mouse with precision.
- Avoid common mistakes: Skipping proportions and ignoring surface textures are the top errors beginners make.
- Practice different styles: Wireless, gaming, and optical mice each have unique design features worth exploring.
📑 Table of Contents
Understanding the Computer Mouse Design
Before you put pencil to paper, you need to understand what a computer mouse actually looks like. The computer mouse is one of the most recognizable input devices in the world. Its shape is simple but has distinct features that make it instantly identifiable.
The typical mouse has an oval or rounded rectangular body. It sits flat on a surface and fits comfortably under your palm. The top side has two primary buttons and a scroll wheel in the center. The bottom side houses a sensor or ball that tracks movement. All of these parts work together to help you use a mouse on a laptop or desktop computer with ease.
When you set out to draw one, start by studying real mice. Pick up your own mouse or look at pictures online. Notice the curves, the seams, and the subtle details. This observation step is the foundation of any good drawing.
The Basic Shape and Proportions
The body of a standard mouse is about three inches long and two inches wide. It is wider at the back where your palm rests and narrower at the front. The top surface is slightly curved to follow the shape of your hand. Getting these proportions right is the first step toward a believable drawing.
Here are the key proportions to keep in mind:
- The body length is roughly three times the height.
- The front taper is gentle and smooth.
- The buttons are slightly recessed into the top surface.
- The scroll wheel sits between the left and right buttons.
Key Parts of a Mouse You Need to Draw
A realistic mouse drawing needs to include several distinct parts. Each part adds to the overall authenticity of your sketch.
- Left and Right Buttons: These are the most prominent features. They are slightly angled and have a subtle seam where they meet the body.
- Scroll Wheel: This small cylindrical piece sits between the buttons. It has tiny grooves or ridges for your finger.
- The Sensor: On the bottom, you will see a small optical sensor or a ball. This is what tracks your movements.
- The Cable or Receiver: Wired mice have a cable that exits from the back. Wireless mice have a small USB receiver or no external connection at all.
- The Feet: These are the small pads on the bottom that let the mouse glide smoothly.
Understanding these parts will help you add the right details at the right places. If you want to learn more about how people actually use a mouse on a laptop, studying the real device will give you a huge advantage in your drawing.
Gathering Your Drawing Tools
You do not need expensive supplies to draw a great computer mouse. The right tools depend on whether you are working traditionally or digitally. Both approaches can produce stunning results.
Essential Supplies for a Realistic Sketch
If you prefer traditional drawing, here is what you will need:
- A good quality pencil set (HB, 2B, 4B, and 6B grades)
- A smooth drawing paper or sketchbook
- A kneaded eraser for lifting graphite
- A blending stump or tortillon for smooth shading
- A fine-tip pen for outlines and small details
These basic tools are all you need to create a detailed and realistic mouse drawing. The different pencil grades let you control light and dark values effectively.
Digital vs Traditional Drawing
Digital drawing offers flexibility and undo options. Tools like a graphics tablet with software such as Procreate or Photoshop work wonderfully for mouse illustrations. You can experiment with colors, layers, and textures without worrying about mistakes.
Traditional drawing gives a tactile feel that many artists love. The texture of paper and the feel of pencil on your hand create a natural drawing experience. Both methods are valid. Choose the one that feels most comfortable to you.
Some artists even combine both approaches. They sketch the initial outline by hand and then scan it to add digital shading. This hybrid method gives you the best of both worlds.
Step-by-Step Guide to Drawing a Computer Mouse
Now comes the fun part. Follow these steps to draw a computer mouse from scratch. Take your time and enjoy the process.
Step 1: Outline the Basic Shape
Start with a light pencil sketch. Draw the overall oval or rounded rectangle shape of the mouse body. Keep your lines loose and light at this stage. You are just mapping out the general form.
Make sure the shape is slightly wider at the back and tapers toward the front. This natural taper is what makes a mouse comfortable to hold. If the shape looks off, erase and adjust until you are happy with the silhouette.
Step 2: Add Details and Features
Once the basic shape is set, start adding the key features.
- Draw the left and right buttons as slightly raised sections on top.
- Add the scroll wheel as a small circle between the buttons.
- Sketch the seam line that runs along the top of the mouse.
- Draw the cable or wireless receiver at the back end.
- Add the small feet pads on the bottom of the mouse.
Keep your lines light and refine as you go. This is the stage where your drawing starts to look like a real mouse.
Step 3: Shading and Realistic Textures
Shading is what brings your drawing to life. Use the side of your pencil for broad, light shading on the main body. Then build up darker values in the recessed areas.
Focus on these shading zones:
- The area under the buttons where shadows naturally fall.
- The edges and curves of the mouse body.
- The bottom surface where the feet meet the table.
- The scroll wheel, which often has a slightly different texture.
Use a blending stump to smooth out your shading. This creates a soft, realistic look that makes your drawing stand out.
Making Your Mouse Drawing Look Real
Turning a basic sketch into a realistic illustration takes attention to detail. Here are the techniques that make the biggest difference.
Lighting and Shadow Techniques
Choose a light source direction before you start shading. Most artists prefer light coming from the upper left. This creates natural shadows on the right side and underneath the mouse.
The key to realistic shading is gradual transitions. Do not jump from light to dark. Instead, build up your values slowly. Use a light touch for the highlights and gradually increase pressure for the shadows.
If you want to see how a real mouse is used in everyday settings, understanding the process of connecting a wireless mouse to a laptop can give you insight into the device’s design and form factor.
Adding Surface Details
The surface of a mouse tells a story. Glossy mice have sharp reflections. Matte mice absorb light and show subtle texture. Gaming mice often have RGB lighting that creates colorful reflections.
To draw a glossy surface, add a bright highlight streak along the top curve. For a matte finish, use very soft and even shading with no sharp highlights. If you are drawing a gaming mouse, add small LED glow spots near the wheel or logo area.
These small details are what separate a good drawing from a great one. They add depth and realism that viewers immediately notice.
Common Mistakes to Avoid
Even experienced artists make mistakes when drawing everyday objects like a mouse. Here are the most common errors and how to avoid them.
- Skipping proportions: If the buttons are too big or the body is too short, the whole drawing looks wrong. Always check your proportions before adding details.
- Ignoring the bottom view: Many people forget to draw the bottom of the mouse. The sensor, feet, and cable all add realism.
- Over-shading: Too much darkness makes a drawing look muddy. Keep your shadows soft and build them up gradually.
- Flat lighting: Drawing with no light source makes the mouse look like a flat shape. Always define where the light is coming from.
- Forgetting the cable or receiver: This small detail anchors the mouse in reality. A wireless mouse looks different from a wired one, so pay attention to which type you are drawing.
By watching out for these mistakes, you will save yourself from frustrating revisions. Slow down and check your work often.
Tips for Drawing Different Mouse Types
Not all mice look the same. Different types have unique design features that make them interesting to draw.
Wireless Mouse Design
Wireless mice are sleeker and often smaller than wired ones. They do not have a cable, which means the back end is clean and smooth. Some wireless mice have a small compartment for the USB receiver. When drawing a wireless mouse, focus on the smooth, uninterrupted lines of the body.
Many modern wireless mice connect via Bluetooth technology. If you are interested in how Bluetooth mice connect to laptops, the compact design of these devices is a key feature. This sleek form translates beautifully into a clean, minimalist drawing style.
Gaming Mouse Sketch
Gaming mice are bulkier and more angular than standard mice. They have extra buttons on the side, textured grips, and often bold colors. The shape is designed for fast movements and precision.
When drawing a gaming mouse, pay attention to the side panels and the additional buttons. The lighting effects also give gaming mice a futuristic look. Use bright highlights and vivid colors to capture that energy.
Ergonomic Mouse Drawing
Ergonomic mice have a unique vertical or contoured shape. They are designed to reduce wrist strain. Drawing an ergonomic mouse is a great challenge because the shape is less conventional. Focus on the curved, natural form that fits the hand.
Conclusion
Drawing a computer mouse is easier than most people think. With the right approach and a little practice, anyone can create a realistic and impressive mouse illustration. Start with basic shapes, add the key details, and use shading to bring your drawing to life.
Remember that every great artist started with simple sketches. Do not be afraid to make mistakes. Each drawing teaches you something new. Keep practicing, keep observing real mice, and keep refining your technique.
The computer mouse is a simple object, but it has enough detail to challenge and inspire you. Pick up your pencil today and start drawing. You will be surprised at how quickly your skills improve.
Frequently Asked Questions
What supplies do I need to draw a computer mouse?
You only need a pencil set, a sketchpad, an eraser, and a blending tool. If you prefer digital art, a graphics tablet and drawing software work perfectly. The most important tool is your willingness to practice.
How long does it take to learn to draw a mouse?
Most beginners can draw a recognizable mouse within an hour of practice. Achieving a fully realistic look takes more time and patience. With regular practice, you will see noticeable improvement within a few weeks.
Can I draw a mouse if I have no art experience?
Absolutely. This tutorial is designed for beginners. The steps are simple and easy to follow. Start with light pencil sketches and build up gradually. Anyone can learn to draw a computer mouse with the right guidance.
Should I draw a wired or wireless mouse first?
A wired mouse is slightly easier for beginners because the cable gives you an extra reference line. However, wireless mice have cleaner shapes that are also great for practice. Choose whichever style you find more interesting.
How do I make my mouse drawing look 3D?
Focus on shading and lighting. Define a clear light source and build up gradual shadow values. Add highlights on glossy surfaces and use soft blending for smooth transitions. These techniques create the illusion of depth and dimension.
What is the easiest way to practice drawing a mouse?
Set up your real mouse on a desk and draw it from life. Having the actual object in front of you makes it much easier to capture accurate proportions and details. Try drawing it from different angles for extra practice.