Does Usb C to Hdmi Work on Apple
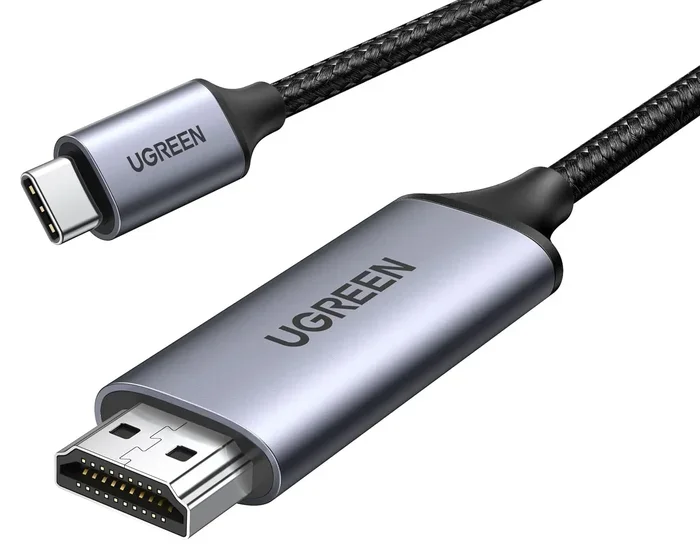
Yes, USB-C to HDMI does work on Apple devices, but compatibility depends on your Mac model, port type, and the adapter you choose. This guide walks you through everything you need to know about connecting your Apple laptop or desktop to an external display using a USB-C to HDMI cable or adapter. You will learn which Apple devices support this connection, how to set it up in minutes, and common issues to watch out for.
Let us talk about something that confuses a lot of Apple users. You just bought a shiny new USB-C to HDMI adapter, or maybe you are thinking about getting one. The question is simple. Does USB-C to HDMI actually work on Apple devices? The short answer is yes. But the full answer has some important details you need to know before you plug anything in.
Apple has changed its lineup of ports more than once over the years. Some Macs have USB-C ports. Some have Thunderbolt 3 or Thunderbolt 4 ports. And older models still use USB-A or MagSafe charging. This means not every adapter works on every Mac. Understanding the differences saves you time, money, and frustration.
In this guide, we will cover everything you need to know. We will look at which Apple devices support USB-C to HDMI connections. We will walk through the setup process step by step. We will also tackle common problems and share tips for picking the right adapter. Whether you own a MacBook Air, MacBook Pro, or an iMac, this article has you covered.
Key Takeaways
- USB-C to HDMI works on most modern Apple devices: MacBook Pro, MacBook Air, and iMac models with USB-C or Thunderbolt ports support HDMI output with the right adapter.
- Check your port and macOS version first: Not all older Macs support video output over USB-C, and some require updated software for full compatibility.
- The right adapter matters a lot: Cheap or unbranded adapters can cause flickering, no signal, or poor resolution. Choose certified adapters from trusted brands.
- Troubleshooting is simple: Most connection issues stem from cable defects, incorrect display settings, or outdated macOS. A few quick steps usually fix the problem.
- USB-C hubs add extra value: Beyond HDMI output, a USB-C hub gives you additional ports like USB-A, SD card slots, and charging pass-through.
- Apple Silicon Macs handle USB-C to HDMI easily: M1, M2, and M3 Macs natively support external display connections through USB-C and Thunderbolt ports.
📑 Table of Contents
What Is USB-C to HDMI and How Does It Work?
USB-C to HDMI is a simple adapter or cable that lets you connect your Apple device to an external monitor, TV, or projector. The USB-C end plugs into your Mac. The HDMI end connects to your display. Once connected, your Mac can mirror its screen or extend it to the bigger display.
USB-C is a small, reversible connector that carries data, power, and video signals all at once. This is what makes it so convenient. You do not need separate cables for charging and displaying video. A single USB-C cable or adapter handles multiple tasks at the same time.
Apple uses USB-C and Thunderbolt ports on most of its newer devices. Thunderbolt 3 and Thunderbolt 4 use the same USB-C connector but offer faster data transfer speeds and better video support. If your Mac has a Thunderbolt port, you get even more flexibility when connecting to external displays.
When you use a USB-C to HDMI adapter, your Mac sends a video signal through the USB-C port. The adapter converts that signal into HDMI, which your monitor or TV can read. This process works smoothly on most Apple devices made after 2016.
USB-C vs. Thunderbolt: What Is the Difference?
People often confuse USB-C and Thunderbolt. They look the same because Thunderbolt 3 and Thunderbolt 4 use the USB-C connector shape. But they are not exactly the same thing.
- USB-C: A universal connector that carries data and power. It can also carry video, but not all USB-C ports support video output.
- Thunderbolt 3: Uses the USB-C shape but offers much faster data speeds (up to 40 Gbps) and supports one external display natively.
- Thunderbolt 4: The latest version. It also supports up to two external displays and maintains the 40 Gbps speed of Thunderbolt 3.
For HDMI output, both USB-C and Thunderbolt work. Thunderbolt just gives you more bandwidth and better performance if you are using high-resolution displays.
Which Apple Devices Support USB-C to HDMI?
Not every Apple device can output video through USB-C. The compatibility depends on the hardware and the year the device was released. Here is a breakdown of the Apple devices that support USB-C to HDMI connections.
MacBook Pro Models
Most MacBook Pro models from 2016 onward support USB-C to HDMI. The 2016 through 2020 models used Thunderbolt 3 USB-C ports. The 2021 and newer models use either Thunderbolt 3 or Thunderbolt 4 USB-C ports. All of these can connect to an external HDMI display without any issues.
If you own a MacBook Pro with Apple Silicon (M1, M2, or M3 chip), you are in great shape. These chips handle external display connections very well. The M1 MacBook Pro supports one external display. The M2 and M3 versions can support one or two external displays depending on the model.
MacBook Air Models
The MacBook Air switched to USB-C with the 2018 model. All MacBook Air models from 2018 onward support USB-C to HDMI output. Apple Silicon MacBook Air models (M1, M2, and M3) also support external displays through USB-C.
One thing to keep in mind. The base M1 MacBook Air supports only one external display. The M2 and M3 MacBook Air models can also support one external display in most configurations. Check your specific model to confirm.
iMac Models
iMac models from 2019 onward with USB-C or Thunderbolt ports can use USB-C to HDMI adapters. These iMacs often have USB-C ports on the back that support video output. You can connect a second monitor to expand your workspace.
Older iMac models that do not have USB-C ports will not work with a USB-C to HDMI adapter. If your iMac only has USB-A or Mini DisplayPort, you need a different type of adapter.
Mac Mini and Mac Studio
The Mac Mini (2018 and newer) and Mac Studio models come with USB-C or Thunderbolt ports that support HDMI output. These are great choices if you want a compact desktop setup with an external monitor.
How to Connect USB-C to HDMI on Your Apple Device
Setting up a USB-C to HDMI connection on your Apple device is quick and straightforward. Follow these steps and you will be up and running in just a few minutes.
Step 1: Check Your Ports
Before you buy anything, look at your Mac. Do you see USB-C ports? Do they have the little lightning bolt icon next to them? That means you have Thunderbolt ports. Both USB-C and Thunderbolt ports can output HDMI video.
If your Mac does not have USB-C ports at all, you will need a different type of adapter. Some older Macs use Mini DisplayPort or HDMI ports directly. In those cases, a USB-C to HDMI adapter will not work.
Step 2: Get the Right Adapter
You need a USB-C to HDMI adapter or cable. You have a few options here.
- USB-C to HDMI adapter: A small dongle that plugs into your Mac’s USB-C port. You then connect an HDMI cable from the adapter to your monitor.
- USB-C to HDMI cable: A single cable with USB-C on one end and HDMI on the other. This is more convenient because you need fewer separate pieces.
- USB-C hub with HDMI: A hub that gives you HDMI output plus extra USB-A ports, an SD card reader, and charging pass-through. This is the most versatile option.
When picking an adapter, make sure it supports the resolution you need. If you want 4K at 60Hz, choose an adapter that explicitly supports that. Cheap adapters that only claim 4K support might only work at 30Hz or lower resolutions.
Step 3: Plug Everything In
Once you have your adapter, follow these simple steps.
- Plug the USB-C end of the adapter into your Mac.
- Connect an HDMI cable from the adapter to your monitor or TV.
- Turn on your external display.
- Your Mac should automatically detect the new display.
If nothing happens, do not worry. We will cover troubleshooting in the next section. Sometimes you need to go into your display settings to activate the external output.
Step 4: Configure Display Settings
After connecting, go to System Settings (or System Preferences on older macOS versions). Click on Displays. You should see your external monitor listed there.
From here, you can choose to mirror your display or extend it. Mirroring shows the same image on both screens. Extending gives you more screen space to work with.
You can also adjust the resolution, refresh rate, and arrangement of your displays from this menu. Take a few minutes to play around with these settings until you find the setup that works best for you.
Common Issues and Troubleshooting
Even with the right adapter, things sometimes go wrong. Here are the most common problems people face when using USB-C to HDMI on Apple devices and how to fix them.
No Signal on the External Display
If your external monitor shows nothing, try these steps first. Unplug the adapter and cable. Wait a few seconds. Plug them back in firmly. Sometimes the connection just needs to be reseated.
If that does not work, check your display settings. Go to System Settings > Displays and see if the external monitor appears. If it does not, try a different USB-C port on your Mac. Some ports may not support video output depending on the Mac model.
Flickering or Distorted Image
A flickering screen usually means the adapter or cable is faulty. Try a different USB-C to HDMI adapter if you have one available. Cheap, unbranded adapters are a common cause of flickering and image issues.
Another cause can be an incompatible HDMI cable. Make sure your HDMI cable supports the resolution and refresh rate you are trying to use. A damaged HDMI cable can also cause signal problems.
External Display Not Recognized After macOS Update
Sometimes after updating your Mac, the external display stops being detected. This can happen after major macOS updates. The fix is usually simple. Go to System Settings > Displays and click the Detect Displays button. This forces your Mac to look for connected displays again.
If that does not work, restart your Mac and check the connection again. Keeping your macOS up to date also helps prevent these issues.
No Sound Through HDMI
USB-C to HDMI carries both video and audio. But sometimes the audio does not come through automatically. To fix this, go to System Settings > Sound. Under the Output tab, select your HDMI display as the audio output device.
This is a quick fix that many people overlook. Your Mac might default to its built-in speakers even when an HDMI display is connected.
Adapter Gets Hot
It is normal for a USB-C to HDMI adapter to feel slightly warm during use. However, if it gets too hot to touch, something might be wrong. Stop using the adapter and let it cool down.
Overheating can happen with low-quality adapters that do not handle the power and data transfer properly. Using a well-made, certified adapter reduces this risk significantly.
Best USB-C to HDMI Adapters for Apple Devices
Not all adapters are created equal. When it comes to Apple devices, you want something reliable that delivers great performance. Here are some things to look for and some recommendations.
What to Look For in an Adapter
- Certification: Look for adapters certified by USB-IF or DisplayPort. These meet quality and performance standards.
- Resolution support: Make sure the adapter supports the resolution you need. 4K at 60Hz is the sweet spot for most users.
- Build quality: Metal adapters tend to be more durable and handle heat better than plastic ones.
- Brand reputation: Stick with well-known brands like Apple, Anker, Belkin, or Satechi for reliable performance.
- Extra features: Some adapters also include USB-A ports, SD card readers, or charging pass-through. These add a lot of value.
Top Recommendations
Apple USB-C Digital AV Multiport Adapter: This is Apple’s own adapter. It costs more but delivers excellent reliability and includes a USB-C charging port, a standard USB-A port, and an HDMI output. It works flawlessly with all Apple devices that have USB-C ports.
Anker USB-C to HDMI Adapter: Anker offers a great balance of price and quality. Their adapters support 4K resolution and are compact and portable. They are a solid choice for everyday use.
Satechi USB-C Multiport Adapter with HDMI: Satechi makes stylish adapters that work well with MacBooks. Their models often include multiple ports and good build quality. They are a popular choice among Apple users.
When you are shopping for adapters, you might also come across universal adapters or USB-C hubs. These are worth considering if you need more than just HDMI output. A good USB-C hub gives you HDMI, USB-A, Ethernet, and charging all in one compact device.
For users who also need portable storage on the go, a USB-C enclosure for external SSDs can complement your setup perfectly, letting you connect high-speed storage alongside your display.
USB-C to HDMI on Apple: Final Thoughts
Using USB-C to HDMI on Apple devices is straightforward and works reliably on most modern Macs. The key is knowing your device’s capabilities, choosing the right adapter, and following the setup steps correctly.
Whether you are connecting your MacBook Pro to a home theater TV, extending your MacBook Air display for work, or hooking up an iMac to a second monitor, USB-C to HDMI makes it all possible. The technology is mature, the adapters are affordable, and the experience is smooth on Apple Silicon Macs.
If you run into issues, the troubleshooting steps in this guide should help you resolve most problems quickly. And remember, investing in a quality adapter from a trusted brand saves you headaches down the road. A cheap adapter might save you a few dollars now but cost you hours of frustration later.
For users who also work with external storage devices, consider pairing your USB-C setup with a reliable NVMe SSD to USB adapter for fast file transfers alongside your external display setup.
The bottom line is simple. USB-C to HDMI works great on Apple devices when you use the right equipment and follow the right steps. You can enjoy a bigger, better display experience with your Mac in just a few minutes.
Take some time to explore your options. Check your Mac model, pick a quality adapter, and start enjoying the benefits of a larger external display today. Your eyes and your productivity will thank you.
Frequently Asked Questions
Can I use any USB-C to HDMI adapter with my MacBook?
Most USB-C to HDMI adapters work with MacBook models that have USB-C or Thunderbolt ports. However, it is best to use a certified or well-known brand adapter. Cheap, unbranded adapters may not support the resolution or refresh rate you need and can cause flickering or no signal issues.
Does USB-C to HDMI work on M1 MacBooks?
Yes, M1 MacBooks support USB-C to HDMI connections. The M1 MacBook Pro and MacBook Air can connect to one external display through their USB-C ports. Make sure your adapter supports the resolution you want, and check that your macOS is up to date for the best compatibility.
Can I connect a USB-C to HDMI adapter to an older iMac?
Only iMac models from 2019 onward that have USB-C or Thunderbolt ports support USB-C to HDMI output. Older iMacs that use Mini DisplayPort or other port types will need a different adapter. Check your iMac model specifications before purchasing an adapter.
Why does my USB-C to HDMI adapter not work on my Mac?
This can happen for several reasons. The adapter might be faulty or incompatible. The HDMI cable could be damaged. Or your Mac might not have a USB-C port that supports video output. Try reseating the connections, using a different port, or testing with a different adapter to isolate the problem.
Can I use USB-C to HDMI for gaming on my Mac?
Yes, you can use USB-C to HDMI for gaming on supported Macs. However, the gaming performance depends on your Mac’s hardware. Apple Silicon Macs handle external displays well, but demanding games may still be limited by the Mac’s GPU capabilities. Check your Mac model’s supported resolutions and refresh rates for the best gaming experience.
Do I need a special HDMI cable for USB-C to HDMI on Apple devices?
You do not need a special HDMI cable. Any standard HDMI cable works with a USB-C to HDMI adapter. However, if you want to use higher resolutions like 4K at 60Hz, make sure your HDMI cable supports that bandwidth. A standard HDMI cable should work fine for most everyday uses.