How Do You Add More Ram to a Laptop
Want a faster laptop without buying a new one? Adding RAM is a simple, cost‑effective upgrade. This guide walks you through checking compatibility, picking the right modules, and installing them yourself—no tech degree required.
Key Takeaways
- Check Compatibility First: Verify your laptop’s maximum RAM, type, and slot count before buying.
- Static Safety Matters: Use anti‑static wrist straps or touch metal to prevent component damage.
- Installation Is Quick: Most laptops let you add or replace RAM in 10‑15 minutes.
- BIOS/UEFI May Need a Refresh: Some systems require a quick BIOS check after installation.
- Performance Gains Are Real: Expect smoother multitasking, faster app launches, and better gaming.
- Upgrade Limits Vary: Ultrabooks often have soldered RAM; 2‑inch laptops usually have upgradeable slots.
- Test Before You Use: Run a memory diagnostic tool to confirm the new RAM is recognized and stable.
📑 Table of Contents
Introduction: Why Adding RAM Is the Easiest Speed Boost
When your laptop feels sluggish, the first thing most people think of is a new computer. In reality, a single upgrade can make an old machine feel brand new: adding more RAM. Random‑Access Memory is the short‑term workspace your operating system uses to keep apps running. If that workspace is too small, the system constantly swaps data to the hard drive, which feels like a traffic jam.
Upgrading RAM is cheap, usually under $100 for a decent 8 GB stick, and it takes less time than a coffee break. In this guide, we’ll walk you through every step—from checking what your laptop can handle to installing the new modules and verifying the upgrade. By the end, you’ll be ready to give your laptop the memory boost it deserves.
1. Determine If Your Laptop Can Be Upgraded
1.1 Find the Model Number
The first step is to locate the exact model number. It’s usually on a sticker under the bottom panel or on the box. Brands label it differently—Dell uses “Service Tag,” HP calls it “Product Number,” and Lenovo lists “Machine Type.” Write it down; you’ll need it for compatibility research.
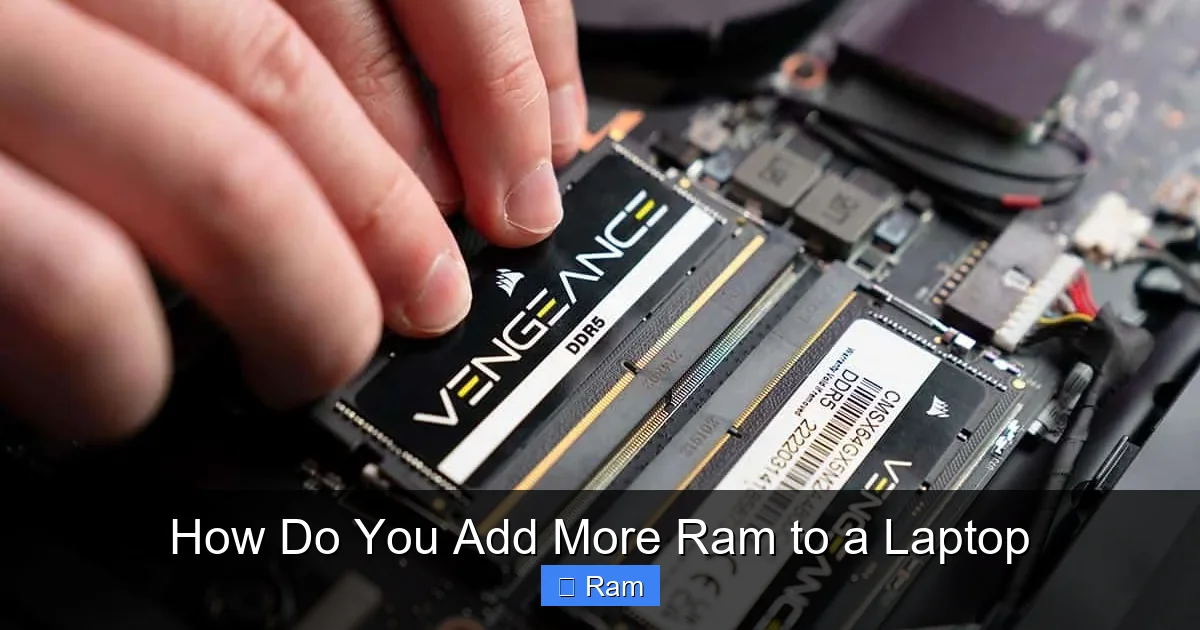
Visual guide about How Do You Add More Ram to a Laptop
Image source: wepc.com
1.2 Look Up the Official Specs
Visit the manufacturer’s support site and search your model. Look for a “Memory” or “Upgrade” section. You’ll find three critical pieces of information:
- Maximum RAM Capacity: The most memory the motherboard can address (e.g., 32 GB).
- Supported RAM Type: DDR4‑2666, DDR5‑4800, etc.
- Number of Slots: One, two, or sometimes four slots.
If the site says “Memory is soldered,” you cannot add RAM; you can only replace the existing module (if it’s not soldered).
1.3 Use Third‑Party Tools
Tools like Crucial System Scanner or CPU‑Z can read the hardware details directly from Windows. They’ll tell you the current RAM, type, speed, and how many slots are free. This quick scan is especially handy when the manufacturer’s page is vague.
2. Choose the Right Memory Modules
2.1 Matching Type and Speed
Buy RAM that matches the type (DDR4, DDR5) and speed (e.g., 2666 MHz) listed for your laptop. Mixing speeds works, but the system will default to the slower module, wasting potential performance.
Visual guide about How Do You Add More Ram to a Laptop
Image source: robots.net
2.2 Capacity Planning
Most users see a big jump moving from 4 GB to 8 GB, and another noticeable jump from 8 GB to 16 GB. If you do heavy multitasking, video editing, or gaming, aim for 16 GB or more. Remember the maximum capacity you discovered in Section 1.
2.3 Form Factor: SO-DIMM vs. DIMM
Laptops use SO‑DIMM (Small Outline DIMM) sticks, which are about half the size of desktop DIMMs. Always buy “SO‑DIMM” to avoid a costly mistake.
2.4 Brand and Warranty
Reputable brands—Crucial, Kingston, Corsair, G.Skill—offer limited‑lifetime warranties. Buying from a trusted retailer also gives you a return window in case the RAM is incompatible.
3. Gather the Tools You’ll Need
3.1 Essential Tools
- Phillips #0 or #00 screwdriver: Most laptops use tiny screws.
- Anti‑static wrist strap: Prevents electrostatic discharge (ESD) damage.
- Plastic pry tool or spudger: Helps open the bottom panel without cracking it.
- Clean, well‑lit workspace: A flat surface with good lighting reduces mistakes.
3.2 Optional Helpful Items
- Small magnetic tray for screws.
- Compressed air can for cleaning dust from the slot.
- Thermal paste (only if you plan to remove the cooling assembly, which is rare for RAM upgrades).
4. Step‑by‑Step Installation Guide
4.1 Power Down and Unplug
Shut down Windows completely (don’t just sleep). Unplug the power adapter, disconnect any external devices, and remove the battery if it’s removable.
Visual guide about How Do You Add More Ram to a Laptop
Image source: robots.net
4.2 Discharge Static
Put on an anti‑static wrist strap and attach the clip to a grounded metal part of the laptop chassis. If you don’t have a strap, touch a metal object (the metal part of the chassis works) every few minutes.
4.3 Remove the Bottom Panel
Flip the laptop over. Using the appropriate screwdriver, remove all screws holding the bottom cover. Keep track of which screws belong to which holes—some are longer than others.
Gently pry the panel off with a plastic tool. Work around the edges; the panel should lift away without force. If it resists, double‑check for hidden screws under rubber feet or stickers.
4.4 Locate the RAM Slots
Inside, you’ll see one or two rectangular slots with a metal retaining clip on one side. Existing RAM (if any) will be seated at an angle.
4.5 Remove Existing RAM (Optional)
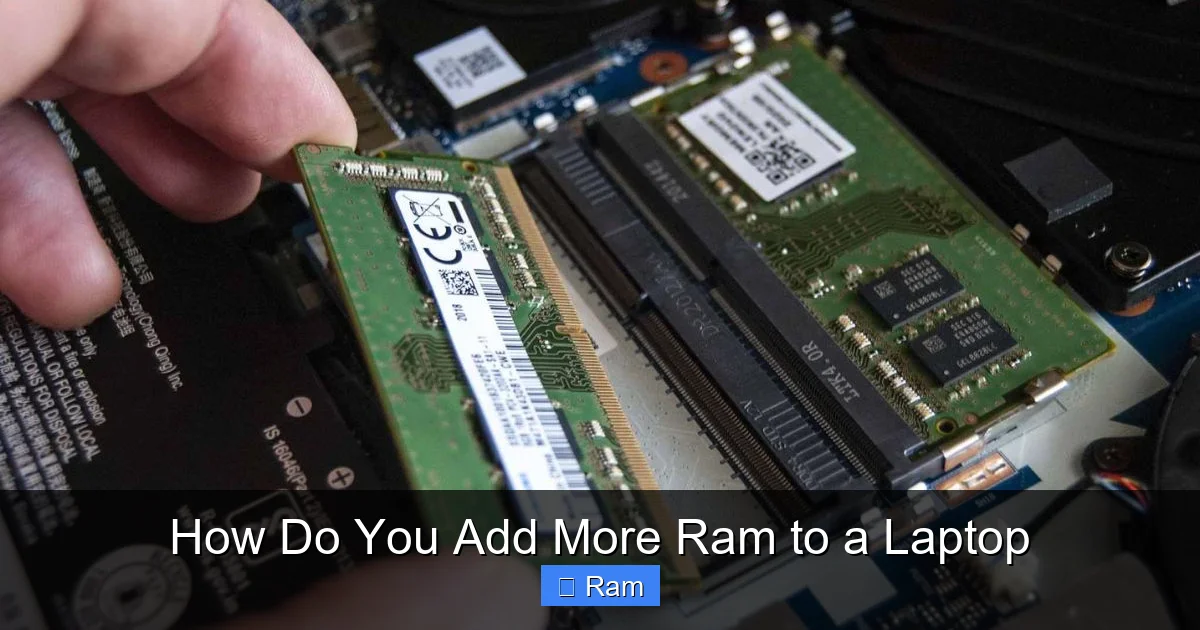
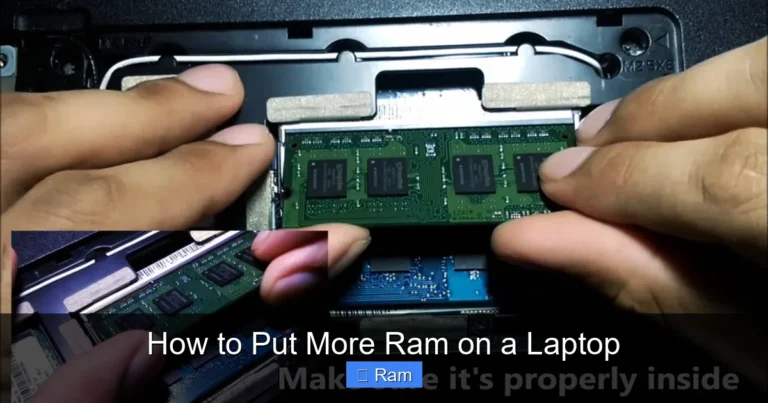
If you’re adding a second stick, you can leave the first one in place. To replace, push the retaining clips outward; the module will pop up at a slight angle. Pull it out gently, holding the edges—not the gold contacts.
4.6 Insert the New RAM
Align the notch on the SO‑DIMM with the key in the slot. The module can only go in one direction. Slide it in at about a 30‑degree angle, then press down firmly until the retaining clips snap into place.
4.7 Re‑assemble the Laptop
Replace the bottom panel, re‑insert all screws (use the correct lengths), and re‑attach the battery if you removed it. Double‑check that no tools are left inside the chassis.
4.8 Power On and Verify
Plug the charger back in and turn on the laptop. Windows should boot normally. To confirm the new memory is recognized, right‑click “This PC” → “Properties” or open Task Manager > Performance > Memory. You should see the total capacity reflect the upgrade.
5. Troubleshooting Common Problems
5.1 Laptop Doesn’t Power On
Check that the RAM is fully seated. Remove and reseat it, ensuring the clips are locked. Also verify that you didn’t accidentally disconnect any ribbon cables while removing the panel.
5.2 System Shows Less RAM Than Expected
Sometimes the BIOS reserves a portion for integrated graphics. If the amount is far lower than installed, you may have an incompatible module (wrong type or speed). Consult the manufacturer’s supported list.
5.3 Random Crashes or Blue Screens
Run a memory diagnostic: type mdsched.exe in the Run dialog, choose “Restart now and check for problems.” If errors appear, the new stick could be defective or mismatched.
5.4 BIOS Doesn’t Recognize New RAM
Update the BIOS to the latest version from the vendor’s website. An outdated BIOS sometimes fails to map newer memory densities.
5.5 Overheating After Upgrade
Adding RAM usually doesn’t affect thermals, but if you removed a heat‑sink while working, re‑apply thermal paste correctly. Use compressed air to clear dust from the cooling vents.
Conclusion: A Small Investment for Big Gains
Adding more RAM is one of the most rewarding DIY upgrades you can perform on a laptop. It costs a fraction of a new machine, takes minutes, and delivers immediate performance improvements. By following the steps above—checking compatibility, buying the right SO‑DIMM, installing safely, and testing—you’ll enjoy smoother multitasking, faster app launches, and a longer lifespan for your device.
Remember, not every laptop lets you upgrade; ultrabooks and some newer models have soldered memory. In those cases, consider external solutions like a fast SSD or cloud‑based storage. Otherwise, grab that extra stick of RAM, follow the guide, and feel the difference the next time you power on.
Frequently Asked Questions
Can I mix different brands of RAM?
Yes, as long as they share the same type (DDR4, DDR5), speed, and voltage. Mixing brands may affect stability, so it’s best to use identical modules for optimal performance.
Do I need to reinstall Windows after adding RAM?
No. Windows detects the new memory automatically. A simple reboot is enough to start using the added capacity.
What if my laptop only has one RAM slot?
If there’s a single slot, you must replace the existing module with a higher‑capacity one. Check the maximum supported size before purchasing.
Is it safe to upgrade RAM on a MacBook?
Most modern MacBooks have soldered RAM, making upgrades impossible. Older models (pre‑2012) may have removable SO‑DIMM slots; verify the exact model before attempting.
Will adding RAM improve gaming performance?
Yes, especially if the game was memory‑starved. More RAM allows textures and assets to load faster, reducing stutter. Pair the upgrade with a decent GPU for the best experience.
How often should I run a memory diagnostic?
Run a diagnostic after any RAM change and then periodically—every few months—to catch early signs of failing modules.




One Comment