How to Check the Ram of Laptop
Knowing your laptop’s RAM is essential for troubleshooting performance issues and planning upgrades. This guide provides simple, built-in methods for Windows and macOS, plus advanced options like BIOS checks and third-party tools. You’ll learn to interpret RAM capacity, speed, and type to make informed decisions about your system’s memory. Understanding these specs helps you avoid compatibility problems and ensures you get the most out of your laptop.
Ever wondered why your laptop suddenly feels sluggish when you have a dozen browser tabs open, a spreadsheet, and a music player running? The culprit is often your RAM, or Random Access Memory. It’s the crucial workspace where your laptop temporarily stores data it needs right now. Knowing exactly how much RAM you have and its specifications isn’t just tech trivia—it’s practical knowledge that can save you money, time, and frustration. Whether you’re troubleshooting a slow system, planning an upgrade, or just curious, learning how to check the ram of laptop is a fundamental skill for any user. This guide will walk you through every method, from the simplest clicks to more advanced technical checks, ensuring you get a complete picture of your laptop’s memory.
Key Takeaways
- RAM (Random Access Memory) is your laptop’s short-term memory, directly impacting multitasking and application performance. More RAM allows smoother operation with multiple programs open.
- You can check RAM using built-in OS tools: Task Manager/System Information on Windows, and About This Mac/System Report on macOS. These methods require no additional software.
- BIOS/UEFI checks show raw hardware data before the operating system loads, useful for verifying detected memory. Access it by pressing a key during startup (F2, Del, etc.).
- Third-party utilities like CPU-Z provide extremely detailed SPD (Serial Presence Detect) data, including manufacturer part numbers and exact timings. This is critical for matching replacement modules.
- Before upgrading, you must check your laptop’s maximum supported RAM, RAM type (DDR3/4/5), and available slots. Use manufacturer specs or compatibility tools like Crucial’s scanner.
- Physical inspection (opening the laptop) is the most accurate way to see installed modules but isn’t always necessary. Software methods are reliable for most users.
- Upgrading RAM can significantly improve performance on memory-starved systems, but it won’t fix bottlenecks from a slow CPU or outdated storage. Always diagnose the root cause first.
📑 Table of Contents
- What is RAM and Why It Matters for Your Laptop
- Top Reasons to Check Your Laptop’s RAM Regularly
- How to Check RAM on Windows (Multiple Methods)
- How to Check RAM on macOS (Built-in Tools)
- Advanced RAM Inspection: BIOS/UEFI and Third-Party Software
- Upgrading Your Laptop’s RAM: Compatibility, Installation, and Verification
- Conclusion: Knowledge is Power (and Performance)
What is RAM and Why It Matters for Your Laptop
Before we dive into the “how,” let’s quickly clarify the “what.” RAM is volatile memory, meaning it loses all data when the power is turned off. Think of it as your laptop’s desktop. A bigger desktop (more RAM) lets you spread out more documents, tools, and projects (applications and data) for instant access. When your desktop is cluttered (RAM is full), your laptop has to constantly shuffle things into and out of a slow storage closet (your hard drive or SSD), causing noticeable lag.
The Core Specs: Capacity, Type, and Speed
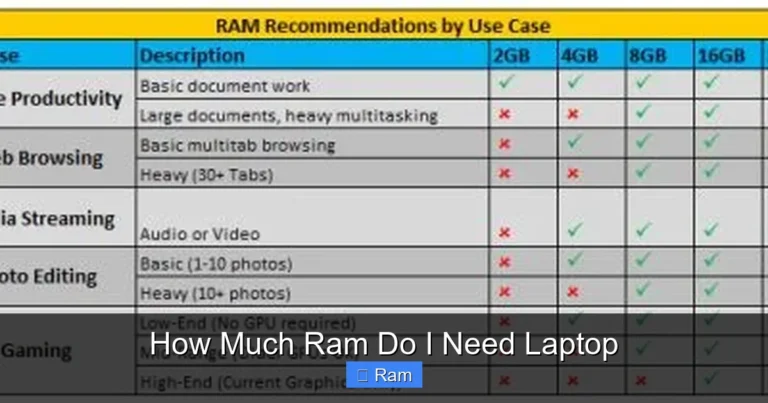
When you check your RAM, you’ll encounter three key numbers. Capacity is measured in Gigabytes (GB) and is the most familiar figure—e.g., 8GB, 16GB, 32GB. For modern computing, 8GB is the bare minimum for basic use, 16GB is the sweet spot for most users, and 32GB+ is for demanding tasks like video editing or virtual machines.
The Type refers to the generation, like DDR3, DDR4, or the latest DDR5. This is a physical and electrical standard. You cannot mix types; your laptop’s motherboard dictates which one it uses. DDR4 is most common in laptops from the last 5-7 years, while DDR5 is found in newer, high-performance models. The type is non-negotiable for upgrades.
Speed is measured in Megahertz (MHz) and sometimes includes “timings” (like CL16). Higher MHz generally means faster data transfer rates. However, laptop RAM often runs at standard JEDEC speeds, and the performance gain from faster RAM in a laptop is usually marginal compared to a desktop. The capacity increase from, say, 8GB to 16GB will almost always provide a more noticeable improvement than going from 2400MHz to 3200MHz RAM.
Integrated vs. Discrete Graphics and RAM
A crucial point for laptop users: most laptops use integrated graphics (like Intel UHD Graphics or AMD Radeon Graphics). These systems share the main system RAM. This means your RAM does double duty—running your operating system and applications and handling graphics processing. Therefore, having sufficient RAM is even more critical for smooth visuals and gaming on an integrated graphics laptop. Dedicated GPU laptops have their own separate video memory (VRAM), relieving some pressure from your system RAM.
Top Reasons to Check Your Laptop’s RAM Regularly
Checking your RAM isn’t a one-time task. It’s a useful diagnostic habit. Here are the most common and practical reasons to perform a check.
Diagnosing Performance Slowdowns
If your laptop feels slower than it used to, high RAM usage is a prime suspect. Before you blame the CPU or consider a full reinstall, check your memory. In Windows, open Task Manager (Ctrl+Shift+Esc) and look at the Memory graph. If it’s consistently above 80-90% during normal use, you’ve likely found your bottleneck. Adding more RAM can be the single most effective upgrade for a system struggling with multitasking.
Planning a Memory Upgrade
This is the most obvious reason. To buy compatible RAM, you need to know: 1) How many slots are available (often 1 or 2 in laptops), 2) What type of RAM is currently installed (DDR4, etc.), 3) The maximum RAM your laptop supports (some older models cap at 8GB or 16GB), and 4) The speed of the existing modules if you plan to add to them. Checking first prevents buying incompatible sticks that sit in a drawer unused.
Troubleshooting Crashes and Freezes
Random system crashes, blue screens (BSODs), or applications crashing unexpectedly can be caused by faulty RAM. While software conflicts are common, defective memory is a hardware culprit. A memory test (like Windows Memory Diagnostic or MemTest86) can help confirm this. But first, you need to know your RAM specs to rule out other issues or to accurately describe the problem if you seek help online or from a technician.
Buying or Selling a Used Laptop
Transparency is key in a used sale. As a seller, accurately listing your laptop’s RAM (e.g., “Upgraded to 16GB DDR4-2666”) builds buyer trust and can justify a higher price. As a buyer, verifying the advertised specs upon receipt is a must. A quick RAM check ensures you got what you paid for and helps you plan any immediate upgrades.
Optimizing Virtual Memory (Page File)
When your physical RAM fills up, Windows uses a portion of your storage drive as “virtual memory” or a page file. This is much slower than real RAM. Knowing your physical RAM capacity helps you make informed decisions about virtual memory settings, though for most users, letting Windows manage it automatically is best practice.
How to Check RAM on Windows (Multiple Methods)
Windows provides several straightforward ways to check your memory. These methods work on Windows 10 and 11.
Method 1: Using Task Manager (The Quickest Glance)
This is the fastest way to see your currently used and available RAM.
- Press Ctrl + Shift + Esc or right-click the taskbar and select Task Manager.
- If you see a simplified view, click More details.
- Select the Performance tab.
- Click on Memory in the left pane.
You’ll see a graph and several key numbers at the bottom:
- In use (Committed): The amount of RAM currently being used by apps and the system.
- Available: RAM that’s free and ready for use.
- Cached: RAM used for disk caching (can be freed quickly if needed).
- Speed: The clock speed of your RAM (e.g., 2666 MHz).
- Form factor: Usually “SODIMM” for laptops.
- Hardware reserved: Memory reserved for system hardware (often a small amount).
Tip: The “Committed” value shows the total virtual memory in use (RAM + page file). It’s normal for this to be higher than your physical RAM.
Method 2: System Information (Detailed Specs)
For a more comprehensive text-based report:
- Press Win + R, type msinfo32, and press Enter.
- In the System Information window, navigate to Components > Memory.
Here you’ll find:
- Total Physical Memory: Your installed RAM capacity.
- Available Physical Memory: Current free RAM.
- Total Virtual Memory: RAM + page file size.
- Memory Device(s): This section lists each RAM stick. Look for Capacity (per module), Speed, Manufacturer, Part Number, and Type (e.g., DDR4). If you have two slots and both are populated, you’ll see two entries.
This is often the most detailed built-in report without using command-line tools.
Method 3: Command Prompt or PowerShell (Raw Data)
For a quick, text-only output that’s easy to copy and paste:
- Open Command Prompt or PowerShell (search for it in the Start menu, right-click and “Run as administrator” for full info).
- Type the following command and press Enter:
wmic memorychip get capacity, speed, memorytype, manufacturer, partnumber
The output will show each memory module on a separate line. The capacity is in bytes (divide by 1,073,741,824 to get GB). The memorytype uses a code: 20=DDR, 21=DDR2, 24=DDR3, 26=DDR4, 30=DDR5. This method is excellent for getting exact part numbers to match when buying new RAM.
How to Check RAM on macOS (Built-in Tools)
macOS makes checking your memory remarkably simple, though upgrade options are limited on newer models.
Method 1: “About This Mac” (The Standard Way)
- Click the Apple menu () in the top-left corner.
- Select About This Mac.
The overview window displays the Memory specification prominently, e.g., “8 GB 2133 MHz LPDDR3”. This tells you total capacity, speed, and type (LPDDR is low-power DDR, common in MacBooks). This is all most users need.
Method 2: System Report (The Detailed View)
- From the Apple menu, go to About This Mac.
- Click the System Report… button.
- In the Hardware section, select Memory.
This report shows the total memory and lists each memory slot. For Macs with user-upgradable RAM (mostly older models), it will list the size, type, and speed of each installed chip. For newer Macs with soldered RAM, it will simply state the total and type, confirming that no slots are available.
Method 3: Terminal (For the Command-Line Inclined)
- Open Terminal (in Applications > Utilities).
- Type one of these commands:
system_profiler SPHardwareDataType | grep "Memory"– Shows a simple line with total RAM.system_profiler SPHardwareDataType– Shows the full hardware report, including memory details.
This is a quick way to get the info without clicking through windows.
Advanced RAM Inspection: BIOS/UEFI and Third-Party Software
Sometimes you need data that the operating system doesn’t fully reveal, or you want to verify what the motherboard sees before the OS loads.
Accessing BIOS/UEFI for Raw Hardware Data
The Basic Input/Output System (BIOS) or its modern successor, UEFI, is the firmware that starts before Windows or macOS boots. It holds the fundamental hardware configuration.
- Restart your laptop.
- Immediately start pressing the designated key repeatedly. Common keys are F2, F10, F12, Del, or Esc. The correct key is often shown on the splash screen (“Press F2 for Setup”). You may need to try a few times.
- Once inside the BIOS/UEFI setup utility, navigate using arrow keys. Look for tabs or menus named System Information, Main, Advanced, or Status.
- Find fields labeled System Memory, Installed Memory, or RAM. It will show total detected memory and sometimes the type and frequency.
Important: Be careful not to change any settings here unless you know what you’re doing. Simply view the information and exit (usually F10 or Esc, choosing “Exit Saving Changes” or “Discard Changes”).
Why Use BIOS/UEFI Checks?
This method confirms that the motherboard is detecting all installed RAM. If you installed a new stick and the OS doesn’t see it, checking BIOS can tell you if the hardware is recognized at a fundamental level. It bypasses any potential OS-level driver or configuration issues.
Third-Party Utilities: CPU-Z and Speccy (The Deep Dive)
For technicians, gamers, and upgraders, third-party tools are invaluable. They read the SPD chips on the RAM modules directly.
- CPU-Z (Free, Windows): Download from cpuid.com. Go to the Memory tab for overall Type, Size, and Speed. The crucial SPD tab lists each slot. Click on each slot number to see the exact manufacturer (e.g., Samsung, Micron), part number (e.g., M471A1K43DB1-CTD), and detailed timing information (CL, tRCD, tRP, tRAS). This part number is gold for finding identical replacement modules.
- Speccy (Free, Windows): From CCleaner’s makers. Provides a clean, readable summary under the RAM section, showing slots, size, type, and speed. Less detailed than CPU-Z for SPD data but more user-friendly.
When to use these: When you need the exact part number to buy matching RAM, or when you suspect the system is not running the RAM at its rated speed (e.g., a 3200MHz stick showing 2400MHz).
Upgrading Your Laptop’s RAM: Compatibility, Installation, and Verification
So you’ve checked your RAM and decided you need more. Here’s how to proceed correctly.
Step 1: Determine Complete Compatibility
This is the most critical step. Don’t just buy “DDR4 RAM.” You need specifics.
- Find your laptop’s exact model number. It’s on a sticker on the bottom or inside the battery compartment (if removable). Or, in Windows, run
wmic csproduct get namein Command Prompt. - Search for the official manufacturer’s specifications. Go to the support page for your model (e.g., Dell, HP, Lenovo). Look for “Tech Specs” or “Product Guide.” Find the section on memory. It will state: maximum supported RAM (e.g., “Up to 64GB”), type (e.g., “DDR4 SODIMM 2666MHz”), and number of slots (e.g., “2 SODIMM slots”).
- Use a compatibility scanner. Tools like the Crucial System Scanner or Kingston Memory Search are excellent. They scan your system and list guaranteed compatible modules for your specific make and model.
- Check what’s already installed. Use the methods above to see if you have one or two sticks. If you have two 8GB sticks (total 16GB) and two slots, you could replace both with 16GB sticks for 32GB total, or add another 8GB stick if one slot is empty (though mixing capacities can sometimes affect dual-channel performance).
Step 2: Purchase the Right RAM
Buy from reputable brands (Crucial, Kingston, Corsair, G.Skill). Match the type (DDR4), speed (e.g., 2666MHz), and form factor (SODIMM for laptops). If possible, get a kit (two identical sticks) for best dual-channel performance. Ensure the voltage matches (usually 1.2V for DDR4). The part number from CPU-Z is your best guide for an exact match.
Step 3: Safe Installation
- Power down completely. Shut down the laptop, unplug the charger, and if possible, remove the internal battery (consult your manual).
- Discharge static electricity. Touch a metal part of the laptop chassis or use an anti-static wrist strap.
- Open the RAM access panel. Most laptops have a small door on the bottom secured by one or two screws. Some require removing the entire bottom cover. Consult your service manual or a reliable YouTube teardown video for your specific model.
- Remove old RAM (if upgrading). Gently pull the metal clips on either side of the module outward. The module will pop up at an angle. Pull it out straight.
- Install new RAM. Align the notch on the module with the slot. Insert at a 45-degree angle, then press down firmly and evenly until the clips snap into place.
- Reassemble and power on. Screw the panel back on, reconnect the battery if removed, and start the laptop.
Step 4: Verify the Upgrade
Do not assume it worked. Immediately use the Task Manager or System Information methods from earlier to confirm the new total capacity is recognized. If you see the correct amount, run a quick memory stress test. Windows has a built-in tool: search for “Windows Memory Diagnostic,” restart your PC, and let it run. For a more thorough test, use the bootable MemTest86 (requires a USB drive). A clean run with no errors means your new RAM is stable and properly installed.
Conclusion: Knowledge is Power (and Performance)
Checking your laptop’s RAM is one of the easiest and most empowering things you can do as a user. It demystifies your machine and puts you in control. You now know that a quick glance at Task Manager can reveal a memory bottleneck, that CPU-Z can give you the exact part number for a perfect upgrade, and that your laptop’s manual or a compatibility scanner is your best friend before buying new sticks. Remember, RAM is just one piece of the performance puzzle. If your laptop has a traditional hard drive, upgrading to an SSD will often provide a more dramatic improvement than adding RAM alone. But if you’re constantly seeing memory usage pegged at 100%, a RAM upgrade is a cost-effective and relatively simple solution. So go ahead, run one of the methods described, and take the first step toward a faster, more responsive laptop.
Frequently Asked Questions
What’s the difference between DDR3, DDR4, and DDR5 RAM?
These are generations of RAM technology. DDR4 and DDR5 are not physically or electrically compatible. DDR4 is common in laptops from ~2015-2021, offering good performance and power efficiency. DDR5 is the latest standard, found in newer high-end laptops, offering higher speeds and bandwidth but at a higher cost. Your laptop’s motherboard determines which type it supports; you must match it exactly for an upgrade.
Can I check my laptop’s RAM without opening it?
Absolutely. All the software methods described—Task Manager, System Information, About This Mac, and third-party tools—will give you a complete picture of your RAM capacity, type, and speed without ever touching a screwdriver. Physical opening is only necessary if you need to see the physical modules for identification or to install new ones.
What do RAM MHz and timings (like CL16) mean?
MHz (megahertz) is the data transfer rate or speed. Higher MHz generally means faster data movement. Timings (e.g., CL16, tRCD 18) are latency measurements—the delays in clock cycles between operations. Lower numbers are better. For laptop RAM, speed (MHz) is more commonly advertised and has a more noticeable impact than tight timings. The JEDEC standard speed (often 2133-2666MHz for DDR4) is what most laptop RAM runs at automatically.
Is virtual RAM (page file) the same as physical RAM?
No. Virtual RAM is a portion of your storage drive (SSD/HDD) that Windows uses as overflow when your physical RAM is full. It extends your available memory but is orders of magnitude slower than actual RAM. It’s a necessary safety net, but relying on it heavily causes severe slowdowns. Adding physical RAM reduces the need for virtual memory and dramatically improves performance.
Does higher RAM frequency always mean better performance?
Not always, especially in laptops. The performance gain from faster RAM (e.g., 3200MHz vs 2666MHz) is often minimal in everyday tasks and gaming on integrated graphics. The jump from 8GB to 16GB capacity will provide a far more significant and noticeable improvement. Focus on capacity first. If you’re already at a high capacity (16GB+) and have a high-performance CPU/GPU, then faster RAM *might* offer a small boost in specific applications.
Will adding more RAM always speed up my laptop?
Only if insufficient RAM is the actual bottleneck. If your laptop is slow because it has a weak CPU, an old mechanical hard drive, or integrated graphics struggling with a high-resolution display, adding RAM will have little to no effect. Use Task Manager to check. If your RAM usage is consistently below 70-80% during slow tasks, the problem lies elsewhere. Always diagnose before you upgrade.