How to Know If Your Speakers Are Blown

Noticing weird sounds? You might need to learn how to know if your speakers are blown before permanent damage occurs. This guide walks you through simple listening tests, physical checks, and quick fixes. Catch speaker damage early to protect your audio system and wallet.
Music should sound crisp, clear, and full of life. But what happens when your favorite track starts crackling, buzzing, or sounding flat? You might be dealing with blown speakers. The good news is you do not need fancy tools to figure it out. You just need to pay attention to the signs.
In this guide, we will walk you through exactly how to know if your speakers are blown. We will cover simple listening tests, physical checks, and quick troubleshooting steps. By the end, you will know exactly what to look for and what to do next. Let us dive in.
Key Takeaways
- Listen for distortion: Crackling, buzzing, or fuzzy sounds at high volume often signal blown speakers.
- Check for physical damage: Tears in the cone or a loose surround can ruin sound quality fast.
- Test at low volume first: Start quiet to isolate speaker issues without risking further harm.
- Use a multimeter for accuracy: Measure speaker impedance to confirm if the voice coil is broken.
- Replace blown drivers promptly: Ignoring damaged speakers can strain your amplifier and worsen the problem.
- Clean and maintain regularly: Dust and debris often mimic blown speaker symptoms, so keep your setup tidy.
- Know when to seek help: Complex wiring or amplifier issues may require a pro instead of DIY fixes.
📑 Table of Contents
- Why It Matters to Spot Blown Speakers Early
- Common Signs That Point to Blown Speakers
- Physical Checks to Confirm Speaker Damage
- Simple Tests You Can Do at Home
- Car Audio vs. Home Speakers: What Changes?
- What to Do After You Find Blown Speakers
- How to Prevent Blown Speakers in the Future
- Key Takeaways
Why It Matters to Spot Blown Speakers Early
Catching speaker damage early saves you time, money, and frustration. A small tear in the cone can turn into a full replacement if you keep pushing it. Bad speakers also strain your amplifier and receiver. That extra stress can shorten the life of your whole audio system.
Think of it like a squeaky wheel on a bike. Ignore it, and the whole ride gets rough. Fix it early, and you keep enjoying the journey. The same goes for your car audio or home setup. Spotting the warning signs keeps everything running smooth.
The Cost of Waiting Too Long
Delaying repairs often leads to bigger problems. A slightly damaged woofer might only sound muffled at first. Push it harder, and the voice coil can overheat. Then you face a full replacement instead of a simple fix. Early detection is your best friend.
How Blown Speakers Affect Your Listening
Bad drivers change the whole vibe of your music. Bass loses its punch. Vocals sound thin. Highs turn harsh or disappear completely. You might even notice sound distortion at normal volume. That is your cue to investigate.
Common Signs That Point to Blown Speakers
You do not need to be an audio engineer to notice trouble. Your ears are powerful tools. Start by playing a song you know well. Listen closely at different volumes. Pay attention to any changes that feel off.
Visual guide about blown car speaker cone damage
Image source: improvecaraudio.com
Distortion and Crackling Sounds
One of the clearest red flags is distortion. The sound gets fuzzy, gritty, or crunchy. It often shows up when you turn the volume up. Sometimes you hear a light crackle even at low levels. That usually means the speaker cone is struggling to move properly.
Buzzing, Rattling, or Harsh Highs
A loose part inside the cabinet can cause buzzing. But if the noise comes from the driver itself, you may have a blown speaker. Harsh, shrill highs are another clue. They often mean the tweeter is damaged or misaligned. Rattling that does not stop when you lower the volume is a strong warning.
Loss of Bass or Fading Sound
Sometimes the problem is not noise. It is silence. A blown subwoofer or woofer may stop producing deep bass altogether. The sound feels weak, thin, or unbalanced. You might notice one side of the room sounds quieter than the other. That uneven output often points to a failing driver.
Quick Tip: The Volume Test
Play a familiar track at a low volume first. Then slowly raise it. If the sound breaks up only at higher levels, the voice coil may be overheating. If it sounds bad from the start, the damage is likely more serious. Use this simple test before moving on to physical checks.
Physical Checks to Confirm Speaker Damage
Listening tells you a lot. Looking tells you more. A quick visual inspection can reveal tears, holes, or warping. You do not need special gear. Just a bright light and a careful eye.
Inspecting the Cone and Surround
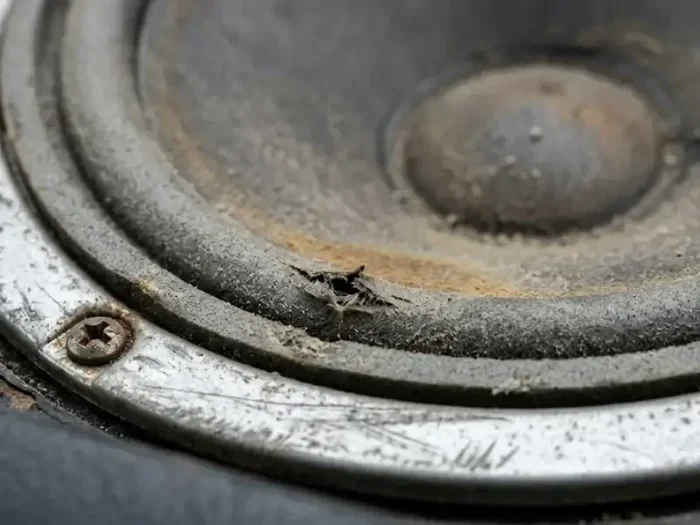
Gently look at the speaker cone. Check the outer edge, called the surround. Small tears, cracks, or peeling material are clear signs of wear. A damaged surround often causes air leaks. That leads to weak, muddy sound. If you see visible holes, the driver is likely compromised.
Checking for Debris and Dust
Sometimes the issue is not damage at all. Dirt, dust, or loose wires can mimic blown speaker symptoms. Wipe the grille and cone lightly with a soft brush. Remove any debris that might be causing rattles. Clean speakers often sound better right away. This step helps you rule out simple fixes.
Feeling for Air Leaks and Loose Parts
Place your hand near the speaker while it plays low bass. You should feel a steady push of air. If the airflow feels uneven or weak, there may be a leak. Tapping the cabinet lightly can also reveal loose panels. Secure everything before assuming the driver is dead.
Simple Tests You Can Do at Home
You can run a few easy checks without opening anything up. These tests help you separate speaker issues from amplifier problems or wiring faults. Keep things simple and safe.
The Swap Test
Move the suspect speaker to another channel or position. If the bad sound follows the speaker, the driver is likely the problem. If the sound stays in the same spot, check your wiring or receiver settings. This quick swap saves a lot of guesswork.
The Frequency Sweep Test
Play a tone sweep from low to high frequencies. Listen for drops, buzzes, or dead zones. A healthy speaker handles the full range smoothly. A blown speaker often fails at specific points. You can find free tone generator apps online for this. Keep the volume low to avoid further stress.
Using a Multimeter for Speaker Impedance
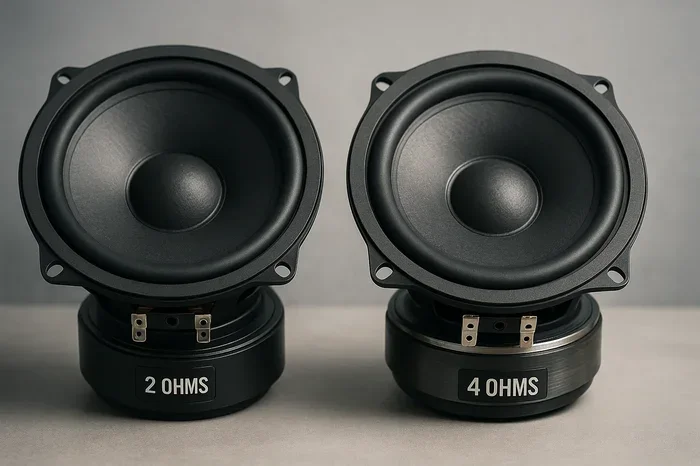
If you want a more technical check, grab a multimeter. Set it to measure resistance. Touch the probes to the speaker terminals. A healthy 4-ohm or 8-ohm speaker will show a steady reading. A reading near zero or infinity usually means the voice coil is broken. This test confirms electrical failure quickly.
Car Audio vs. Home Speakers: What Changes?
The signs are similar, but the setup changes a bit. Car audio faces heat, vibration, and moisture. Home speakers deal with different room acoustics and power levels. Knowing the context helps you diagnose faster.
Car Speaker Challenges
Car speakers sit in tight spaces and handle constant movement. Door panels can rattle and mask true speaker damage. Heat from the sun can also weaken glue and surrounds over time. If your car audio sounds tired, check for environmental wear. You may also want to learn how to wire component speakers if you plan an upgrade later.
Home Speaker Considerations
Home setups often run at higher volumes for longer sessions. Placement matters a lot. A speaker near a wall can sound boomy, which some people mistake for damage. Rule out room effects before blaming the driver. Clean placement and proper isolation often improve sound right away.
What to Do After You Find Blown Speakers
So you confirmed the problem. Now what? You have a few solid options. The right choice depends on the damage, your budget, and your goals.
Repair vs. Replace
Small tears in the surround can sometimes be fixed. Voice coil damage, however, usually means replacement. If the cone is cracked or the frame is bent, replacement is safer. Compare the cost of repair against a new driver. Often, a quality replacement is the smarter long-term move.
Checking Your Amplifier and Wiring
Never assume the speaker is the only culprit. A weak amplifier or bad wire can cause similar symptoms. Inspect connections for corrosion or loose ends. Make sure your receiver or amp is not clipping. If you are running multiple drivers, you might also look into how to connect 4 speakers to a 2 channel amp to balance your setup properly.
When to Call a Pro
If you are unsure about wiring, impedance, or enclosure design, get help. A pro can test your system safely and suggest the right replacements. This is especially useful for complex car audio or home theater builds. Expert guidance prevents costly mistakes.
Quick Tip: Match Your New Drivers
Replace like with like when possible. Match impedance, size, and power handling. Mixing mismatched speakers can strain your amp and ruin the sound balance. Take notes on your old driver specs before buying a new one.
How to Prevent Blown Speakers in the Future
Prevention is easier than replacement. A few good habits keep your audio system healthy for years. Treat your speakers well, and they will reward you with great sound.
Avoid Overpowering Your Drivers
Too much power is a common cause of failure. Clipping from an underpowered amp is just as bad. Match your amp to your speakers and keep volumes reasonable. Give your system room to breathe.
Keep Volume and Bass in Check
Heavy bass at max volume stresses the woofer fast. Dial it back before the sound distorts. If you love deep bass, consider a dedicated subwoofer that can handle the load. That takes pressure off your main speakers.
Regular Cleaning and Care
Dust and grime build up over time. Wipe your speakers gently and keep vents clear. Avoid placing drinks or sharp objects near the setup. Good care reduces false alarms and extends speaker life.
Expert Insight: Let Your System Rest
Give your speakers a break during long sessions. Continuous high output generates heat. Heat wears down glue, surrounds, and coils. Short breaks keep everything cooler and happier.
Key Takeaways
You now have a clear path to spot trouble early. Listen for distortion, buzzing, and bass loss. Look for tears, debris, and air leaks. Run simple swaps and tone tests. Use a multimeter when you need a definitive answer. Treat your system well, and you will avoid most blown speaker headaches.
Remember, learning how to know if your speakers are blown is about paying attention. Your ears, eyes, and a few basic tools go a long way. Catch problems early, fix them smart, and keep enjoying your music the way it should sound.
Frequently Asked Questions
What are the first signs of a blown speaker?
The earliest signs are distortion, crackling, or buzzing at higher volumes. You may also notice weak bass or a fading sound on one side. If the problem stays even at low volume, the damage is likely more serious.
Can a blown speaker damage my amplifier?
Yes, a damaged speaker can reflect odd loads and strain your amplifier over time. Severe impedance issues or continuous clipping can shorten amp life. It is best to fix or replace the speaker before pushing the system hard.
How do I test a speaker with a multimeter?
Set your multimeter to resistance mode and touch the probes to the speaker terminals. A working 4-ohm or 8-ohm speaker shows a steady reading near its rated value. A reading near zero or infinity usually means the voice coil is broken.
Is crackling always a sign of a blown speaker?
Not always. Loose wires, dirt, or a bad connection can also cause crackling. Clean the speaker and check the wiring first. If the noise persists, the driver itself may be damaged.
Should I repair or replace a blown speaker?
Small surround tears can sometimes be repaired, but voice coil damage usually requires replacement. If the cone is cracked or the frame is bent, replacement is the safer choice. Compare repair cost and sound quality before deciding.
How can I prevent my speakers from blowing out?
Match your amplifier to your speakers and avoid pushing volumes into distortion. Keep the system clean, limit excessive bass, and give it breaks during long sessions. Good wiring and proper placement also help your speakers last longer.