How to Clean Speakers in Car
Dirty car speakers can ruin your audio experience and harbor harmful bacteria. This guide shows you exactly how to clean speakers in car environments without damaging delicate cones or grilles. You will learn safe methods to remove dust, grease, and static noise for better sound. Keep your vehicle fresh and your music crisp with our expert tips.
Key Takeaways
- Use gentle tools: Soft microfiber cloths and soft brushes prevent scratches on delicate speaker surfaces.
- Avoid harsh chemicals: Alcohol and ammonia can crack coatings, so stick to mild soap solutions.
- Remove grime safely: Compressed air helps dislodge dust from hard-to-reach crevices effectively.
- Clean grilles first: Always remove the speaker grille if possible to clean behind it thoroughly.
- Dry completely: Moisture inside speakers causes static, so ensure everything is dry before playing music.
- Regular maintenance: Wiping down speakers weekly prevents heavy buildup and extends speaker life.
- Check for damage: Cleaning is a good time to inspect for blown speakers or wiring issues.
📑 Table of Contents
Why You Need to Clean Your Car Audio System
Your car is a sanctuary. It is where you commute, run errands, and sometimes even relax after a long day. But have you ever noticed that your music sounds muffled? Often, the problem is not the radio. It is the dirt. Dirty car speakers accumulate dust, grease, and grime over time. This buildup blocks sound waves. It also makes your interior look neglected.
Cleaning your audio system is simple. You do not need expensive tools. You just need the right technique. Many people worry about damaging the cones. That is a valid concern. However, with care, you can restore clarity. A clean speaker performs better. It also lasts longer. Dirt can cause overheating in some components. It can also attract moisture. This leads to corrosion on metal parts.
Furthermore, hygiene matters. Your hands touch the dashboard. Then you touch the speakers. Bacteria builds up there. Cleaning removes these germs. It makes your car healthier for you and your passengers. If you wonder how to clean speakers in car settings without stress, this guide helps. We will walk you through every step. You will save money on repairs too. Sometimes sound issues come from dirt, not blown drivers. You might check how to check if speakers are blown before assuming the worst.
Gathering the Right Cleaning Supplies
Before you start, you need the right gear. Using the wrong tools causes damage. Harsh chemicals melt plastic. Rough cloths scratch surfaces. You want to be gentle. Here is what you should gather for the job.

Visual guide about cleaning car speakers interior
Image source: i.ytimg.com
Essential Tools for the Job
You likely have most of these at home. If not, they are cheap to buy. Do not skip the microfiber cloth. Paper towels leave lint. They can also scratch soft materials.
- Microfiber cloths: These are soft and lint-free. They trap dust without scratching.
- Soft-bristle brush: A clean paintbrush or makeup brush works well. It gets into crevices.
- Compressed air: This blows out dust from tight spots. Use it carefully.
- Mild soap solution: Mix water with a drop of dish soap. Avoid strong detergents.
- Isopropyl alcohol (optional): Use only for tough grime on metal. Do not use on cones.
- Vacuum cleaner: Use a brush attachment for loose dust.
What to Avoid
Some items seem helpful but are dangerous. Do not use glass cleaner. It often contains ammonia. Ammonia damages speaker coatings. Do not use excessive water. Electronics and water do not mix. You want the cloth damp, not wet. If you are unsure about chemical safety, read more about how to clean car speakers safely.
Also, avoid sharp objects. Never use a knife to pry off grilles. You might crack the plastic. Use your fingers or a plastic trim tool. Patience is key. Rushing leads to mistakes. Take your time to prepare your workspace. Park in a shaded area. Direct sun dries cleaning solutions too fast. This leaves streaks.
Step-by-Step Guide on How to Clean Speakers in Car
Now you are ready. This process is straightforward. Follow these steps in order. Do not skip the preparation phase. It ensures the best results. You will see a difference immediately.
Removing the Speaker Grille
Most car speakers have a grille. This is the protective mesh. Dust hides behind it. To clean deeply, you should remove it. Check if your grilles are removable. Some clip on. Others use screws.
Gently pull the grille away. If it resists, do not force it. Check for hidden clips. You can use a plastic pry tool. Once off, set it aside safely. Clean the grille separately. You can wash it with soap and water. Let it dry completely. Never put a wet grille back on. Moisture causes rust and sound issues.
Wiping the Speaker Cones
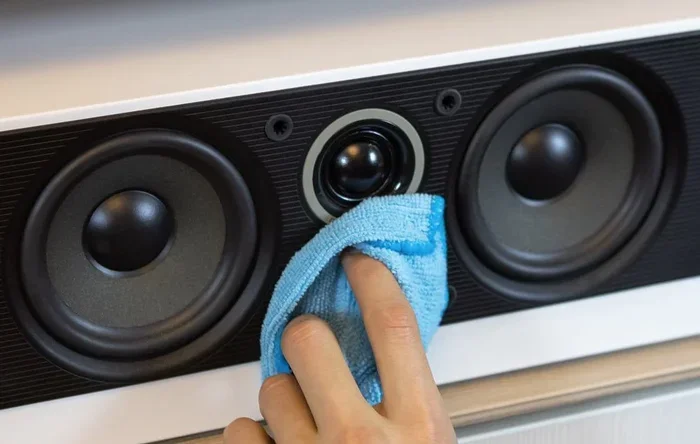
The cone is the main part that moves. It is usually made of paper, plastic, or metal. Paper cones are very delicate. Do not scrub them. Use a dry microfiber cloth. Gently wipe the surface. Remove loose dust first.
For sticky grime, use a slightly damp cloth. Wring it out well. You want minimal moisture. Wipe gently in one direction. Do not rub back and forth hard. This can damage the surround. The surround is the flexible edge. It is often rubber or foam. Keep it dry. If you hear distortion later, you might need to learn how to tell if your speakers are blown.
Cleaning the Surround and Frame
The frame holds the speaker in place. It collects oils from the air. Use your soft brush here. Sweep away dust from the edges. You can use a tiny bit of alcohol on the metal frame. Do not let it touch the cone. Alcohol dries fast. It is good for grease. But it is harsh on paper.
Check the wiring while you are there. Look for frayed wires. Clean wires ensure good connection. If you see damage, fix it soon. Good maintenance prevents future costs. You can read about how much does it cost to fix car speakers if repairs are needed.
Dealing with Stubborn Grime and Grease
Sometimes dust is not the only issue. Hands touch speakers. Oils transfer. Food spills happen. This creates a sticky layer. Regular wiping might not work. You need a deeper clean. But you must stay safe.
Using Safe Cleaning Solutions
Water and soap is the safest bet. Mix a few drops of dish soap in warm water. Dip your cloth. Wring it until it is almost dry. Wipe the greasy area. The soap breaks down the oil. Wipe again with a clean damp cloth. This removes soap residue.
For metal parts, you can use a bit of vinegar. Mix equal parts water and vinegar. This cuts through heavy grease. Do not use this on painted surfaces. Test a small spot first. Always dry the area immediately. Lingering moisture is the enemy.
Handling Static Noise
Dirt causes static. It interferes with the signal. If you hear crackling, clean the contacts. Sometimes the issue is internal. But often it is surface dirt. Clean the connections gently. If the noise persists, check your wiring. You might want to know static noise from speakers in car causes.
Compressed air helps here too. Blast away loose particles. Hold the can upright. Do not spray liquid. Keep the nozzle a few inches away. This prevents damage from high pressure. It is great for speaker terminals.
Drying and Reassembling Your Speakers
Cleaning is half the work. Drying is the other half. You cannot turn on the music yet. Moisture inside the speaker causes short circuits. It also ruins sound quality. Wait until everything is bone dry.
Ensuring Everything is Dry
Use a dry microfiber cloth to blot any wet spots. Let the car sit with windows open. Airflow helps evaporation. Do not use a hair dryer. Heat can warp plastic cones. It can also melt adhesives. Natural drying is best.
Wait at least thirty minutes. If you used alcohol, it dries faster. If you used soap, wait longer. Check the grille too. Ensure no water is trapped in the mesh. Wet grilles look bad. They also drip onto your dashboard.
Putting It All Back Together
Once dry, reinstall the grilles. Line up the clips carefully. Press them in until they click. Ensure the speaker sits flush. Loose speakers vibrate. This causes rattling noises. Tighten any screws you removed. Do not overtighten. Stripped screws are hard to fix.
Now test the sound. Play some music at low volume. Listen for distortion. Check both left and right channels. If it sounds clear, you succeeded. You have learned how to clean speakers in car like a pro. Enjoy your refreshed audio system.
Maintenance Tips to Keep Speakers Clean
Cleaning once is great. Keeping them clean is better. Establish a routine. This prevents heavy buildup. It saves you time later. Small efforts yield big results.
Regular Wiping Schedule
Wipe your speakers once a week. It takes two minutes. Use a dry microfiber cloth. Dusting prevents accumulation. It also keeps your car looking new. Make it part of your car wash routine.
Vacuum the interior monthly. Use the brush attachment. Go over the speaker areas. This removes loose debris. It stops dirt from settling into the cones. Consistent care extends the life of your audio gear.
Protective Measures
Consider using speaker covers. Some aftermarket grilles are easier to clean. They protect the cones from direct dust. You can wash them more easily. Also, avoid eating messy food in the car. Crumbs and grease are the main culprits.
Keep your hands clean when adjusting volume. Oils from skin attract dust. This creates a cycle of dirt. Small habits make a big difference. If you upgrade your system later, look into car speakers with built in amplifier options for better sound.
Common Mistakes to Avoid
Even with good intentions, errors happen. Avoid these pitfalls. They can cost you money. Some mistakes cause permanent damage. Learn from others’ experiences.
- Using too much water: This causes internal damage. Always wring out cloths.
- Scrubbing too hard: Cones are delicate. Gentle pressure is enough.
- Ignoring the grille: Dust behind the grille blocks sound. Remove it to clean properly.
- Using harsh chemicals: Ammonia and bleach destroy coatings. Stick to mild soap.
- Skipping the dry step: Wet speakers crackle. Let them dry fully.
- Forcing clips: Plastic breaks easily. Use tools gently.
Expert insights suggest regular checks. Audio technicians recommend inspecting wiring during cleaning. Loose connections cause sound dropouts. Catching them early saves repairs. If you plan major upgrades, you might research how to wire 4 speakers to 2 channel amp for better setup.
Key Takeaways
Cleaning your car audio is simple. It improves sound and hygiene. Use soft tools and mild solutions. Avoid harsh chemicals and excess water. Dry everything completely before use. Regular maintenance keeps sound crisp. Follow these steps to learn how to clean speakers in car environments effectively. Your music deserves a clean stage.
Frequently Asked Questions
Can I use water to clean car speakers?
Yes, but use it sparingly. Dampen a cloth slightly rather than spraying water directly. Excess moisture can damage the internal electronics and cause static noise.
What is the best cleaner for car speaker grilles?
A mild soap and water solution is safest for most grilles. Avoid alcohol or ammonia-based cleaners as they can crack or fade the plastic mesh over time.
How often should I clean my car speakers?
You should wipe them down once a week to prevent dust buildup. A deeper clean every few months ensures optimal sound quality and hygiene.
Will cleaning speakers improve sound quality?
Yes, removing dust and grime can clear blocked sound waves. It reduces muffled audio and may eliminate minor static interference caused by debris.
Can I remove the speaker grille without breaking it?
Most grilles clip on gently and can be removed with care. Use a plastic pry tool if needed, but never force them as plastic clips break easily.
Is it safe to use compressed air on speakers?
Yes, but keep the nozzle at a distance. Use short bursts to dislodge dust without pushing it deeper into the speaker cone or voice coil.