How to Upgrade Laptop Ram Memory
Upgrading your laptop’s RAM is one of the most effective and affordable ways to breathe new life into a sluggish machine. This guide walks you through every critical step, from checking compatibility to safely installing the new modules. You’ll learn how to select the correct memory, avoid common pitfalls, and verify the upgrade’s success, often resulting in significantly faster multitasking and application performance.
Is your trusty laptop starting to feel more like a patient tortoise than a swift hare? Do you find yourself waiting for web browsers with dozens of tabs to respond, or does your video conference call stutter the moment you open a spreadsheet? Before you start saving for a brand-new machine, there’s a powerful, cost-effective trick that can often restore its youthful vigor: a laptop RAM upgrade. Random Access Memory, or RAM, is your computer’s short-term workspace. The more of it you have, the more tasks your laptop can juggle at once without slowing down to a crawl. This comprehensive guide will transform you from a cautious beginner into a confident do-it-yourselfer, capable of performing one of the most impactful upgrades possible for your portable PC.
We’ll break down everything you need to know in plain English. No confusing jargon, no skipped steps. You’ll learn how to become a detective and uncover your laptop’s exact memory secrets, how to shop for the perfect new RAM sticks without overspending, and the precise, safe method to crack open your machine and install them. Think of this as a friendly, detailed conversation over coffee about how to make your laptop feel fast again. By the end, you’ll not only know how to upgrade laptop RAM but also understand the why behind every step, ensuring a successful and stress-free experience.
Key Takeaways
- Compatibility is King: Your laptop’s motherboard dictates the maximum RAM, type (DDR3/DDR4/DDR5), speed, and number of slots. Always verify this before purchasing any memory.
- Preparation Prevents Problems: Back up your data, gather the right tools (screwdrivers, anti-static wrist strap), and fully power down and unplug your laptop, removing the battery if possible.
- Handle Memory Modules with Care: RAM sticks are sensitive to static electricity and physical damage. Hold them by the edges, avoid touching the gold pins, and ensure they click securely into place.
- The Process is Reversible: Upgrading RAM typically does not void your warranty if done carefully. You can always reinstall the old modules if needed, making it a low-risk, high-reward project.
- Verify After Installation: Use your operating system’s system information tool or a utility like CPU-Z to confirm the new RAM is recognized and operating at the correct speed.
- Diminishing Returns Exist: For most general use, 8GB-16GB is sufficient. Upgrading beyond 16GB is primarily for professional workloads like video editing, 3D rendering, or running multiple virtual machines.
- Know When to Skip It: If your laptop has soldered RAM (non-upgradable) or is severely bottlenecked by an old hard drive or slow CPU, a RAM upgrade may not yield noticeable benefits.
📑 Table of Contents
- Why Upgrade Your Laptop’s RAM? Understanding the “Why”
- Phase One: The Detective Work – Researching Your Laptop’s Compatibility
- Phase Two: Acquiring Your New RAM – Shopping Smart
- Phase Three: The Physical Upgrade – A Step-by-Step Guide
- Phase Four: Verification and Troubleshooting
- The Real-World Impact: What to Expect After the Upgrade
- When a RAM Upgrade Isn’t the Answer (Or Isn’t Possible)
- Conclusion: You Did It! Now Go Enjoy Your Faster Laptop
Why Upgrade Your Laptop’s RAM? Understanding the “Why”
Before we dive into the “how,” let’s solidify the “why.” RAM is fundamentally different from your laptop’s storage (the hard drive or SSD). Storage is like a vast warehouse where all your files, programs, and the operating system live permanently. RAM is the workbench on your factory floor. When you open an application or a file, the necessary data is copied from the slow warehouse (storage) to the fast workbench (RAM) so your CPU can access it instantly. If your workbench is too small (low RAM), the CPU has to constantly shuffle things back and forth to the warehouse, which creates the lag and stuttering you experience.
The Tangible Benefits of More Memory
Adding more RAM expands your workbench. The results are often immediately noticeable in everyday tasks:
- Seamless Multitasking: This is the number one benefit. You can have a web browser with 20+ tabs, a word processor, a music streaming app, and a video call running simultaneously without the system grinding to a halt. Your laptop will switch between them instantly.
- Faster Application Performance: RAM-intensive programs like Google Chrome (famous for its appetite), photo editors (Adobe Photoshop, GIMP), and development environments (Visual Studio, Android Studio) run much smoother. Large files open quicker, and filters or calculations process faster.
- Improved Gaming (on some laptops): While the GPU is the star for gaming, many modern games also rely on system RAM for textures and game data. If your laptop meets other gaming requirements but has only 8GB of RAM, upgrading to 16GB can provide a more stable frame rate and reduce stuttering in open-world games.
- Better for Professionals: For video editors, 3D artists, and data analysts, more RAM is non-negotiable. It allows them to work with larger project files and complex datasets without the system crashing or using incredibly slow virtual memory (a portion of your hard drive used as fake RAM).
How Much RAM Do You Really Need in 2024?
The “sweet spot” has shifted over the years. Here’s a practical breakdown:
- 4GB: The absolute bare minimum for modern Windows or macOS. Only suitable for very light web browsing and document work. Upgrading from this is the single biggest performance leap you can make.
- 8GB: The current standard for general use. Handles web browsing, office applications, and media consumption comfortably. Good for students and casual users.
- 16GB: The new recommended sweet spot for power users, gamers, and professionals. Provides ample room for heavy multitasking, modern game titles, and moderate creative work. This is the target for most upgrade projects.
- 32GB and Above: For professional workstations: 4K video editing, 3D rendering, running multiple virtual machines, or scientific computing. Overkill for 99% of everyday users.
Phase One: The Detective Work – Researching Your Laptop’s Compatibility
This is the most critical phase. Buying the wrong RAM is a waste of money and can damage your laptop. You must become a detective and gather three key pieces of information: Type, Capacity, and Slots.
Visual guide about How to Upgrade Laptop Ram Memory
Image source: cdn.mos.cms.futurecdn.net
Step 1: Identify Your Laptop Model Externally
Turn your laptop over. Look for a model number sticker. It’s often on a label near the battery or on the bottom panel. It might look like “Dell XPS 15 9510,” “HP Pavilion 15-ek1xxx,” “Lenovo ThinkPad T14 Gen 3,” or “ASUS ROG Zephyrus G14.” This exact model string is your golden ticket. Write it down.
Step 2: Use Software to Check Current RAM (The Easy Way)
Before you open anything, use your existing system to gather clues. On Windows, press Ctrl + Shift + Esc to open Task Manager. Go to the “Performance” tab and click on “Memory.” Here you’ll see:
- The current installed capacity (e.g., 8.0 GB).
- The speed in MHz (e.g., 3200 MHz).
- The “Form factor” will say ” SODIMM” (the small laptop memory module).
- Most importantly, the “Hardware reserved” memory is not relevant here, but the “Speed” and “In use” / “Committed” graphs give you a live view of your usage.
For even more detail, download a free, safe utility like CPU-Z. Go to the “Memory” tab and the “SPD” tab. The SPD tab will list each memory slot. Click through each one. It will tell you the exact part number, type (e.g., DDR4), size, and manufacturer of the stick currently in that slot. This is incredibly valuable data.
Step 3: Consult the Manufacturer’s Official Documentation
This is your authoritative source. Go to the laptop manufacturer’s support website (e.g., Dell Support, HP Support, Lenovo Support). Enter your exact model number. Look for:
- Specifications/Technical Specifications: This page will list the “Memory” section. It will state the type (DDR4, DDR5), the maximum supported RAM (e.g., “Up to 64GB”), the number of slots (e.g., “2 SODIMM slots”), and the official supported speeds.
- Hardware Maintenance Manual (HMM) or User Guide: Search for “Upgrading Memory” or “Replacing Memory.” This PDF will have exploded diagrams, exact screw locations, and step-by-step disassembly instructions specific to your model. Download this! It is your roadmap.
Step 4: The Crucial.com / Manufacturer’s Configurator Method
Websites like Crucial.com (by Micron) and Kingston.com have excellent system scanner tools. You can download their scanner app, which will automatically detect your laptop model and list 100% compatible RAM options. This is perhaps the easiest method for beginners. You can also manually enter your laptop brand and model on their sites. These tools are reliable because they are built by memory manufacturers with direct access to compatibility databases.
Phase Two: Acquiring Your New RAM – Shopping Smart
Armed with your laptop’s specific requirements (e.g., “DDR4-3200 SODIMM, max 64GB, 2 slots”), you’re ready to shop. The key decisions are capacity, speed, and brand.
Visual guide about How to Upgrade Laptop Ram Memory
Image source: thumbs.dreamstime.com
Matching Specifications: Type, Speed, and Capacity
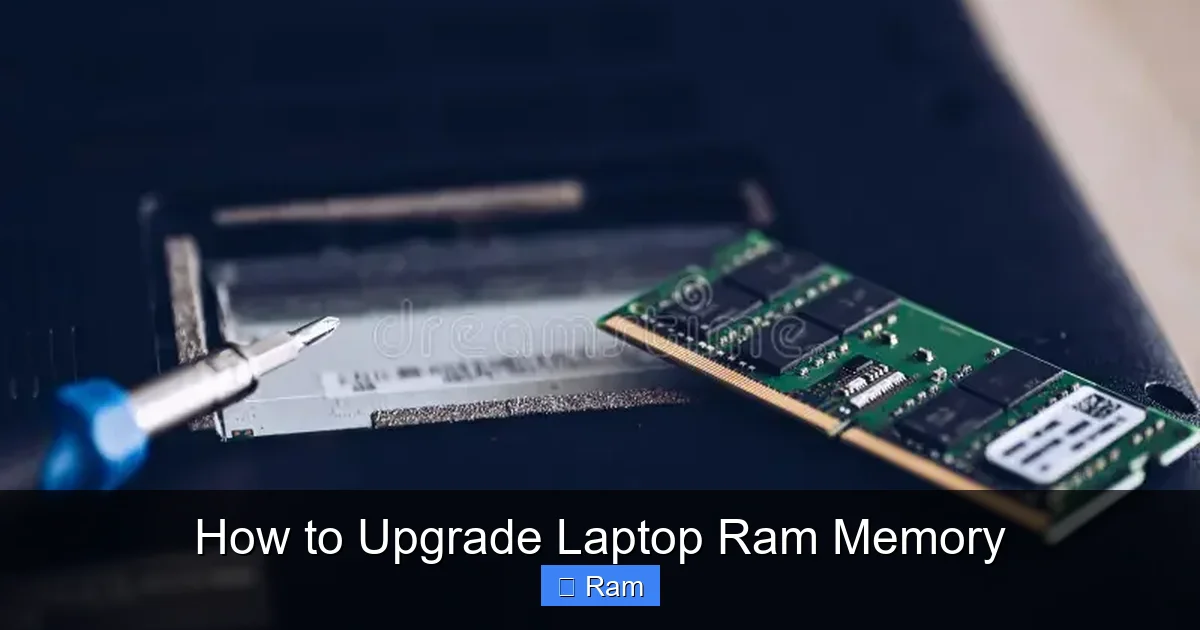
Type (DDR4, DDR5, etc.): This is non-negotiable. DDR4 and DDR5 are physically incompatible. Your research will tell you which one you need. DDR5 is newer and found in laptops from roughly 2022 onward.
Speed (MHz): RAM speed is measured in megahertz (e.g., 2666, 3200, 4800, 5600). Your laptop’s motherboard and CPU support a maximum speed. You can install faster RAM, but it will simply run at the motherboard’s maximum supported speed (this is called “downclocking” or “JEDEC speed”). It’s safe and common. For best performance, match the speed of your existing RAM if you are adding to it. If replacing all sticks, buying a slightly higher speed kit (within spec) is fine.
Capacity: Decide based on your needs and the number of slots. If you have 2 slots and currently have one 8GB stick, you can either add another 8GB for 16GB total (dual-channel mode, which is faster), or replace both with two 16GB sticks for 32GB total. Dual-channel performance is a real benefit, so matching pairs are ideal.
Single Stick vs. Dual-Channel Kits
Motherboards are optimized to run two identical RAM modules in “dual-channel” mode, which doubles the data throughput between the RAM and the memory controller. For the best performance:
- If you have two empty slots, buy a 2-stick kit (e.g., 2x8GB) that is sold as a matched pair.
- If you have one occupied slot and one empty slot, try to find the exact same make, model, and speed as your existing stick. If that’s impossible, buy a new 2-stick kit and replace both. Using mismatched sticks will work, but it may force the system into single-channel mode, losing some performance.
Trusted Brands and Where to Buy
Stick to reputable brands: Crucial (Micron), Kingston, Corsair, G.Skill, Team Group, Samsung (B-die chips are legendary). Avoid unknown, ultra-cheap brands on marketplaces like eBay or Amazon third-party sellers, as they may use recycled chips or mislabel specifications. Purchase from authorized retailers or the brands’ official stores. Look for lifetime warranties—most good RAM comes with one.
Phase Three: The Physical Upgrade – A Step-by-Step Guide
Now, the hands-on part. With your new RAM in hand and your laptop’s service manual open, let’s get to work. The cardinal rule: ESD (Electrostatic Discharge) can kill electronics. Always take precautions.
Visual guide about How to Upgrade Laptop Ram Memory
Image source: prontoarigato.sg
Essential Tools and Safety Precautions
You will need:
- A set of small, precision Phillips-head screwdrivers (#0 and #1 are common).
- An anti-static wrist strap (highly recommended). Clip it to a grounded metal object on your desk or the laptop’s chassis (once the bottom is off).
- A small, clean, static-free workspace. A large, flat wooden table is ideal. Avoid carpets.
- A plastic spudger or pry tool (for clips that are tight).
- Small containers or a magnetic mat to hold screws.
Safety Sequence:
1. Shut down your laptop completely (do not just sleep or hibernate).
2. Unplug the AC adapter/power brick.
3. Remove all external devices (USB drives, docks, monitors).
4. If possible, remove the internal battery. This is the most important safety step. Consult your service manual. Some laptops have a simple bottom-plate battery, others require deeper disassembly. If you cannot remove the main battery, ensure the laptop is completely disconnected from power and hold the power button for 15-30 seconds to discharge residual power.
5. Ground yourself. Put on the anti-static wrist strap. If you don’t have one, frequently touch a grounded metal object (like an unpainted part of your desk’s metal leg) before touching internal components.
Accessing the RAM Compartment
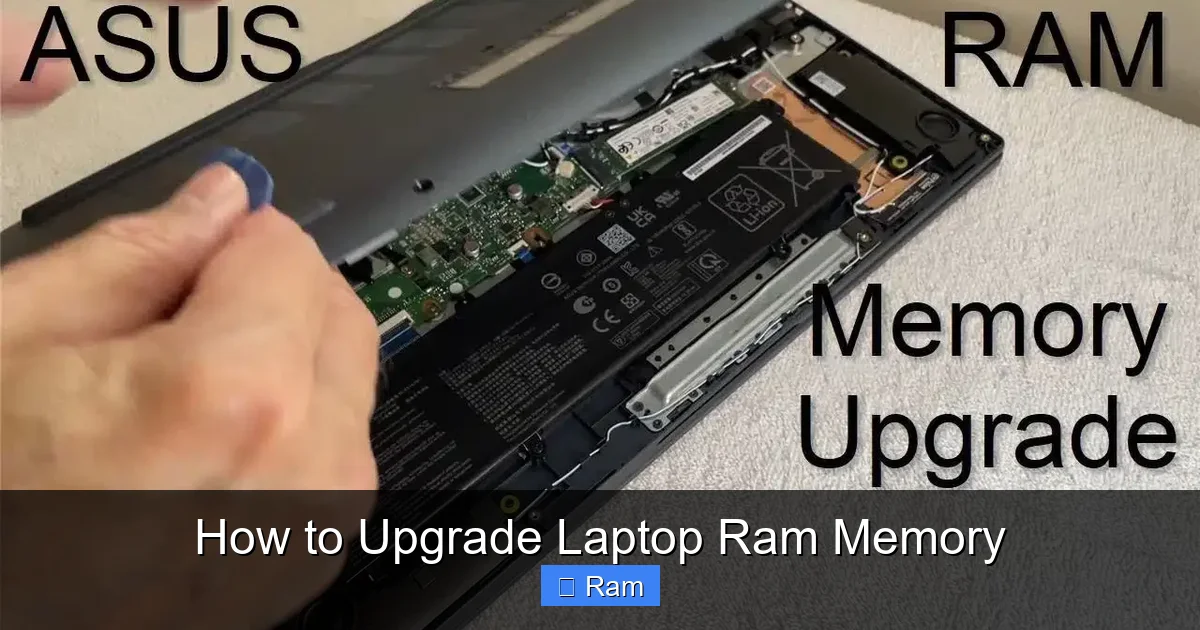
Most modern laptops have a dedicated RAM access panel on the bottom. Look for a small rectangular panel held by one or two screws, often marked with a memory chip icon.
- Place the laptop upside-down on your static-free surface.
- Remove the screws securing the access panel. Note their length and position; some may be different.
- Gently pry the panel off using a plastic tool or your fingernail. It may have clips. Start at a corner and work your way around. Do not force it.
If there is no dedicated panel: You will need to remove the entire bottom cover. This is more involved. Follow the step-by-step instructions and screw map in your manufacturer’s service manual precisely. Be prepared to remove other components (like the keyboard) on some ultra-thin models. If this seems daunting, consider seeking professional help.
Removing the Old RAM Modules
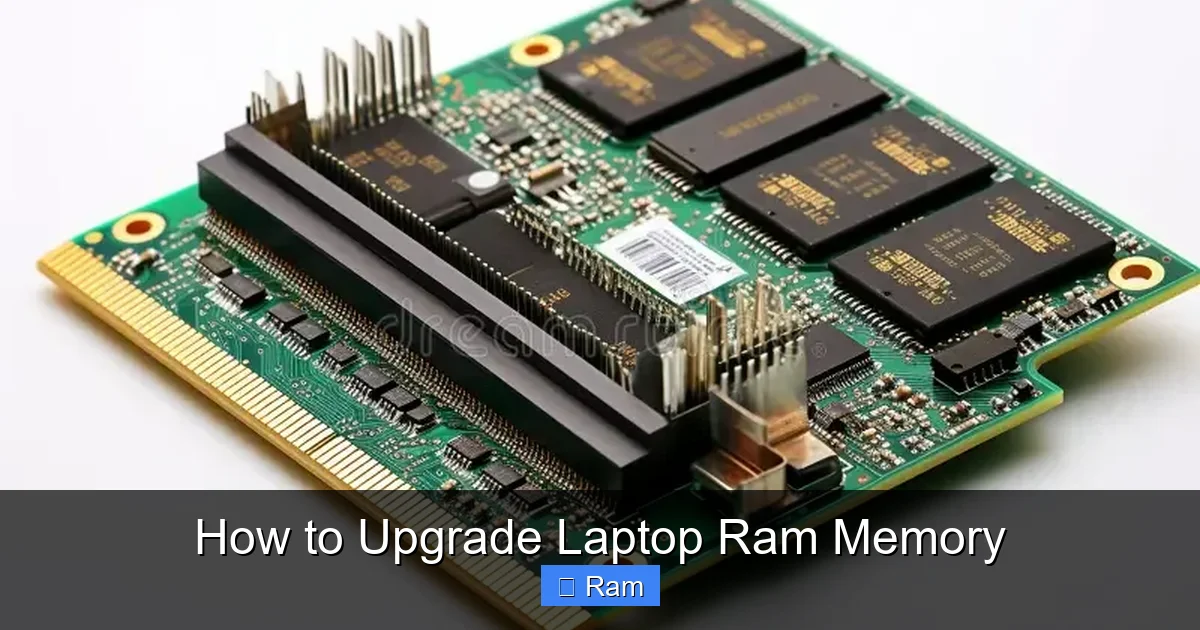
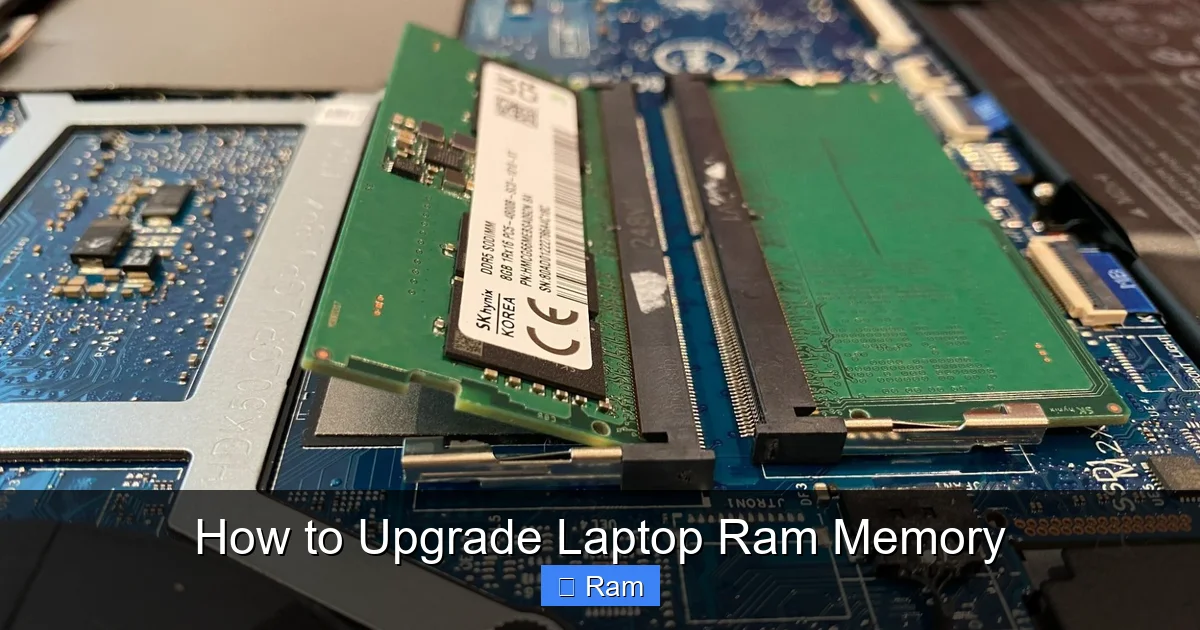
Once the compartment is open, you’ll see one or two small circuit boards (the SODIMMs) held by small metal clips on either side.
- Gently push the two retention clips outward and away from the module simultaneously. They will pivot and release the module. The module will pop up at an angle (usually ~30 degrees).
- Grasp the module by its top edges (the black plastic part) and pull it straight out, firmly and evenly. Do not wiggle it side-to-side.
- Place the old RAM in an anti-static bag for safekeeping.
Key Visual: The gold pins should be facing inward, toward the motherboard, when installed. The notch on the module’s connector (the gold part) must align perfectly with the key in the slot. It is physically impossible to insert it incorrectly if the notches match. Forcing it will break something.
Installing the New RAM Modules
The installation is the reverse of removal, but with a crucial final step.
- Hold the new SODIMM by the edges. Align the notch on the gold pins with the key in the slot. It should fit one way only.
- Insert the module into the slot at the same angle the old one came out (~30 degrees). Push firmly and evenly on the top edge until the pins are fully seated in the slot. You should feel it stop.
- Now, the critical part: Press down on the top edge of the module (the side with the label/chips) until it lies flat, parallel to the motherboard. You must apply even pressure until the two retention clips snap into place, locking the module down. You should hear/feel a soft click from both clips. Do not skip this—an unclipped module will not make proper contact and your laptop won’t boot.
- Repeat for the second module if you have two slots.
Visual Check: The module should sit flush and secure, with no part of the gold pins visible above the slot.
Reassembly and First Boot
- Double-check that nothing is loose, no tools are inside, and the RAM is seated correctly.
- Replace the access panel or bottom cover, reinserting all screws in their correct holes. Do not overtighten; snug is sufficient.
- If you removed the main battery, reinstall it now.
- Plug in the AC adapter.
- Turn on your laptop.
It should boot normally. If it beeps repeatedly or shows a black screen, power it off immediately. Reopen it and re-seat the RAM modules, ensuring they are locked in. 99% of no-post issues after a RAM install are due to a module not being fully clipped in.
Phase Four: Verification and Troubleshooting
Assuming your laptop boots to the login screen, your work isn’t done. You must verify the system sees the new RAM correctly.
How to Confirm the Upgrade Worked
On Windows:
- Press Ctrl + Shift + Esc to open Task Manager. Go to Performance > Memory. The top-right should now show your new total capacity (e.g., “16.0 GB”).
- Right-click the Start button and select “System.” Under “Device specifications,” it will show “Installed RAM.”
- Open the “Command Prompt” (search for it, right-click > Run as administrator). Type
wmic memorychip get capacityand press Enter. It will list the capacity of each stick in bytes. You can use an online converter to check the math. - Use the CPU-Z tool again. Go to the “Memory” and “SPD” tabs. It should now list both sticks (if you installed two) with their correct sizes and speeds.
On macOS: Click the Apple menu > About This Mac. The “Memory” line will show your total RAM. For more detail, go to Utilities > System Information > Memory.
Common Issues and Their Fixes
- “System doesn’t boot, beeps, or shows a black screen.”
Fix: Power off, unplug, open the case. Remove and re-seat the RAM modules. Ensure they are locked down by the clips. Try booting with only one stick installed (test each stick in each slot) to isolate a faulty module or bad slot. - OS reports less RAM than installed (e.g., you installed 16GB, it shows 15.8GB).
Fix: This is almost always normal. Some RAM is reserved by the system and graphics card (especially on laptops with integrated graphics that share RAM). A discrepancy of 200-800MB is standard. - RAM is running at a slower speed than purchased (e.g., bought DDR4-3200, shows 2666).
Fix: The motherboard or CPU may have a default speed limit. Check your laptop’s specs. You may need to enable XMP/DOCP profiles in the BIOS/UEFI, but most laptops do not allow this. They run RAM at their JEDEC standard speed. This is usually not a problem; the capacity increase is the primary benefit. - System is unstable, crashes, or blue screens after install.
Fix: Could be incompatible RAM (even if specs match) or a defective module. Test with one stick at a time. Run a memory test like Windows Memory Diagnostic (search for it) or MemTest86 (create a bootable USB). This will identify errors.
The Real-World Impact: What to Expect After the Upgrade
So, you’ve done it. The new RAM is in, verified, and your laptop is humming along. What now? The experience varies slightly based on your starting point.
From 4GB to 8GB or 16GB: The Night-and-Day Difference
If you were on 4GB, the change is transformative. That constant feeling of your laptop “thinking” will vanish. Web browsing becomes fluid, you can have actual productivity suites open alongside your browser, and the system won’t grind to a halt when Windows Update runs in the background. This is the upgrade with the highest ROI for an old, struggling machine.
From 8GB to 16GB: The Modern Standard
This upgrade is for the power user. If you regularly have 50+ Chrome tabs open, work with large Excel files, do light photo editing, or play modern games, you will notice smoother performance. Application load times improve, and system freezes during heavy multi-app use should disappear. It’s a quality-of-life upgrade that makes your laptop feel capable and current.
Beyond 16GB: For Professionals Only
Jumping to 32GB or 64GB will yield zero perceptible benefit for web browsing, office work, or gaming (unless the game is specifically RAM-hungry). The only people who will see a difference are those running virtual machines, editing 4K/8K video, working with massive datasets in Python/R, or doing complex 3D rendering. For them, it’s essential. For everyone else, it’s an unnecessary expense.
When a RAM Upgrade Isn’t the Answer (Or Isn’t Possible)
As powerful as this upgrade is, it’s not a magic fix for every slow laptop. Knowing its limits is key.
The Soldered RAM Problem
An increasing number of modern ultrabooks, thin-and-lights, and business laptops (like many recent MacBooks, Dell XPS 13, some Lenovo Yoga models) have the RAM chips soldered directly onto the motherboard. There are no slots. In these cases, a RAM upgrade is physically impossible without a complex and risky reflow process that’s not practical. Your only options are to max out the soldered RAM at purchase or consider other upgrades.
The Storage Bottleneck: The Silent Killer
If your laptop still has a traditional spinning hard disk drive (HDD), that is almost certainly the biggest bottleneck in your system. An HDD is orders of magnitude slower than an SSD (Solid State Drive). Even with 32GB of RAM, an HDD will make your laptop feel slow during boot, program launch, and file loading. The single best upgrade for any laptop with an HDD is to replace it with an SSD. Do this first. Then, if you have the budget and empty slots, add RAM.
The Aging CPU or GPU
If your laptop is more than 5-7 years old, its processor (CPU) or graphics chip (GPU) may simply be too underpowered for modern software, no matter how much RAM you add. You’ll still hit a performance wall. RAM upgrades are most effective on systems that are otherwise capable but are being held back by memory constraints.
Alternative Path: If you cannot upgrade RAM and have an HDD, replace the HDD with an SSD. This often yields a more dramatic improvement than a RAM upgrade on an HDD-based system. If you have neither option, your laptop may be at the end of its upgradeable life, and a new purchase might be the most sensible path.
Conclusion: You Did It! Now Go Enjoy Your Faster Laptop
Congratulations! By following this guide, you’ve successfully navigated the entire journey of a laptop RAM upgrade: from detective work and smart shopping to the careful, precise physical installation and final verification. You’ve not only saved money but also gained a deeper understanding of your machine and a valuable new skill. Your laptop should now feel noticeably snappier, more responsive, and far more capable of handling your daily workflow without the frustration of constant spinning wheels and frozen screens.
Remember the core principles: research meticulously, prepare your workspace with anti-static measures, handle components by the edges, and ensure modules click securely into place. The process is designed to be reversible and low-risk when done correctly. Bookmark this guide for your next upgrade or to help a friend. In a world of planned obsolescence, taking control of your technology’s performance is an empowering act. You’ve extended the useful life of your laptop, reduced electronic waste, and gotten a faster computer for a fraction of the cost of a new one. Now, go open those hundred browser tabs and enjoy the smooth, lag-free freedom you’ve earned.
Frequently Asked Questions
Will upgrading my laptop RAM void the warranty?
Generally, no. Most manufacturers do not void the warranty for user-performed memory upgrades, as RAM is considered a customer-replaceable part (CRU). However, always check your specific warranty terms first. If your laptop is still under warranty and you’re uncomfortable, using an authorized service provider is the safest option.
Can I mix and match different RAM brands, speeds, or sizes?
Technically, you can, but it’s not recommended for optimal performance. Mixing different speeds will cause all modules to run at the speed of the slowest stick. Mixing different sizes (e.g., 8GB + 16GB) will work but may prevent dual-channel mode from activating on some systems, reducing performance. For best results, use identical sticks from the same kit.
What’s the difference between DDR4 and DDR5 laptop RAM?
DDR5 is the newer generation, offering higher speeds, better power efficiency, and increased density per chip. However, DDR4 and DDR5 are physically incompatible—their notches are in different positions. Your laptop’s motherboard supports only one type. You must match the type specified for your laptop model, which you find through the research steps outlined above.
How do I know if my laptop has an empty RAM slot or if all slots are full?
The easiest way is to use a tool like CPU-Z. Install it, go to the “Memory” tab, and look at the “Channel #” and “Size” information. If it says “Single” channel and your total RAM is less than the maximum your laptop supports, you likely have an empty slot. You can also physically open the RAM compartment and look.
My laptop has 8GB of RAM. Should I upgrade to 16GB or 32GB?
For the vast majority of users—including gamers, students, and office workers—upgrading from 8GB to 16GB is the sweet spot and will provide a massive improvement. Upgrading to 32GB is only necessary for specialized professional work like 4K video editing, 3D animation, or running multiple virtual machines. The extra cost for 32GB is not justified for general use.
Is there any software or configuration needed after installing new RAM?
No. The laptop’s BIOS/UEFI automatically detects and configures the new RAM on boot. There is no driver to install. Your only task is to verify within your operating system (via Task Manager or System Information) that the new total capacity is recognized. If the speed is lower than expected, it’s usually a motherboard limitation, not a configuration issue you can fix on most laptops.