How To Kill A Windows 10 Service That Is Not Stopping
Dealing with a Windows 10 service that refuses to stop can be frustrating and slow down your entire system. This guide walks you through multiple reliable methods to force kill a Windows 10 service that is not stopping, including using Task Manager, the Services console, and command-line tools. You will learn safe techniques, common mistakes to avoid, and expert tips to prevent services from hanging in the future.
Have you ever stared at your screen watching a Windows 10 service spin endlessly, refusing to close? It is one of the most annoying things that can happen when you are trying to get work done. A service that will not stop can eat up your system resources, freeze other programs, and make your entire PC feel sluggish. Whether it is a background process tied to a driver, a software update, or something else entirely, a service hanging in Windows 10 is more common than you might think.
The good news is that you do not need to be a tech expert to fix this. In this guide, we will walk you through every practical method to kill a Windows 10 service that is not stopping. We will cover easy graphical tools, powerful command-line options, and even some preventive steps you can take to stop this from happening again. By the end, you will have the confidence to handle any stubborn service on your Windows 10 laptop.
Key Takeaways
- Multiple Methods Available: You can kill a stuck Windows 10 service using Task Manager, the Services console, Command Prompt, or PowerShell.
- Safety First: Always check service dependencies before forcing a stop to avoid system instability.
- Command Prompt Is Powerful: The
taskkillandsc stopcommands give you direct control over stubborn services. - Prevention Matters: Regular system maintenance and driver updates help prevent services from hanging.
- Administrator Access Is Required: Most force-stop methods need elevated permissions to work properly.
- Restart as a Last Resort: If all else fails, a clean restart of your Windows 10 laptop will clear stuck services.
📑 Table of Contents
- Why Do Windows 10 Services Get Stuck?
- Method 1: Use Task Manager to Kill a Stuck Service
- Method 2: Use the Services Console (services.msc)
- Method 3: Force Kill a Service Using Command Prompt
- Method 4: Use PowerShell for Advanced Service Management
- What to Do After Killing a Stuck Service
- How to Prevent Services from Hanging in the Future
- When to Restart Your PC Instead
- Common Mistakes to Avoid
- Expert Insight: Understanding Service Dependencies
- Conclusion
Why Do Windows 10 Services Get Stuck?
Before jumping into the fixes, it helps to understand why a Windows 10 service might refuse to stop in the first place. Services are background programs that run continuously to support your operating system and installed apps. They handle everything from network connections to printing to security scans.
Sometimes these services become unresponsive. A service not responding usually happens for one of a few common reasons:
- Buggy software: An application that installed a background service may have a coding error that causes it to hang.
- Resource conflicts: Two services trying to access the same file or memory location can cause a deadlock.
- Driver issues: Outdated or corrupted drivers often lead to services that freeze mid-operation.
- Permission problems: If your user account lacks the right permissions, a service may fail to shut down properly.
- System overload: When your Windows 10 laptop is running low on RAM or CPU capacity, services can become unresponsive.
Understanding the root cause helps you choose the right fix. For example, if a driver issue is to blame, restarting your PC might solve it temporarily. But if it is a software bug, you will need to dig deeper using the tools below.
Method 1: Use Task Manager to Kill a Stuck Service
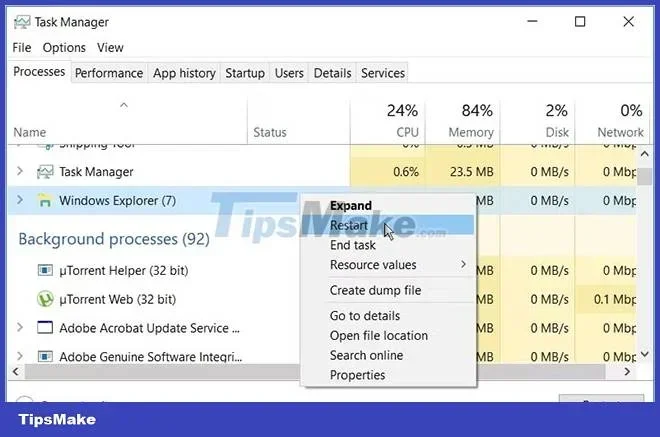
Task Manager is the most accessible tool on your Windows 10 PC. Most people know it for closing frozen apps, but it can also help you deal with stubborn services. Here is how to use it step by step.
Step-by-Step Guide
- Press Ctrl + Shift + Esc on your keyboard to open Task Manager.
- Click the Services tab at the top of the window.
- Scroll through the list and find the service that is not stopping.
- Right-click on the service name.
- Select Stop from the context menu.
If the service stops, great! You are done. But if it is truly stuck, you might see the status remain as “Stopping” for a long time. In that case, move on to the next method.
Quick Tip
You can also click on the service and then look at the Process ID (PID) number at the bottom of the Task Manager window. This number becomes very useful if you need to use the command line to force kill the process later.
Task Manager works well for most everyday situations. However, some deeply stuck services will ignore the stop command entirely. That is where the command-line tools come in handy.
Method 2: Use the Services Console (services.msc)
The Services console gives you a more detailed view of every service running on your Windows 10 system. It is built right into Windows and provides more control than Task Manager alone.
How to Access the Services Console
- Press Windows Key + R to open the Run dialog.
- Type services.msc and press Enter.
- The full list of services will appear in a new window.
From here, you can scroll through the list and find the service giving you trouble. Double-click on it to open its properties window. You will see the current service status and several options:
- Stop: Attempts a normal stop of the service.
- Pause: Temporarily halts the service.
- Restart: Stops and then starts the service again.
If the service is truly frozen, the Stop button might not respond. In that case, you can try changing the Startup type to “Disabled” and then restarting your computer. This prevents the service from starting again and gives Windows a chance to clear it from memory.
Important Warning
Be very careful when disabling services. Some services are critical to Windows 10 functioning properly. Disabling the wrong one could cause system instability or prevent your PC from booting correctly. Only disable services you are absolutely sure are not essential.
Method 3: Force Kill a Service Using Command Prompt
When graphical tools fail, the Command Prompt is your most powerful option. Running commands as an administrator gives you direct control over every process and service on your system.
Step 1: Open Command Prompt as Administrator
- Click the Start button.
- Type cmd in the search bar.
- Right-click on “Command Prompt” and select Run as administrator.
- Click Yes on the permission prompt.
Step 2: Find the Service Name or Process ID
Before you can kill anything, you need to identify the exact name of the service or its process ID. Type the following command and press Enter:
sc query state= all
This will display a full list of all services on your Windows 10 PC along with their current status. Look for the service that is stuck and note its exact display name.
Step 3: Stop the Service
Now use the sc stop command followed by the service name:
sc stop "ServiceName"
Replace “ServiceName” with the actual name of the service you found in the previous step. If the service responds, it will stop within a few seconds.
But what if it does not stop? That is the whole point of this guide.
Step 4: Force Kill Using taskkill
If the service will not stop with sc stop, you can force kill the underlying process. First, find the process ID using Task Manager (as described in Method 1). Then use this command:
taskkill /PID [number] /F
Replace [number] with the actual process ID. The /F flag forces the termination, which is exactly what you need for a service hanging in Windows 10.
You can also kill by service name directly:
taskkill /FI "SERVICES eq ServiceName" /F
This command targets all processes associated with a specific service and forcefully terminates them.
Quick Tip
Always double-check the service or process name before running a force kill. Terminating the wrong process can close important system functions or cause data loss in open applications. If you are unsure, write down the name first and look it up online to confirm it is safe to stop.
Method 4: Use PowerShell for Advanced Service Management
PowerShell is a more advanced command-line tool built into Windows 10. It offers more powerful scripting capabilities than the traditional Command Prompt and gives you fine-grained control over services.
How to Stop a Service with PowerShell
- Right-click the Start button and select Windows PowerShell (Admin).
- Type the following command to stop a service:
Stop-Service -Name "ServiceName" -Force
The -Force parameter tells PowerShell to stop the service even if other services depend on it. This is very effective for services that will not stop through normal means.
Finding Services in PowerShell
If you are not sure of the exact service name, you can search for it first:
Get-Service | Where-Object {$_.Status -eq "Running"}
This lists all currently running services. You can then identify the one causing problems and target it specifically.
PowerShell is especially useful when you need to manage multiple services at once or automate the process. However, it does have a steeper learning curve, so use it with care.
What to Do After Killing a Stuck Service
Once you have successfully killed a Windows 10 service that is not stopping, there are a few important follow-up steps to make sure everything is back to normal.
Check If the Service Restarted Automatically
Some services are configured to restart automatically after being stopped. Open Task Manager or the Services console and check if the service you killed has come back. If it has, you may need to temporarily change its startup type to “Manual” or “Disabled” to prevent it from restarting on its own.
Monitor System Performance
After killing a service, keep an eye on your system performance. Open Task Manager and check the Performance tab. Look at CPU usage, memory consumption, and disk activity. If everything looks normal, you are good to go. If something still seems off, you may need to restart your PC.
Update or Reinstall the Problematic Software
If a specific software keeps causing services to hang, consider updating that application or reinstalling it. A buggy software update is one of the most common causes of stuck services on Windows 10. Checking for driver updates through Device Manager can also help resolve recurring issues.
How to Prevent Services from Hanging in the Future
Dealing with a stuck service is frustrating, but the good news is that prevention is possible. Here are some practical steps to keep your Windows 10 services running smoothly.
Keep Your System Updated
Microsoft regularly releases Windows 10 updates that fix bugs and improve service stability. Make sure your system is set to install updates automatically. Go to Settings > Update & Security > Windows Update and check for updates regularly.
Avoid Overloading Your System
Running too many resource-heavy programs at the same time can starve background services of the resources they need. If your Windows 10 laptop has limited RAM, consider closing unused applications and browser tabs. Having at least 8GB of RAM on your laptop helps ensure smooth multitasking and reduces the chances of services becoming unresponsive.
For more information on how much RAM your system needs, check out our guide on what amount of RAM is good on a laptop.
Scan for Malware Regularly
Malware can disguise itself as a legitimate service and cause all kinds of problems. Use a trusted antivirus program to scan your system at least once a week. Windows Defender, which comes built into Windows 10, is a solid option for most users.
Check for Driver Conflicts
Outdated or incompatible drivers are a leading cause of service hanging in Windows 10. Visit your PC manufacturer’s website or use Windows Update to keep your drivers current. This is especially important for graphics cards, network adapters, and USB controllers.
Use Clean Boot for Troubleshooting
If you frequently deal with services that will not stop, try performing a clean boot. This starts Windows with a minimal set of drivers and startup programs, helping you identify which software is causing the conflict. You can find the Clean Boot tool in System Configuration (msconfig) under the Services tab.
When to Restart Your PC Instead
Sometimes the simplest solution really is the best one. If you have tried all the methods above and the service still will not stop, a clean restart of your Windows 10 PC will almost always clear the problem. Restarting closes all running processes and gives your system a fresh start.
Before restarting, make sure you have saved all your work. Once your PC powers back on, check Task Manager to confirm the stuck service has been cleared. In most cases, a restart resolves the issue completely.
For related troubleshooting tips on Windows 10, you might also find our article on Windows 10 laptop with 8GB RAM helpful for optimizing your system performance.
Common Mistakes to Avoid
When trying to kill a Windows 10 service that is not stopping, many people make avoidable mistakes. Here is what you should watch out for:
- Killing critical system services: Stopping essential Windows services can cause your PC to crash or fail to boot properly. Always verify a service is safe to stop before forcing it.
- Ignoring service dependencies: Some services rely on other services to function. Killing a parent service can cascade problems to dependent services.
- Using force kill as a first option: Always try the gentler methods first, like stopping through Task Manager or the Services console. Reserve force killing for truly stuck services.
- Not restarting after changes: If you disable or modify a service, restarting your PC ensures the changes take full effect.
- Skipping antivirus scans: A persistent stuck service could be a sign of malware. Do not skip security checks.
Avoiding these mistakes will save you time and protect your Windows 10 system from accidental damage.
Expert Insight: Understanding Service Dependencies
Every Windows 10 service can have dependencies on other services. When you try to stop a service, Windows will usually warn you if other services depend on it. This is an important safety feature.
For example, if you try to stop the “Windows Audio” service, Windows might tell you that the “Windows Audio Endpoint Builder” service depends on it. Stopping the parent service first, or stopping both together, is the correct approach.
You can view service dependencies in the Services console by right-clicking a service, selecting Properties, and clicking the Dependencies tab. Understanding these relationships helps you make informed decisions about which services to stop and in what order.
If you are troubleshooting broader Windows 10 issues, you might also want to check out our guide on why your mouse is not connecting to your laptop, which covers common Windows 10 troubleshooting steps.
Conclusion
Killing a Windows 10 service that is not stopping does not have to be scary or complicated. You now have four solid methods at your disposal: Task Manager, the Services console, Command Prompt, and PowerShell. Each method works for different situations, and together they give you complete control over your system’s background processes.
Remember to always check service dependencies before forcing a stop, and use the gentler methods first. If all else fails, a simple restart of your Windows 10 laptop will clear the problem. Prevention through regular updates, driver maintenance, and system monitoring will help you avoid stuck services in the future.
With the knowledge in this guide, you are now well-equipped to handle any service that refuses to cooperate. Keep this page bookmarked for quick reference the next time a Windows 10 service decides to hang.
Frequently Asked Questions
Can I kill a Windows 10 service without administrator rights?
Most methods for stopping or force killing a service require administrator privileges. You can try Task Manager under your current account, but for Command Prompt, PowerShell, and the Services console, you will need to run them as an administrator. Without elevated permissions, you will get access denied errors.
Is it safe to force kill a Windows service?
It is generally safe if you are stopping a non-essential service. However, force killing critical system services can cause instability, data loss, or a blue screen. Always verify the service name online before using the force kill option, especially with unfamiliar services.
Will killing a service delete my files or data?
No, stopping or killing a service does not delete your files. However, if you force close a service that is actively writing data, you could lose unsaved work in the application using that service. Always save your work before terminating any background process.
How do I know if a service is safe to stop?
Search the service name online or check the description in the Services console. Microsoft provides detailed descriptions for most built-in services. If the service belongs to a third-party app you recognize, check the app’s support page. Avoid stopping services with names you do not recognize.
What should I do if a service keeps coming back after I kill it?
This usually means the service is set to start automatically. Open the Services console, find the service, right-click, and change the Startup type to Manual or Disabled. Then restart your PC. If it still comes back, a scheduled task or another program may be restarting it automatically.
Can I use these methods on Windows 11 too?
Yes, all the methods described in this guide work on Windows 11 as well. The interface may look slightly different, but Task Manager, Services console, Command Prompt, and PowerShell function the same way for managing and stopping services on Windows 10 and Windows 11.