Lenovo Thinkbook 14 Gen 6 Intel Ram Ssd Upgrade Made Easy

The Lenovo ThinkBook 14 Gen 6 Intel is a solid business laptop, but upgrading its RAM and SSD can make it truly exceptional. This guide walks you through everything you need to know, from picking the right memory modules to choosing the best M.2 SSD. You will learn how to boost speed, multitask with ease, and extend the life of your machine without spending a fortune.
The Lenovo ThinkBook 14 Gen 6 Intel is a dependable notebook for work, study, and everyday tasks. But out of the box, it may not feel as fast as you want it to be. The good news is that a Lenovo ThinkBook 14 Gen 6 Intel Ram Ssd Upgrade can transform your experience in just a couple of hours.
Whether you are running too many tabs in your browser or waiting forever for files to load, this guide has you covered. We will walk you through every step, from choosing the right parts to installing them safely. By the end, you will feel confident enough to do the upgrade yourself.
Many people think laptop upgrades are complicated. That was true years ago. Today, modern notebooks like the ThinkBook 14 Gen 6 are designed with user-friendly access panels. You do not need to be a tech expert. You just need a little patience and the right information.
Key Takeaways
- Easy Upgrade Path: The ThinkBook 14 Gen 6 Intel allows simple RAM and SSD upgrades that anyone can do at home.
- Big Performance Gains: Adding more RAM and a faster NVMe SSD dramatically improves boot times and multitasking.
- Affordable Boost: Upgrading costs far less than buying a new laptop.
- Compatible Parts Matter: Choosing the right DDR5 RAM and M.2 NVMe SSD ensures smooth operation.
- No Tools Needed: Most upgrades require only a small Phillips screwdriver and a few minutes.
📑 Table of Contents
Why Upgrade RAM and SSD on Your ThinkBook 14?
Your laptop comes with a set amount of memory and storage. Over time, software gets heavier. Apps use more space. Your system memory fills up, and everything slows down. Upgrading both RAM and storage tackles the two biggest bottlenecks in any laptop.
Think of RAM as your desk space. More RAM means you can open more apps at once without your laptop slowing down. The SSD is like a filing cabinet. A faster SSD means your files open almost instantly. Together, these upgrades make your machine feel brand new.
Signs Your ThinkBook 14 Needs an Upgrade
How do you know it is time to upgrade? Watch for these common signs:
- Your laptop takes more than a minute to boot up.
- You get “out of memory” warnings when using Chrome or Office apps.
- Apps freeze or crash when you switch between them.
- File transfers take forever, even small documents.
- Your battery drains faster because the hard drive works too hard.
If you notice two or more of these issues, a laptop upgrade will make a noticeable difference. Most users see a 2x to 3x improvement in speed after upgrading both components.
Choosing the Right RAM for Your ThinkBook 14 Gen 6
The ThinkBook 14 Gen 6 Intel uses DDR5 memory, which is the latest standard for laptop RAM. DDR5 offers higher speeds and better efficiency compared to older DDR4 modules. This means smoother performance and less power drain.
Before you buy, check your current setup. You can use a free tool like CPU-Z to see what type and speed of RAM your laptop currently has. The ThinkBook 14 Gen 6 typically supports up to 32GB of RAM across two slots.
How Much RAM Do You Actually Need?
The right amount depends on how you use your laptop. Here is a quick breakdown:
- 8GB: Enough for basic tasks like web browsing and word processing.
- 16GB: The sweet spot for most users. Great for multitasking and light creative work.
- 32GB: Ideal for video editing, programming, or running virtual machines.
For most people, a laptop with 16GB RAM and SSD setup hits the perfect balance between performance and price. If you already have 8GB, adding another 8GB stick is an easy and affordable first step.
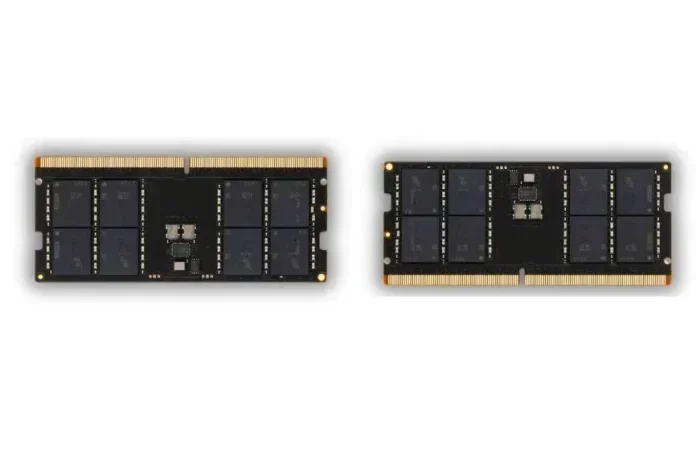
When shopping, look for DDR5 SO-DIMM modules. These are the small form factor sticks designed for laptops. Make sure the speed matches your existing module, or go slightly faster. Mixing speeds is fine, but both sticks will run at the slower speed.
Selecting the Best SSD for Your Upgrade
The ThinkBook 14 Gen 6 Intel uses an M.2 NVMe SSD slot. This is the small, flat chip that plugs directly into the motherboard. NVMe drives are significantly faster than older SATA SSDs or hard drives.
When choosing a new drive, pay attention to three things: capacity, speed, and endurance. Capacity is how much space you get. Speed is measured in read and write rates. Endurance refers to how many terabytes the drive can write over its lifetime.
PCIe Gen 4 vs. Gen 5 SSDs
Most ThinkBook 14 Gen 6 models support PCIe Gen 4 NVMe SSDs. These offer excellent speeds of up to 7,000 MB/s read speeds. Newer Gen 5 drives are even faster, but they may not be fully supported on all models yet. Check your laptop manual before buying a Gen 5 M.2 NVMe SSD to make sure it is compatible.
For most users, a 512GB or 1TB Gen 4 NVMe SSD is the best choice. It gives you plenty of room for your operating system, apps, and files while keeping costs reasonable. If you store lots of videos or large projects, go for 2TB.
Step-by-Step Upgrade Process
Now for the fun part. Installing RAM and an SSD on the ThinkBook 14 Gen 6 is straightforward. Follow these steps carefully, and you will be done in about 20 minutes.
Step 1: Prepare Your Workspace
Find a clean, flat surface with good lighting. Gather a small Phillips-head screwdriver, an anti-static wrist strap (optional but helpful), and your new RAM and SSD. Turn off your laptop completely and unplug the charger.
Step 2: Remove the Bottom Panel
Flip your laptop over. Locate the screw(s) holding the bottom cover in place. The ThinkBook 14 Gen 6 usually has one or two screws. Gently pry off the cover using a plastic spudger or your fingernail. Set the screws somewhere safe.
Step 3: Install the RAM
Locate the RAM slots. They are long, narrow connectors with clips on each end. Line up your new DDR5 SO-DIMM stick at a 30-degree angle and press it firmly into the slot. Then push it down flat until the clips click into place. If you are adding a second stick, repeat the process in the other slot.
Step 4: Install the SSD
Find the M.2 slot on the motherboard. Remove the small mounting screw. Insert your NVMe SSD at a 30-degree angle into the slot. Press it down gently and secure it with the screw. Do not overtighten. A firm but gentle touch is all you need.
Once both components are installed, replace the bottom panel and screw it back in. Plug in your charger and power on the laptop. Your new RAM and SSD should be detected automatically.
Step 5: Verify and Optimize
After booting up, check that your new components are recognized. On Windows, open Task Manager and go to the Performance tab. You should see your total RAM and your new SSD listed. If everything looks correct, you are all set.
For best results, run Windows Update and update your drivers. This ensures your system takes full advantage of the new hardware. You may also want to clone your old drive to the new one if you are replacing an existing SSD.
Common Mistakes to Avoid During Your Upgrade
Upgrading a laptop is usually simple, but small mistakes can cause problems. Here are the most common errors to watch out for:
- Buying the wrong RAM type: DDR4 and DDR5 are not interchangeable. Double-check your model number before ordering.
- Forcing the SSD in: The M.2 slot is snug but should not require excessive force. If it does not slide in easily, check the angle.
- Skipping the anti-static precaution: Static electricity can damage components. Touch a metal surface before handling parts.
- Not backing up your data: Always back up important files before opening your laptop. Even if you are only adding RAM, it is better to be safe.
- Overtightening screws: Stripped screws can make future upgrades much harder. Hand-tighten only.
Avoiding these simple mistakes will save you time and frustration. Take your time, work carefully, and you will have a fully upgraded ThinkBook 14 in no time.
How Much Does a ThinkBook 14 Upgrade Cost?
One of the best things about upgrading your own laptop is the savings. A new laptop with similar specs can cost $800 or more. Upgrading your ThinkBook 14 Gen 6 costs a fraction of that.
A DDR5 16GB RAM stick typically runs between $40 and $60. A 1TB NVMe SSD usually costs $50 to $80. So for under $150, you can double your memory and multiply your storage. That is a fantastic upgrade cost compared to buying new.
Compare this to the Lenovo or Intel I7 16GB RAM laptop options on the market, which often start above $1,000. Upgrading gives you the same performance boost at a much lower price.
What to Do After Your Upgrade
Your ThinkBook 14 Gen 6 is now faster and more capable. But a few post-upgrade steps will help you get the most out of it. First, run a disk cleanup to remove old temporary files. This frees up space on your new SSD and keeps things running smoothly.
Next, check your power settings. A faster SSD and more RAM can improve battery life because the system does not work as hard. You may also want to enable Windows ReadyBoost or adjust virtual memory settings for the best performance.
Finally, consider installing a fresh copy of Windows if your old drive had accumulated years of clutter. A clean install on your new SSD gives you the fastest possible start. Just remember to back up your files first!
If you are interested in learning more about similar upgrades, check out our guide on upgrade RAM for Lenovo laptop for additional tips and compatible parts.
Conclusion
A Lenovo ThinkBook 14 Gen 6 Intel Ram Ssd Upgrade is one of the best investments you can make for your laptop. It costs less than a new machine, takes under an hour, and delivers real, noticeable improvements. Your boot times shrink, your apps launch faster, and multitasking becomes effortless.
Whether you are a student, a professional, or a casual user, upgrading your RAM and SSD brings your ThinkBook 14 back to life. The process is simple, the parts are affordable, and the results speak for themselves. Do not let a slow laptop hold you back any longer.
Grab your screwdriver, pick your parts, and give your ThinkBook 14 Gen 6 the upgrade it deserves. You will wonder why you did not do it sooner.
Frequently Asked Questions
Can I upgrade the RAM in the Lenovo ThinkBook 14 Gen 6 Intel myself?
Yes, absolutely. The ThinkBook 14 Gen 6 is designed for easy user upgrades. You just need a small Phillips screwdriver and about 15 minutes. The RAM slots are accessible from the bottom panel, and the process is straightforward even for beginners.
What type of RAM does the ThinkBook 14 Gen 6 Intel use?
The ThinkBook 14 Gen 6 Intel uses DDR5 SO-DIMM memory modules. These are the smaller form factor sticks made specifically for laptops. Make sure to match the speed and voltage of your existing module for the best compatibility.
Is an M.2 NVMe SSD compatible with the ThinkBook 14 Gen 6?
Yes, the ThinkBook 14 Gen 6 Intel features an M.2 NVMe SSD slot that supports PCIe Gen 4 drives. You can install a 512GB, 1TB, or 2TB NVMe SSD depending on your storage needs and budget.
How much will the upgrade improve my laptop’s speed?
Most users experience a 2x to 3x speed improvement after upgrading both RAM and SSD. Boot times drop significantly, apps launch faster, and multitasking becomes much smoother. The exact improvement depends on your current specs and usage habits.
Do I need any special tools for the upgrade?
Not really. A small Phillips-head screwdriver is all you need. An anti-static wrist strap is optional but recommended. You will also want a clean, well-lit workspace and a soft cloth to place your laptop on during the upgrade.
Should I upgrade the RAM, the SSD, or both?
Upgrading both gives the best results. RAM improvements help with multitasking and running heavier apps, while a faster SSD improves boot times and file access. If you can only afford one, prioritize the SSD since it has the most immediate impact on everyday performance.