Mouse Pad Is Not Working on Dell Laptop
Is your Dell laptop’s mouse pad suddenly unresponsive or completely dead? This is a common issue that can stem from accidental disabling, outdated drivers, or hardware problems. Don’t panic – most touchpad issues on Dell laptops can be resolved with simple troubleshooting steps like checking keyboard shortcuts, updating drivers, or adjusting Windows settings.
Key Takeaways
- Accidental disabling is the top cause: Most Dell laptop users accidentally turn off their touchpad using a keyboard shortcut, which is the number one reason the mouse pad stops working.
- Function key shortcuts matter: Dell laptops use Fn key combinations like Fn + F3 or Fn + F5 to toggle the touchpad on and off – knowing your specific model’s shortcut is essential.
- Outdated or corrupted drivers: Touchpad drivers can become outdated or corrupted after Windows updates, causing the mouse pad to stop responding on your Dell laptop.
- Windows settings can override functionality: Settings in Windows Control Panel or Settings app may disable the touchpad, especially when an external mouse is connected.
- BIOS settings play a role: The touchpad can be disabled at the BIOS level, which means no amount of Windows troubleshooting will fix it until you re-enable it there.
- Hardware failure is rare but possible: If software fixes don’t work, the touchpad ribbon cable may be loose or the hardware itself may have failed and need professional repair.
- Prevention is simple: Regularly updating drivers, being mindful of keyboard shortcuts, and keeping your Dell laptop clean can prevent most touchpad issues.
📑 Table of Contents
- Introduction: When Your Dell Laptop Touchpad Stops Responding
- Understanding Why Your Dell Laptop Touchpad Stops Working
- Quick Fix #1: Check the Keyboard Shortcut
- Quick Fix #2: Enable the Touchpad in Windows Settings
- Quick Fix #3: Update or Reinstall Touchpad Drivers
- Quick Fix #4: Check BIOS Settings
- Quick Fix #5: Run Windows Troubleshooter and System Checks
- Quick Fix #6: Addressing Hardware Issues
- Preventing Future Touchpad Problems on Your Dell Laptop
- Conclusion: Getting Your Dell Laptop Touchpad Back on Track
Introduction: When Your Dell Laptop Touchpad Stops Responding
You’re sitting at your desk, ready to get some work done on your Dell laptop, and suddenly nothing happens when you swipe across the touchpad. The cursor won’t move. Clicks don’t register. Your mouse pad is not working on your Dell laptop, and you’re left staring at a frozen screen wondering what went wrong.
If this sounds familiar, you’re definitely not alone. Touchpad issues are among the most common complaints Dell laptop users face. Whether you own an Inspiron, XPS, Latitude, or Alienware model, the touchpad can stop working for a variety of reasons – and the good news is that most of them are fixable without a trip to the repair shop.
In this comprehensive guide, we’ll walk you through every possible cause and solution for when your mouse pad is not working on your Dell laptop. From the simplest keyboard shortcut fix to more advanced driver and BIOS troubleshooting, we’ve got you covered. Let’s dive in and get your touchpad back in action.
Understanding Why Your Dell Laptop Touchpad Stops Working
Before jumping into fixes, it helps to understand what might be causing the problem. A touchpad is a sophisticated piece of hardware that relies on both physical components and software drivers to function. When any part of that chain breaks, you’ll experience issues.
The Most Common Culprits
The number one reason a mouse pad is not working on a Dell laptop is that it was accidentally disabled. Dell laptops come equipped with a keyboard shortcut that toggles the touchpad on and off. It’s incredibly easy to hit this combination without realizing it, especially if you’re typing quickly or have large hands.
Beyond accidental disabling, other frequent causes include outdated or corrupted touchpad drivers, Windows settings that automatically disable the touchpad when a USB mouse is plugged in, BIOS-level disabling, and in rarer cases, physical hardware failure. Each of these requires a different approach to fix, which is why we’ll cover them all in detail below.
How Dell Touchpads Differ from Other Brands
Dell laptops typically use touchpad hardware from manufacturers like Synaptics or Alps, and they run Dell-specific driver software. This means that generic Windows touchpad fixes might not always work perfectly. Dell also includes its own set of utilities and settings that can affect touchpad behavior, so it’s important to check Dell-specific solutions alongside general Windows troubleshooting.
Quick Fix #1: Check the Keyboard Shortcut
This is the fix that solves the problem about 60% of the time. If your mouse pad is not working on your Dell laptop, the very first thing you should try is the touchpad toggle shortcut.
Finding Your Model’s Specific Shortcut
Most Dell laptops use one of the following Fn key combinations to toggle the touchpad:
- Fn + F3 – Common on Inspiron and Vostro models
- Fn + F5 – Found on many Latitude business laptops
- Fn + F7 – Used on some XPS models
- Fn + F9 – Seen on certain Alienware laptops
Look for a small touchpad icon on one of your function keys (F1 through F12). That’s your toggle key. Press Fn and that key simultaneously, then test your touchpad. If it was accidentally disabled, this should bring it right back.
What If the Shortcut Doesn’t Work?
If pressing the function key combination doesn’t restore your touchpad, don’t worry. It could mean your function keys are set to perform their special functions without needing the Fn key. Try pressing just the F-key with the touchpad icon without holding Fn. Alternatively, your laptop might have a dedicated touchpad button near the top of the touchpad itself – some Dell models include a small LED indicator that shows whether the touchpad is on or off.
For more general guidance on touchpad issues across different laptop brands, check out our guide on mouse pad not working on laptop.
Quick Fix #2: Enable the Touchpad in Windows Settings
If the keyboard shortcut didn’t solve the issue, the next step is to check your Windows settings. Windows has several options that can disable or limit touchpad functionality, and sometimes updates or software changes can flip these settings without you knowing.
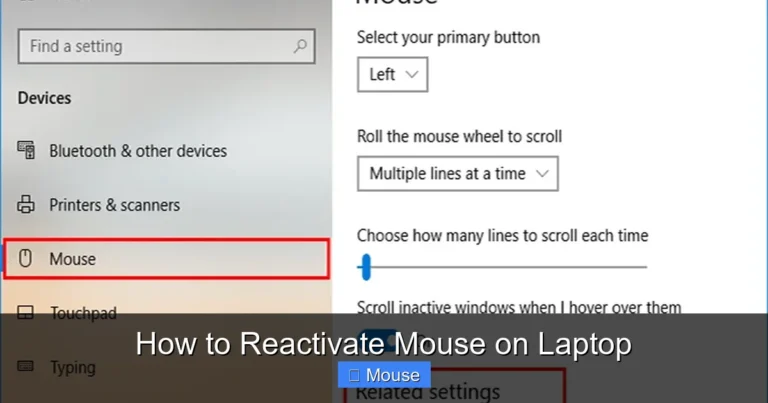
Using Windows 10/11 Settings App
Here’s how to check and enable your touchpad through the Settings app:
- Press Windows + I to open Settings
- Navigate to Bluetooth & devices (Windows 11) or Devices (Windows 10)
- Click on Touchpad in the left sidebar
- Make sure the toggle at the top says On
- Scroll down and ensure Leave touchpad on when a mouse is connected is checked
This last setting is particularly important. Many Dell laptops are configured to automatically disable the touchpad when an external mouse is plugged in. If you recently connected a USB mouse and then disconnected it, the touchpad might have stayed disabled.
Using the Control Panel (Legacy Method)
For older Dell laptops or if you prefer the classic interface, you can also access touchpad settings through the Control Panel:
- Open Control Panel from the Start menu
- Go to Hardware and Sound > Mouse
- Look for a tab labeled Device Settings, TouchPad, or Dell Touchpad
- Make sure the touchpad is set to Enabled
- Click Apply and then OK
If you don’t see a touchpad-specific tab in the Mouse properties, it could indicate a driver issue – which brings us to our next fix.
Quick Fix #3: Update or Reinstall Touchpad Drivers
Drivers are the software that allows Windows to communicate with your touchpad hardware. When these drivers become outdated, corrupted, or incompatible (often after a Windows update), your mouse pad may stop working on your Dell laptop.
Updating Drivers Through Device Manager
The most straightforward way to update your touchpad driver is through Device Manager:
- Right-click the Start button and select Device Manager
- Expand the Mice and other pointing devices category
- Look for entries like Dell TouchPad, Synaptics TouchPad, or Alps TouchPad
- Right-click the touchpad device and select Update driver
- Choose Search automatically for drivers
- Follow the prompts and restart your laptop
Reinstalling the Driver Completely
If updating doesn’t work, a clean reinstall might be necessary:
- Open Device Manager as described above
- Right-click the touchpad device and select Uninstall device
- Check the box that says Delete the driver software for this device (if available)
- Click Uninstall
- Restart your Dell laptop – Windows will automatically reinstall a generic driver
- Test the touchpad to see if it’s working
Downloading Drivers from Dell’s Website
For the best results, download the official touchpad driver directly from Dell’s support website:
- Go to www.dell.com/support
- Enter your Service Tag or select your laptop model
- Navigate to Drivers & Downloads
- Filter by Input Devices or Mouse, Keyboard & Input Devices
- Download the latest touchpad driver
- Install it and restart your laptop
Using Dell’s official drivers ensures full compatibility and access to all touchpad features, including multi-finger gestures and palm rejection settings.
If you’re experiencing broader mouse issues beyond just the touchpad, our article on why is my mouse not working on my laptop covers additional troubleshooting steps.
Quick Fix #4: Check BIOS Settings
If your touchpad works in some situations but not others, or if none of the Windows-level fixes have worked, the issue might be in your laptop’s BIOS (Basic Input/Output System). The BIOS controls hardware settings at a level below Windows, and if the touchpad is disabled there, no amount of Windows troubleshooting will fix it.
Accessing the BIOS on a Dell Laptop
Here’s how to enter BIOS on most Dell laptops:
- Shut down your laptop completely (not sleep or hibernate)
- Press the power button to turn it on
- Immediately start pressing F2 repeatedly (about once per second)
- Continue pressing until the BIOS setup screen appears
If F2 doesn’t work, try F12 to access the boot menu, then select BIOS Setup from the options.
Enabling the Touchpad in BIOS
Once you’re in the BIOS:
- Use the arrow keys to navigate (BIOS doesn’t support mouse input)
- Look for a section called System Configuration, Advanced, or Input Devices
- Find an option labeled Internal Pointing Device, Touchpad, or Trackpad
- Make sure it’s set to Enabled or On
- Press F10 to save and exit
- Confirm when prompted
After your laptop restarts, test the touchpad again. If it was disabled in BIOS, this should resolve the issue immediately.
Quick Fix #5: Run Windows Troubleshooter and System Checks
Windows includes built-in troubleshooting tools that can automatically detect and fix common hardware issues. While they won’t solve every problem, they’re worth trying as part of your troubleshooting process.
Running the Hardware Troubleshooter
Windows 10 and 11 include a hardware troubleshooter that can identify touchpad problems:
- Open Settings (Windows + I)
- Go to System > Troubleshoot > Other troubleshooters (Windows 11) or Update & Security > Troubleshoot (Windows 10)
- Find Hardware and Devices or Keyboard
- Click Run the troubleshooter
- Follow the on-screen instructions
Checking for Windows Updates
Sometimes a Windows update can cause touchpad issues, but subsequent updates often fix them. Make sure your system is fully up to date:
- Open Settings > Windows Update
- Click Check for updates
- Install any available updates
- Restart your laptop
Performing a System File Check
Corrupted system files can also cause hardware to malfunction. Run the System File Checker to repair any issues:
- Open Command Prompt as Administrator (search for “cmd” in Start, right-click, select “Run as administrator”)
- Type sfc /scannow and press Enter
- Wait for the scan to complete (this can take 10-15 minutes)
- Restart your laptop
If the scan finds and fixes corrupted files, your touchpad might start working again after the restart.
Quick Fix #6: Addressing Hardware Issues
If you’ve tried all the software fixes above and your mouse pad is still not working on your Dell laptop, it might be time to consider a hardware problem. While less common, hardware failures do happen.
Signs of a Hardware Problem
Here are indicators that your touchpad issue might be hardware-related:
- The touchpad doesn’t work even in BIOS (before Windows loads)
- There’s visible physical damage to the touchpad surface
- The touchpad works intermittently or only in certain areas
- You recently spilled liquid on or near the touchpad
- The laptop was dropped or experienced physical impact
- None of the software troubleshooting steps had any effect
Checking the Ribbon Cable
Inside your Dell laptop, the touchpad connects to the motherboard via a thin ribbon cable. Over time, this cable can become loose due to thermal expansion and contraction, or from the laptop being opened and closed repeatedly.
Warning: Opening your laptop may void your warranty. If your Dell laptop is still under warranty, contact Dell support before attempting any internal repairs.
If you’re comfortable opening your laptop:
- Power off the laptop and disconnect the charger
- Remove the bottom panel (usually held by Phillips-head screws)
- Locate the touchpad ribbon cable connector on the motherboard
- Gently disconnect and reconnect the cable
- Reassemble and test
When to Seek Professional Help
If you’re not comfortable opening your laptop, or if reseating the cable doesn’t help, it’s time to contact Dell support or visit a certified repair center. The touchpad itself may need to be replaced, which requires professional tools and expertise.
Dell’s support website allows you to check your warranty status and schedule repairs. If your laptop is out of warranty, a local computer repair shop can usually replace a touchpad for a reasonable cost.
For related issues like a disappearing cursor, you might also find our article on mouse disappeared on Dell laptop helpful.
Preventing Future Touchpad Problems on Your Dell Laptop
Once you’ve gotten your touchpad working again, you’ll want to prevent the issue from happening again. Here are some simple habits that can keep your Dell laptop’s touchpad in good shape.
Keep Drivers Updated
Set a reminder to check for driver updates every few months, or use Dell’s SupportAssist utility to automatically keep your drivers current. Outdated drivers are one of the most common causes of touchpad issues.
Be Mindful of Keyboard Shortcuts
Know which Fn key combination toggles your touchpad, and be careful not to press it accidentally. If you find yourself hitting it frequently, you can often disable the shortcut through Dell’s touchpad settings utility.
Keep Your Touchpad Clean
Dirt, oil, and debris can interfere with touchpad sensitivity. Clean your touchpad regularly with a soft, slightly damp cloth. Avoid using harsh chemicals or excessive moisture.
Use a Surge Protector
Power surges can damage laptop components, including the touchpad. Using a surge protector can help protect your Dell laptop from electrical damage.
Handle Your Laptop with Care
Avoid placing heavy objects on your closed laptop, and be gentle when opening and closing the lid. Physical stress can loosen internal connections over time.
Conclusion: Getting Your Dell Laptop Touchpad Back on Track
Having your mouse pad not working on your Dell laptop can be incredibly frustrating, especially when you’re in the middle of important work. But as we’ve covered in this guide, the vast majority of touchpad issues are fixable with a systematic approach to troubleshooting.
Start with the simplest solutions – check the keyboard shortcut, verify Windows settings, and update your drivers. If those don’t work, move on to BIOS checks and system file repairs. And if all else fails, don’t hesitate to seek professional help for potential hardware issues.
Remember, the key is to stay calm and work through the troubleshooting steps methodically. Most Dell laptop touchpad problems are software-related and can be resolved in just a few minutes. With the knowledge from this guide, you’re well-equipped to handle any touchpad issue that comes your way.
Frequently Asked Questions
Why did my Dell laptop touchpad suddenly stop working?
The most common reason is accidentally pressing the Fn key shortcut that toggles the touchpad on and off. It could also be due to a recent Windows update that affected your touchpad drivers, or a setting that automatically disables the touchpad when an external mouse is connected.
How do I turn my touchpad back on using keyboard shortcuts?
Look for a function key (F1-F12) with a touchpad icon on your Dell laptop keyboard. Press Fn along with that key to toggle the touchpad. Common combinations include Fn + F3, Fn + F5, or Fn + F7, depending on your specific Dell model.
Can a Windows update cause my Dell touchpad to stop working?
Yes, Windows updates can sometimes install incompatible or generic drivers that don’t work well with Dell’s touchpad hardware. If your touchpad stopped working after an update, try rolling back the driver in Device Manager or downloading the latest driver from Dell’s support website.
How do I know if my touchpad issue is hardware or software related?
Test your touchpad in the BIOS (press F2 during startup). If it doesn’t work in BIOS, it’s likely a hardware problem. If it works in BIOS but not in Windows, the issue is probably software-related, such as a driver or settings problem.
Should I contact Dell support if my touchpad isn’t working?
If your laptop is still under warranty, definitely contact Dell support before attempting any internal repairs. Even out of warranty, Dell’s support team can help diagnose the issue and recommend the best course of action, whether that’s a driver fix or a hardware replacement.
Can I use an external mouse while troubleshooting my touchpad?
Absolutely. Connecting a USB or Bluetooth mouse is a great way to continue using your Dell laptop while you troubleshoot the touchpad issue. Just remember to check the setting that might automatically disable the touchpad when an external mouse is connected.