Nvme Ssd Boot with the Raspberry Pi 5

Booting your Raspberry Pi 5 from an NVMe SSD transforms performance, cutting load times dramatically compared to a microSD card. This guide walks you through every step, from choosing the right drive to configuring firmware and optimizing your setup. Whether you are a hobbyist or a maker, you will find practical tips to get your Pi 5 running at full speed with a NVMe SSD boot drive.
Booting a NVMe SSD with the Raspberry Pi 5 is one of the best upgrades you can make. It changes everything about how your Pi feels. The days of waiting for a slow microSD card to load your operating system are over. With an NVMe drive, your Pi 5 starts faster, runs smoother, and handles heavy tasks with ease. This guide will show you exactly how to set it up, what hardware you need, and how to get the most out of your new boot drive.
The Raspberry Pi 5 is a powerful little computer. It has a 64-bit quad-core processor and supports PCIe Gen 2, which opens the door to NVMe storage. Unlike earlier Pi models that relied solely on microSD cards, the Pi 5 can now boot directly from a NVMe M.2 SSD. This means your operating system lives on a solid-state drive instead of a flash card. The result is a much more responsive and dependable system.
Key Takeaways
- Faster Boot Times: An NVMe SSD delivers significantly quicker boot and load speeds than a traditional microSD card.
- Improved Reliability: SSDs have no moving parts, meaning fewer read/write failures compared to SD cards over time.
- Simple Setup: Raspberry Pi 5 supports NVMe boot natively through firmware updates and a few straightforward steps.
- Affordable Options: Budget-friendly NVMe drives like the Kingston 1TB M.2 NVMe SSD work great for Pi projects.
- Performance Boost: NVMe drives use PCIe lanes for much higher data transfer speeds than USB or SD interfaces.
- Wider Compatibility: Many M.2 NVMe SSDs fit standard Raspberry Pi 5 enclosures with the right adapter or HAT.
📑 Table of Contents
What Is NVMe SSD Boot on Raspberry Pi 5?
NVMe stands for Non-Volatile Memory Express. It is a protocol designed for flash storage that communicates directly through the PCIe bus. In simple terms, this means data moves between your drive and the Pi 5 at incredibly high speeds. When you set up an NVMe SSD boot, your Raspberry Pi 5 loads the operating system from the SSD instead of a microSD card.
The Pi 5 uses a special connector called the PCIe connector on its board. You can attach an NVMe drive using an M.2 HAT or adapter. Once the firmware is configured, the Pi recognizes the SSD as its primary boot device. This setup is officially supported by the Raspberry Pi foundation, making it accessible even for beginners.
How NVMe Boot Differs from microSD Boot
When you boot from a microSD card, the Pi reads data through a simple SD interface. This interface is slow and prone to corruption. An NVMe drive uses the PCIe bus, which is far faster and more stable. The difference is noticeable the moment you power on your Pi 5. Applications launch quicker, file transfers finish faster, and the whole system feels snappier.
Another big advantage is durability. microSD cards wear out over time from repeated read and write cycles. NVMe SSDs handle these cycles much better. So your Pi system stays reliable for longer. If you run a server, a media center, or a home automation project, this reliability matters a lot.
Why Boot from NVMe SSD Instead of microSD?
There are several strong reasons to switch from a microSD card to an NVMe SSD for your Raspberry Pi 5. Let us break them down so you can see the real value.
Speed is the number one reason. A typical microSD card writes at around 20 to 30 megabytes per second. A good NVMe SSD can hit 1,500 megabytes per second or more. That is a massive difference. Your Pi 5 will feel like a completely different machine.
Reliability comes next. SD cards fail. They corrupt. They wear out. If you are running a project that needs to stay on 24/7, an SD card is risky. An NVMe drive is built for constant use. It has no moving parts and handles heavy workloads with confidence.
Capacity is another factor. Most microSD cards max out at 256GB or 512GB. NVMe SSDs are available in 1TB and even 2TB sizes. The 1TB NVMe M.2 SSD option gives you plenty of room for your operating system, apps, media files, and projects.
- Faster boot and load times compared to microSD
- Greater durability and resistance to corruption
- Higher storage capacity options available
- Better sustained performance under heavy workloads
- Official Raspberry Pi 5 support through firmware
What You Need to Get Started
Setting up NVMe boot on a Raspberry Pi 5 is straightforward. You need a few pieces of hardware and a little patience. Here is everything you will need before you begin.
Hardware Requirements
First, you need a Raspberry Pi 5 board. This is essential because older Pi models do not support NVMe boot. Next, you need a compatible NVMe M.2 SSD. A 1TB M.2 PCIe NVMe SSD works perfectly for most users. Make sure the drive uses the 2230 or 2242 form factor, which fits the Pi 5’s M.2 connector.
You will also need an M.2 HAT or adapter. The official Raspberry Pi M.2 HAT is the easiest option. It slots right onto the Pi 5’s GPIO pins and provides the PCIe connection. Alternatively, you can use a third-party M.2 adapter board. Just make sure it supports PCIe Gen 2 and the correct keying (B key or M key).
Finally, you need a power supply. The Raspberry Pi 5 requires a 5V 5A USB-C power supply. A reliable power source keeps your NVMe drive running stable during boot and operation.
Software Requirements
You will need the latest Raspberry Pi Imager tool. This free software lets you flash the Raspberry Pi OS onto your NVMe drive. Make sure your Pi 5 firmware is up to date. The NVMe boot feature requires firmware version 1.2019 or later. You can update your firmware through the Raspberry Pi configuration tool or by running a simple terminal command.
You will also need a temporary microSD card for the initial setup. This card is only used to flash the firmware and configure the boot order. Once that is done, you can remove it and boot entirely from the NVMe drive.
Step-by-Step Setup Guide
Now let us walk through the actual setup process. Follow these steps carefully, and you will have your Pi 5 booting from an NVMe SSD in no time.
Step 1: Flash the NVMe Drive
Insert your NVMe SSD into the M.2 HAT or adapter. Connect the assembly to the Raspberry Pi 5. Open the Raspberry Pi Imager on your computer. Select the Raspberry Pi OS (other) option. This version supports NVMe boot out of the box. Choose your NVMe drive as the target device and click Write.
The imager will flash the operating system onto the SSD. This may take a few minutes depending on the drive speed. Once it finishes, safely eject the drive.
Step 2: Configure Boot Order
Insert a temporary microSD card into your computer. Open the SD card in your file manager. You will see a file called boot.conf or config.txt. Open this file with a text editor and add the following line:
program_usb_boot_mode=1
Save the file and eject the SD card. Insert this SD card into your Raspberry Pi 5 and power it on. The Pi will write the boot mode setting to its EEPROM. After a few seconds, power off the Pi and remove the microSD card.
Step 3: Boot from NVMe
Now connect the NVMe SSD back to the Pi 5. Power on the board. The Pi should boot directly from the NVMe drive. You will see the Raspberry Pi OS desktop load just like it would from an SD card, but much faster. Congratulations, your NVMe SSD boot setup is complete.
If the Pi does not boot from the NVMe drive, check your connections. Make sure the M.2 HAT is seated properly. Verify that the SSD is compatible and formatted correctly. Sometimes a simple reseat fixes the issue.
Optimizing Your Raspberry Pi 5 for NVMe Boot
Getting your Pi 5 to boot from an NVMe drive is only the beginning. You can fine-tune your setup to squeeze out even more performance and reliability.
Enable TRIM for Better SSD Health
TRIM is a command that tells the SSD which data blocks are no longer in use. Enabling TRIM helps your NVMe drive maintain peak performance over time. Open a terminal on your Pi and run:
sudo fstrim -v /
You can also set up a weekly TRIM cron job so the drive stays optimized automatically. This small step goes a long way in extending the life of your SSD.
Adjust Swap Settings
The Raspberry Pi 5 has 8GB of RAM, which is plenty for most tasks. However, you may want to reduce or disable swap space on your NVMe drive. Swap uses SSD storage as virtual memory, which can wear out the drive over time. If you do not run memory-heavy applications, set swap to a low value or turn it off entirely.
Use a Quality Power Supply
NVMe drives draw more power than microSD cards. A weak power supply can cause crashes or data corruption. Always use the official Raspberry Pi 5 power supply or a reputable 5V 5A USB-C adapter. Stable power keeps your NVMe boot drive healthy and your Pi running smoothly.
For the best results, consider pairing your NVMe drive with a heatsink or fan. The Pi 5 runs warm, and adding a cooling solution keeps both the processor and the SSD at safe temperatures. Thermal throttling can slow down your NVMe speeds, so good airflow matters.
Common Problems and How to Fix Them
Even with a straightforward setup, you might run into a few hiccups. Here are the most common issues and their solutions.
Problem: Pi does not recognize the NVMe drive. This usually means the M.2 HAT is not seated correctly. Remove the HAT, check the connector alignment, and press it firmly back onto the Pi 5. Also verify that your NVMe drive is compatible with the PCIe Gen 2 interface.
Problem: Boot hangs at the rainbow square. This indicates the Pi cannot find a bootable drive. Make sure you flashed the OS correctly. Try re-flashing the NVMe drive with the Raspberry Pi Imager. Also confirm that the boot mode was written to the EEPROM by checking the boot order in the config.
Problem: Slow performance after setup. Some NVMe drives are slower than others. Budget drives may not reach their full potential on the Pi 5’s PCIe Gen 2 bus. Check your drive’s specifications. A Kingston 1TB M.2 NVMe SSD or similar reliable brand will deliver consistent speeds. You can also benchmark your drive using the fio tool in the terminal to see actual read and write speeds.
Problem: Drive disconnects randomly. This is often a power issue. Make sure your USB-C power supply delivers a full 5A. Loose M.2 connections can also cause intermittent disconnects. Reseat the drive and HAT to ensure a solid connection.
Final Thoughts
Booting your Raspberry Pi 5 from an NVMe SSD is a game-changer. The speed, reliability, and capacity improvements make it one of the best upgrades you can do. Whether you are building a home server, a media center, a retro gaming station, or a smart home hub, NVMe boot takes your Pi 5 to the next level.
The setup process is simple and well-documented. You do not need advanced technical skills. With the right hardware and a bit of patience, anyone can do it. Start with a reliable NVMe drive, follow the steps in this guide, and enjoy a dramatically faster Raspberry Pi experience. Your Pi 5 was built for this, and the results will surprise you.
Frequently Asked Questions
Can any NVMe SSD work with the Raspberry Pi 5?
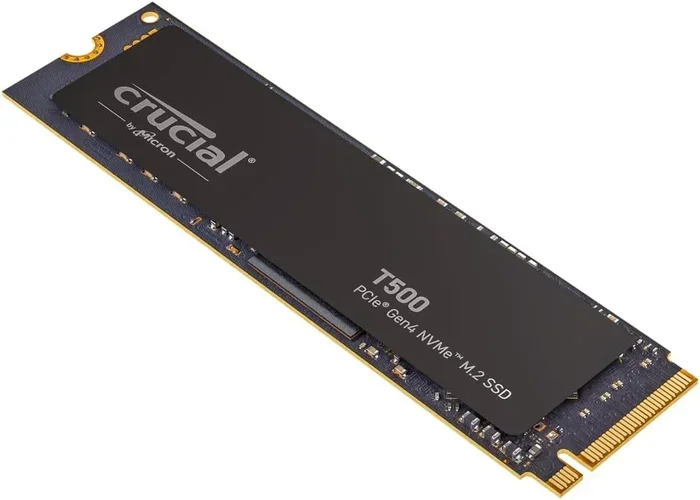
Most M.2 NVMe SSDs work with the Pi 5 as long as they use the PCIe interface and the correct form factor (2230 or 2242). The Pi 5 uses a PCIe Gen 2 connection, so drives designed for older PCIe standards are fully compatible. Brands like Kingston and Crucial offer reliable options that work well.
Do I need a special HAT to boot from NVMe on the Pi 5?
Yes, you need an M.2 HAT or adapter to connect the NVMe SSD to the Pi 5. The official Raspberry Pi M.2 HAT is the easiest and most reliable choice. Third-party adapters also work, but make sure they support PCIe Gen 2 and the correct M.2 keying for your drive.
Is NVMe boot faster than USB boot on the Raspberry Pi 5?
Yes, NVMe boot is significantly faster than USB boot. NVMe drives communicate directly through the PCIe bus, which offers much higher bandwidth than USB 3.0. If speed is your priority, NVMe boot is the clear winner for the Pi 5.
Can I still use a microSD card with NVMe boot?
Once you configure NVMe boot, the Pi will prioritize the SSD as the primary boot device. You can still use a microSD card for additional storage or backup, but the operating system will run from the NVMe drive. Removing the SD card after setup will not affect your Pi’s operation.
Will NVMe boot void my Raspberry Pi 5 warranty?
No. NVMe boot is an officially supported feature of the Raspberry Pi 5. Using an M.2 HAT and NVMe drive does not void your warranty. Just make sure you use compatible hardware and follow proper setup procedures.
How do I know if my Pi 5 firmware supports NVMe boot?
Check your firmware version by opening a terminal and running vcgencmd bootloader_version. If the version is 1.2019 or later, your Pi 5 supports NVMe boot. You can update firmware through the Raspberry Pi configuration tool or by running sudo rpi-update in the terminal.