Thermal Imaging Camera Ghost Hunting
Thermal imaging camera ghost hunting blends science and the supernatural, giving investigators a clear view of temperature anomalies that may signal paranormal activity. This guide walks you through choosing the right thermal gear, mastering field techniques, and interpreting the eerie data you capture.
Key Takeaways
- Thermal cameras detect heat, not light: They reveal temperature differences invisible to the naked eye, making them ideal for spotting cold spots and sudden heat spikes.
- Choose the right resolution and sensitivity: A 640×480 sensor with ≤50 mK NETD gives clear, detailed images for accurate analysis.
- Proper setup matters: Stabilize the camera, calibrate for ambient temperature, and use a tripod or gimbal to avoid motion blur.
- Combine tools for better evidence: Pair thermal video with an EMF meter, voice recorder, and still‑camera for a comprehensive investigation.
- Interpretation requires context: Not every cold spot is a ghost; drafts, insulation gaps, and equipment heat can create false positives.
- Legal and ethical considerations: Always respect private property and obtain permission before filming, especially in historic sites.
- Post‑hunt workflow: Use software to annotate, enhance, and export clips, then document findings in a structured report.
📑 Table of Contents
- Introduction: Why Thermal Imaging Has Become a Ghost Hunter’s Favorite Tool
- 1. Understanding the Basics of Thermal Imaging
- 2. Selecting the Right Thermal Imaging Camera for Ghost Hunting
- 3. Preparing for a Thermal Ghost Hunt
- 4. Field Techniques: Getting the Most Out of Your Thermal Camera
- 5. Analyzing Thermal Data After the Hunt
- 6. FAQs About Thermal Imaging Camera Ghost Hunting
Introduction: Why Thermal Imaging Has Become a Ghost Hunter’s Favorite Tool
For decades, paranormal investigators relied on night‑vision goggles, EMF meters, and shaky handheld video cameras. Those tools gave a glimpse of the unknown, but they often left more questions than answers. Enter thermal imaging cameras—a technology originally built for firefighters, electricians, and wildlife researchers. By visualizing heat, these devices expose temperature anomalies that can hint at a presence that doesn’t belong to the living world.
Thermal imaging camera ghost hunting isn’t about proving the existence of spirits; it’s about adding a scientific layer to an inherently subjective pursuit. When a sudden cold spot appears on a live thermal feed, you have a concrete, measurable event to log, analyze, and compare across multiple investigations.
1. Understanding the Basics of Thermal Imaging
How Thermal Cameras Work
Thermal cameras detect infrared radiation, which every object above absolute zero emits. Sensors translate this radiation into a color‑coded image—typically shades of red, orange, and white for warm areas, and blues or purples for cooler zones. The key specs to watch are:
Visual guide about Thermal Imaging Camera Ghost Hunting
Image source: kotuu.com
- Resolution: Higher pixels (e.g., 640×480) capture finer detail.
- NETD (Noise‑Equivalent Temperature Difference): Lower values (≤50 mK) mean the camera can sense smaller temperature changes.
- Temperature Range: Look for a range that covers typical indoor (‑20 °C to +150 °C) and outdoor (‑40 °C to +300 °C) conditions.
Why Heat Matters in Paranormal Research
Many investigators believe that a spirit’s energy can manifest as a localized temperature shift. A sudden drop (a “cold spot”) might indicate a draft caused by an unseen entity, while an unexpected warm bloom could be the result of a “heat signature” left by a lingering presence. Thermal imaging provides a visual record of these shifts, turning anecdotal feelings into quantifiable data.
2. Selecting the Right Thermal Imaging Camera for Ghost Hunting
Budget vs. Professional Models
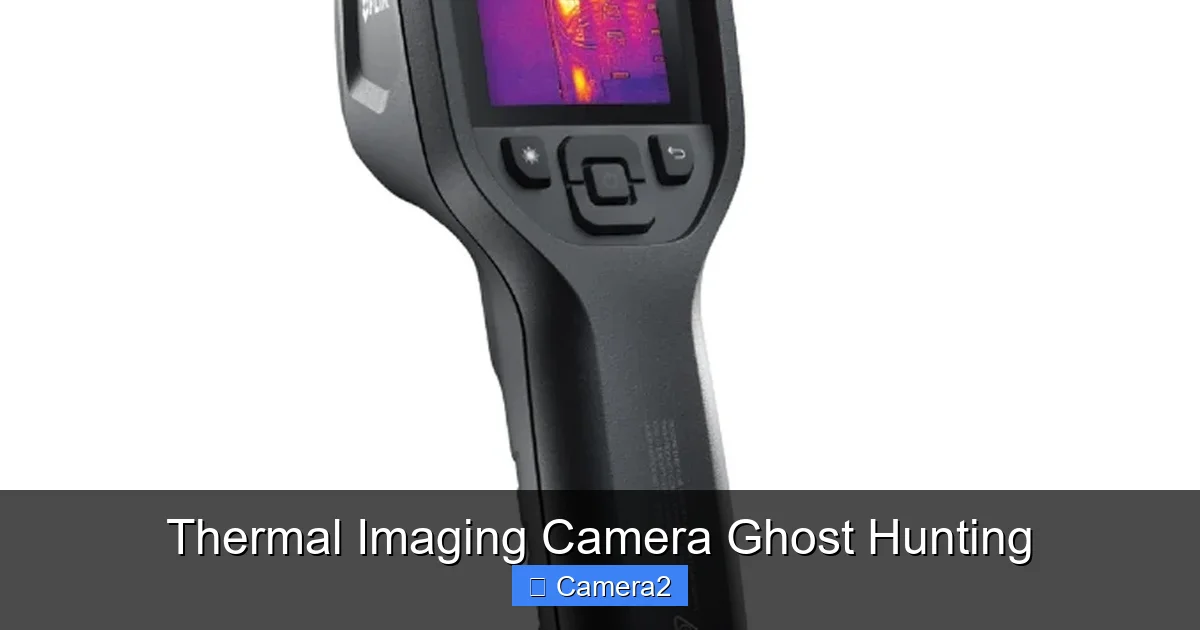
If you’re just starting, a smartphone attachment like the FLIR One (≈$200) offers decent sensitivity and a user‑friendly app. For serious field work, consider a dedicated handheld unit such as the FLIR Scout TK or the Seek Thermal Compact Pro, which deliver higher resolution and better thermal sensitivity.
Visual guide about Thermal Imaging Camera Ghost Hunting
Image source: static.vecteezy.com
Essential Features to Prioritize
- Video Recording: Look for at least 30 fps recording to capture rapid temperature changes.
- Built‑in GPS: Helps tag each clip with location data for later analysis.
- Adjustable Emissivity: Allows you to fine‑tune readings on different surfaces (wood, metal, stone).
- Battery Life: A minimum of 4‑6 hours ensures you won’t miss the crucial moment.
Real‑World Example: Field Test Comparison
During a night investigation at an abandoned asylum, a budget FLIR One captured a brief cold spot but missed the surrounding context due to its narrow field of view. Switching to a FLIR Scout TK revealed a larger, swirling cold area that persisted for over 12 seconds—stronger evidence that could be cross‑referenced with audio spikes from an EMF meter.
3. Preparing for a Thermal Ghost Hunt
Pre‑Investigation Checklist
- Charge all batteries and bring spares.
- Load a high‑capacity microSD card (32 GB or more) for uninterrupted recording.
- Calibrate the camera to the ambient temperature (most units have an auto‑calibration mode).
- Set up a tripod or a stable mount—consider a good camera backpack for hiking that includes a compact tripod.
- Brief the team on safety protocols and area boundaries.
Site Survey: Knowing Your Environment
Before you turn on the thermal sensor, walk the location with a regular flashlight. Identify drafts, heat sources (radiators, pipes), and reflective surfaces that could trick the camera. Mark these spots on a simple floor plan; you’ll reference them when you later see a cold spot in the same area.
Visual guide about Thermal Imaging Camera Ghost Hunting
Image source: cdn11.bigcommerce.com
Integrating Other Paranormal Tools
Thermal imaging works best when paired with:
- EMF meters (to detect electromagnetic fluctuations).
- Digital voice recorders (for EVP capture).
- Standard video cameras (for visual confirmation).
This multi‑sensor approach creates a richer data set, making it easier to rule out mundane explanations.
4. Field Techniques: Getting the Most Out of Your Thermal Camera
Static vs. Mobile Scanning
Static scanning involves placing the camera on a tripod and slowly panning across a room. This method reduces motion blur and lets you focus on temperature gradients. Mobile scanning—walking with a handheld unit—covers larger areas quickly but can introduce noise. Use a gimbal or a stabilizer if you need to move.
Temperature Calibration on the Fly
Many cameras let you set a “reference temperature” using a known surface (e.g., a wall that feels room temperature). This helps the device adjust for sudden ambient changes, such as an open door letting in cold air.
Capturing “Event Windows”
When a cold spot appears, hit the record button immediately and keep the camera focused on the area for at least 10 seconds. This “event window” gives you enough footage to analyze the temperature drop and recovery curve, which can be plotted later using thermal analysis software.
Practical Tip: Use a Thermal‑Friendly Lens Cover
Some lenses can reflect IR radiation, causing hot spots in the image. A matte, non‑reflective cover reduces this effect and improves image fidelity.
5. Analyzing Thermal Data After the Hunt
Software Tools for Post‑Processing
Most manufacturers provide free desktop apps (e.g., FLIR Tools, Seek Thermal Capture). Import your video, then use the following steps:
- Identify the frame where the temperature anomaly first appears.
- Read the exact temperature value (most cameras display it on hover).
- Apply a color‑enhancement filter to highlight subtle changes.
- Export the clip with an overlay of temperature readings for documentation.
Distinguishing Natural From Paranormal
Look for patterns:
- Repeating cold spots in the same location across multiple visits.
- Temperature changes that occur without any visible draft source.
- Correlation with other sensor spikes (EMF, audio).
If a cold spot aligns with a known vent or a cracked window, it’s likely mundane. Otherwise, you may have something worth further investigation.
Reporting Your Findings
Structure your report with these sections:
- Location & date
- Equipment list (include camera model, resolution, NETD)
- Environmental conditions (ambient temperature, humidity)
- Observed anomalies (temperature values, duration, video timestamps)
- Cross‑sensor data (EMF, audio)
- Interpretation & possible explanations
A clear, data‑driven report adds credibility, whether you’re sharing with a paranormal society or publishing online.
6. FAQs About Thermal Imaging Camera Ghost Hunting
Can thermal cameras see through walls?
No. Thermal cameras capture surface temperature; they cannot penetrate solid materials. However, they can detect temperature differences on the surface that may hint at hidden drafts.
Do I need a special license to use a thermal camera for paranormal work?
In most regions, no license is required for non‑commercial use. Check local regulations if you plan to film in public or historic properties.
How does weather affect thermal imaging?
Outdoor temperature swings can create false positives. Always record the ambient temperature and wait for the environment to stabilize before starting your scan.
Can I use a trail camera as a thermal imager?
Some trail cameras have built‑in infrared but not true thermal sensing. For genuine temperature data, stick to dedicated thermal units. See the Wildgame Innovations Trail Camera Manual for details on infrared vs. thermal.
What is the best way to store thermal footage?
Save files on a high‑capacity, high‑speed SD card and back them up to a cloud service or external hard drive. Naming files with date, location, and temperature range helps keep archives organized.
Are there any health risks using thermal cameras at night?
Thermal cameras emit no visible light and are safe for the eyes. However, operating in dark, unfamiliar spaces can be hazardous—always bring a reliable flashlight and a buddy.
Frequently Asked Questions
What is thermal imaging camera ghost hunting?
thermal imaging camera ghost hunting is an important topic with many practical applications.