How to Fix Rattling Car Speakers
If you hear annoying buzzing or shaking from your audio system, you need to how to fix rattling car speakers before it worsens. Most rattles come from loose mounting, damaged cones, or poor wiring connections. We will walk you through quick checks, safe fixes, and smart upgrades. You can restore clean sound without spending a fortune on professional repair.
Nothing kills a good drive faster than a buzzing, shaking speaker. You crank up your favorite track, and suddenly the door panel vibrates like a cheap snack wrapper. That sound is not music. It is a rattle. The good news is you can often stop it at home. Learning how to fix rattling car speakers saves money and brings back clear, tight audio.
Most rattles come from three places. The speaker is not secured well. The cone or surround is damaged. Or the wiring is loose and vibrating against metal. Sometimes the problem is not the speaker at all. A loose trim piece or empty screw hole can mimic a bad driver. We will help you sort it out fast.
This guide keeps things simple. You do not need fancy tools. You just need patience, a few basic supplies, and a careful approach. We will cover quick checks, safe fixes, and clear signs that it is time to replace a unit. By the end, you will know exactly what to do next and how to keep your system quiet for the long haul.
Key Takeaways
- Identify the source first: Determine if the rattle comes from the speaker, mount, grill, or nearby trim.
- Check mounting hardware: Tighten screws, add foam tape, and secure loose brackets to stop vibration.
- Inspect the cone and surround: Look for tears, cracks, or dry rot that cause distortion and buzzing.
- Verify wiring and polarity: Loose wires or reversed connections can create harsh, rattling output.
- Test with different tracks: Use bass-heavy and midrange songs to isolate frequency-specific rattles.
- Know when to replace: If the voice coil is damaged or the cone is shredded, replacement beats repair.
- Prevent future issues: Seal gaps, use proper enclosures, and avoid excessive volume spikes.
📑 Table of Contents
- How to Fix Rattling Car Speakers by Diagnosing the Real Source
- How to Fix Rattling Car Speakers by Securing Loose Mounts
- How to Fix Rattling Car Speakers by Inspecting the Cone and Surround
- How to Fix Rattling Car Speakers by Checking Wiring and Connections
- How to Fix Rattling Car Speakers by Testing and Fine-Tuning the Sound
- How to Fix Rattling Car Speakers by Knowing When to Replace
- How to Fix Rattling Car Speakers with a Simple Maintenance Routine
- Frequently Asked Questions
- Conclusion
How to Fix Rattling Car Speakers by Diagnosing the Real Source
Before you grab a screwdriver, you need to know where the noise starts. A rattle can trick you. The sound may seem to come from the door, but the real culprit could be a loose trim clip or a vibrating pocket. Start with a careful listen.
Quick listening tests
Play a track with steady bass and midrange. Keep the volume moderate. Press gently on the speaker grill while the music plays. If the noise changes or stops, the speaker or its mount is likely the issue. Try the same test with the window down. Road noise can hide or reveal certain frequencies. This simple step helps you focus your effort.
Check nearby parts
Look at the door panel, dashboard, and center console. Loose screws, hollow screw holes, and thin plastic clips love to buzz. Tap each area lightly with your finger. If you hear a knock, you found a suspect. Fixing these small issues often solves the problem without touching the speaker at all.
Isolate the speaker
If your system has multiple drivers, test them one at a time. Lower the fader and balance to send sound to a single speaker. This makes it easier to pinpoint the exact location. Once you know which unit is acting up, you can move to the next step with confidence.
How to Fix Rattling Car Speakers by Securing Loose Mounts
A speaker that moves too much will shake its housing and the surrounding panel. That movement creates a buzz. Tightening and cushioning the mount usually solves it. This is one of the most common fixes, and it is often the easiest.
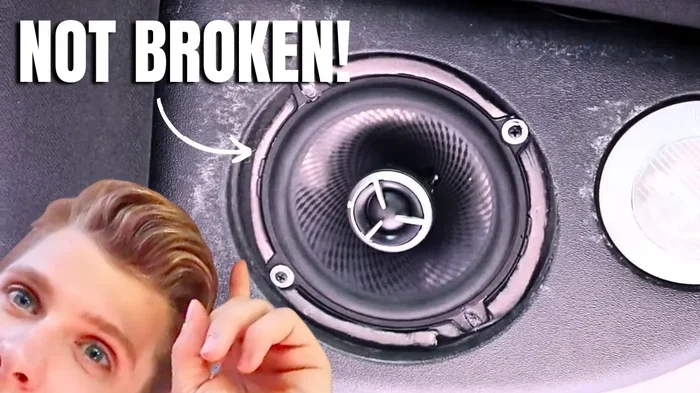
Visual guide about car speaker rattling repair
Image source: i.ytimg.com
Tighten the hardware
Remove the grill if possible. Check every screw, bolt, and clip. Tighten anything that feels loose, but do not overdo it. Plastic threads strip fast. If a screw spins freely, the hole may be stripped. In that case, use a slightly larger screw or fill the hole with a plastic anchor. A secure fit stops the panel from vibrating.
Add damping material
Thin door panels love to resonate. A small piece of foam or butyl damping material can calm things down. Place a thin layer behind the speaker area if you have access. You can also add a tiny gasket of foam around the mounting ring. This cushions the driver and reduces metal-to-plastic contact. The goal is to absorb vibration, not block sound.
Recheck the enclosure
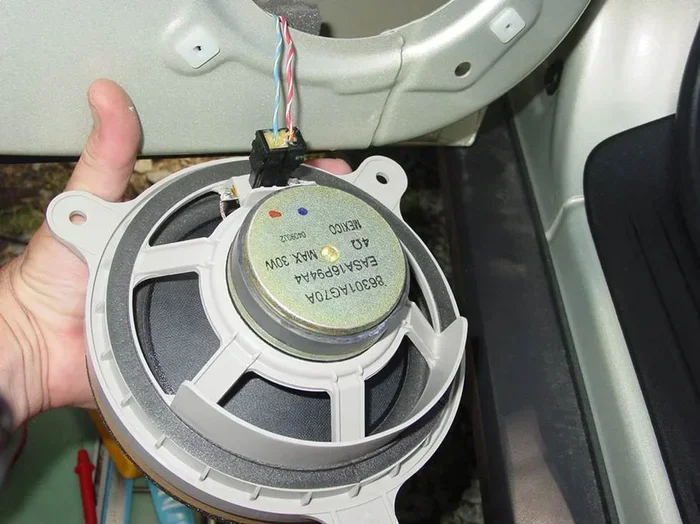
Aftermarket speakers sometimes come with shallow mounts or mismatched brackets. If the basket sits unevenly, it will buzz. Level the fit with a thin shim or a new mounting ring. Make sure the magnet does not rub against the door metal. A clean, stable fit makes a huge difference in clarity.
Quick Tip: If you want a deeper dive on fit and sizing before you start, read our guide on how to measure car speakers so the new or repaired unit matches your space perfectly.
How to Fix Rattling Car Speakers by Inspecting the Cone and Surround
Even a well-mounted speaker can rattle if the cone or surround is damaged. The cone moves air. The surround keeps that motion controlled. When either part wears out, the driver loses control and starts to buzz.
Look for visible damage
Shine a light on the cone. Check for tears, holes, or peeling edges. Look at the surround for dry rot, cracks, or stiff spots. Small tears can grow fast when volume rises. If you see damage, the speaker may still work at low volume, but it will sound rough and noisy.
Test the movement
With the music off, gently press the cone evenly with your fingers. It should move smoothly and return to center. If it feels scratchy, binds, or makes a clicking sound, the voice coil may be damaged. That is a serious sign. In many cases, repair is not worth the cost, and replacement is the smarter move.
Decide between repair and replacement
Tiny edge tears on a high-quality driver can sometimes be sealed with a careful adhesive repair. But most modern speakers are affordable enough that replacement makes more sense. If you love the sound signature, match the size and impedance before buying a new unit. If you are unsure about compatibility, check your owner manual or ask a pro.
Common Mistake: Many people keep cranking the volume to test a damaged cone. That only makes the tear worse. Keep levels moderate during checks and stop if you hear scraping.
How to Fix Rattling Car Speakers by Checking Wiring and Connections
Loose wires can vibrate against metal and create a buzz that sounds like a speaker problem. Bad connections also cause distortion that mimics a blown driver. A quick wiring check is easy and often overlooked.
Inspect the terminals
Look at the speaker terminals and the wiring harness. Make sure the leads are tight and clean. Corrosion or green buildup can weaken the connection. Clean it with a small brush if needed. A solid connection keeps the signal clear and reduces harsh vibration.
Secure loose wires
Wires that flap around can tap against the door or the magnet. Use a zip tie or a small clip to route them neatly. Leave enough slack for door movement if the speaker is in a swinging door. A tidy harness prevents rattles and protects the wiring over time.
Check polarity
Reversed polarity does not always cause a rattle, but it can make the system sound loose and muddy. If one speaker is out of phase, the low end can feel weak and strange. A simple polarity check helps you confirm the wiring is correct. If you want a step-by-step method, see our article on how to check polarity on speakers with multimeter for a quick, reliable test.
Match the wiring to your setup
If you have added an amplifier or changed speaker layout, make sure the wiring plan still makes sense. Extra speakers on a limited channel count can cause strain if not wired properly. For practical connection ideas, review our guides on how to wire 4 speakers to 2 channel amp and how to connect 4 speakers to a 2 channel amp. The right wiring setup keeps each driver stable and reduces unwanted noise.
How to Fix Rattling Car Speakers by Testing and Fine-Tuning the Sound
Sometimes the fix is not mechanical. The sound itself can reveal weak points. Certain frequencies may excite a loose panel or a damaged cone. Fine-tuning the audio can calm the system while you plan the next repair.
Use the right test tracks
Pick songs you know well. Start with midrange vocals, then move to steady bass lines. Listen for buzzing that changes with specific notes. If the rattle appears only at certain bass frequencies, the panel or mount is likely resonating. If it sounds harsh across the board, the speaker may be worn.
Adjust the EQ carefully
A small cut in the problem frequency can reduce the buzz without ruining the music. Try a narrow dip of a few decibels where the rattle seems strongest. Do not slash big chunks of sound. Small, careful changes work best. This is a temporary fix, but it can make the system usable right away.
Watch your volume habits
Big volume spikes stress the driver and the mount. If you love loud music, give the system a little breathing room. Avoid sudden bass hits at maximum volume. A moderate listening level protects the cone, the surround, and the mounting hardware. Over time, that habit prevents many rattles from coming back.
Expert Insight: Rattles often show up when the bass hits a frequency that matches the panel’s natural resonance. Damping the panel and securing the mount usually works better than chasing the sound with heavy EQ cuts.
How to Fix Rattling Car Speakers by Knowing When to Replace
Not every rattle can be saved. Some damage is too deep. Some mounts are too worn. When the cost of repair starts climbing, replacement becomes the smarter choice. Knowing the difference saves time and frustration.
Signs replacement makes sense
If the cone is torn badly, the surround is shredded, or the voice coil is scraping, replacement is usually best. If the speaker still rattles after you secure the mount and check the wiring, the driver itself may be done. Also, if the speaker is very old and the materials have dried out, a new unit will sound better and last longer.
Choose the right replacement
Match the size, impedance, and power handling to your system. If you are upgrading from factory speakers, you may want a model that fits the same space without major modification. If you plan to add a sub later, think about how the front speakers will handle the load. For example, some builders tap into rear speakers for subs, and that setup needs careful planning. You can read more in our guide on how to tap into rear speakers for subs if you are considering that route.
Set up the new driver for success
Use fresh screws, clean gaskets, and secure wiring. Make sure the basket sits flat and the magnet clears the door metal. If your system uses tweeters, connect them properly so the highs stay crisp. For a clear connection walkthrough, check our article on how to connect tweeters to speakers. A careful install keeps the new speaker quiet and reliable.
How to Fix Rattling Car Speakers with a Simple Maintenance Routine
A little maintenance goes a long way. Most rattles start small and grow over time. A quick routine keeps your system stable and helps you catch problems early.
Do a monthly check
Listen for new buzzes. Look for loose screws and worn clips. Make sure wires are still tucked away safely. If you notice a change, act early. Small issues are easier to fix than big ones.
Keep the area clean
Dust and debris can work into the surround and make it stiff. Wipe the grill and the area around the speaker gently. If you want a safe cleaning routine, see our guide on how to clean car speakers for simple steps that protect the driver.
Protect the system from stress
Avoid slamming doors with the speaker magnet close to metal. Do not store heavy items against the door panel. If you carry gear, make sure it is secured. A calm environment helps the speaker last longer and sound better.
Frequently Asked Questions
Why do my car speakers rattle only at high volume?
High volume increases cone movement and panel vibration. A loose mount, weak surround, or resonance in the door can turn into a buzz when the output rises. Lower the volume, check the mounting, and add damping to calm the system.
Can a rattling speaker be fixed, or do I need to replace it?
Many rattles can be fixed if the cone is intact and the mount is the problem. Tightening hardware, adding foam, and securing wires often solve it. If the cone is torn or the voice coil is damaged, replacement is usually the better choice.
How do I know if the rattle is the speaker or the door panel?
Press gently on the speaker grill while playing music. If the noise changes, the speaker or its mount is likely involved. If the sound stays the same, check nearby trim, clips, and hollow screw holes. Tapping the panel lightly can also reveal a separate rattle.
Will adding foam or damping material affect sound quality?
A small amount of foam or damping can reduce unwanted vibration without killing the sound. The key is to use thin, targeted material in the right spots. Too much mass can dull the output, so start small and test as you go.
What tools do I need to fix a rattling car speaker?
You usually need a screwdriver, a trim removal tool, some foam tape or damping material, and maybe a few zip ties. A flashlight helps you see tears and loose wires. If you check polarity, a multimeter can be useful too.
How can I prevent car speakers from rattling in the future?
Secure the mount, keep wires tidy, and avoid constant max-volume listening. Check screws and clips from time to time. If you upgrade components, make sure the new parts fit well and match your amplifier or receiver setup.
Conclusion
A rattling speaker is annoying, but it is usually fixable. Start by finding the real source. Then secure the mount, inspect the cone and surround, and check the wiring. Small changes often make a big difference. If the driver is damaged beyond repair, a careful replacement can restore clean sound and stop the buzz for good.
Learning how to fix rattling car speakers gives you more than a quieter ride. It helps you understand your system and protect your investment. Take your time, test as you go, and use simple fixes first. With a steady approach, you can enjoy music that sounds tight, clear, and rattle-free.