What to Do After Installing New Gpu
Installing a new graphics card is only half the battle. After installing a new GPU, you need to update drivers, tweak settings, and run tests to unlock full performance. This guide walks you through every essential step to make sure your new GPU works perfectly from day one.
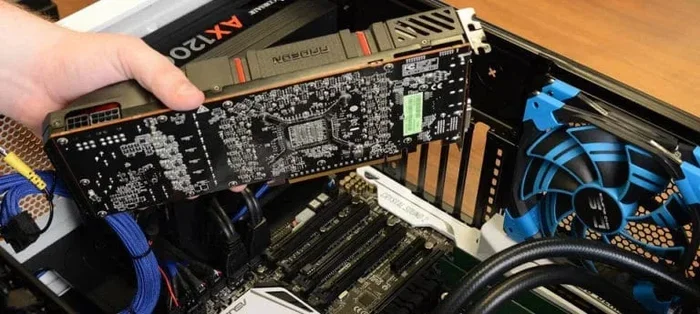
You just unboxed your brand-new graphics card. You screwed it in, plugged in the power cables, and turned the PC on. But wait. There is more to do. Many people stop after the physical install and wonder why their new GPU is not performing as well as it should. The truth is, what you do after installing a new GPU matters just as much as the install itself.
A fresh graphics card needs the right software, settings, and a little bit of love to reach its full potential. Whether you are a gamer chasing smooth frame rates or a creator working with heavy video files, this guide covers everything you need to do. We will walk you through each step in plain language, so you do not have to guess. Let us get your new GPU running at its best.
Before we dive in, keep in mind that your system works as a team. Your RAM and GPU share the workload. Making sure all your components work well together gives you the smoothest experience possible.
Key Takeaways
- Always update your graphics drivers first: The latest drivers fix bugs and boost performance right out of the gate.
- Check your power supply and connections: A loose cable or weak PSU can cause crashes and poor performance.
- Benchmark your GPU after setup: Testing helps you confirm everything is working and spot any issues early.
- Optimize in-game and system settings: Small tweaks can make a big difference in frame rates and smoothness.
- Monitor temperatures regularly: Keeping your GPU cool extends its lifespan and maintains peak performance.
- Don’t skip Windows and BIOS updates: These keep your entire system compatible with new hardware.
📑 Table of Contents
- Why Post-Install Steps Matter For Your New GPU
- Step-By-Step: What To Do Right After Installing New GPU
- Updating And Managing Graphics Drivers Properly
- Testing And Benchmarking Your New GPU
- Optimizing In-Game And System Settings
- Troubleshooting Common Issues After GPU Installation
- Long-Term Maintenance For Your New GPU
- Final Thoughts
Why Post-Install Steps Matter For Your New GPU
It is tempting to jump straight into your favorite game or application. But skipping post-install steps can lead to poor performance, crashes, and even hardware damage over time. Think of it like buying a brand-new car. You would not skip the break-in period and expect peak performance forever.
When you install a new GPU, the operating system does not automatically know how to use it at full capacity. Windows may load a generic driver. Your display settings might be off. Power management features could be limiting your card. Each of these issues is easy to fix, but they can cause big headaches if you ignore them.
Taking 20 to 30 minutes after your install to follow the right steps saves you hours of frustration later. It also helps your GPU last longer. A well-set-up graphics card runs cooler, uses power more efficiently, and delivers smoother visuals.
What Happens If You Skip These Steps?
Here are common problems people face when they do not complete post-install setup:
- Low frame rates: Your GPU is powerful, but outdated drivers hold it back.
- Screen flickering or artifacts: Wrong display settings or driver conflicts cause visual glitches.
- System crashes: Missing software updates can lead to blue screens or unexpected shutdowns.
- Overheating: Default settings may not optimize fan curves or power limits.
- Poor battery life on laptops: Without proper configuration, your GPU drains power unnecessarily.
None of these issues are hard to avoid. The fix is simply following the steps below in order.
Step-By-Step: What To Do Right After Installing New GPU
Now let us get into the actual steps. Follow them in order for the best results. Each one builds on the last to give you a fully optimized system.
Step 1: Power On And Check Physical Connections
Turn on your PC and listen carefully. Do you hear the fans spin up on your new GPU? Do you see a display on your monitor? These simple checks tell you a lot before you even open software.
Make sure your monitor cable is plugged into the GPU, not the motherboard. This is one of the most common mistakes. If your cable runs to the motherboard port, you will not get any GPU acceleration. Move it to the back of your new graphics card.
Also check the PCIe power cables. These should be firmly seated. A loose connection causes random shutdowns and restarts. Gently tug on each cable to confirm it is secure.
Step 2: Update Your Graphics Drivers
This is the single most important step. Your GPU needs the latest drivers to perform at its best. Both NVIDIA and AMD release regular updates that improve game compatibility, fix bugs, and boost performance.
For NVIDIA cards, visit the official NVIDIA website and download the latest Game Ready Driver. For AMD cards, head to the AMD Drivers and Support page. You can also use the NVIDIA GeForce Experience or AMD Adrenalin software to update automatically.
After downloading, run the installer and choose the “Clean Install” option. This removes old driver files and gives your new GPU a fresh start. Once the install finishes, restart your computer.
Step 3: Verify The GPU Is Recognized
After your PC restarts, open the Device Manager. On Windows, right-click the Start button and select Device Manager. Expand the “Display adapters” section. Your new GPU should appear in the list.
If you see a yellow warning triangle next to it, the driver did not install correctly. Try uninstalling the driver and installing it again. Also check that your system RAM is properly seated, since memory issues can sometimes interfere with GPU detection.
You can also use the NVIDIA Control Panel or AMD Radeon Software to confirm your card is active. These tools show your GPU model, memory size, and driver version right on the dashboard.
Step 4: Run A Benchmark Or Stress Test
Once your GPU is recognized and drivers are fresh, it is time to test it. Running a benchmark confirms that your new card is performing as expected. It also helps you spot any problems early.
Popular free tools include:
- 3DMark: Tests gaming performance with realistic scenarios.
- Unigine Heaven: A quick and easy benchmark for visual performance.
- FurMark: A stress test that pushes your GPU to its limits to check stability.
- MSI Afterburner: Monitors temperatures, clock speeds, and fan speeds in real time.
Run a benchmark and compare your scores to the expected results for your specific GPU model. If your scores are way below average, something is wrong. Recheck your drivers, power connections, and BIOS settings.
Step 5: Optimize Windows And Display Settings
Windows comes with settings that can limit your GPU performance. Taking a few minutes to adjust them makes a noticeable difference.
First, go to Settings > System > Display and set your resolution to your monitor’s native resolution. This ensures your GPU is rendering at the highest quality your screen can display.
Next, open the NVIDIA Control Panel or AMD Radeon Software and set your preferred refresh rate. If your monitor supports 144Hz or higher, make sure Windows is set to use that refresh rate. A higher refresh rate means smoother motion in games and videos.
Also, go to Settings > System > Power & Sleep and set your power plan to “High Performance.” This tells Windows to give your GPU the power it needs instead of throttling it to save energy.
Updating And Managing Graphics Drivers Properly
Drivers are the bridge between your GPU and your operating system. Without the right drivers, your graphics card cannot communicate properly with your games and applications. Keeping them updated is not a one-time task. It is an ongoing habit.
NVIDIA vs AMD Driver Updates
NVIDIA releases Game Ready Drivers about once a month. These are tuned for the latest games and include performance optimizations. NVIDIA also releases Studio Drivers, which are designed for content creators who use applications like Adobe Premiere or Blender.
AMD follows a similar schedule. Their Adrenalin software makes it easy to check for updates with one click. The software also lets you create a custom game profile, adjust fan speeds, and overclock your GPU from a single dashboard.
How Often Should You Update?
For most users, checking for driver updates once a month is enough. If you are a competitive gamer, check more often. New driver releases often include optimizations for newly launched games.
Always use the “Clean Install” option when updating. This clears out old files that can cause conflicts. If you are switching from NVIDIA to AMD or vice versa, a clean install is absolutely essential.
Testing And Benchmarking Your New GPU
Benchmarking is the best way to measure your new GPU’s performance. It gives you hard numbers to compare against other cards and track over time. Think of it as a fitness test for your graphics card.
What To Look For In Your Results
When you run a benchmark, pay attention to three key metrics:
- Average frame rate (FPS): This tells you how smooth your gameplay or rendering is. Above 60 FPS is smooth for most users. Above 120 FPS is excellent.
- Frame time consistency: Even if your average FPS is high, inconsistent frame times cause stuttering. Look for low variance in frame times.
- Temperature under load: Your GPU should stay below 85 degrees Celsius during heavy use. Anything higher means you need better cooling.
Compare your results to online benchmarks for your specific GPU model. Sites like UserBenchmark and TechPowerUp provide reference scores for thousands of graphics cards.
When To Re-Benchmark
Re-run your benchmarks after any major driver update or system change. This helps you track performance over time and catch any issues early. It is also fun to see how much your scores improve with each new driver release.
Optimizing In-Game And System Settings
Now that your GPU is installed, drivers are updated, and benchmarks look good, it is time to fine-tune your settings. Small adjustments in games and your operating system can deliver big gains.
In-Game Settings That Make The Biggest Difference
Not all graphics settings are created equal. Here are the ones that affect performance the most:
- Resolution: Lowering resolution has the biggest impact on frame rate. Try 1440p before dropping to 1080p.
- Anti-aliasing: This smooths out jagged edges but costs performance. FXAA or TAA are lighter options.
- Shadow quality: High shadow settings are very demanding. Medium shadows offer a good balance.
- Texture quality: This affects visual detail more than performance. Set it as high as your VRAM allows.
- V-Sync: Turn this off to reduce input lag. Use G-Sync or FreeSync instead for tear-free visuals.
System-Level Optimizations
Beyond in-game settings, a few system tweaks help your GPU run better:
- Close background apps: Browsers with many tabs, streaming software, and other apps eat up resources.
- Enable hardware acceleration: Many apps, including Chrome and Discord, let you offload work to the GPU.
- Disable unnecessary startup programs: Fewer background programs means more power for your GPU.
- Keep your PC cool: Good airflow in your case helps your GPU maintain high performance without throttling.
Remember that your overall system matters. A powerful GPU paired with slow RAM or an outdated processor creates a bottleneck. If you want to learn more about how memory affects performance, check out what RAM does for your laptop and how it works alongside your graphics card.
Troubleshooting Common Issues After GPU Installation
Even with careful setup, problems can happen. Here are the most common issues and how to fix them.
No Display Signal
If your monitor shows no signal after installing the GPU, try these steps in order:
- Check that your monitor cable is plugged into the GPU, not the motherboard.
- Reseat the GPU in the PCIe slot. Remove it and put it back in firmly.
- Check that the PCIe power cables are connected to the GPU.
- Try a different monitor cable or port on your GPU.
- Clear your CMOS to reset BIOS settings.
Artifacts Or Glitches On Screen
Visual artifacts like flashing colors or lines on screen can indicate a few things:
- Overheating: Check your GPU temperatures. Clean dust from fans and heatsinks.
- Loose power cables: Reseat the PCIe power connectors.
- Driver issues: Perform a clean driver reinstall using DDU (Display Driver Uninstaller).
- Faulty hardware: If none of the above works, the GPU may be defective. Contact the manufacturer for a replacement.
Performance Is Lower Than Expected
If your benchmarks show lower scores than expected, check these common causes:
- Your power plan is set to power-saving mode. Switch to High Performance.
- Your drivers are outdated. Update to the latest version.
- Your CPU is bottlenecking the GPU. Check CPU usage during benchmarks.
- Your system is running in integrated graphics mode. Make sure the GPU is active in Device Manager.
- Background applications are consuming resources. Close everything unnecessary before testing.
Most issues have simple fixes. Patience and methodical troubleshooting will solve the vast majority of problems.
Long-Term Maintenance For Your New GPU
Setting up your GPU is not a one-time event. Regular maintenance keeps it running smoothly for years. Here are a few habits worth building.
Clean your PC’s interior every 3 to 6 months. Dust builds up on fans and heatsinks, causing temperatures to rise. A can of compressed air and a soft brush make quick work of this.
Keep your drivers updated. Set a calendar reminder to check for updates once a month. New drivers often include performance improvements for the latest games.
Monitor your GPU temperatures during heavy use. Software like MSI Afterburner or HWMonitor makes this easy. If temperatures consistently climb above 85 degrees Celsius, consider improving your case airflow or reapplying thermal paste.
Also, consider your power supply. A GPU upgrade sometimes requires a stronger PSU. If your system is unstable after installing a new card, your power supply might not be delivering enough wattage. This is especially important if you are running a high-end card like an RTX 4080 or RX 7900 XTX.
Final Thoughts
Installing a new GPU is exciting. But the steps you take afterward determine how well it actually performs. From updating drivers to running benchmarks to tweaking in-game settings, each step plays an important role in getting the most out of your investment.
Take the time to follow this guide. Your future self will thank you when your games run smoothly and your GPU stays cool and stable. A little effort after installation goes a long way. Enjoy the power of your new graphics card and the experiences it unlocks.
Frequently Asked Questions
Do I need to update my GPU drivers immediately after installation?
Yes, absolutely. The latest drivers ensure your GPU works correctly and performs at its best. Outdated drivers can cause crashes, low frame rates, and compatibility issues with new games and applications.
How do I know if my GPU is being recognized by my system?
Open Device Manager and look under Display adapters. Your new GPU should appear in the list without any warning icons. You can also check the NVIDIA Control Panel or AMD Radeon Software for confirmation.
What temperature is too hot for a GPU after installing it?
Temperatures above 85 degrees Celsius under load are a concern. Most GPUs are designed to run between 65 and 80 degrees Celsius during heavy use. If yours runs hotter, check your cooling and case airflow.
Can I skip benchmarking my new GPU?
You can skip it, but we do not recommend it. Benchmarking confirms your GPU is working correctly and helps you spot issues early. It also gives you a baseline to compare future performance against.
How often should I clean my GPU and PC internals?
Every 3 to 6 months is a good schedule. Dust buildup causes overheating, which reduces performance and shortens component lifespan. Use compressed air and a soft brush for safe cleaning.
Is it normal for my GPU to use a lot of power after a fresh install?
Yes, especially during the first few days as drivers optimize power management. If usage remains very high during light tasks, check for background applications and update your drivers to the latest version.