Can I Upgrade My Laptop Ram
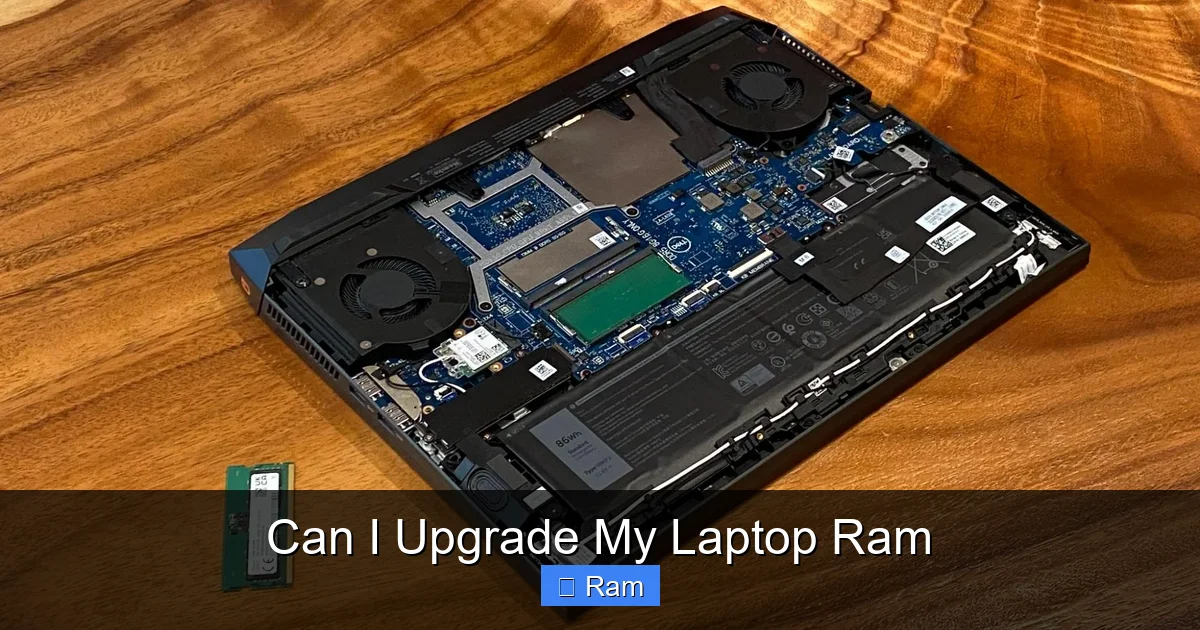
Yes, you can often upgrade your laptop RAM, but it’s not always simple. The feasibility depends entirely on your specific laptop model’s design. Many modern laptops have RAM soldered directly to the motherboard, making an upgrade impossible. For models with accessible slots, you must verify the number of slots, current occupancy, and maximum supported RAM. This guide provides a definitive checklist to determine if your laptop can be upgraded and exactly how to do it safely if possible.
That frustrating moment when your laptop slows to a crawl, the fan whirs like a jet engine, and you wait impatiently for a simple web browser to open. Your first thought might be, “Can I upgrade my laptop RAM?” It’s a fantastic idea. Adding more Random Access Memory (RAM) is one of the most effective and cost-efficient ways to breathe new life into a sluggish computer, especially for multitasking, web browsing with dozens of tabs, and running modern applications.
But here’s the critical catch: not all laptops allow RAM upgrades. The sleek, ultra-thin design of many modern laptops comes at the cost of repairability. Manufacturers often solder the RAM chips directly onto the motherboard, making any upgrade physically impossible. So, before you go shopping for new memory sticks, you must become a detective and investigate your specific machine. This comprehensive guide will walk you through every step, from diagnosis to installation, ensuring you know exactly what’s possible for your laptop.
Key Takeaways
- Check Before You Buy: Your laptop’s upgradeability is determined by its model, not its age. Use system tools or manufacturer specs to confirm.
- Soldered vs. Slot RAM: If your RAM is soldered (glued) to the motherboard, you cannot upgrade it. Only laptops with accessible SO-DIMM slots can be upgraded.
- Maximum Capacity Matters: Even with a free slot, your laptop’s chipset and BIOS impose a maximum RAM limit (e.g., 32GB, 64GB). Exceeding it won’t work.
- Compatibility is Key: RAM must match in type (DDR4, DDR5), speed (MHz), and voltage. Mixing mismatched sticks can cause instability.
- Tools & Safety First: You typically need only a small screwdriver and a static-free workspace. Always disconnect the battery if possible.
- Performance Gains Vary: Upgrading from 4GB to 8GB or 16GB is transformative for basic tasks. Gains from 16GB to 32GB are only noticeable for heavy professional workloads.
- Warranty & Risk: Opening your laptop may void its warranty. If unsure, consult the manufacturer or a professional.
📑 Table of Contents
- 1. The RAM Upgrade Question: Yes or No? The Two Main Laptop Designs
- 2. How to Check Your Laptop’s Current RAM Setup (The Detective Work)
- 3. Understanding RAM Specifications: Type, Speed, and Size
- 4. Tools, Preparation, and the “What If” Scenarios
- 5. Step-by-Step: The Physical RAM Upgrade Process
- 6. Post-Upgrade: Troubleshooting and Maximizing Your Investment
- 7. The Final Verdict: Should You Upgrade?
1. The RAM Upgrade Question: Yes or No? The Two Main Laptop Designs
The answer to “can I upgrade my laptop RAM?” hinges on one fundamental engineering decision made by your laptop’s manufacturer. There are only two ways RAM is implemented in modern laptops:
1.1. The “Accessible Slot” Design (The Good News)
This is the traditional, user-friendly design. The laptop has one or two small compartments, often secured by a screw on the bottom panel. Inside these compartments are standard SO-DIMM (Small Outline Dual In-line Memory Module) slots. The RAM sticks are inserted at an angle and clipped into place. This design is common in:
- Business and workstation laptops (e.g., Dell Latitude, Lenovo ThinkPad, HP EliteBook series)
- Gaming laptops (e.g., many ASUS ROG, MSI, and older Alienware models)
- Some mainstream consumer laptops from a few years ago
- Most 15-inch and larger laptops (though this is changing)
If your laptop has this design, you have a very high chance of being able to upgrade. You simply need to open the panel, check the slots, and install compatible new modules.
1.2. The “Soldered” Design (The Bad News)
In pursuit of thinner profiles and better battery life, manufacturers now frequently solder the RAM chips directly onto the motherboard using a process called Ball Grid Array (BGA). This means the memory is permanently attached. There are no slots, no clips, and no user-replaceable modules. This design is ubiquitous in:
- Ultrabooks and thin-and-light laptops (e.g., Dell XPS 13, MacBook Air/Pro, Microsoft Surface Laptop, many ASUS Zenbook models)
- Most modern 13-inch and 14-inch laptops
- Nearly all Chromebooks
If your laptop uses soldered RAM, the answer to “can I upgrade my laptop RAM?” is a definitive no. The memory capacity is fixed at the time of manufacture. The only theoretical (and extremely impractical/risky) exception is a professional micro-soldering service, which costs more than the laptop is worth.
2. How to Check Your Laptop’s Current RAM Setup (The Detective Work)
Before you unscrew anything, you need to gather intelligence. You must determine three things: 1) How much RAM you currently have, 2) How many slots are available and occupied, and 3) Whether the RAM is soldered or slot-based. Here are your primary tools:
2.1. The Easiest Method: Built-in System Tools
On Windows: Press Ctrl + Shift + Esc to open Task Manager. Go to the “Performance” tab and click on “Memory.” Here you’ll see the total installed RAM (e.g., “16.0 GB”) and, crucially, the “Speed” (e.g., “3200 MHz”) and “Form factor” (which should say “SODIMM” if it’s in a slot). The “Slots used” field is the golden ticket—it will tell you if you have one slot occupied out of two, or if it says “N/A” or “1 of 1,” it strongly suggests soldered RAM.
On macOS: Click the Apple menu > About This Mac > Memory. It will list the memory and often say “Upgradable” or “Not Upgradable” directly. For MacBooks, this is usually very clear.
Using CPU-Z (The Gold Standard): Download and run the free, trusted utility CPU-Z. Go to the “Memory” and “SPD” tabs. The “SPD” tab will list each slot. If you see “Slot #1” with your RAM’s details and “Slot #2” says “None,” you have one free slot. If only “Slot #1” exists or both slots show data but “Size” is blank for one, it might be soldered.
2.2. The Physical Inspection Method (If You’re Comfortable)
If system tools are ambiguous, the only surefire way is to look. Always power down your laptop completely, unplug it, and remove the battery if it’s removable. Place the laptop on a static-free surface. Locate the RAM access panel on the bottom—it’s usually a small rectangular panel held by one or two screws. Gently pry it open with a plastic spudger. Look inside.
- If you see one or two green/black circuit boards with chips on them, clipped into small slots with side latches, you have slot-based RAM. Count them.
- If you see only the motherboard with no visible modules, or if you see a small, flat chip with many tiny solder balls directly attached to the board (no slot), you have soldered RAM.
3. Understanding RAM Specifications: Type, Speed, and Size
Assuming you have a slot-based system, you now need to buy the right RAM. Compatibility is non-negotiable. Here’s what you need to match:

Visual guide about Can I Upgrade My Laptop Ram
Image source: i.ytimg.com
3.1. Generation (DDR4, DDR5, etc.)
This is the most critical compatibility factor. DDR4 and DDR5 are physically incompatible—their notches are in different places. You cannot force one into the wrong slot. Your laptop’s manual or the existing RAM stick itself will have “DDR4” or “DDR5” printed on it. You must buy the same generation. Mixing generations is impossible.
3.2. Speed (MHz)
RAM speed is measured in megahertz (e.g., 2666MHz, 3200MHz, 4800MHz). Your new RAM should ideally match the speed of your existing stick(s) if you are adding to them. If replacing all modules, you can buy a faster kit, but your laptop’s chipset will often downclock it to the highest speed it supports. Check your laptop’s specifications for the maximum supported RAM speed.
3.3. Size (Capacity per Stick)
Common sizes are 4GB, 8GB, 16GB, and 32GB per SO-DIMM module. You can mix sizes (e.g., adding a 16GB stick to an existing 8GB stick), but for optimal dual-channel performance (a speed boost), it’s best to use identical pairs. If you have one slot occupied with an 8GB stick and one free slot, you can install a 16GB stick. The system will run in asymmetric dual-channel mode, which is still beneficial.
3.4. Voltage
Most modern laptop RAM is 1.2V (DDR4) or 1.1V (DDR5). This is almost always standard, but it’s good to note. High-performance “XMP” profiles with higher voltages are rare and usually irrelevant in laptops.
4. Tools, Preparation, and the “What If” Scenarios
Armed with knowledge, you need to prepare properly. A rushed upgrade can damage components.
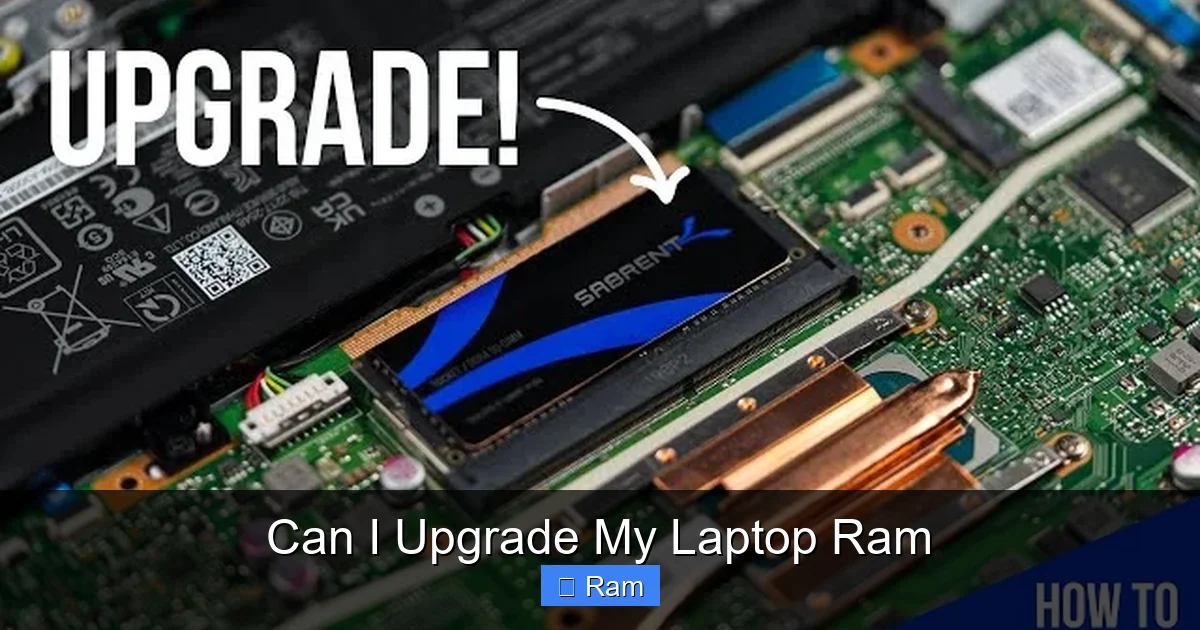
Visual guide about Can I Upgrade My Laptop Ram
Image source: i.ytimg.com
4.1. The Essential Toolkit
- A small Phillips-head screwdriver (#0 or #00). The size that fits your laptop’s specific screws perfectly.
- A plastic spudger or pry tool. For opening clips and panels without scratching.
- An anti-static wrist strap (optional but recommended). Or, simply touch a grounded metal object (like a plugged-in but switched-off desktop PC case) before touching components to discharge static.
- A clean, well-lit, static-free workspace. A wooden table is ideal. Avoid carpets.
4.2. What If I Have Only One Slot and It’s Occupied?
This is a common scenario. You must replace the existing stick with a larger-capacity one. For example, swap an 8GB stick for a 16GB or 32GB stick. You cannot add to it. Ensure the new stick’s specifications match what your laptop supports.
4.3. What If My Laptop Has Two Slots, Both Occupied?
You must replace both existing sticks with a new, matched kit (e.g., replace two 8GB sticks with two 16GB sticks for a total of 32GB). Mixing old and new sticks of different brands, speeds, or sizes can cause boot failures or instability. For the best results, replace them as a pair.
4.4. Manufacturer Support and Documentation
Always check your laptop’s official manual or support page first. Search for “[Your Laptop Model] specifications” or “[Your Laptop Model] maintenance guide.” The manufacturer’s spec sheet will list the “Maximum Memory” and often the number of slots. The hardware maintenance manual (HMM) will have exploded diagrams showing exactly how to access and replace the RAM. This is your most reliable source.
5. Step-by-Step: The Physical RAM Upgrade Process
You’ve confirmed you have slots, you’ve bought the correct RAM, and you have your tools. Time for surgery.
- Power Down Completely: Shut down Windows/macOS fully. Do not just sleep or hibernate.
- Unplug Everything: Remove the charger, any USB drives, dongles, or peripherals.
- Remove the Battery (if possible): If your laptop has a removable bottom battery, take it out. For internal batteries, you must open the case and disconnect the battery cable from the motherboard. This is the most important safety step to prevent short circuits. If you are not comfortable disconnecting an internal battery, do not proceed. Seek professional help.
- Open the RAM Access Panel: Locate the small panel (often marked with a RAM symbol). Remove the screws. Gently pry the panel up. Some panels are part of the entire bottom cover; in that case, you must remove all bottom screws and carefully pry around the edges to release the clips.
- Discharge Static: Touch the metal chassis inside the laptop (not the circuitry) before touching the RAM.
- Remove Old RAM (if replacing): Gently pull the two side latches outward. The stick will pop up at an angle. Pull it out straight, holding it by the edges.
- Install New RAM: Align the notch on the new SO-DIMM stick with the notch in the slot. Insert the stick into the slot at a ~45-degree angle, ensuring it’s seated fully. Press it down firmly and evenly until the side latches click into place automatically. You should hear/feel two distinct clicks.
- Reassemble: Reconnect the battery (if you disconnected it). Replace the access panel and screws. Do not overtighten.
- Power On and Verify: Plug in the charger and power on. Immediately enter the BIOS/UEFI (usually by pressing F2, Del, or F12 during boot) to confirm the new total RAM is recognized. Then boot into your OS and check Task Manager or System Information again to verify the full capacity is available.
6. Post-Upgrade: Troubleshooting and Maximizing Your Investment
If your laptop powers on but shows less RAM than you installed, or it beeps and fails to boot, don’t panic.
6.1. Common Troubleshooting Steps
- Reseat the RAM: Power off, unplug, open the case, remove the stick(s), and reinstall them firmly, ensuring the latches are fully engaged.
- Test One Stick at a Time: If you installed two new sticks, try booting with only one installed in each slot. This isolates a faulty stick or a bad slot.
- Check Compatibility: Double-check that you didn’t accidentally buy DDR4 for a DDR5-only system, or exceed the maximum supported capacity.
- Clear CMOS: Sometimes, a BIOS reset is needed. Power off, unplug, remove the main battery and CMOS battery (a coin cell on the motherboard) for 5 minutes, then reinstall. Consult your manual first.
6.2. Does More RAM Always Mean a Faster Laptop?
This is a crucial understanding. RAM is for working space, not raw speed. The performance boost is most dramatic when upgrading from a critically low amount (like 4GB) to a comfortable baseline (8GB or 16GB). This eliminates constant swapping of data to the slow hard drive/SSD (called “paging” or “thrashing”). Once you have enough RAM for your typical workload (e.g., 16GB for a power user with 50 browser tabs, Photoshop, and Spotify), adding more (e.g., going to 32GB) will not make your web browser or games run faster. The benefit only appears in specific, memory-hungry professional applications: large-scale video editing (4K/8K), 3D rendering, scientific simulations, and running multiple virtual machines. For the average user, 16GB is the sweet spot for 2024 and beyond.
7. The Final Verdict: Should You Upgrade?
After following this guide, you should have a clear answer. If you have a slot-based design and the upgrade is within your skill comfort zone, yes, upgrading your laptop RAM is an excellent, high-value project. It can extend your laptop’s useful life by 2-3 years for a cost of $30-$100. The feeling of a snappy, responsive system after a RAM upgrade is genuinely rewarding.
However, if you discovered your RAM is soldered, or if the laptop is very old and has other limitations (like a slow hard drive instead of an SSD), your money might be better spent toward a new, more modern machine. Remember, RAM is just one part of the performance equation. A fast SSD and a modern CPU are equally, if not more, important for overall system responsiveness.
The ultimate goal is a laptop that serves you well. By becoming your own tech support and doing this simple diagnostic, you make an informed decision. You either save money on a new laptop or you gain the satisfaction and performance of a successful DIY upgrade.
Frequently Asked Questions
Will upgrading my laptop RAM void the warranty?
Often, yes. Opening the chassis typically voids the manufacturer’s warranty. Check your warranty terms. Some business-class laptops (like certain ThinkPads) have user-upgradeable parts that don’t void the warranty. When in doubt, contact the manufacturer before opening the case.
Can I mix different RAM brands or sizes?
Technically, you can mix brands and sizes, but it’s not recommended for best stability and performance. The system will run in a slower “flex” or “asymmetric” dual-channel mode. For a trouble-free experience, especially when adding to existing RAM, use identical modules (same brand, model, capacity, speed, and timings). If replacing all RAM, buy a matched kit from a single manufacturer.
My laptop runs a 32-bit version of Windows. Will more RAM help?
No. A 32-bit operating system can only address a maximum of about 3.2-3.5GB of RAM, regardless of how much you physically install. You must upgrade to a 64-bit version of Windows or Linux to use more than 4GB of RAM. Check your OS version in System Information.
Do I need to reapply thermal paste when opening my laptop for a RAM upgrade?
No. Thermal paste is used between the CPU/GPU and their heat sinks. Accessing the RAM slots does not disturb these components. You only need to disconnect the battery and handle the RAM modules. Do not touch the thermal paste if you see it elsewhere.
Should I update my BIOS before upgrading RAM?
It’s a good practice. A BIOS/UEFI update can improve memory compatibility and stability, especially with newer, higher-capacity RAM modules. Check the manufacturer’s website for your specific model. Update the BIOS while your old RAM is still installed, then power off and perform the hardware upgrade.
What if my laptop has no accessible panel and I can’t see the RAM?
If you cannot find a RAM access panel and system tools indicate soldered memory (e.g., “1 of 1” slots used), the RAM is almost certainly soldered. In this case, you cannot upgrade it. Your only options to improve performance are to upgrade to a faster SSD (if you have a hard drive) or, ultimately, purchase a new laptop with more RAM.