How to Replace Ram in Hp Laptop
Upgrading your HP laptop’s RAM is one of the most cost-effective ways to breathe new life into a sluggish machine. This comprehensive guide walks you through every step of how to replace RAM in HP laptop models, from checking compatibility to installing the new memory module. Whether you’re a complete beginner or a casual DIYer, you’ll find everything you need to complete this upgrade with confidence.
Key Takeaways
- Check compatibility first: Not all HP laptops support RAM upgrades. Verify your specific model’s maximum supported memory and RAM type before purchasing new modules.
- Know your current setup: Use tools like Task Manager or CPU-Z to check your existing RAM configuration, speed, and available slots before buying replacement memory.
- Safety is critical: Always power down your laptop, unplug the battery, and ground yourself with an anti-static wrist strap to prevent electrostatic discharge damage.
- HP laptop RAM location varies: Some models have easy-access bottom panels, while others require removing the entire back cover or even the keyboard to reach the memory slots.
- Proper alignment matters: RAM modules have a notch that must align with the slot. Never force a module in — if it doesn’t seat easily, check the orientation.
- Test after installation: Always boot into BIOS or Windows to confirm the new RAM is detected and running at the correct speed after installation.
- Dual-channel boosts performance: Installing RAM in matched pairs (same size and speed) enables dual-channel mode, which can significantly improve memory bandwidth.
📑 Table of Contents
- Why You Should Replace RAM in Your HP Laptop
- Step 1: Check If Your HP Laptop Supports RAM Upgrades
- Step 2: Determine Your Current RAM Configuration
- Step 3: Purchase the Right RAM for Your HP Laptop
- Step 4: Prepare Your Workspace and Tools
- Step 5: Replace the RAM in Your HP Laptop
- Step 6: Reassemble and Test Your HP Laptop
- HP Laptop-Specific Tips and Considerations
- Troubleshooting Common Issues After RAM Replacement
- Conclusion
Why You Should Replace RAM in Your HP Laptop
Is your HP laptop running slower than it used to? Do you notice long loading times when opening multiple browser tabs or switching between applications? If so, learning how to replace RAM in HP laptop models could be the game-changer you need. RAM, or Random Access Memory, is your laptop’s short-term memory. It temporarily stores data that your processor needs to access quickly. When you don’t have enough RAM, your laptop has to rely on slower storage drives, which creates frustrating lag.
Upgrading RAM is one of the most affordable and impactful hardware upgrades you can perform. Unlike buying a brand-new laptop, which can cost hundreds or even thousands of dollars, a RAM upgrade typically costs between $20 and $80 depending on the capacity and speed. For most HP laptop models, the entire process takes less than 30 minutes. You don’t need to be a tech expert — just follow the steps in this guide carefully, and you’ll have your HP laptop running like new.
Before we dive into the step-by-step process, it’s important to understand that not all HP laptops have upgradeable RAM. Some newer ultrabooks and certain HP models have soldered memory that cannot be replaced. That’s why the first step is always to verify that your specific HP laptop model supports RAM upgrades. Let’s walk through everything you need to know.
Step 1: Check If Your HP Laptop Supports RAM Upgrades
Find Your Exact HP Laptop Model
The very first thing you need to do is identify your exact HP laptop model. You can usually find this information on a sticker on the bottom of your laptop. It might look something like “HP Pavilion 15-eg0023dx” or “HP EliteBook 840 G7.” If the sticker has worn off, you can also find your model number by pressing Windows + R, typing msinfo32, and looking at the “System Model” field.

Visual guide about How to Replace Ram in Hp Laptop
Image source: buffalo7.co.uk
Check the Maximum Supported RAM
Once you have your model number, visit HP’s official support website or search for your model’s specifications. Look for the “Memory” or “RAM” section. You’ll want to note three critical pieces of information:
- Maximum supported memory: This tells you the total amount of RAM your laptop can handle (for example, 16GB or 32GB).
- Number of RAM slots: Most HP laptops have two SODIMM slots, but some have only one.
- RAM type and speed: Common types include DDR4-2666, DDR4-3200, or DDR5-4800. Using the wrong type of RAM will not work.
You can also use tools like Crucial System Scanner or CPU-Z to automatically detect your current RAM configuration and compatible upgrade options. These tools are free and incredibly helpful for beginners who aren’t sure what their laptop supports.
Soldered vs. Upgradeable RAM
Here’s something that catches many people off guard. Some HP laptops, especially the Spectre and Envy ultrabook lines, have RAM that is soldered directly to the motherboard. This means it cannot be upgraded at all. If your laptop falls into this category, unfortunately, no amount of DIY effort will allow you to replace the RAM. Always check this before purchasing new memory modules. If you’re unsure, a quick Google search for “[your model] RAM upgradeable” will usually give you a definitive answer.
Step 2: Determine Your Current RAM Configuration
Check RAM in Windows Task Manager
Before buying new RAM, you need to know what you currently have. The easiest way to do this on an HP laptop is through Task Manager. Right-click on your taskbar and select “Task Manager,” then click on the “Performance” tab and select “Memory.” Here you’ll see your current RAM usage, total installed RAM, speed, form factor, and how many slots are being used.
Visual guide about How to Replace Ram in Hp Laptop
Image source: funnelgraphic.com
Use CPU-Z for Detailed Information
For more detailed information, download and install CPU-Z. This free utility provides comprehensive details about your RAM, including the manufacturer, part number, timings, and whether you’re running in single-channel or dual-channel mode. This information is invaluable when shopping for replacement RAM because it helps you match your existing module or plan a complete replacement strategy.
Decide on Your Upgrade Strategy
Based on what you find, you have a few options. If you have one RAM slot free, you can simply add another module. If both slots are occupied, you’ll need to replace the existing modules with higher-capacity ones. For the best performance, we recommend using matched pairs — two RAM sticks of the same size, speed, and brand. This enables dual-channel memory mode, which can improve performance by up to 20% compared to a single stick of the same total capacity.
For example, if your HP laptop currently has one 8GB DDR4-3200 module and one empty slot, buying another identical 8GB DDR4-3200 module would give you 16GB in dual-channel mode — a significant performance boost.
Step 3: Purchase the Right RAM for Your HP Laptop
Types of RAM Compatible with HP Laptops
HP laptops use SODIMM (Small Outline Dual Inline Memory Module) RAM, which is the smaller form factor designed for laptops. The most common types you’ll encounter are:
Visual guide about How to Replace Ram in Hp Laptop
Image source: xqvnmkjynbkcujcrtubi.supabase.co
- DDR3L: Found in older HP laptops (pre-2015). Operates at 1.35V. Not compatible with DDR4 slots.
- DDR4: The most common type in HP laptops from 2015 to 2022. Speeds range from 2133MHz to 3200MHz.
- DDR5: Found in the newest HP laptops (2022 and later). Offers significantly higher speeds starting at 4800MHz.
Important: DDR3, DDR4, and DDR5 are not interchangeable. They have different notch positions on the connector, so a DDR4 module physically cannot fit into a DDR5 slot and vice versa. Make sure you buy the correct type for your specific HP laptop model.
Recommended RAM Brands for HP Laptops
While many RAM brands work well with HP laptops, some of the most reliable and commonly recommended include Crucial, Kingston, Corsair, G.Skill, and Samsung. Crucial is particularly popular because their website has a compatibility checker that lets you enter your exact HP laptop model and shows you guaranteed-compatible RAM options.
How Much RAM Do You Need?
The amount of RAM you should install depends on how you use your HP laptop:
- 8GB: Sufficient for basic web browsing, email, and office work.
- 16GB: Ideal for multitasking, moderate photo editing, and light gaming. This is the sweet spot for most users.
- 32GB: Recommended for video editing, 3D rendering, heavy multitasking, and running virtual machines.
- 64GB: Only necessary for professional workloads like large-scale video production or scientific computing.
For the average HP laptop user, upgrading to 16GB provides the best balance of cost and performance improvement.
Step 4: Prepare Your Workspace and Tools
Tools You’ll Need
Gather these tools before you start the replacement process:

Visual guide about How to Replace Ram in Hp Laptop
Image source: goldfarbinc.com
- Phillips-head screwdriver (size #0 or #1): Most HP laptops use small Phillips screws on the bottom panel.
- Anti-static wrist strap: This prevents electrostatic discharge (ESD) that can damage sensitive components. They cost just a few dollars and are well worth it.
- Plastic prying tool or guitar pick: For safely prying open the bottom cover without scratching or damaging the laptop chassis.
- Small container or magnetic tray: To keep track of screws. Laptop screws are tiny and incredibly easy to lose.
- Clean, flat, well-lit workspace: A desk or table with good lighting makes the process much easier.
Safety Precautions
Before you begin working on your HP laptop, follow these essential safety steps:
- Shut down your laptop completely. Don’t just put it to sleep or hibernate — perform a full shutdown.
- Unplug the AC adapter and disconnect all peripherals including USB drives, external monitors, and mice.
- Remove the battery if possible. Many modern HP laptops have internal batteries, so if yours doesn’t have a removable battery, you’ll need to disconnect it internally after opening the case.
- Ground yourself by wearing an anti-static wrist strap attached to a metal part of the laptop or by touching a grounded metal object before handling components.
- Work on a non-conductive surface. Avoid carpeted floors and work on a wooden or glass surface if possible.
Taking these precautions seriously protects both you and your laptop from accidental damage. ESD can destroy RAM modules and other components without any visible signs, so don’t skip the anti-static measures.
Step 5: Replace the RAM in Your HP Laptop
Accessing the RAM Slots
This is where the process varies depending on your specific HP laptop model. Here are the most common access methods:
Visual guide about How to Replace Ram in Hp Laptop
Image source: yourautovision.com
HP Pavilion and HP 15-series laptops: These typically have a single bottom panel secured by several Phillips screws. Remove all the screws (note that some may be different lengths, so keep them organized), then use a plastic prying tool to gently separate the panel from the chassis. Start at a corner and work your way around the edges.
HP EliteBook and HP ProBook business laptops: These often have dedicated RAM access panels held in place by one or two screws. Simply remove the screws and lift the panel to reveal the memory slots.
HP Spectre and HP Envy laptops: These can be trickier. Some models require removing the entire bottom cover, which involves removing all screws (including those hidden under rubber feet) and carefully prying the cover off. Be extra gentle with these premium models as the chassis can be more delicate.
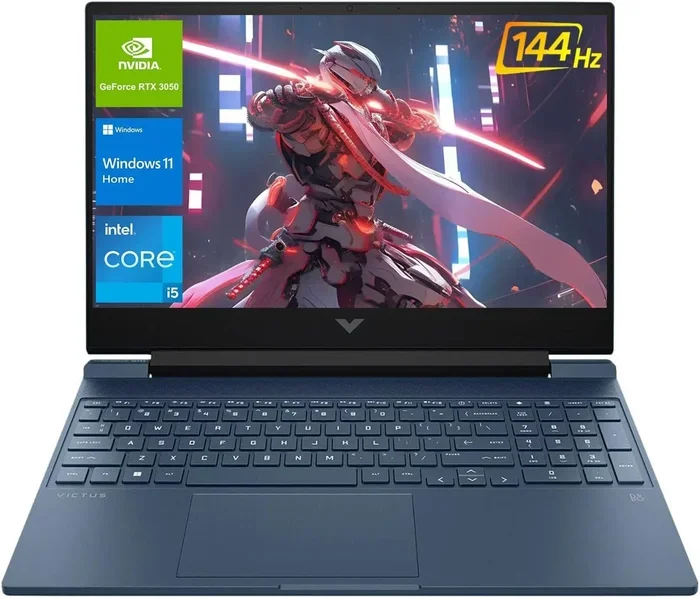
HP gaming laptops (Omen and Victus series): These usually have easy-access bottom panels similar to the Pavilion line. The larger chassis makes the internal components more accessible.
Removing the Old RAM Module
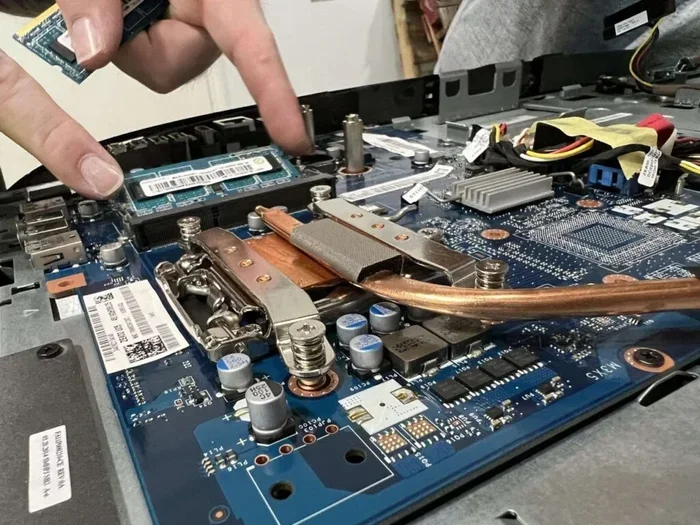
Once you’ve located the RAM slots, you’ll see the existing memory modules held in place by small metal clips on each side. Here’s how to remove them:
- Gently push the retention clips outward on both sides of the RAM module. These are small spring-loaded clips that hold the module in place. Push them away from the module simultaneously.
- The RAM module will pop up at an angle (about 30 degrees) once the clips release. This is by design.
- Carefully pull the module out at the same angle. Don’t pull straight up or bend it. Gently wiggle it if it feels stuck, but never use excessive force.
- Handle the module by its edges only. Avoid touching the gold contacts or the chips on the module.
If you’re replacing both modules, repeat this process for the second slot.
Installing the New RAM Module
Now for the exciting part — installing your new RAM. Follow these steps carefully:
- Align the notch on the new RAM module with the key in the SODIMM slot. The notch is a small gap in the gold contacts on the bottom of the module. It’s designed to prevent you from inserting the RAM in the wrong orientation. If the notch doesn’t line up, rotate the module 180 degrees.
- Insert the module at a 30-degree angle. Slide the gold contacts into the slot while keeping the module tilted upward. It should slide in smoothly with gentle pressure.
- Press the module down flat. Once the contacts are fully seated in the slot, gently press the top of the module down until the retention clips on both sides click into place. You should hear and feel a satisfying click.
- Verify the installation. The module should sit flat and level in the slot. The gold contacts should not be visible. If the module is tilted or the clips aren’t fully engaged, remove it and try again.
Pro tip: If the RAM doesn’t seat easily, do not force it. Remove it, double-check the orientation, and try again. Forcing a RAM module can damage both the module and the slot, which could mean a costly motherboard replacement.
Common Mistakes to Avoid
When learning how to replace RAM in HP laptop models, watch out for these common pitfalls:
- Forgetting to ground yourself: Even a small static shock can fry a RAM module. Always use an anti-static wrist strap.
- Mixing incompatible RAM: Using different speeds, sizes, or brands can cause instability. While it sometimes works, it’s not recommended.
- Not fully seating the module: If the retention clips don’t click, the RAM isn’t properly installed. This can cause boot failures.
- Losing screws: HP laptops often use screws of different lengths. Mixing them up can damage threaded holes. Keep them organized.
- Forgetting to reconnect the battery: If you disconnected the internal battery, make sure to reconnect it before closing the laptop.
Step 6: Reassemble and Test Your HP Laptop
Putting Everything Back Together
With the new RAM installed, it’s time to reassemble your HP laptop:

Visual guide about How to Replace Ram in Hp Laptop
Image source: bestdevops.com
- Reconnect the internal battery if you disconnected it earlier.
- Replace the bottom cover by aligning it with the chassis and pressing it into place around the edges until all the clips engage.
- Reinsert all screws in their correct locations. Remember to use the right length screw for each hole.
- Replace any rubber feet that you removed to access hidden screws.
First Boot and BIOS Check
Plug in your AC adapter and power on your HP laptop. During the boot process, press F10 repeatedly to enter the BIOS setup. Once in the BIOS, navigate to the “System Information” or “Memory” section. You should see the new RAM capacity and speed listed. If the BIOS shows the correct amount of memory, that’s a great sign that the installation was successful.
If the BIOS doesn’t show the expected amount of RAM, don’t panic. Power down, open the laptop again, and reseat the RAM modules. Sometimes they need to be removed and reinserted to make proper contact.
Verify in Windows
After confirming the BIOS recognizes the new RAM, boot into Windows. Open Task Manager (Ctrl + Shift + Esc), go to the Performance tab, and click on Memory. You should see the updated capacity, speed, and slot usage. You can also run Windows Memory Diagnostic by typing it into the Start menu search bar. This built-in tool will test your new RAM for errors and give you peace of mind that everything is working correctly.
Run a Stress Test
For extra confidence, consider running a memory stress test using a free tool like MemTest86. This utility boots from a USB drive and performs comprehensive testing of your RAM. Let it run for at least one full pass (which can take an hour or more). If it reports zero errors, your new RAM is functioning perfectly.
HP Laptop-Specific Tips and Considerations
HP Warranty Considerations
Many people worry about voiding their warranty by opening their HP laptop. In the United States, the Magnuson-Moss Warranty Act generally prevents manufacturers from voiding warranties simply because a user opened the device. However, if you damage something during the upgrade process, that damage may not be covered. Check your specific warranty terms before proceeding. If your laptop is still under warranty and you’re uncomfortable doing the upgrade yourself, consider having it done at an HP-authorized service center.
HP Laptop Models with Easy RAM Access
Some HP laptop models are particularly user-friendly when it comes to RAM upgrades. The HP Pavilion Gaming 15, HP Omen 15/16, and HP 15t series all have straightforward bottom panel access. The HP EliteBook 840/850 series is also known for its excellent serviceability with dedicated RAM access panels.
HP Laptop Models That Are More Challenging
On the other hand, models like the HP Spectre x360 and some HP Envy ultrabooks can be significantly more difficult to open. These premium models often use Torx screws, hidden screws under rubber feet, and tightly fitted chassis panels. If you own one of these models, consider watching a model-specific disassembly video on YouTube before attempting the upgrade.
Troubleshooting Common Issues After RAM Replacement
Laptop Won’t Boot After RAM Upgrade
If your HP laptop doesn’t power on or shows a black screen after installing new RAM, try these steps:
- Remove the new RAM and try booting with the old RAM to confirm the laptop still works.
- Try the new RAM in a different slot if available.
- Test each new module individually to identify if one is defective.
- Reset the CMOS by removing the battery and holding the power button for 30 seconds.
- Ensure the RAM type matches exactly what your laptop supports.
Blue Screen Errors After Upgrade
Blue Screen of Death (BSOD) errors after a RAM upgrade usually indicate a compatibility or seating issue. Boot into Safe Mode, remove the new RAM, and test each module individually. If one module consistently causes errors, it may be defective and should be returned or exchanged.
RAM Running at Lower Speed Than Expected
Sometimes your new RAM will run at a lower speed than its rated speed. This can happen if your HP laptop’s motherboard doesn’t support the higher speed, or if you’ve mixed RAM modules of different speeds. In the BIOS, look for memory settings and ensure XMP (Extreme Memory Profile) or equivalent is enabled if available. Note that many HP consumer laptops have limited BIOS options and may not support XMP profiles.
Conclusion
Learning how to replace RAM in HP laptop models is a valuable skill that can save you money and extend the life of your computer by years. With the right preparation, tools, and a bit of patience, this is a straightforward upgrade that most people can complete in under 30 minutes. The performance improvement is often immediately noticeable — faster boot times, smoother multitasking, and the ability to run more demanding applications.
Remember to always verify compatibility before purchasing RAM, take proper anti-static precautions, and never force components into place. If you run into any issues during the process, don’t hesitate to consult your HP laptop’s service manual or seek help from online communities. With your newly upgraded RAM, your HP laptop should feel faster and more responsive than ever before.
Frequently Asked Questions
How do I know if my HP laptop’s RAM is upgradeable?
Check your specific HP laptop model’s specifications on HP’s official support website. Look for information about SODIMM slots and maximum supported memory. You can also use tools like Crucial System Scanner to automatically detect whether your laptop supports RAM upgrades and what type of memory is compatible.
What type of RAM does my HP laptop use?
Most modern HP laptops use DDR4 SODIMM RAM, while newer models may use DDR5. Older HP laptops might use DDR3L. You can determine the exact type by checking your laptop’s specifications, using CPU-Z software, or consulting the Crucial System Scanner tool for a definitive answer.
Can I mix different brands of RAM in my HP laptop?
While it’s technically possible to mix RAM brands, it’s not recommended. Using matched pairs of the same brand, speed, and capacity ensures the best stability and enables dual-channel mode. Mixing different RAM modules can sometimes cause compatibility issues, system instability, or prevent dual-channel operation.
How much does it cost to replace RAM in an HP laptop?
The cost varies depending on the capacity and type of RAM you choose. A single 8GB DDR4 SODIMM module typically costs between $15 and $30, while a 16GB kit (two 8GB modules) ranges from $30 to $60. DDR5 memory is generally more expensive. This makes RAM upgrades one of the most cost-effective laptop improvements available.
Will replacing RAM void my HP laptop warranty?
In most cases, simply opening your laptop to replace RAM does not void your warranty under US consumer protection laws. However, any damage caused during the upgrade process may not be covered. It’s best to check your specific warranty terms with HP before proceeding, especially if your laptop is still under the manufacturer’s warranty period.
What happens if I install the wrong type of RAM?
If you install incompatible RAM, your HP laptop simply won’t boot or won’t recognize the memory. The good news is that this typically doesn’t cause permanent damage. Different DDR generations (DDR3, DDR4, DDR5) have different physical notch positions, making it nearly impossible to insert the wrong type. Just power down, remove the incompatible module, and install the correct type.