How to Install Windows 11 Without a Microsoft Account
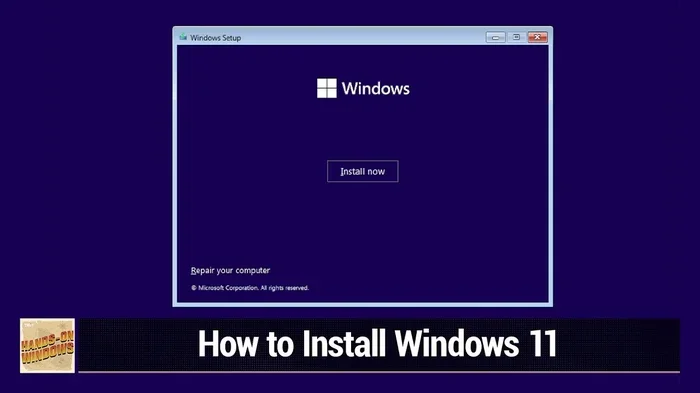
Installing Windows 11 without a Microsoft account is simple and gives you more privacy control. You can skip the online sign-in and create a local account during setup. This guide walks you through every step clearly.
Setting up a new PC with Windows 11 can feel overwhelming. Many users want to skip the Microsoft account sign-in during installation. Maybe you prefer a local account for privacy reasons. Or maybe you just want a simpler setup. Whatever your reason, you can absolutely install Windows 11 without a Microsoft account. This guide shows you exactly how to do it, step by step.
The process is easier than most people think. You just need the right approach and a little patience. In this article, we cover everything from system requirements to post-installation setup. You will learn proven methods to bypass the Microsoft account prompt. We also share tips to avoid common pitfalls along the way.
Whether you are setting up a fresh install or upgrading an existing PC, this guide has you covered. Let us walk through it together.
Key Takeaways
- You can skip the Microsoft account requirement: Windows 11 allows local account setup with a few simple workarounds.
- Privacy improves with a local account: Your data stays on your device instead of syncing to the cloud.
- Installation is straightforward: You only need a USB drive and your product key.
- You can switch accounts later: Adding a Microsoft account after setup is always an option.
- Common mistakes slow you down: Avoid the OOBE lockout trick and use the right tools.
- Post-installation setup matters: Configuring your local account properly ensures a smooth experience.
📑 Table of Contents
- Why Install Windows 11 Without a Microsoft Account?
- Before You Begin: What You Need
- Step-by-Step: Installing Windows 11 Without a Microsoft Account
- Setting Up Your Local Account After Installation
- Comparison: Microsoft Account vs Local Account
- Common Mistakes to Avoid
- Expert Tips for a Flawless Installation
- Key Takeaways
- Frequently Asked Questions
- Conclusion
Why Install Windows 11 Without a Microsoft Account?
Microsoft pushes users to sign in with a Microsoft account during Windows 11 setup. But it is not mandatory. There are several good reasons to choose a local account instead.
Privacy Benefits
A local account keeps your data on your device. It does not sync to Microsoft servers. You control what information stays on your PC. This is a big win for privacy-conscious users.
No Internet Required
You can set up Windows 11 offline with a local account. This is helpful in areas with limited connectivity. It also works well for users who prefer not to link their device to a cloud account.
Simpler Management
Local accounts are easy to manage. You do not need to remember another password for Microsoft services. Your account stays tied to your device alone.
Better for Shared Computers
If multiple people use the same PC, local accounts work great. Each user gets their own profile without tying it to a personal Microsoft account.
Before You Begin: What You Need
Preparation makes the installation smooth. Gather these items before you start the process.
- A working PC to create the installation media
- A USB flash drive (at least 8 GB)
- Your Windows 11 product key
- A stable internet connection (for downloading media)
- The Windows 11 ISO file (or access to the Media Creation Tool)
Check System Requirements
Make sure your PC meets the Windows 11 system requirements. Your processor should be 64-bit and at least 1 GHz. You need at least 4 GB of RAM and 64 GB of storage. A TPM 2.0 chip is also required. If you are unsure, you can run the PC Health Check app on your current system.
If you are upgrading your storage before installation, consider installing a new NVMe SSD to improve performance. A fast drive makes the entire setup process smoother.
Step-by-Step: Installing Windows 11 Without a Microsoft Account
Now let us get into the actual installation process. Follow these steps carefully for the best results.
Step 1: Create Installation Media
Go to the Microsoft website and download the Media Creation Tool. Run the tool and select “Create installation media for another PC.” Choose your language, edition, and architecture (64-bit is standard). Select USB flash drive and pick your drive from the list. The tool will download Windows 11 and create a bootable USB drive.
Step 2: Boot from the USB Drive
Plug the USB drive into your target PC. Restart the computer and enter the BIOS or boot menu. This is usually done by pressing F2, F12, Del, or Esc during startup. Select the USB drive as your boot device. The Windows 11 setup will begin.
Step 3: Start the Installation
Select your language and keyboard layout. Click “Install Now.” Enter your product key when prompted. If you do not have one, you can skip it and activate later. Accept the license terms and choose “Custom: Install Windows only.”
Step 4: Select Your Drive
Choose the drive where you want to install Windows 11. If you need to format the drive first, select it and click “Delete.” Then select the unallocated space and click “Next.” The installation will begin. This may take 10 to 20 minutes.
If you are working with a laptop and need to swap your storage drive, check out our guide on how to install an M.2 NVMe SSD in a laptop for detailed instructions.
Step 5: Bypass the Microsoft Account Prompt
Here is the critical step. When Windows 11 asks you to sign in with a Microsoft account, you need to work around it. The easiest method is the OOBE\BYPASSNRO trick.
- On the screen that asks for a Microsoft account, press Shift + F10. This opens the Command Prompt.
- Type OOBE\BYPASSNRO and press Enter.
- The PC will restart automatically.
- When the setup screen appears again, you will now see the “I do not have internet” option.
- Click that option, then select “Continue with limited setup.”
- You can now create a local account instead of signing in with Microsoft.
Type a username for your account. Leave the password fields blank if you want no password, or create a strong password. Click “Next” and the setup will finish.
Alternative Method: Using a Batch File
Some users prefer a batch file approach. You can create a .bat file on the USB drive with the bypass command. This saves time if you need to repeat the process on multiple PCs. Simply create a text file, paste the OOBE\BYPASSNRO command, save it as a .bat file, and run it when needed.
What If You Already Have a Microsoft Account Linked?
If you accidentally signed in with a Microsoft account, do not worry. You can switch to a local account after setup. Go to Settings > Accounts > Your info. Click “Sign in with a local account instead.” Follow the prompts and enter your Microsoft account password. You will then create a new local account name and password. Restart your PC and sign in with the local account.
Setting Up Your Local Account After Installation
Once Windows 11 is installed with a local account, there are a few things you should do to optimize your setup.
Configure Privacy Settings
Go to Settings > Privacy & Security. Review each privacy category. Turn off any data sharing options you are not comfortable with. This includes diagnostic data, advertising ID, and location services.
Install Essential Drivers
Windows 11 will install most drivers automatically. However, you may need to update some manually. Check your PC manufacturer’s website for the latest drivers. Pay special attention to graphics, audio, and network drivers.
Activate Windows
Go to Settings > System > Activation. Click “Change product key” and enter your Windows 11 key. This activates your copy of Windows 11 and unlocks all features.
Update Windows
Go to Settings > Windows Update. Click “Check for updates.” Install all available updates. This ensures your system is secure and runs smoothly.
Comparison: Microsoft Account vs Local Account
Not sure which account type is right for you? Here is a quick comparison.
| Feature | Microsoft Account | Local Account |
|---|---|---|
| Cloud Syncing | Yes | No |
| Privacy Level | Lower | Higher |
| Internet Required | Yes | No |
| OneDrive Integration | Yes | No |
| Cross-Device Sync | Yes | No |
| Setup Complexity | Simple | Slightly more steps |
| Password Recovery | Online recovery | Local only |
As you can see, both account types have their strengths. Choose based on your needs and preferences.
Common Mistakes to Avoid
Many users run into problems during this process. Here are the most common mistakes and how to avoid them.
- Skipping the backup step: Always back up your data before installing Windows 11. Use an external drive or cloud storage.
- Using the wrong USB drive: Use a reliable USB flash drive. Cheap or damaged drives can cause installation failures.
- Forgetting the product key: Keep your product key safe. You can find it on a sticker on your PC or in your purchase email.
- Not checking BIOS settings: Make sure Secure Boot is enabled and your boot order prioritizes the USB drive.
- Rushing through the OOBE screen: Take your time at the account setup screen. The bypass trick only works if you do it correctly.
- Ignoring driver updates: After installation, update all drivers to avoid performance issues.
Expert Tips for a Flawless Installation
Here are some insider tips from experienced users and technicians.
Use a Reliable USB Drive
Not all USB drives work well for installation media. Use a USB 3.0 drive from a reputable brand. This ensures faster write speeds and fewer errors during the installation process.
Disable Fast Startup Before Installation
If you are installing Windows 11 on a PC that already has Windows 10, disable Fast Startup first. Go to Control Panel > Power Options > Choose what the power buttons do. Uncheck “Turn on fast startup.” This prevents file system conflicts during the install.
Keep Your Internet Disconnected During Setup
For the smoothest experience with a local account, disconnect from the internet before starting setup. This prevents Windows from pushing you toward a Microsoft account automatically. You can reconnect after the installation is complete.
Consider Your Storage Setup
If your PC has both an HDD and an SSD, install Windows 11 on the SSD. This dramatically improves boot times and overall system responsiveness. If you need help setting up additional storage, our guide on installing an NVMe SSD in a PC can help.
Key Takeaways
- Installing Windows 11 without a Microsoft account is fully supported: You have the right to use Windows 11 with a local account.
- The OOBE\BYPASSNRO method is reliable: It works on most Windows 11 installations and is easy to execute.
- Preparation prevents problems: Have your USB drive, product key, and drivers ready before you start.
- Local accounts offer better privacy: Your personal data stays on your device and out of the cloud.
- You can switch account types later: Microsoft allows you to change from a Microsoft account to a local account anytime.
- Post-installation steps matter: Updating drivers, activating Windows, and configuring privacy settings complete the setup.
Frequently Asked Questions
Can I still use Windows Update with a local account?
Yes, absolutely. Windows Update works the same way regardless of account type. Your local account will receive all security patches and feature updates just like a Microsoft account would.
Will I lose my files if I switch from a Microsoft account to a local account?
No, your files stay on your PC. Switching account types only changes how you sign in. Your personal files, apps, and settings remain intact. However, cloud-synced data from OneDrive will no longer sync automatically.
Can I add a Microsoft account later to my local account?
Yes, you can. Go to Settings > Accounts > Your info and click “Sign in with a Microsoft account instead.” This lets you link your local account to a Microsoft account whenever you want.
Is the OOBE\BYPASSNRO method safe?
Yes, it is a safe and well-known method. It simply restarts the out-of-box experience to reveal the offline setup option. It does not modify your system files or compromise security.
Do I need an internet connection to install Windows 11?
You need internet to download the Media Creation Tool and the Windows 11 ISO file. However, you can install Windows 11 without an internet connection during the actual setup. The installation will work fine offline.
What if the bypass method does not work for me?
If the OOBE\BYPASSNRO trick does not work, try the alternative batch file method. You can also try disconnecting from the internet before starting setup. In some cases, simply clicking the “I do not have internet” option directly on the setup screen works.
Conclusion
Installing Windows 11 without a Microsoft account is straightforward and empowering. You gain more control over your privacy and your setup experience. The methods in this guide work reliably and do not require advanced technical skills.
Remember to prepare your installation media, back up your data, and follow each step carefully. The OOBE\BYPASSNRO method is your best friend during setup. And if anything goes wrong, you can always switch to a local account after installation.
Take your time, enjoy the process, and welcome to Windows 11 on your own terms. Your PC, your rules.