How to Install an Nvme Ssd
Installing a NVMe SSD is simpler than you think and can dramatically speed up your PC or laptop in minutes. This guide walks you through how to install an NVMe SSD step by step, from mounting the drive to configuring it in your BIOS and operating system. You’ll learn the essential tools, connector types, and common pitfalls to avoid, so you can enjoy faster boot times and snappier performance right away.
Key Takeaways
- Check compatibility first: Always confirm your motherboard has an M.2 slot before buying an NVMe SSD.
- Insert at the right angle: Place the NVMe SSD at 30 degrees, then press it firmly into the slot.
- Secure it properly: Use the included M.2 screw to fasten the SSD snugly without over-tightening.
- Update your BIOS settings: Enable AHCI or NVMe mode in BIOS to unlock the full speed of your drive.
- Install the right driver: Use the manufacturer-provided NVMe driver for optimal performance and system stability.
- Confirm recognition: Verify the NVMe SSD is detected in your operating system through disk management tools.
📑 Table of Contents
- Why Upgrading to an NVMe SSD Is Worth It
- What You Need Before You Start
- How to Install an NVMe SSD in a Laptop
- How to Install an NVMe SSD in a Desktop PC
- Setting Up Your New NVMe SSD After Installation
- Data Speed Comparison: NVMe SSD vs. Other Storage Types
- Common Mistakes to Avoid When Installing an NVMe SSD
- Conclusion
Why Upgrading to an NVMe SSD Is Worth It
If your computer has been crawling through everyday tasks, the problem might not be your processor or your RAM. More often than not, it comes down to storage. A traditional hard drive just can’t keep up with what modern software demands. That is exactly where an NVMe SSD steps in and changes the game completely.
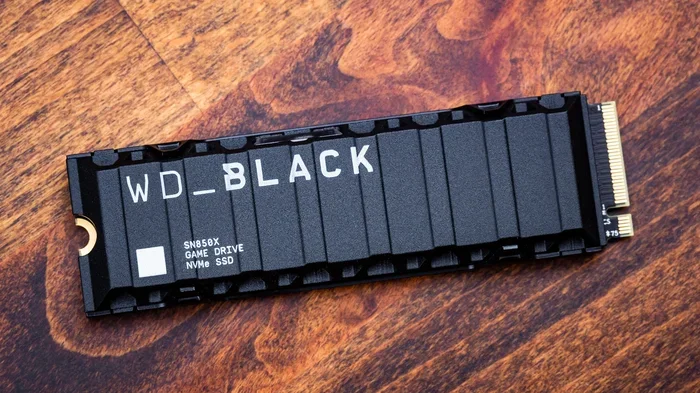
An NVMe SSD (which stands for Non-Volatile Memory Express Solid State Drive) is one of the fastest forms of internal storage you can put inside your computer. Unlike older drives that rely on spinning disks, an NVMe drive stores data on flash memory chips. The result? Blazing data transfer speeds that can reach 3,500 MB/s or even higher on newer drives. To put that in perspective, a standard SATA solid state drive tops out around 550 MB/s. That is a huge difference in real-world use.
Upgrading to an NVMe SSD means shorter boot times, faster app launches, and smoother multitasking. Whether you are a gamer, a content creator, or just someone who wants a snappier computer, this storage upgrade delivers noticeable results almost immediately. You will wonder how you ever lived with your old drive.
What You Need Before You Start
Before you dive into the installation process, it helps to gather everything you need. Preparing ahead of time makes the whole experience smoother and prevents frustrating pauses halfway through. Here is a quick checklist to get you ready.
- An NVMe SSD — Make sure it matches the M.2 form factor your system supports. Most modern computers use the M.2 2280 size, but double-check before buying.
- A Phillips-head screwdriver — You will need this to open your computer case and secure the drive.
- A clean, flat workspace — A large table or desk works best. Keep your components safe from static and dust.
- An anti-static wrist strap (optional) — This protects your hardware from static electricity. If you do not have one, simply touching a metal surface periodically works too.
- Your computer’s manual or online specs — This helps you confirm motherboard compatibility and locate the correct M.2 slot.
- A backup of your important files — Always protect your data before making hardware changes.
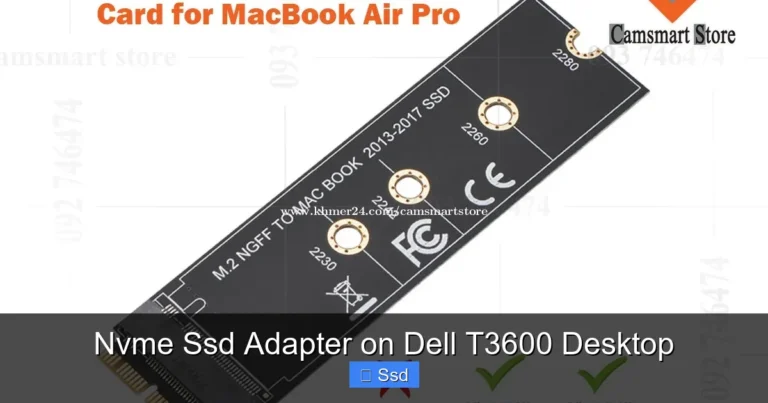
One important thing to consider: does your system have an available M.2 slot? Most desktops and laptops made after 2018 include at least one. If yours does not, you might need an M.2 to PCIe adapter or a different storage drive altogether. Check your specs ahead of time to avoid surprises.
How to Install an NVMe SSD in a Laptop
Laptops are getting thinner every year, but many still leave room for a storage upgrade. Installing an NVMe SSD in a laptop is straightforward once you know the steps. Let us walk through it together.
Step 1: Back Up Your Data and Prepare
First things first — back up anything important. You are working inside your computer, and while the risk is low, it is always smart to be safe. Copy your files to an external drive or cloud storage. Once that is done, power off your laptop completely and unplug the charger.
Step 2: Open the Laptop Bottom Panel
Flip your laptop over and locate the screws on the bottom cover. Most laptops have anywhere from four to ten small Phillips-head screws. Remove them carefully and store them in a small container so nothing gets lost. Use a plastic pry tool or a flat screwdriver to gently separate the bottom panel from the body. Do not force it — there are usually small clips holding it in place.
Step 3: Locate the M.2 Slot
Once you have access to the internals, look for the M.2 slot. It is usually a small, narrow slot positioned near the center or edge of the motherboard. Some laptops cover the slot with a small metal bracket or a tiny screw. If your laptop already has a drive installed there, you will need to remove it first by gently prying it out at a 30-degree angle and unscrewing the holding clip.
Step 4: Insert the NVMe SSD
Hold your NVMe SSD by the edges. Align the gold connector pins on the bottom of the drive with the M.2 slot. Insert it at roughly a 30-degree angle and push it gently into the slot. Once it is fully seated, press the drive down flat and secure it with the small screw or clip. Do not overtighten — a snug fit is all you need.
Step 5: Close Up and Power On
Replace the bottom panel and screw it back in. Plug in your charger, power on the laptop, and head into the BIOS to confirm the system recognizes the new drive. From there, you can install your operating system or clone your existing drive to the new NVMe SSD.
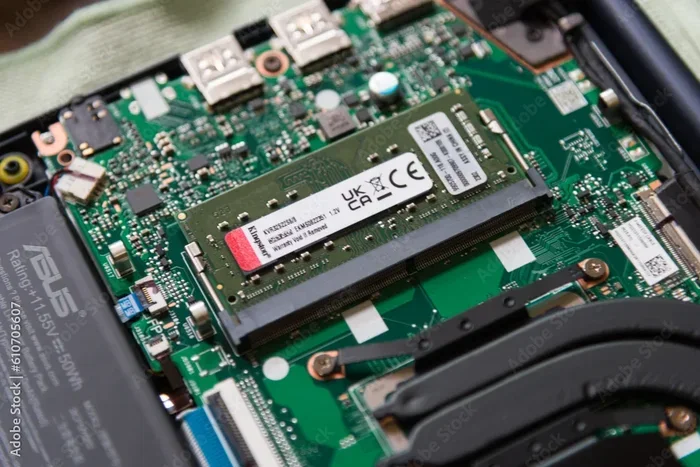
For more detailed guidance on laptop storage installations, you can check out this helpful guide on how to install RAM in a laptop — the general approach shares many similarities with SSD installation.
How to Install an NVMe SSD in a Desktop PC
Desktop computers generally offer more room to work and often have multiple M.2 slots available. The process of how to install an NVMe SSD on a desktop is slightly different from a laptop, but just as manageable. Here is how to do it right.
Step 1: Power Down and Ground Yourself
Shut down your desktop completely and unplug the power cable. Press the power button once or twice to discharge any remaining electricity. If you have an anti-static wrist strap, put it on now. Touch a metal part of the case to ground yourself before handling any components.
Step 2: Open the Case
Remove the side panel by taking off the rear screws or pressing the release latches, depending on your case design. Set the panel aside in a safe spot. You should now have a clear view of the motherboard and other components.
Step 3: Find the M.2 Slot on the Motherboard
Look at your motherboard and locate the M.2 slot. On most modern boards, you will find it near the CPU socket or between the PCIe slots. Some motherboards have multiple M.2 slots, and each one may support different speeds or protocols. Check your motherboard compatibility details in the manual to pick the right slot. If the M.2 slot has a heatsink cover, remove it carefully to expose the slot underneath.
Step 4: Mount and Insert the Drive
Some desktop M.2 slots come with a small mounting bracket. If yours does, screw the bracket onto the motherboard first, leaving the screw loose enough for the drive to slide in. Then insert your NVMe SSD at a 30- to 45-degree angle into the slot. Press it down gently until it sits flat, then secure it with the bracket screw. The drive should feel firm but not strained. Be careful not to over-tighten — a quarter turn past snug is plenty.
For additional context on storage installation best practices, you might find this resource on how to install more RAM to a laptop useful — it covers similar hardware handling tips that apply broadly.
Setting Up Your New NVMe SSD After Installation
Great, your NVMe SSD is physically installed. Now comes the software side of things. A drive without an operating system or file structure is just a blank piece of internal storage right now. Here is how to get it fully running.
Check That the BIOS Recognizes the Drive
Restart your computer and enter the BIOS by pressing the correct key during boot (usually F2, DEL, or ESC — it varies by manufacturer). Look for the storage or boot section. Your new NVMe SSD should appear in the list of detected drives. If it does not, power down, double-check the physical installation, and try again. Sometimes reseating the drive solves the problem.
Install or Clone Your Operating System
If this is a brand-new drive, you need to install an operating system on it. You can do this by creating a bootable USB drive with Windows or your preferred OS and booting from it. Follow the on-screen prompts to partition and format the drive during setup.
If you are replacing an older drive, consider disk cloning. Cloning copies everything — your files, programs, and settings — directly to the new NVMe SSD. Several free tools make this easy, such as Macrium Reflect Free or Clonezilla. Cloning saves you from reinstalling everything from scratch, which is a huge time-saver.
Verify Performance and Partition Alignment
After setup, run a quick benchmark to confirm your data transfer speed matches what the drive is capable of. Tools like CrystalDiskMark are free and straightforward. Also, make sure partition alignment is correct. Misaligned partitions can reduce performance significantly, and modern installation tools usually handle this automatically. Still, it is worth verifying if you cloned from an older drive.
Data Speed Comparison: NVMe SSD vs. Other Storage Types
Not sure if the storage upgrade is really worth it? Take a look at this speed comparison to see the difference for yourself.
| Storage Type | Max Sequential Read Speed | Max Sequential Write Speed | Interface |
|---|---|---|---|
| HDD | ~150 MB/s | ~120 MB/s | SATA |
| SATA SSD | ~550 MB/s | ~520 MB/s | SATA III |
| NVMe SSD (Gen 3) | ~3,500 MB/s | ~3,000 MB/s | PCIe Gen 3 x4 |
| NVMe SSD (Gen 4) | ~7,000 MB/s | ~5,500 MB/s | PCIe Gen 4 x4 |
| NVMe SSD (Gen 5) | ~14,000 MB/s | ~10,000 MB/s | PCIe Gen 5 x4 |
As you can see, the jump from a traditional hard drive replacement to an NVMe SSD is dramatic. Even comparing a SATA SSD to a Gen 4 NVMe SSD, you are getting roughly twelve times the read speed. Games load faster, video exports finish sooner, and your day-to-day workflow feels noticeably more responsive.
Common Mistakes to Avoid When Installing an NVMe SSD
Even though the process is fairly simple, a few common pitfalls can cause headaches. Here are some mistakes to watch out for when learning how to install an NVMe SSD the right way.
- Using the wrong M.2 slot. Not all M.2 slots support NVMe. Some only support SATA protocols. Always check your motherboard manual before picking a slot. Plugging into the wrong one means your drive will either not work or run at reduced speeds.
- Over-tightening the screw. The holding screw on an M.2 bracket should be snug, not rock-hard. Overtightening can crack the motherboard or damage the drive. A gentle tightening does the job perfectly.
- Ignoring thermal management. NVMe SSD drives can run hot, especially during heavy workloads. Many desktop motherboards include a built-in heatsink, but in a laptop, you may want to consider aftermarket thermal pads or a heatsink cover. Good thermal management keeps your drive running fast and extends its lifespan.
- Skipping the BIOS check. Some users install the drive and jump straight to using it without verifying BIOS detection. Always confirm the system sees the drive first. Catching issues early saves time and frustration later.
- Forgetting to update drivers. After installation, make sure your chipset and storage drivers are up to date. Outdated drivers can limit your PCIe interface performance and cause unexpected behavior.
- Not checking storage capacity limits. Some older motherboards have limitations on the maximum storage capacity they can recognize. A brand-new 4TB drive might not display fully on an older system. Check compatibility if you are going for a larger drive.
Quick Tips for a Smooth Installation
- Keep your screws in a magnetic tray so they do not fall into the case.
- Take photos of the inside of your computer before disassembling, so you have a reference for putting things back.
- If your laptop has a single M.2 slot shared with Wi-Fi, check whether your system uses a combo card. Some older setups share the slot between Wi-Fi and storage, which limits your options.
- When installing an NVMe SSD as a secondary drive, make sure your operating system knows where your boot drive is. You can manage this in the disk management tool after booting up.
Expert Insight: Getting the Most Out of Your NVMe SSD
According to hardware specialists, one of the biggest overlooked aspects of using an NVMe SSD is making sure your system’s BIOS is configured to take full advantage of the NVMe protocol. Some motherboards default to legacy settings that cap performance. Switching to AHCI or NVMe mode in the BIOS can unlock significantly faster speeds. Also, enabling Resizable BAR support (if available) can improve how your system communicates with the drive and other PCIe devices, leading to better overall system performance.
Key Takeaways
- An NVMe SSD is one of the best storage upgrades you can make for speed and responsiveness.
- Always verify motherboard compatibility and choose the correct M.2 slot before installing.
- Handle the drive by the edges, align it properly, and secure it without over-tightening.
- Check BIOS detection, update your drivers, and manage partitions for optimal data transfer speed.
- Consider thermal management, especially for sustained workloads, to protect performance and drive longevity.
Conclusion
Learning how to install an NVMe SSD is one of the most rewarding DIY projects you can do for your computer. The process itself takes only about fifteen to thirty minutes, but the impact on your daily experience lasts for years. From dramatically faster boot times to smoother gaming and quicker file transfers, an NVMe SSD breathes new life into any system.
Whether you are upgrading a laptop or building out a desktop, the steps are surprisingly similar. Prepare your workspace, follow the installation steps carefully, avoid the common mistakes we covered, and you will be up and running in no time. This storage upgrade is practical, affordable, and delivers results you will notice the moment you start using your computer again. So grab that screwdriver, pick up your NVMe SSD, and give your system the speed boost it deserves.
Frequently Asked Questions
What is an NVMe SSD and why should I install one?
An NVMe SSD is a fast storage drive that uses the PCIe interface to deliver much quicker read and write speeds than traditional hard drives. Installing one can dramatically speed up boot times, file transfers, and overall system responsiveness. It is one of the best upgrades you can make to an older or new PC.
How do I install an NVMe SSD in my desktop computer?
First, locate an available M.2 slot on your motherboard and unscrew the mounting bracket. Align the NVMe drive at a 30-degree angle, gently press it down, and secure it with a small screw. Finally, boot into your BIOS to confirm the drive is detected before installing an operating system on it.
Can I install an NVMe SSD in a laptop?
Yes, many modern laptops have an M.2 NVMe slot accessible from the bottom panel. Simply remove the screw, slide out the old drive if needed, insert the new NVMe SSD at an angle, and secure it. Just make sure your laptop supports NVMe speeds before purchasing the drive.
Do I need a heatsink for my NVMe SSD?
Some NVMe drives run hot under heavy workloads, especially in compact builds, so a heatsink can help maintain optimal performance. Many motherboards come with a built-in M.2 heatsink, so check yours first. If your drive gets too warm, adding a small aftermarket heatsink is a simple and affordable fix.
What tools do I need to install an NVMe SSD?
You will typically need a small Phillips-head screwdriver, the NVMe drive itself, and your motherboard manual to locate the correct M.2 slot. A thermal pad or heatsink may also be necessary depending on your motherboard design. That is really all you need for a straightforward installation.
How do I format and set up a new NVMe SSD after installing it?
After physically installing the drive, enter your BIOS or UEFI settings to confirm it is recognized by the system. Boot from a USB installer for your operating system, select the NVMe drive as your target, and follow the on-screen prompts to format and install Windows or your preferred OS. Once complete, your new drive will be ready to use with blazing-fast speeds.