Installing M 2 Nvme Ssd

Installing M 2 NVMe SSD is one of the easiest ways to dramatically speed up your computer. This guide walks you through every step, from choosing the right drive to setting it up in your system. You will learn what tools you need, how to physically install the drive, and how to configure it for the best performance.
Installing M 2 NVMe SSD might sound intimidating, but it is actually one of the simplest upgrades you can do. Whether you are building a new PC or upgrading an existing one, swapping in a NVMe M.2 drive can transform your system. Boot times shrink, games load faster, and file transfers happen in seconds.
The process is much easier than most people think. You do not need advanced technical skills or expensive tools. In this guide, we walk you through every single step. By the end, you will feel confident installing your own M.2 NVMe SSD like a pro.
We cover everything from picking the right drive to initializing it in Windows. Let us get started.
Key Takeaways
- M.2 NVMe SSDs offer blazing fast speeds: These drives use the PCIe interface to deliver read speeds far beyond traditional SATA drives.
- You need very few tools: A Phillips screwdriver and your motherboard manual are all you really need to get started.
- Compatibility matters: Check your motherboard for M.2 slot support and the correct keying type before buying a drive.
- Setup is straightforward: The physical installation takes about 10 to 15 minutes for most users.
- Initialization is required after installation: You must initialize and format the drive through Disk Management before using it.
- Avoid common mistakes: Not securing the drive properly and ignoring thermal management are the top errors people make.
📑 Table of Contents
What Is an M.2 NVMe SSD?
An M.2 NVMe SSD is a small, flat solid state drive that plugs directly into your motherboard. Unlike traditional 2.5-inch drives, M.2 drives do not need cables. They connect through a dedicated slot on the board. This makes them compact and incredibly fast.
The “NVMe” part stands for Non-Volatile Memory Express. It is a protocol designed specifically for flash storage. NVMe uses the PCIe interface to communicate with your system. This is a huge upgrade over the older SATA protocol used by traditional SSDs.
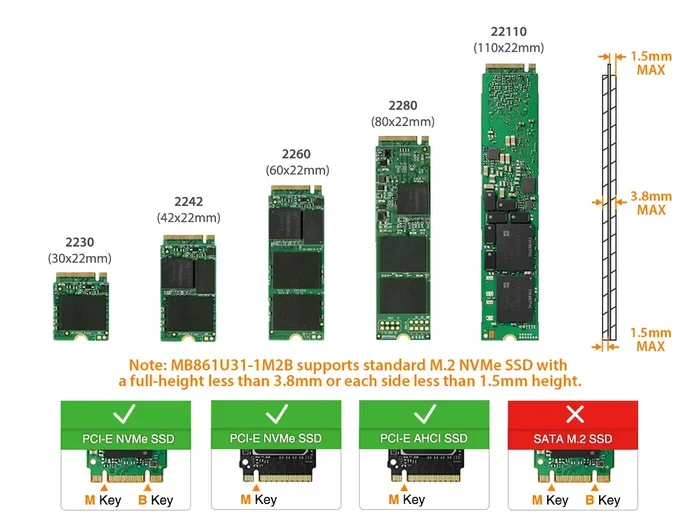
Most M.2 drives follow the 2280 form factor. That means they are 22 millimeters wide and 80 millimeters long. However, different lengths exist, so always check your motherboard manual before buying. A 512GB NVMe M.2 SSD is a popular choice for most users. It offers a great balance of capacity and price.
Tools You Need for Installing M 2 NVMe SSD
One of the best things about this upgrade is how little you need. Here is a simple list of tools and items to have ready before you begin.
Essential Tools
- Phillips head screwdriver: A small one works best. You need it to secure the drive to the motherboard.
- Motherboard manual: This tells you exactly where the M.2 slots are located. It also shows the correct slot to use for the best performance.
- Anti-static wrist strap (optional): This protects your components from static electricity. It is not strictly required but is a good habit.
What to Check Before You Start
- M.2 slot availability: Open your PC case and look for the M.2 slot on the motherboard. It is usually labeled and located near the CPU socket.
- PCIe generation support: Check if your motherboard supports PCIe Gen3 or Gen4. A Gen4 NVMe M.2 SSD will be faster, but it works in Gen3 slots too, just at lower speeds.
- Keying type: M.2 drives come in different key types, usually B-key or M-key. Most NVMe drives use the M-key slot. Make sure your motherboard has an M-key slot.
Taking a few minutes to check these things beforehand saves you a lot of frustration later.
Step-by-Step Installation Guide
Now for the fun part. Here is how to physically install your M.2 PCIe NVMe SSD. Follow these steps carefully and you will be done in no time.
Step 1: Prepare Your Workspace
Find a clean, flat surface to work on. Unplug your computer from the wall. If you are working on a laptop, remove the battery if possible. Ground yourself by touching a metal part of the case before touching any components.
Step 2: Locate the M.2 Slot
Open your PC case and find the M.2 slot on the motherboard. It looks like a small horizontal slot with a tiny screw already in place. Refer to your motherboard manual if you are not sure where it is. Some motherboards have multiple M.2 slots. Use the one connected directly to the CPU for the best speeds.
Step 3: Remove the Standoff and Screw
At the end of the M.2 slot, you will see a small standoff with a screw. Remove the screw and keep it safe. The standoff stays in place. This screw is what holds your drive securely.
Step 4: Insert the M.2 Drive
Take your NVMe M.2 SSD and hold it at a 30-degree angle. Align the gold contacts on the bottom of the drive with the slot on the motherboard. Gently push the drive down into the slot. It should slide in smoothly. Then, press the back end of the drive down flat against the motherboard.
Step 5: Secure the Drive
Use the screw you removed earlier to fasten the drive to the standoff. Tighten it gently. You do not need to crank it down hard. Just snug is fine. The drive should not wiggle or move.
That is it for the physical installation. It really is that simple. Now let us move on to setting up the drive in your operating system.
Setting Up Your New NVMe Drive
Once the drive is physically installed, you need to set it up in your system. The steps differ slightly depending on whether you are installing Windows for the first time or adding the drive to an existing system.
If You Are Installing Windows for the First Time
Boot from your Windows installation USB drive. When you reach the screen where you choose where to install Windows, you should see your new NVMe M.2 SSD listed. Select it and click Next. Windows will handle the rest.
If You Are Adding the Drive to an Existing System
Boot into your current Windows installation. Right-click the Start button and select Disk Management. You should see your new drive listed. It might show as “Unallocated.”
Here is what to do next:
- Right-click on the unallocated space and select “New Simple Volume.”
- Follow the wizard to assign a drive letter and format the drive.
- Choose NTFS as the file system for the best compatibility.
- Give the drive a name and click Finish.
Your new drive is now ready to use. You can start moving files, installing programs, or using it as a boot drive for your operating system.
One thing to note: if you want to use the drive as a boot drive, you may need to change the boot order in your BIOS. Restart your PC, enter the BIOS setup (usually by pressing F2 or Delete during startup), and set the NVMe drive as the first boot device. Save and exit.
Common Mistakes to Avoid
Even though the process is simple, people do make mistakes. Here are the most common ones and how to avoid them.
Forgetting to Check Compatibility
Not every motherboard supports every M.2 drive. Some older boards only support SATA M.2 drives, not NVMe ones. Always double-check your motherboard specifications. If you are unsure, look up your motherboard model online and check the M.2 slot details.
Not Using the Correct M.2 Slot
Many motherboards have multiple M.2 slots, but they do not all run at the same speed. Some slots share bandwidth with SATA ports or PCIe lanes. For the fastest speeds, always use the slot that runs directly off the CPU. Your motherboard manual will show you which slot that is.
Skipping the Thermal Solution
NVMe SSDs can run hot, especially under heavy workloads. Many drives come with a small heatsink included. If yours does not, consider buying one separately. A basic M.2 heatsink costs just a few dollars and can prevent thermal throttling. This keeps your drive running at full speed for longer periods.
Overtightening the Screw
It is tempting to crank the screw down as hard as you can. Do not do this. M.2 slots and drives are delicate. Overtightening can damage the slot or even crack the circuit board on the drive. A few gentle turns until snug is all you need.
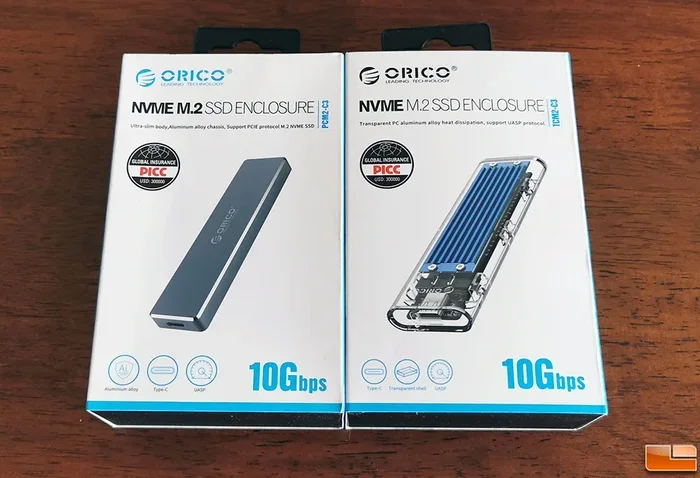
M.2 NVMe SSD Enclosure: When You Need One
Sometimes you do not want to install the drive inside your PC. Maybe you need a portable external drive, or your laptop does not have an available M.2 slot. In these cases, an NVMe M.2 enclosure is a great solution.
An enclosure is a small adapter that turns your internal M.2 drive into an external USB drive. You simply slide the drive into the enclosure, screw it in, and connect it via USB. This is a popular option for people who want fast portable storage.
When choosing an enclosure, look for one that supports PCIe Gen3 or Gen4 speeds. Cheap enclosures with USB 3.0 connections will bottleneck your drive. A good enclosure lets you take full advantage of your M.2 NVMe SSD speeds, even outside your PC.
What to Expect After Installation
Once your M.2 NVMe SSD is up and running, you will notice a big difference. Here are some of the improvements you can expect.
- Faster boot times: Your system should start in seconds rather than minutes.
- Quick file transfers: Copying large files happens much faster thanks to the high read and write speeds.
- Smoother gaming: Games load faster and run more smoothly when installed on an NVMe drive.
- Better multitasking: Opening multiple apps at once feels snappier and more responsive.
Compared to a traditional SATA SSD, an NVMe drive can deliver read speeds up to 7,000 MB/s or more on the latest Gen4 and Gen5 drives. Even a budget 512GB M.2 NVMe SSD will feel noticeably faster than any hard drive or older SATA SSD.
If you want to learn more about what happens if your NVMe drive disconnects unexpectedly, check out our guide on what happens if an NVMe SSD disconnects. Understanding potential issues helps you troubleshoot problems faster.
For those looking at specific drive options, we also review drives like the 512GB NVMe M.2 SSD and the NVMe PCIe M.2 SSD in detail. These articles can help you choose the right drive for your needs.
Final Thoughts
Installing M 2 NVMe SSD is a straightforward upgrade that delivers massive performance gains. The physical installation takes just a few minutes, and setting up the drive in Windows is equally simple. Whether you are a gamer, a content creator, or just someone who wants a faster PC, this upgrade is well worth the effort.
Remember to check your motherboard compatibility before buying, handle the drive gently during installation, and always use a proper thermal solution. These small steps ensure your drive lasts for years and performs at its best.
Now that you know how to install M 2 NVMe SSD, you have everything you need to get started. Grab your screwdriver, pick out your drive, and give your PC the speed boost it deserves.
Frequently Asked Questions
Do I need any special drivers for an M.2 NVMe SSD?
Most modern versions of Windows include native drivers for NVMe drives. You usually do not need to download anything separately. However, if your drive is not showing up, check the manufacturer’s website for the latest NVMe driver. Keeping your drivers updated ensures the best performance and stability from your M.2 NVMe SSD.
Can I install an M.2 NVMe SSD in a laptop?
Yes, many laptops have an M.2 slot available for upgrades. Check your laptop’s manual or look up your model online to confirm. The installation process is similar to a desktop but usually involves removing a bottom panel instead of a full case. Always power off and disconnect the battery before starting.
What is the difference between M.2 SATA and M.2 NVMe SSD?
The main difference is the interface they use. M.2 SATA drives use the same SATA protocol as traditional 2.5-inch SSDs, so they are limited to about 550 MB/s. M.2 NVMe drives use the PCIe interface and can reach speeds of 3,500 MB/s or more. If your motherboard supports NVMe, always choose an NVMe drive for much better performance.
How do I know if my motherboard has an M.2 slot?
Check your motherboard manual or look up your motherboard model online. Most modern motherboards have at least one M.2 slot. You can also open your PC case and look for a small horizontal slot near the CPU socket. It will have a tiny screw hole next to it. If you see that slot, your board supports M.2 drives.
Do I need a heatsink for my M.2 NVMe SSD?
It depends on your usage. For everyday tasks like browsing and office work, a heatsink is usually not necessary. However, if you do heavy workloads like video editing or large file transfers for extended periods, a heatsink helps prevent thermal throttling. Many motherboards come with a built-in M.2 heatsink, so check yours before buying a separate one.
Can I use an M.2 NVMe SSD as my primary boot drive?
Absolutely. In fact, using an NVMe SSD as your boot drive is one of the best upgrades you can make. Install Windows or your preferred operating system on the drive, and you will enjoy dramatically faster boot and load times. Just make sure to set the NVMe drive as the first boot device in your BIOS settings.