Repairing Broken Laptop Hinges or Cases
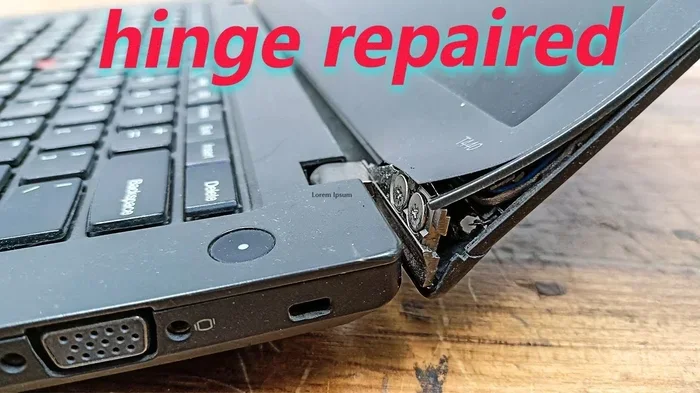
Repairing broken laptop hinges or cases is easier than most people think. Whether your hinge is loose, cracked, or completely broken, this guide walks you through every fix. You will learn DIY methods, when to call a pro, and how to prevent future damage. Save money and extend your laptop’s life with these practical solutions.
Your laptop hinge is one of the most used and most abused parts of the entire machine. Every single day, you open and close your laptop dozens of times. Over time, this constant movement wears down the hinge mechanism. Eventually, you might notice a wobble, a crack, or even a completely broken hinge. Repairing broken laptop hinges or cases is a topic that many laptop users need but rarely talk about. This guide covers everything you need to know to fix the problem right.
Whether you have a loose hinge that wobbles when you type or a cracked case that looks terrible, there is a solution. You do not always need to buy a new laptop. In fact, most hinge and case issues can be resolved with basic tools and a little patience. Let us dive into the details of how to handle broken laptop hinge repair like a pro.
Key Takeaways
- Loose hinges can often be fixed with simple tightening or adhesive before needing a full replacement.
- A broken laptop hinge repair costs between $50 and $200 depending on the model and damage level.
- DIY repair is possible for minor case cracks and hinge wear with the right tools and patience.
- Severe damage may require professional help to avoid further harm to internal components.
- Regular maintenance prevents hinge and case problems from developing in the first place.
- Always check your warranty before attempting repairs to avoid voiding coverage.
📑 Table of Contents
- Understanding Laptop Hinge and Case Damage
- Tools You Need for Hinge and Case Repair
- How to Fix a Loose Laptop Hinge
- Replacing a Broken Laptop Hinge
- Fixing a Cracked or Broken Laptop Case
- When to Seek Professional Repair
- Preventing Future Hinge and Case Damage
- Final Thoughts on Repairing Broken Laptop Hinges or Cases
Understanding Laptop Hinge and Case Damage
Before you start fixing anything, you need to understand what is actually wrong. Laptop hinges and cases come in different designs. The damage type determines the best repair method. Let us break down the common problems you might face.
Common Types of Hinge Damage
Not all hinge problems are the same. Here are the most common types of laptop hinge damage you will encounter:
- Loose hinge: The screen wobbles and does not stay in place. This usually happens when the hinge screw becomes worn or stripped.
- Cracked hinge housing: The plastic or metal piece around the hinge breaks. This is common in older laptops.
- Broken hinge pin: The central pin that connects the two hinge halves snaps. This makes the screen completely floppy.
- Stiff or grinding hinge: The hinge does not move smoothly. This often means dirt or debris has built up inside.
- Split case near the hinge: The laptop shell cracks where the hinge meets the base. This is a serious structural issue.
Common Types of Case Damage
Case damage is different from hinge damage but often happens at the same time. Here is what to look for:
- Cracked or broken plastic shell: Drops and impacts cause visible cracks on the laptop base or lid.
- Broken plastic clips: The clips that hold the two halves together snap, causing parts to separate.
- Bent or dented chassis: Metal cases can bend, which puts stress on internal components.
- Warped base: Heat and pressure can warp the laptop base over time, making it unstable.
Understanding the type of damage helps you choose the right fix. A loose laptop hinge needs a different approach than a cracked laptop case. Take your time to inspect the damage before you start any repair.
Tools You Need for Hinge and Case Repair
You do not need a fancy workshop to fix most hinge and case issues. A basic laptop repair kit with the right tools will get the job done. Here is what you should have on hand:
Essential Tools
- Small Phillips and flathead screwdrivers: Most laptop screws are tiny. A precision screwdriver set is essential.
- Plastic spudger or pry tool: This helps you open the laptop without scratching or cracking the case.
- Super glue or epoxy adhesive: Great for bonding cracked plastic or securing loose hinge pieces.
- Replacement hinge screws: Stripped screws are a common problem. Having spares saves a lot of hassle.
- Tweezers: Helpful for removing small screws and clips.
- Isopropyl alcohol and cotton swabs: Use these to clean dirt and grime from the hinge area.
- Replacement hinge or case parts: For severe damage, you may need a new hinge or shell piece.
Optional but Helpful Tools
- Heat gun or hair dryer: Softens plastic clips when you need to remove them carefully.
- Torx screwdriver set: Many modern laptops use Torx screws. Check your model before starting.
- Anti-static wrist strap: Protects your laptop’s internal components from static damage.
Having the right tools makes the repair process much smoother. It also reduces the risk of causing additional damage. Do not skip this step, even if you are eager to start fixing.
How to Fix a Loose Laptop Hinge
A loose hinge is the most common problem. The screen wobbles when you type or move the laptop. This is annoying but usually easy to fix. Here is how to tighten a loose laptop hinge step by step.
Step 1: Inspect the Hinge Area
Open the laptop and look closely at the hinge. Check for visible screws, cracks, or gaps. If a screw is missing or stripped, that is likely the cause. If the plastic around the hinge is cracked, you have a bigger problem to address.
Step 2: Tighten the Hinge Screws
Most loose hinges are simply caused by loose screws. Use the right screwdriver to tighten them. Go slowly and do not overtighten. Overtightening can strip the screw hole or crack the plastic. Here is the process:
- Flip the laptop open and locate the hinge screws.
- Gently tighten each screw a quarter turn at a time.
- Test the hinge after each turn. Stop when the wobble is gone.
- If a screw spins without tightening, the hole is stripped. Move to the next step.
Step 3: Fix Stripped Screw Holes
If a screw hole is stripped, you have a few options. You can use a toothpick or matchstick dipped in wood glue to fill the hole. Let it dry completely, then reinsert the screw. Another option is to use a slightly larger screw or a threaded insert. For laptop hinge tightening, these simple tricks work surprisingly well.
Step 4: Apply Adhesive for Extra Stability
If the hinge still feels loose after tightening, apply a small amount of epoxy adhesive around the hinge area. This adds strength and prevents further movement. Just be careful not to get glue on the screen or keyboard.
Most loose hinge problems can be solved with these four steps. It takes about 15 to 30 minutes. If the hinge is completely broken, you may need a full replacement, which we will cover next.
Replacing a Broken Laptop Hinge
When the hinge is cracked, snapped, or beyond tightening, replacement is the best option. Hinge replacement sounds intimidating, but it is very doable with the right guidance. Here is how to approach it.
Step 1: Find the Right Replacement Part
Every laptop model uses a specific hinge design. Search for your laptop model number along with “replacement hinge” to find the correct part. You can buy replacement hinges online for $5 to $20. Make sure you get the correct side (left or right) and the right type.
Step 2: Disassemble the Laptop Carefully
Start by removing the battery. Then remove the screws from the bottom case. Use your plastic spudger to carefully separate the case halves. Keep track of every screw. A small container or magnetic mat helps a lot here.
Once the case is open, locate the broken hinge. Remove any screws holding it in place. Disconnect the display cable if needed. Be gentle, as cables can be fragile.
Step 3: Install the New Hinge
Attach the new hinge in the reverse order of removal. Secure all screws. Reconnect the display cable. Then carefully close the case and test the hinge movement. The screen should open and close smoothly without any wobble.
If you are not comfortable disassembling your laptop, consider watching a video tutorial for your specific model. Many laptop repair DIY videos on YouTube walk you through the exact process. This can save you from making costly mistakes.
Fixing a Cracked or Broken Laptop Case
A cracked case is more than just a cosmetic problem. It can affect the structural integrity of your laptop. If left unrepaired, cracks can spread and damage internal components. Here is how to handle laptop case damage repair.
Small Cracks and Chips
For small cracks, plastic welding or super glue works well. Clean the area around the crack with isopropyl alcohol. Apply a thin layer of super glue or epoxy along the crack. Press the pieces together and hold for 30 seconds. Let it cure for at least 24 hours before using the laptop.
Large Cracks or Broken Plastic Clips
For larger cracks, you may need to use a plastic repair kit. These kits include specialized adhesives and reinforcement strips. Here is a quick process:
- Clean and dry the damaged area thoroughly.
- Apply the adhesive according to the kit instructions.
- Use reinforcement strips or braces for extra strength.
- Allow full curing time before reassembling the laptop.
Broken Plastic Clips
Plastic clips that hold the case together can snap over time. You can replace them with small bolts and nuts as a temporary fix. For a permanent solution, use strong epoxy or consider replacing the entire case panel. Some manufacturers sell replacement panels separately.
Remember that case repairs are not always perfect. The repaired area may not look as good as new. But functionally, it will protect your laptop just as well.
When to Seek Professional Repair
Not every repair is a DIY project. Some situations call for a professional. Knowing when to stop and call for help saves you time and money. Here are signs that you need professional laptop repair:
- The hinge is completely broken and the screen falls off: This is a serious structural issue that requires expert handling.
- Internal components are damaged: If the hinge damage has affected the display cable or motherboard, you need a specialist.
- Your laptop is still under warranty: Opening the laptop yourself may void the warranty. Check first.
- You do not have the right tools or experience: Forcing a repair you are not confident about can make things worse.
- The damage is extensive and affects multiple areas: A cracked case combined with a broken hinge is complex and best left to experts.
Professional repair costs vary. A simple hinge tightening might cost $30 to $50. A full hinge replacement can range from $100 to $200. Case replacement depends on the model and can go higher. Always get a quote before committing to any repair service.
Many local repair shops and online services offer free diagnostics. This helps you understand the full scope of the problem before spending any money. It is always smart to compare a few options before choosing a repair shop.
Preventing Future Hinge and Case Damage
The best repair is the one you never need. Preventing damage is much easier than fixing it. Here are simple habits that keep your laptop hinges and cases in great shape for years.
- Open and close the laptop lid gently: Do not slam it shut. Use both hands and apply even pressure.
- Never pick up the laptop by the screen: Always carry it by the base. Picking up by the lid puts stress on the hinges.
- Keep the laptop on a flat, stable surface: Do not use it on your bed or couch where it can flex and bend.
- Clean the hinge area regularly: Dust and debris can cause grinding and wear over time.
- Use a padded laptop bag: A good case protects your laptop from drops and impacts.
- Avoid extreme temperatures: Heat can warp the case and weaken the adhesive that holds the hinges.
These habits take almost no effort but make a huge difference. A well-maintained laptop can last many more years without hinge or case problems. Think of it as an investment in your device’s longevity.
Some people also wonder about other common laptop issues. For example, if you are dealing with performance problems, you might want to look into upgrading your laptop RAM to get things running smoothly again. Similarly, if you are replacing parts like storage, you might need guidance on installing an M.2 NVMe SSD in your laptop. And if you are worried about safety, you can check whether a laptop can explode from overheating and how to prevent it.
Final Thoughts on Repairing Broken Laptop Hinges or Cases
Repairing broken laptop hinges or cases is a manageable task for most people. Whether you are tightening a loose hinge, replacing a broken one, or fixing a cracked case, the right approach makes all the difference. Start by identifying the type of damage. Gather your tools. Follow the steps carefully. And do not hesitate to call a professional when the damage is beyond DIY repair.
Your laptop is a significant investment. Taking care of hinge and case issues promptly keeps it functional and looking good. With the tips and methods in this guide, you have everything you need to tackle the most common problems. Roll up your sleeves, grab your screwdriver, and give your laptop the care it deserves.
Frequently Asked Questions
How much does it cost to repair a broken laptop hinge?
Hinge repair costs typically range from $50 to $200. Simple tightening is on the lower end, while full hinge replacement costs more. The exact price depends on your laptop model and the repair shop you choose. Always ask for a quote before committing to any repair.
Can I fix a broken laptop hinge at home?
Yes, minor hinge issues like looseness can often be fixed at home with basic tools. Stripped screws can be repaired with glue and a toothpick. However, if the hinge is completely broken or cracked, replacement is usually needed. Only attempt DIY repair if you feel comfortable working with small screws and delicate components.
What causes laptop hinges to break?
The most common cause is daily wear and tear from opening and closing the laptop. Dropping the laptop or picking it up by the screen also causes hinge damage. Over time, the plastic or metal weakens and eventually fails. Rough handling accelerates this process significantly.
How do I know if my laptop hinge is beyond repair?
If the hinge is completely snapped, the screen wobbles dangerously, or the crack extends into the laptop base, it is likely beyond simple repair. Also, if internal cables are damaged, professional help is necessary. A repair shop can assess the damage and advise whether replacement is the only option.
Will repairing a broken laptop case void the warranty?
It depends on your warranty terms. Many manufacturers consider unauthorized repairs as a warranty void. If your laptop is still under warranty, contact the manufacturer or an authorized service center first. They may repair the case at no cost if the damage is covered.
How long does a laptop hinge repair take?
A simple hinge tightening takes about 15 to 30 minutes. A full hinge replacement usually takes 1 to 2 hours. Case repair time varies depending on the extent of the damage. If you are new to laptop repair, give yourself extra time and work carefully.