How To Clone Hard Drive To Ssd And Upgrade Your PC Today

Cloning your hard drive to an SSD is the single best upgrade you can make for a faster PC. This guide walks you through every step, from picking the right cloning software to booting up your brand-new drive. You will learn how to clone hard drive to SSD safely, avoid common mistakes, and enjoy dramatically faster load times without reinstalling Windows or losing your files.
Key Takeaways
- Cloning copies everything: Your OS, programs, settings, and files move to the new SSD in one seamless process.
- You do not need to reinstall Windows: Cloning preserves your entire system exactly as it is.
- Free and paid cloning tools exist: Options like Macrium Reflect Free and Clonezilla work great for most users.
- SSD speeds change everything: Boot times drop from minutes to seconds after a successful clone.
- Preparation is key: Back up your data, check drive sizes, and connect the SSD properly before cloning.
- Post-clone steps matter: Setting the SSD as the primary boot drive ensures your PC runs from the new disk.
📑 Table of Contents
- How To Clone Hard Drive To Ssd And Upgrade Your PC Today
- What Does It Mean To Clone A Hard Drive?
- What You Need Before You Start
- Step-By-Step Guide To Clone Hard Drive To Ssd
- Common Mistakes To Avoid When Cloning
- How To Install Your New Ssd After Cloning
- How To Install Nvme Ssd In Your Pc After Cloning
- Expert Tips For The Best Cloning Experience
- How To Format A New Ssd Before Or After Cloning
- Conclusion
How To Clone Hard Drive To Ssd And Upgrade Your PC Today
Your computer feels slow. It takes forever to boot up. Programs launch with a painful delay. If this sounds familiar, you are not alone. Millions of PC users deal with aging hard drives every single day.
The good news? You do not need to buy a new computer. Cloning your hard drive to an SSD is the fastest, easiest, and most affordable way to breathe new life into an old machine. In this guide, we will show you exactly how to do it. You will learn what cloning means, which tools to use, and how to get your new SSD up and running in no time.
Whether you are a complete beginner or someone who has tinkered with PC hardware before, this guide has you covered. We break everything down into simple, easy-to-follow steps. No jargon. No guesswork. Just clear instructions that get results.
By the end of this article, you will know exactly how to clone hard drive to SSD, what to watch out for, and how to enjoy blazing-fast performance every single day. Let us get started.
What Does It Mean To Clone A Hard Drive?
Cloning means creating an exact copy of your entire hard drive and moving it to a new SSD. This is not just copying files. It duplicates everything on your drive, including your operating system, installed programs, system settings, and personal files.
Think of it like making a perfect mirror image of your current drive. When you are done, your new SSD looks and feels exactly like your old hard drive. But it runs much faster because SSDs have no moving parts and access data instantly.
Cloning is different from a fresh Windows install. With cloning, you keep everything. You do not need to reinstall programs, reconfigure settings, or hunt down your old files. It is a one-step migration that saves hours of tedious work.
Why Clone Instead Of A Fresh Install?
There are several reasons cloning wins over a fresh install. First, you keep all your software licenses and configurations intact. Second, you do not spend hours reinstalling drivers and updates. Third, your file structure stays exactly the same. You open folders and find everything where you left it.
For most users, cloning is the clear winner. It is faster, safer, and far less stressful than starting from scratch.
What You Need Before You Start
Before you begin the cloning process, you need a few things ready. Preparation makes the whole process smoother and prevents problems along the way.
1. Your New SSD
You need an SSD that is at least as large as your current hard drive. If your old drive is 500 GB, get a 500 GB SSD or larger. It is always smart to go bigger if you can. This gives you room to grow without running out of space.
2. A Way To Connect The SSD
You need to connect your new SSD to your computer. You can do this internally by installing it in an empty drive bay or M.2 slot. Alternatively, you can use an external enclosure or adapter to connect the SSD through USB. This is especially helpful if your PC only has one drive slot.
If you are using an M.2 NVMe SSD externally, an M 2 Nvme To Usb C Ssd Enclosure works perfectly for this task.
3. Cloning Software
You need reliable disk cloning software. Several great options exist, and many are free. Here are the most popular choices:
- Macrium Reflect Free: A trusted free tool with a simple interface. Great for beginners.
- Clonezilla: Open-source and powerful. Best for advanced users who want full control.
- EaseUS Todo Backup: User-friendly with both free and paid versions.
- AOMEI Backupper: Another solid free option with good cloning features.
4. A Backup Of Your Important Data
Even though cloning is generally safe, always back up your most important files before starting. Use an external drive or cloud storage. This protects you in case anything unexpected happens during the cloning process.
Step-By-Step Guide To Clone Hard Drive To Ssd
Now for the part you have been waiting for. Here is the full cloning process broken down into simple steps. Follow them carefully and you will have a working SSD in no time.
Step 1: Install Or Connect Your New SSD
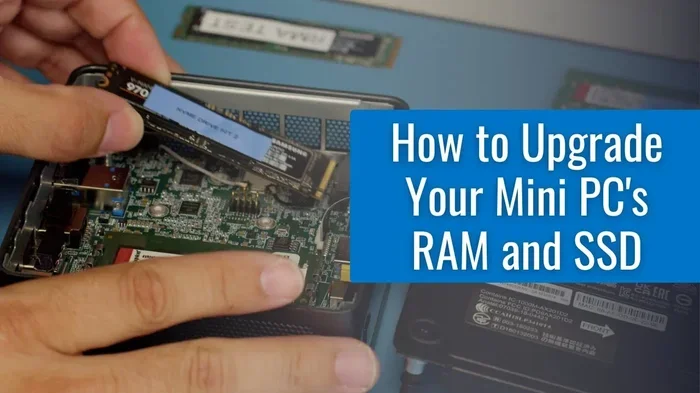
If you are installing the SSD inside your PC, open the case and connect it to your motherboard. For an M.2 NVMe SSD, simply insert it into the M.2 slot and secure it with a screw. If you are using a SATA SSD, connect it to a SATA port on your motherboard and plug in a power cable from your power supply.
If you are using an external enclosure, connect the SSD to the enclosure and plug the enclosure into a USB port on your computer. Your PC should recognize the new drive automatically.
Step 2: Download And Install Cloning Software
Choose your cloning tool from the list above and download it. Install it on your current hard drive (the source drive). Launch the software and look for the cloning or disk copy option.
Step 3: Select Source And Destination Drives
The software will ask you to choose the source drive (your old hard drive) and the destination drive (your new SSD). Double-check these selections carefully. If you pick the wrong drive, you could overwrite important data.
Pro tip: Always confirm the drive sizes and model names before proceeding. Your old drive is likely larger than the new SSD, so make sure the used space on the old drive fits on the new SSD.
Step 4: Start The Cloning Process
Once you have confirmed your source and destination drives, start the cloning process. The software will now copy every sector of your old drive to the new SSD. Depending on the amount of data, this can take anywhere from 20 minutes to several hours.
Do not use your computer during this time. Let the software work uninterrupted. Interrupting the process could corrupt the clone and leave you with an unusable drive.
Step 5: Shut Down And Swap Drives
When cloning finishes, shut down your computer completely. Disconnect the power. Now swap out the old hard drive and replace it with the new SSD. If you cloned to an external drive, simply disconnect the old drive and keep the SSD connected.
Step 6: Boot From Your New SSD
Power on your PC and enter the BIOS or UEFI settings (usually by pressing F2, Del, or F12 during startup). Change the boot order so your new SSD is listed first. Save the settings and exit. Your PC should now boot from the cloned SSD.
If everything went well, you will see your familiar Windows desktop in seconds. All your programs, files, and settings will be exactly where you left them. The only difference? Everything is dramatically faster.
Common Mistakes To Avoid When Cloning
Cloning is straightforward, but a few common mistakes can cause problems. Here is what to watch out for:
Choosing The Wrong Destination Drive
This is the most common and most dangerous mistake. Always verify that you are cloning to the new SSD, not your old hard drive. Overwriting your source drive will destroy your data permanently.
Not Checking Drive Size Compatibility
Your new SSD must be large enough to hold all the used data on your old drive. If your old drive has 400 GB of used data, you need at least a 400 GB SSD. The software will usually warn you, but always double-check.
Skipping The Post-Clone Boot Order
After cloning, your PC might still try to boot from the old hard drive. Always go into BIOS and set the SSD as the primary boot device. Forgetting this step is a common reason people think cloning failed.
Using A Faulty Cable Or Enclosure
If you are cloning externally, a cheap USB cable or bad enclosure can cause connection drops. This interrupts the cloning process and can corrupt the clone. Use quality cables and reliable enclosures.
How To Install Your New Ssd After Cloning
Once cloning is complete and you have swapped the drives, you may want to do a few things to optimize your new SSD. These small steps ensure you get the best performance and longest lifespan from your drive.
Enable TRIM Support
TRIM is a command that helps your SSD manage unused data efficiently. Windows 10 and 11 usually enable TRIM automatically for SSDs. To check, open Command Prompt and type fsutil behavior query DisableDeleteNotify. If the result is 0, TRIM is active.
Update Your SSD Firmware
Check the manufacturer’s website for the latest firmware update for your SSD. Firmware updates often improve performance, fix bugs, and enhance compatibility.
Optimize Your System For SSD Performance
A few simple tweaks help your SSD perform at its best. Disable disk defragmentation (SSDs do not need it). Enable the AHCI mode in your BIOS settings. And keep at least 10-15% of your SSD free for optimal performance.
After you have cloned and installed your SSD, you will notice the difference immediately. Boot times drop from minutes to seconds. Programs open instantly. File transfers happen at incredible speeds. For a detailed look at how much faster SSDs and NVMe drives really are compared to traditional hard drives, check out our guide on how much faster NVMe is than SSD.
If you plan to install an NVMe SSD directly into your motherboard, our How To Install Nvme Ssd guide walks you through the hardware setup step by step.
How To Install Nvme Ssd In Your Pc After Cloning
Many people choose to clone their old hard drive onto a new NVMe SSD for the best possible performance. NVMe drives connect directly to the motherboard via the M.2 slot and offer speeds that far exceed traditional SATA SSDs and hard drives.
The installation process is straightforward. Locate an available M.2 slot on your motherboard. Remove the protective cover, insert the NVMe SSD at a slight angle, and press it down gently. Secure it with the small screw that came with your motherboard or case.
Once the SSD is physically installed, your PC should recognize it automatically after a reboot. If you cloned to this NVMe drive using the steps above, you simply need to set it as the primary boot device in BIOS. Your cloned system will run perfectly from the new NVMe drive.
For a detailed walkthrough of the entire NVMe installation process, including tips for different motherboard brands, visit our How To Install An Nvme Ssd guide.
Expert Tips For The Best Cloning Experience
Here are some insider tips from experienced PC builders and technicians. These small adjustments make a big difference in cloning success.
- Close all unnecessary programs before starting the clone. This frees up system resources and speeds up the process.
- Defragment your old hard drive before cloning. This organizes files for faster copying and reduces the chance of errors.
- Keep your PC plugged into power during cloning. A sudden power loss can corrupt the clone and damage both drives.
- Label your drives clearly so you always know which is the source and which is the destination.
- Test your clone before wiping the old drive. Boot from the new SSD, check your files, and verify your programs work before retiring the old drive.
How To Format A New Ssd Before Or After Cloning
In most cases, you do not need to format your new SSD before cloning. Good cloning software handles this automatically. However, if your new SSD comes with existing partitions or data, formatting it first ensures a clean slate.
To format the SSD, connect it to your PC, open Disk Management (right-click the Start button and select Disk Management), right-click the SSD partition, and choose Format. Use the NTFS file system for Windows.
If you prefer to format after cloning is complete, you can use the same Disk Management tool or the built-in Windows format utility. Just make sure you have booted successfully from the new SSD first.
For a complete walkthrough of formatting a new NVMe SSD, our How To Format New Nvme Ssd guide covers everything you need to know.
Conclusion
Cloning your hard drive to an SSD is one of the most rewarding upgrades you can do for your PC. It is fast, it is affordable, and it transforms your computing experience overnight. Instead of spending hours reinstalling Windows and your programs, cloning lets you move everything in one simple step.
Follow the steps in this guide carefully. Pick the right cloning software, connect your new SSD properly, and take your time during the process. Avoid the common mistakes we highlighted, and you will have a blazing-fast new drive running in under an hour.
The difference a cloned SSD makes is truly remarkable. Your PC will boot faster, programs will launch instantly, and everyday tasks will feel snappy and responsive. It is like getting a new computer for a fraction of the cost.
So what are you waiting for? Grab an SSD, pick your favorite cloning tool, and upgrade your PC today. Your future self will thank you every time you start your computer in seconds instead of minutes.
Frequently Asked Questions
Can I clone a hard drive to SSD without losing data?
Yes, absolutely. Cloning creates a complete copy of your hard drive, including all files, programs, and the operating system. As long as you use reliable cloning software and follow the steps correctly, no data is lost during the process.
Do I need to reinstall Windows after cloning to an SSD?
No. One of the biggest advantages of cloning is that your entire Windows installation transfers to the new SSD exactly as it was. All your programs, settings, and files remain intact. You simply boot from the new drive and everything works.
What is the best free cloning software?
Macrium Reflect Free and Clonezilla are two of the best free options available. Macrium Reflect Free offers a user-friendly interface that is great for beginners, while Clonezilla provides more advanced features for experienced users. Both tools reliably clone hard drives to SSDs.
How long does it take to clone a hard drive to SSD?
The time depends on the amount of data and the speed of your drives. For most users, cloning takes between 30 minutes and 3 hours. Larger drives with more data take longer. Using a USB 3.0 connection for external cloning may slow the process slightly.
Can I clone a larger hard drive to a smaller SSD?
Yes, as long as the used data on the old drive is smaller than the capacity of the new SSD. For example, if your 1 TB hard drive only has 300 GB of used data, you can clone it to a 500 GB SSD. The cloning software will only copy the data that is actually in use.
Should I format my SSD after cloning?
Usually no. The cloning software formats the SSD automatically during the cloning process. Formatting after cloning is only necessary if you want to remove leftover partitions or if the SSD came pre-formatted with an incompatible file system.