How Do I Connect a Wireless Mouse to a Laptop
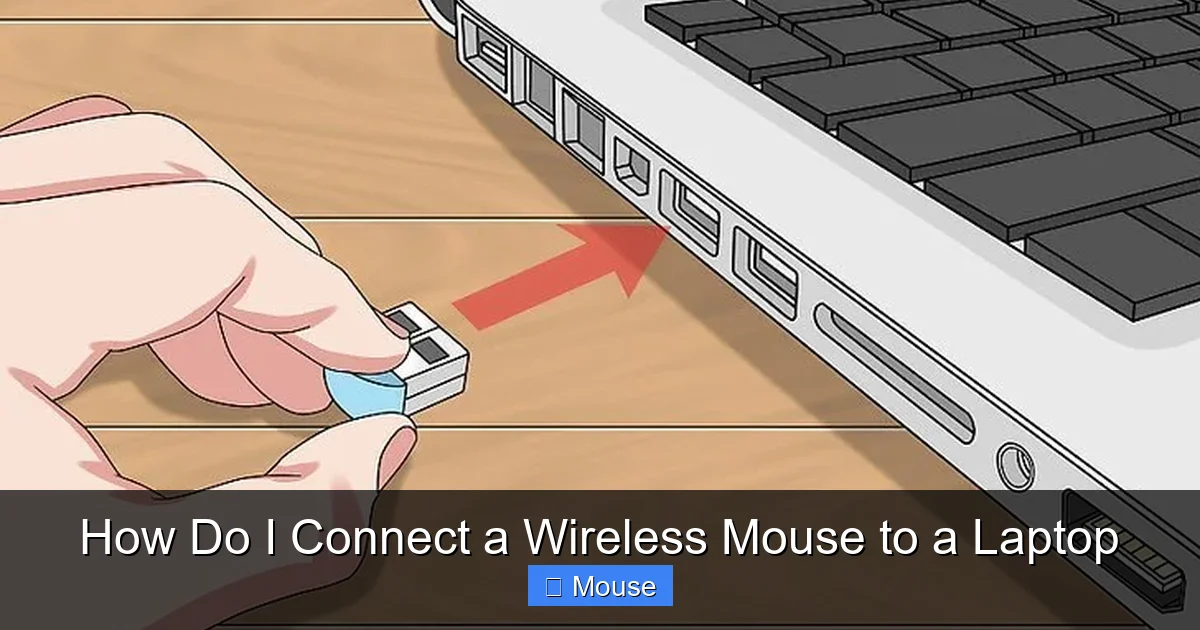
Connecting a wireless mouse to your laptop is simple and typically involves either Bluetooth or a small USB receiver. For Bluetooth mice, you’ll enable Bluetooth on your laptop, put the mouse in pairing mode, and select it from the device list. For mice with a USB dongle, you often just plug it in, though some may require a pairing button press. Always check your mouse’s manual for specific instructions, ensure batteries are installed, and troubleshoot by restarting devices or updating drivers if connection fails.
So, you’ve unboxed that sleek new wireless mouse, ready to ditch the tangled mess of cords on your desk. You push the power button… and nothing happens. Or maybe the cursor just sits there, stubbornly still. Don’t worry—this is one of the most common and easily solvable tech hiccups. Connecting a wireless mouse to a laptop is designed to be effortless, but a few small steps can trip us up. This guide will walk you through every single method, from the simplest plug-and-play to more advanced setups, and arm you with the knowledge to fix any problem that arises. Let’s get you clicking freely.
Key Takeaways
- Two Main Technologies: Wireless mice connect via Bluetooth (built-in) or a USB radio frequency (RF) receiver (often called a dongle).
- Bluetooth is Universal: Uses your laptop’s built-in Bluetooth, saving a USB port, but can sometimes have slightly higher latency than a dedicated receiver.
- USB Receiver is Plug-and-Play: Typically the simplest method—just plug the tiny dongle into a USB port and the mouse works immediately.
- Pairing Mode is Key: Most connection issues arise because the mouse wasn’t correctly put into discoverable/pairing mode (usually via a dedicated button).
- Batteries are the First Check: A dead or poorly connected battery is the most common reason a wireless mouse won’t turn on or connect.
- Drivers Matter: While modern OSes handle drivers automatically, outdated system software can cause connectivity problems with Bluetooth especially.
- Multi-Device Mice: Some advanced mice can pair with multiple computers and switch between them with a button—useful for a laptop and desktop setup.
📑 Table of Contents
- Understanding Your Wireless Mouse: The Two Main Connection Types
- How to Connect a Bluetooth Wireless Mouse
- How to Connect a Wireless Mouse with a USB Receiver
- Troubleshooting: Why Your Wireless Mouse Isn’t Working
- Advanced Features & Optimization for Power Users
- Caring for Your Wireless Mouse: Battery Life & Maintenance
- Conclusion: Embrace the Freedom
Understanding Your Wireless Mouse: The Two Main Connection Types
Before we dive into clicks and taps, it’s crucial to know what kind of wireless mouse you have. The connection method dictates the entire process. There are two primary technologies powering the wireless mouse world today, and knowing which one you own is the first step to success.
Bluetooth Mice: The Built-In Solution
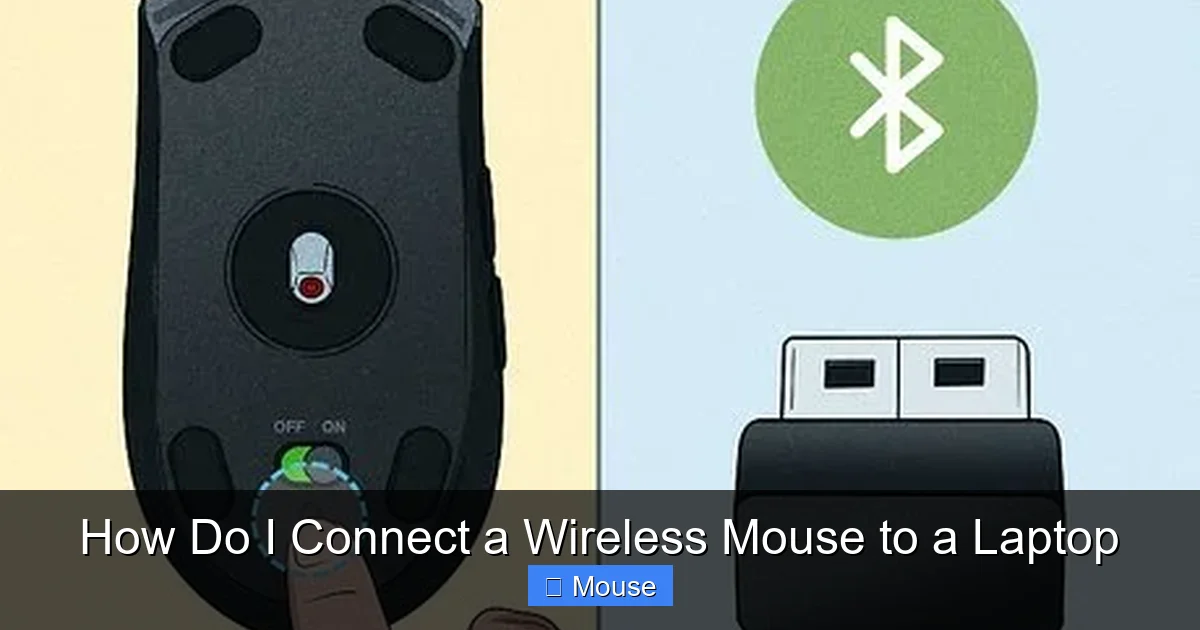
A Bluetooth mouse uses the Bluetooth radio already inside your laptop (or desktop PC, if it has one). It’s a universal standard. Because it relies on your computer’s hardware, it doesn’t require any external dongle or USB port. This is perfect for modern ultrabooks and tablets with limited ports. The pairing process is like connecting a wireless headset or keyboard—you make the mouse “discoverable” and tell your laptop to find it.
- Pros: No USB port taken, often slightly better battery life, works with phones/tablets too.
- Cons: Can occasionally experience more latency (lag) than a dedicated receiver, though for most office and web tasks this is imperceptible. Pairing can sometimes be finicky.
RF (Radio Frequency) Mice with a USB Receiver: The Dedicated Link
These mice come with a tiny USB dongle, often stored in a compartment inside the mouse itself. This dongle contains a dedicated radio chip that talks directly to the mouse. It’s a one-to-one, encrypted connection designed specifically for that mouse (or sometimes a family of mice from the same brand).
- Pros: Extremely reliable, very low latency (favored by gamers), almost never drops connection, simple plug-and-play.
- Cons: Uses up one of your precious USB ports. The dongle can be easily lost if not stored properly.
Note: Some brands, like Logitech with their “Unifying” receiver, allow you to pair multiple compatible mice and keyboards to a single tiny dongle, saving even more ports. We’ll cover that special case later.
How to Connect a Bluetooth Wireless Mouse
Got a Bluetooth mouse? Great. The process is the same whether you’re on Windows 10/11 or macOS. It’s all about getting both devices into a “pairing” or “discoverable” state simultaneously.
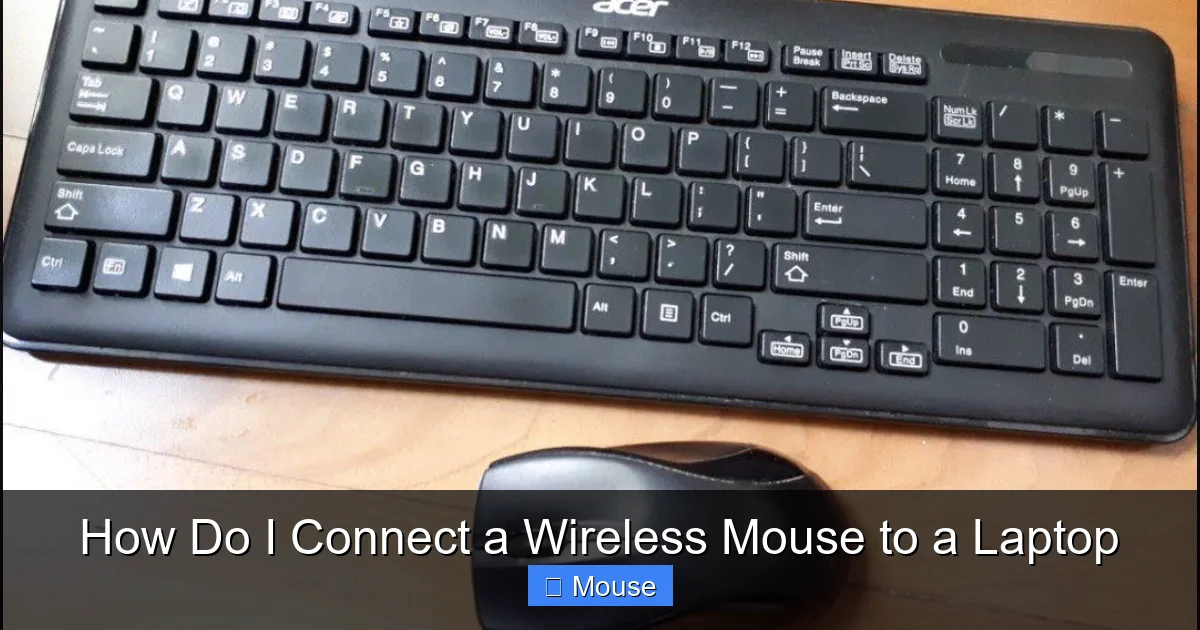
Visual guide about How Do I Connect a Wireless Mouse to a Laptop
Image source: wikihow.com
Step-by-Step for Windows 10 & 11
Step 1: Prepare Your Mouse. Turn your mouse on using the power switch (usually on the bottom). Look for a small button labeled “Pair,” “Connect,” or a Bluetooth icon. Press and hold this button for 3-5 seconds. You’ll often see a blinking LED light (blue, white, or red) indicating the mouse is in pairing/discoverable mode. This is the most critical step. If you skip it, the mouse won’t show up.
Step 2: Open Bluetooth Settings on Your Laptop. Click the Windows Start button or Search icon, type “Bluetooth,” and select “Bluetooth & devices” settings. Make sure Bluetooth is toggled On.
Step 3: Add the Device. Click the “+ Add device” button. A window pops up. Select “Bluetooth.”
Step 4: Select Your Mouse. Your laptop will start scanning. After a few seconds, the name of your mouse (e.g., “MX Master 3,” “HP Z3700”) should appear in the list. Click on it.
Step 5: Wait for Connection. You’ll see a connecting spinner. Once it says “Connected” or “Your device is ready to go,” the LED on your mouse should stop blinking and become solid (or turn off). Test the cursor. You’re done!
Step-by-Step for macOS (Ventura, Sonoma, etc.)
Step 1: Mouse Pairing Mode. Same as above—power on the mouse and hold the pairing button until the LED blinks.
Step 2: Open System Settings. Click the Apple menu > System Settings (or Preferences).
Step 3: Navigate to Bluetooth. In the sidebar, click “Bluetooth.” Ensure it’s turned on.
Step 4: Find and Connect. Your mouse should appear in the “Nearby Devices” list. Click the “Connect” button next to its name. The button may change to “Connected.” The mouse light should stabilize.
What If It Doesn’t Show Up?
If your mouse isn’t appearing in the list after 30 seconds:
- Re-enter pairing mode: Turn the mouse off and on again, then hold the pairing button. Sometimes you need to press it twice quickly or hold longer—check the manual.
- Check battery: A weak battery might not have enough power to broadcast a signal.
- Move closer: Bring the mouse within a foot of the laptop.
- Restart Bluetooth: Toggle Bluetooth off on your laptop, wait 10 seconds, toggle back on, and try scanning again.
- Remove old pairings: If the mouse was previously paired with another device (like your phone or a different computer), it might be trying to connect to that instead. Unpair it from all other devices first.
How to Connect a Wireless Mouse with a USB Receiver
This method is famously straightforward, but there are a couple of nuances depending on your mouse model.
Visual guide about How Do I Connect a Wireless Mouse to a Laptop
Image source: robots.net
The Classic Plug-and-Play Method
For the vast majority of RF mice, this is all you do:
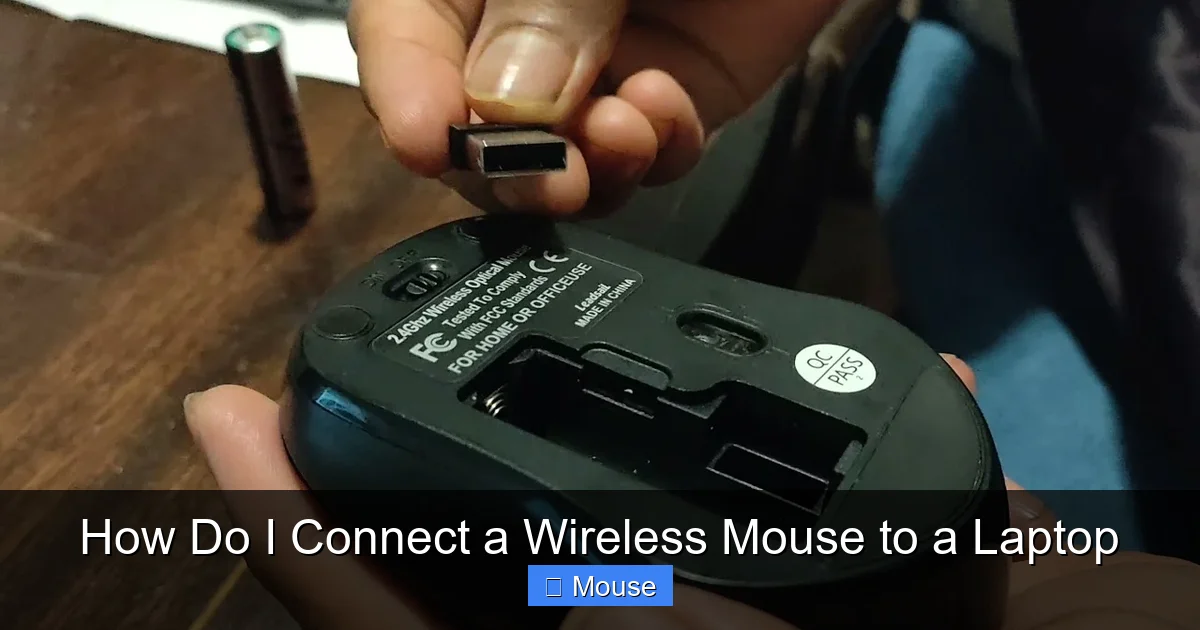
- Install Batteries: Open the battery compartment (usually on the bottom) and insert fresh AA or AAA batteries, observing the correct polarity (+/-).
- Power On: Flip the power switch to “On.”
- Insert the Receiver: Plug the USB dongle directly into an available USB port on your laptop. Avoid using USB hubs for the initial connection, as they can introduce instability.
- Wait a Moment: Your laptop’s operating system (Windows/macOS/Linux) will automatically detect the new hardware, search for and install the generic driver, and the mouse should start working within 10-30 seconds. You might see a small notification pop up.
That’s it. No pairing button needed. The mouse and receiver are pre-paired at the factory.
When You Need to Press a Pairing Button
Some mice, particularly those with multi-device switching capabilities or certain Logitech models, require a manual pairing step even with the receiver.
- Look for a “Connect” or “Pair” button: It’s often small and recessed, possibly requiring a paperclip to press (a “reset” or “pinhole” button).
- The process: With the receiver plugged in and the mouse powered on, press and hold the pairing button on the mouse for a few seconds until the LED blinks rapidly. You may need to also press a button on the receiver itself if it has one. The LEDs on both devices will stabilize once paired.
- Why this exists: It allows you to replace a lost receiver or pair the mouse to a different receiver (like one from a Unifying set).
The Special Case: Logitech Unifying Receivers
If your mouse came with a small, orange-square Logitech Unifying receiver, you have extra flexibility. You can pair multiple compatible Logitech mice and keyboards to that one single receiver. To add a new mouse:
- Plug the Unifying receiver into your laptop.
- Download and install the free “Logi Options+” or “Logitech Unifying Software” from Logitech’s website.
- Open the software, turn on your mouse, and follow the on-screen prompts to add it. The software will guide you through putting the mouse in pairing mode.
This is fantastic for saving USB ports on a laptop with only one or two available.
Troubleshooting: Why Your Wireless Mouse Isn’t Working
So you followed the steps, but the cursor is still ghosting you. Don’t panic. We’ll diagnose this systematically, from the simplest fix to more complex ones.
Visual guide about How Do I Connect a Wireless Mouse to a Laptop
Image source: i.ytimg.com
The Universal First Steps (Do These Now!)
Before anything else, perform this quick checklist. It solves 90% of problems:
- Replace/Reinsert Batteries: Use fresh, high-quality batteries. If using rechargeable, ensure they’re fully charged. Sometimes the battery contacts get a thin layer of oxidation—remove batteries, rub contacts with a pencil eraser, reinsert.
- Power Cycle Everything: Turn the mouse off and on again. Unplug the USB receiver and plug it back in. Restart your laptop. This clears temporary software glitches.
- Check the Power Switch: It’s often on the bottom and can be accidentally switched off during handling.
- Try a Different USB Port: Plug the receiver into another port, preferably one directly on the laptop (not a hub). If it’s a USB-C port, use a proper USB-C to USB-A adapter, not a cheap, unpowered hub.
- Clean the Sensor: Flip the mouse over. Use a can of compressed air to blow dust and lint from the optical sensor (the little hole on the bottom). A smudged sensor can’t track movement.
Bluetooth-Specific Fixes
If your Bluetooth mouse is being temperamental:
- Remove and Re-pair: Go to your Bluetooth device list, find the mouse, select it, and choose “Remove device” or “Forget.” Then go through the entire pairing process from scratch.
- Update Bluetooth Drivers: On Windows, go to Device Manager > Bluetooth > right-click your Bluetooth adapter > “Update driver.” Or visit your laptop manufacturer’s website for the latest drivers.
- Disable Bluetooth Interference: Other wireless devices (Wi-Fi routers, cordless phones, microwaves) can interfere. Move the laptop and mouse away from such devices.
- Check OS Compatibility: Very old operating systems (like Windows 7 without updates) may lack proper Bluetooth Low Energy (BLE) support needed for modern mice.
RF/USB Receiver-Specific Fixes
- Receiver Distance: The receiver should be within a few feet of the mouse. If your laptop is often in a bag or dock, the signal can be blocked. Use a USB extension cable to bring the receiver closer to the mouse’s operating area.
- Check for Physical Damage: Inspect the USB connector for bent pins. Try the receiver in another computer to see if the problem is the mouse or the laptop’s USB port.
- Re-pair (if possible): Use the manual pairing button method described earlier.
- Interference: Same as Bluetooth—keep away from other 2.4GHz devices.
The “Cursor is Jumping/Stuttering” Problem
This is usually a tracking issue, not a connection issue.
- Surface Matters: The mouse sensor needs a uniform, non-reflective surface. Use a mousepad. Glass, glossy wood, or highly reflective surfaces will cause erratic tracking.
- Clean the Sensor: As mentioned, a dirty sensor is a common culprit.
- Adjust Polling Rate: Some gaming mice have software that lets you change the polling rate (how often it reports position to the PC). A very high rate (1000Hz) can sometimes cause issues on slower systems. Try lowering it to 500Hz or 250Hz via the mouse’s configuration software.
Advanced Features & Optimization for Power Users
Once connected, you can unlock more from your mouse. Most major brands (Logitech, Razer, Microsoft, SteelSeries) offer free configuration software.
Button Customization & Macros
Install the manufacturer’s software (e.g., Logi Options+, Razer Synapse). You’ll see a visual representation of your mouse. Click any button to reassign it. Common uses:
- Program side buttons to act as “Back” and “Forward” in browsers.
- Assign a button to launch a specific application (like your calculator or email).
- Create macros—a single button press that executes a complex sequence of keystrokes (great for repetitive tasks in spreadsheets or design software).
DPI/Resolution Tuning
DPI (Dots Per Inch) determines cursor speed. Higher DPI = faster cursor movement across the screen for the same physical mouse movement. Many mice have a dedicated DPI button that cycles through preset levels (e.g., 800, 1600, 3200). Use the software to:
- Set your preferred default DPI.
- Create different DPI stages for different tasks (low DPI for precise photo editing, high DPI for fast browsing).
- Some software allows for per-application DPI settings.
Multi-Device Switching
If your mouse supports it (common with Bluetooth and multi-Unifying mice), you can pair it to 2 or 3 devices and switch between them with a button press. This is invaluable if you use a laptop and a desktop, or a laptop and a tablet. Set it up once in the configuration software, and then just click the switch button to move your cursor from one screen to another seamlessly.
Caring for Your Wireless Mouse: Battery Life & Maintenance
To keep your wireless relationship happy for years, a little maintenance goes a long way.
Battery Best Practices
- Use Quality Batteries: For disposable AA/AAA, name-brand alkaline or lithium batteries last longer and provide more stable voltage. For rechargeable, invest in good NiMH (1.2V) or Lithium (1.5V) cells. Low-voltage NiMH can sometimes cause erratic behavior in power-hungry mice.
- Turn It Off: If your mouse doesn’t have an auto-sleep feature (most do), manually switch it off when not in use for extended periods (like overnight).
- Extreme Temperatures Kill Batteries: Don’t leave the mouse in a hot car or a freezing room. Temperature extremes drastically reduce battery performance.
Physical Cleaning & Care
- Regular Dusting: Use a soft, dry microfiber cloth to wipe the shell. For the sensor, use a dry cotton swab to gently remove dust. Never spray liquid directly onto the mouse.
- Deep Clean: For grime on the sides or scroll wheel, slightly dampen a cloth with isopropyl alcohol (70% or less), wring it out thoroughly, and wipe. Let it dry completely before use.
- Scroll Wheel Gunk: Compressed air blown sideways into the scroll wheel gap can dislodge hair and crumbs. A toothpick can gently scrape out packed-in debris.
- Mouse Pad: Clean your mousepad regularly with mild soap and water. A dirty pad transfers grime to the mouse feet and sensor.
Storage & Travel
When packing your laptop bag, always turn the mouse off to prevent accidental button presses and battery drain. If your mouse has a storage compartment for the receiver, use it! Losing the dongle is the #1 reason for “broken” wireless mice. For Bluetooth mice, consider a small case or sleeve to protect it from scratches and impacts.
Conclusion: Embrace the Freedom
Connecting a wireless mouse is one of the simplest upgrades you can make to your laptop setup. Whether you choose the port-saving convenience of Bluetooth or the rock-solid reliability of a USB receiver, the process is now a clear, step-by-step routine. Remember the golden rules: always ensure the mouse is in pairing mode (for Bluetooth) or that batteries are fresh, and don’t skip the basic restart. With the troubleshooting steps in your back pocket, you’re equipped to handle any connection hiccup. Take a moment to explore your mouse’s software for those powerful customization features—a few clicks can transform your workflow. Now, go forth, untangle your desk, and enjoy the clean, wireless freedom.
Frequently Asked Questions
Can I connect a wireless mouse to a laptop without Bluetooth?
Yes, absolutely. If your laptop lacks built-in Bluetooth, you must use a mouse that comes with a USB receiver (RF dongle). Simply plug the receiver into a USB port and the mouse should work via its dedicated signal.
Why is my Bluetooth mouse not connecting even though it’s in pairing mode?
First, ensure your laptop’s Bluetooth is turned on and not already connected to the maximum number of devices. Try removing any old pairings of that mouse from your laptop’s Bluetooth list. Also, make sure the mouse has fresh batteries and is very close to the laptop during pairing.
Is a Bluetooth mouse or a USB receiver mouse better for gaming?
For competitive gaming, a mouse with a USB receiver is generally preferred. The dedicated, direct connection offers the lowest possible latency (input lag) and the most consistent, interference-free performance. Modern Bluetooth has improved greatly, but a high-quality 2.4GHz RF connection is still the gold standard for serious gamers.
What’s the difference between using disposable and rechargeable batteries in a wireless mouse?
Disposable (alkaline/lithium) batteries typically provide a higher voltage (1.5V) and very long life but must be replaced. Rechargeable NiMH batteries have a lower nominal voltage (1.2V), which can sometimes cause performance issues in power-sensitive mice, but they are cost-effective and eco-friendly. Lithium-ion rechargeable mice (with built-in batteries) offer the most convenience but require a cable for charging.
How do I reset or unpair my wireless mouse?
The method varies. Often, there’s a small pinhole reset button on the bottom—press it with a paperclip for 5-10 seconds until the LED blinks. For Bluetooth, you simply “Forget” or “Remove” the device from your laptop’s Bluetooth settings menu. Consult your mouse’s manual for the exact procedure.
Will any wireless mouse work with any laptop?
For USB receiver mice, compatibility is almost universal—any laptop with a working USB port should accept it. For Bluetooth mice, your laptop must have Bluetooth capability (most post-2010 laptops do) and run an OS that supports Bluetooth Human Interface Device (HID) profiles, which all modern Windows, macOS, and Chrome OS versions do. Very old systems may have issues.