How Do I Upgrade My Ram on My Laptop
Upgrading your laptop RAM is one of the easiest and most affordable ways to breathe new life into a slow computer. This guide walks you through every step, from checking compatibility to installing the new stick. You will learn how to upgrade ram on laptop safely and confidently, even if you have never opened your device before.
Is your laptop running slow? Do apps take forever to open, and your browser keeps freezing with too many tabs? The answer might be simpler than you think. Upgrading your laptop RAM can transform a sluggish machine into a fast, responsive powerhouse.
Many people assume they need to buy a whole new computer when their old one starts to lag. But the truth is, adding memory is one of the cheapest and most effective upgrades you can make. Whether you use your laptop for work, gaming, or streaming, more RAM can make a huge difference in day-to-day performance.
In this guide, I will walk you through the entire process of how to upgrade RAM on a laptop. I will explain how to check what you currently have, what to buy, and exactly how to install it. By the end, you will feel confident enough to do it yourself. No tech degree required.
Key Takeaways
- Know Your RAM: Checking your current memory and laptop specs is the first and most important step before buying anything.
- Compatibility Matters: Not all RAM works with every laptop. You need the right type, speed, and capacity for your system.
- Simple Tools: You only need a screwdriver, an anti-static wrist strap, and a clean workspace to get started.
- Step-by-Step Process: Opening the back panel, removing old RAM, and seating the new stick is easier than most people think.
- Test After Upgrading: Always verify your new memory is recognized and working correctly before closing everything up.
📑 Table of Contents
Why Upgrade Your Laptop RAM
Before you dive into the installation process, it helps to understand why RAM matters so much. Random Access Memory is the short-term memory your laptop uses to handle active tasks. Every time you open a program, browse a website, or play a game, it uses RAM.
When your RAM runs low, your laptop starts swapping data to your hard drive. This slows everything down dramatically. Upgrading your laptop memory gives your system more space to juggle multiple tasks at once.
Signs You Need More Memory
Not sure if your laptop needs an upgrade? Watch for these common signs:
- Your laptop takes more than a few seconds to wake up from sleep mode.
- You experience frequent freezing or crashing when you have several apps open.
- Your browser tabs keep crashing or becoming unresponsive.
- Games or video editing software stutter, even on medium settings.
- You hear your hard drive working overtime for no clear reason.
If any of these sound familiar, a laptop RAM upgrade could be exactly what you need. Many users report a noticeable speed boost right after installing new memory.
How Much RAM Do You Actually Need
The amount of memory you need depends on what you use your laptop for. For basic tasks like browsing and word processing, 8GB is usually enough. If you multitask heavily or run creative software, 16GB is a sweet spot. Power users and gamers often benefit from 32GB or more.
If you are unsure about what capacity to choose, check out our guide on how much RAM you need on your laptop for detailed recommendations based on your usage.
Check Your Current RAM and Compatibility
Not every laptop accepts the same type of memory. Before you buy anything, you need to know what your system supports. This step saves you time, money, and frustration.
Find Out What RAM You Currently Have
First, check your existing memory configuration. On Windows, you can open the Task Manager by pressing Ctrl + Shift + Esc. Click on the Performance tab, then select Memory. You will see how much RAM you have, what type it is, and how many slots are in use.
If you want a more detailed view, you can also use the Command Prompt. Type wmic memorychip list full and press Enter. This shows you the exact part number, speed, and form factor of your current modules.
Another option is to visit your laptop manufacturer’s website and enter your model number. Most brands provide detailed specifications, including maximum RAM support and the type of memory your laptop uses.
Understand RAM Types and Speeds
Laptops use different generations of RAM. The most common types today are DDR4 and DDR5. Older laptops may still use DDR3. Each type is not backward compatible, so you must match the right generation to your laptop.
Speed is measured in megahertz (MHz). Higher MHz means faster data transfer. But your laptop’s motherboard will only support certain speeds. Always check the maximum supported speed before purchasing new modules.
Check Your Laptop’s Maximum RAM Capacity
Every laptop has a limit on how much memory it can handle. Some older models max out at 8GB, while newer ones can support 32GB or even 64GB. This limit depends on your motherboard and BIOS.
If you want to learn more about your specific model’s upgrade potential, you can read our article on whether you can upgrade RAM on your laptop. It covers compatibility across many popular brands and models.
Tools and Materials You Will Need
The good news is that upgrading RAM does not require expensive or specialized equipment. Here is everything you need:
- The new RAM module: Make sure it matches your laptop’s specifications for type, speed, and capacity.
- A small Phillips-head screwdriver: Most laptops use tiny screws to secure the back panel.
- An anti-static wrist strap: This protects your components from static electricity. It is cheap and worth every penny.
- A clean, well-lit workspace: A large table with good lighting makes the process much easier.
- A soft cloth or mat: Place your laptop on a soft surface to prevent scratches.
- Your laptop manual or a service guide: This helps you locate the RAM slots and screws specific to your model.
You can also find free service manuals online. Just search for your laptop model number followed by “service manual” or “disassembly guide.” These documents often include pictures and step-by-step instructions tailored to your exact device.
Step-by-Step RAM Upgrade Process
Now for the fun part. Follow these steps carefully, and you will have your new memory installed in no time.
Step 1: Back Up Your Data
While upgrading RAM is very safe for your data, it is always smart to back up important files first. Use an external hard drive, cloud storage, or both. This way, you have nothing to worry about if anything unexpected happens.
Step 2: Power Down and Unplug
Shut down your laptop completely. Do not just put it to sleep. Unplug the power cable and remove any connected peripherals like USB drives or external monitors. If your laptop has a removable battery, take it out now.
Step 3: Open the Back Panel
Flip your laptop over and locate the screws holding the bottom panel in place. Use your screwdriver to carefully remove them. Keep the screws in a small container so they do not get lost.
Once all screws are removed, gently lift off the back panel. Some panels clip into place, so you may need to wiggle them slightly. Work slowly and avoid using excessive force.
If you are unsure about how to open your specific model, check our guide on how to upgrade RAM on a laptop for model-specific tips and visual walkthroughs.
Step 4: Locate the RAM Slots
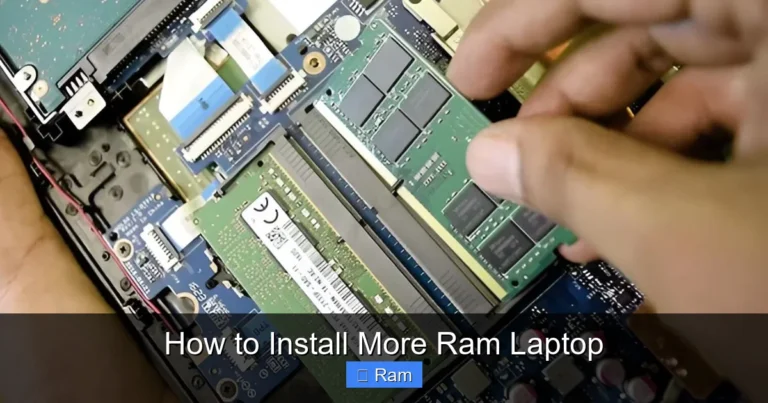
Once the panel is off, look for the RAM slots. They are long, thin slots with small clips on each end. Most laptops have either one or two slots. If one slot is already occupied, you may be able to add a second module alongside it.
Take a photo of the current setup before you make any changes. This makes it easier to remember how everything was positioned when it is time to reassemble.
Step 5: Remove the Old RAM (If Necessary)
If you are replacing existing RAM, you need to remove it first. Push the small clips on either side of the module outward. The RAM stick will pop up at an angle. Then, gently pull it straight out of the slot.
Handle the old module by the edges. Avoid touching the gold connectors on the bottom, as oils from your fingers can cause connection problems.
Step 6: Install the New RAM Stick
Take your new memory module out of its anti-static bag. Hold it by the edges and align the notch on the gold connector with the ridge inside the slot. This ensures you insert it the correct way.
Gently push the module into the slot at a 30- to 45-degree angle. When it is halfway in, press the top of the module down firmly until the side clips click into place. The RAM should sit flat and feel secure.
If you are adding a second stick, repeat the same process for the other slot. Make sure both modules are fully seated and locked in.
Step 7: Close Everything Up
Replace the back panel and align it properly. Press down gently until all clips snap back into place. Then, reinsert the screws and tighten them. Do not overtighten, as this can strip the threads.
If you removed the battery, reinsert it now. Reconnect any peripherals you unplugged earlier.
Testing and Verifying Your Upgrade
Congratulations, you have installed the new RAM. But before you start using your laptop normally, it is important to verify everything is working correctly.
Power on your laptop and check if it recognizes the new memory. On Windows, right-click the Start button and select System. Look at the Installed RAM section. It should now show the updated total.
You can also use a free tool like CPU-Z to get detailed information about your new modules. It shows the type, speed, and timings of the installed memory.
Run a few demanding applications to see how your laptop performs. Open multiple browser tabs, launch a heavy program, or play a game. You should notice faster load times and smoother multitasking.
If your laptop does not recognize the new RAM, do not panic. Try reseating the module by removing it and reinserting it firmly. Sometimes the clips do not lock properly on the first try. If the problem persists, the module may be incompatible with your system.
For troubleshooting help, check out our guide on how to check the RAM on your laptop for step-by-step verification tips.
Common Mistakes to Avoid
Even though upgrading RAM is straightforward, there are a few common mistakes that can cause problems. Here is what to watch out for:
- Buying the wrong RAM type: DDR4 will not work in a DDR3 slot, and vice versa. Always double-check compatibility before purchasing.
- Forcing the module: If the RAM does not slide in easily, you may have it oriented incorrectly. Remove it, flip it, and try again.
- Skipping the anti-static precautions: Static electricity can damage sensitive components. Always use an anti-static wrist strap or touch a grounded metal surface before handling RAM.
- Mixing incompatible modules: Using two different brands or speeds can sometimes cause instability. Try to match the existing module as closely as possible.
- Overlooking BIOS updates: Some laptops require a BIOS update to recognize newer or higher-capacity RAM modules. Check your manufacturer’s website for updates before upgrading.
Avoiding these simple mistakes will save you headaches and ensure a smooth, successful upgrade every time.
Benefits of Upgrading Your Laptop RAM
Still on the fence about whether to upgrade? Here are some real benefits you can expect:
- Faster multitasking: Switch between apps without lag or delays.
- Improved gaming performance: Many modern games require at least 16GB of memory to run smoothly.
- Better video editing: Rendering and exporting videos speed up significantly with more RAM.
- Longer laptop lifespan: A memory upgrade can extend the useful life of your laptop by several years.
- Cost savings: RAM is far cheaper than buying a new laptop, and the installation takes only minutes.
Once you experience the difference, you will wonder why you did not upgrade sooner. It is one of those rare tech upgrades that delivers immediate, tangible results.
Expert Tips for a Smooth RAM Upgrade
Here are a few extra tips from experienced users and technicians to help you get the best results:
- Buy from reputable brands: Stick with well-known manufacturers like Corsair, Kingston, Crucial, and G.Skill for reliable performance.
- Check your laptop’s warranty: Some manufacturers consider opening the back panel as voiding the warranty. Check before you start.
- Upgrade both slots if possible: If your laptop has two slots, replacing both modules with matching sticks often improves stability and performance.
- Keep your old RAM: You never know when you might need it. Store it safely in an anti-static bag.
- Take your time: Rushing through the process increases the risk of mistakes. Work carefully and patiently for the best results.
If you are curious about other ways to boost your laptop’s performance alongside a memory upgrade, you might also want to explore how to upgrade RAM on your laptop with advanced tips and techniques.
Upgrading your laptop RAM is one of the most rewarding DIY projects you can tackle. It costs very little, takes less than 30 minutes, and delivers noticeable improvements every single day. Whether you are a student, a professional, or a casual user, more memory means a better experience.
Now that you know exactly how to upgrade RAM on your laptop, there is nothing stopping you. Gather your tools, grab the right module, and follow the steps in this guide. Your faster, more responsive laptop is just one installation away.
Frequently Asked Questions
Can I upgrade the RAM on any laptop?
Not all laptops allow RAM upgrades. Some ultrabooks and thin models have memory soldered directly to the motherboard. Before purchasing RAM, check your laptop’s specifications or service manual to confirm whether the memory is user-replaceable.
How much does it cost to upgrade laptop RAM?
The cost varies depending on the type and capacity you need. A single 8GB DDR4 RAM stick typically costs between $20 and $40. Higher-capacity modules or DDR5 RAM may cost a bit more, but overall, it remains one of the most affordable laptop upgrades available.
Will upgrading RAM void my laptop warranty?
This depends on your manufacturer and region. Some brands consider opening the back panel as voiding the warranty. Check your warranty terms before proceeding. If you are still under warranty, consider having the upgrade performed by an authorized service center.
How do I know which RAM is compatible with my laptop?
Check your laptop’s manual or the manufacturer’s website for the supported RAM type, speed, and maximum capacity. You can also use tools like CPU-Z or Crucial’s System Scanner to automatically detect compatible modules for your specific model.
Can I mix two different RAM sticks in my laptop?
Yes, you can mix RAM sticks, but it is best to use matching modules from the same brand, speed, and capacity. Mixing different specifications can sometimes lead to compatibility issues or reduced performance. If you must mix, try to match the speed and voltage as closely as possible.
Do I need any special software after upgrading my RAM?
No special software is required. Your laptop’s operating system should automatically detect the new memory upon startup. You can use built-in tools like Task Manager or free third-party apps like CPU-Z to verify that the new RAM is recognized and running at the correct speed.