How to Check Ram Laptop
Knowing your laptop’s RAM is crucial for performance troubleshooting and upgrade planning. You can check your RAM capacity, speed, and type in seconds using your operating system’s built-in utilities like Windows Task Manager or macOS About This Mac. For more detailed hardware information, reliable third-party system profiling tools are the gold standard. This guide walks you through every method, from simplest to most advanced, ensuring you get accurate answers for your specific laptop model.
Ever felt your laptop crawl to a halt when you have a few browser tabs, a document, and a video call open all at once? The culprit is often insufficient or slow Random Access Memory (RAM). But before you can fix a performance problem or plan an upgrade, you need to answer one fundamental question: how to check RAM on your laptop? It’s a simple query with a powerful answer. Knowing your system’s memory configuration—how much you have, what type it is, and how it’s being used—is the first step toward a faster, more responsive computing experience. This guide will transform you from a curious user into a confident diagnostician, covering every safe and effective method to inspect your laptop’s RAM, from one-click software checks to understanding the technical details that matter.
Key Takeaways
- RAM is critical for performance: More and faster RAM allows your laptop to handle more applications simultaneously without slowing down.
- Use built-in OS tools first: Windows Task Manager/System Information and macOS About This Mac/System Report provide instant, accurate RAM details for most users.
- Third-party tools offer deep specs: Utilities like CPU-Z or Speccy reveal exact RAM type (DDR4/DDR5), channel configuration, and timings that OS tools often hide.
- Physical inspection is a last resort: Opening your laptop to check RAM modules directly is only necessary for upgrade planning and carries a risk of damage or voiding warranty.
- Check both capacity and slots: Knowing your installed RAM and the number of empty slots is key to determining your maximum upgrade potential.
- Understand your RAM’s role: Checking RAM isn’t just about gigabytes; understanding speed (MHz) and type helps diagnose bottlenecks and choose compatible upgrades.
- Regular checks aid troubleshooting: Consistently high RAM usage (over 80%) is a clear sign you need to close apps or consider a memory upgrade.
📑 Table of Contents
- Why Checking Your Laptop’s RAM Matters
- Method 1: Using Windows Built-in Tools (The Easiest Way)
- Method 2: Using macOS Built-in Tools
- Method 3: Leveraging Third-Party System Profilers (The Expert’s Choice)
- Method 4: The Physical Inspection (For Upgrade Planning Only)
- Interpreting Your Results and Planning an Upgrade
- Conclusion: Knowledge is Power (and Performance)
Why Checking Your Laptop’s RAM Matters
Before we dive into the “how,” let’s establish the “why.” RAM is your laptop’s short-term, high-speed workspace. When you open an application or a file, it gets loaded from your slow storage drive (SSD/HDD) into the much faster RAM. Your processor then works directly with data in RAM. The more RAM you have, the larger this workspace can be, allowing you to keep more programs active and ready to use without constant swapping back to the slow storage drive.
The Symptoms of Inadequate RAM
If your laptop is struggling, low RAM is a prime suspect. You might notice:
- Constant slowdowns when switching between applications.
- Frequent hard drive activity (listening for clicking or seeing the activity light blink constantly), indicating “swapping” where the system is using your SSD/HDD as fake RAM.
- “Not Responding” messages in applications.
- Difficulty multitasking with modern web browsers, which are notorious RAM hogs.
By learning how to check laptop RAM usage and specs, you can confirm if these symptoms point to a memory shortage. Furthermore, if you’re considering an upgrade, you must know your current configuration to buy compatible modules. You need to know not just the total gigabytes (GB), but also the type (DDR4, DDR5, etc.), speed (MHz), and how many slots your motherboard has.
Method 1: Using Windows Built-in Tools (The Easiest Way)
For the vast majority of Windows laptop users, the operating system itself provides two perfect, no-download-required tools to get all the essential RAM information. These are your first stop for a quick and reliable check.
Visual guide about How to Check Ram Laptop
Image source: i.ytimg.com
Using Task Manager for Real-Time Usage
Task Manager is the go-to utility for seeing how your system resources are being consumed in real-time. It’s fantastic for diagnosing performance issues.
- Press Ctrl + Shift + Esc simultaneously, or right-click the taskbar and select “Task Manager.”
- If you see a simplified view, click “More details” at the bottom.
- Navigate to the “Performance” tab.
- In the left-hand column, click on “Memory.”
Here, you’ll see a clear graph and a set of crucial statistics at the bottom:
- In use (Committed): The amount of RAM currently being used by your OS and applications.
- Available: The amount of free RAM ready for new applications.
- Committed: The total virtual memory (RAM + page file) your system has allocated. The “Commit limit” is the max.
- Speed: The clock speed of your RAM in MHz (e.g., 3200 MHz). This is a key performance metric.
- Installed RAM: The total physical memory capacity (e.g., 16.0 GB). This is the big number everyone looks for.
- Hardware reserved: Memory set aside for your graphics card (GPU) and other hardware. On some laptops, especially those with integrated graphics, this can be 1GB or more.
- Form factor: Will say “SODIMM” for laptops (Small Outline DIMM), confirming you’re looking at the right type.
Pro Tip: The graph shows your RAM usage over time. If it’s consistently near 100% during normal use, that’s a strong indicator you need more RAM. The “Speed” reading here is the effective speed, which might be lower than the module’s rated speed due to power-saving features.
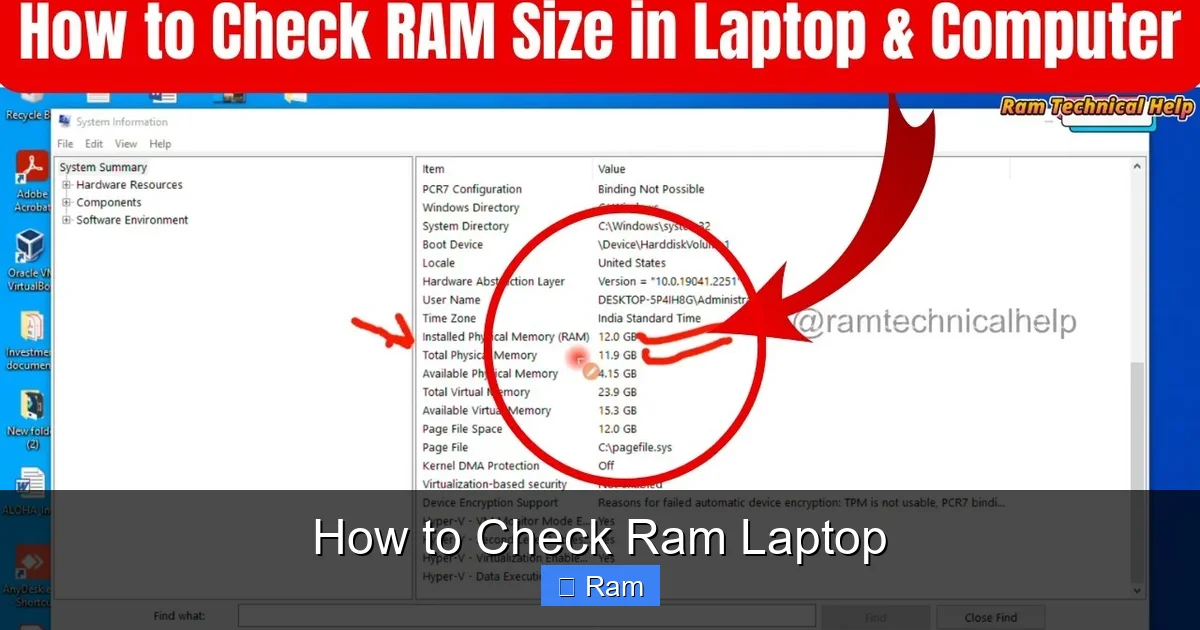
Using System Information for Detailed Specs
For a more text-based, detailed report, the System Information tool is excellent. It provides a snapshot of your hardware configuration.
- Press Windows Key + R to open the Run dialog.
- Type msinfo32 and press Enter.
- In the System Summary window, scroll down to find “Installed Physical Memory (RAM).”
This tells you the total capacity. For more detail, expand the “Components” section on the left, then click “Memory.” This section can provide a more verbose list of each RAM slot and the module installed in it, including the manufacturer, part number, and sometimes the speed. However, on many modern laptops, this information can be sparse or generic. For the most complete hardware-level details, we turn to the next method.
Method 2: Using macOS Built-in Tools
Apple makes checking RAM on a MacBook equally straightforward, though the terminology is slightly different. The process is nearly identical across all modern macOS versions.
Visual guide about How to Check Ram Laptop
Image source: cdn.mos.cms.futurecdn.net
The “About This Mac” Overview
- Click the Apple menu () in the top-left corner of your screen.
- Select “About This Mac.”
The window that appears gives you the headline number: “Memory:” followed by the total capacity (e.g., 8 GB 2133 MHz LPDDR3). This tells you the total RAM, its speed, and its type (LPDDR3, DDR4, etc.). LPDDR (Low Power DDR) is common in modern MacBooks and is soldered directly to the motherboard, making it non-upgradable in most recent models. This is a critical piece of information if you’re considering an upgrade—many MacBooks have RAM that cannot be replaced.
Using System Report for Granular Data
- In the same “About This Mac” window, click the “System Report…” button.
- In the Hardware section, select “Memory.”
This provides a more detailed breakdown. It will list each memory slot (even if only one is populated) and the type, size, and speed of the module installed. For a MacBook with a single, soldered RAM chip, it will show one “Bank” with the full capacity. This report is the definitive source for your Mac’s memory configuration.
Method 3: Leveraging Third-Party System Profilers (The Expert’s Choice)
While OS tools are great, they don’t always reveal the full hardware identity of your RAM modules—the manufacturer, the exact part number, or the individual timings (like CAS latency). For enthusiasts, technicians, or anyone buying a precise upgrade, a dedicated system profiling tool is indispensable. These are free, safe utilities from reputable developers.
CPU-Z: The Gold Standard for Hardware Details
CPU-Z is a lightweight, trusted tool that has been around for years. It’s the preferred method for gamers and overclockers to verify their hardware.
- Download CPU-Z from the official website (cpuid.com).
- Install and run it (no reboot needed).
- Navigate to the “SPD” tab.
This tab is a treasure trove. You’ll see a dropdown list for each memory slot (e.g., “Slot #1”, “Slot #2”). Select each one to see the full specification sheet for the RAM stick physically installed there. You’ll find:
- Module Size: Capacity per stick.
- Module Type: DDR4, DDR5, etc.
- Module Name: The manufacturer’s part number (e.g., HMA851S6CJR6N-XN).
- Max Bandwidth: The theoretical maximum speed (e.g., DDR4-2666).
- Manufacturer: Who made the memory chips (Samsung, Micron, SK Hynix).
- Timings: Detailed latency numbers like CAS Latency (CL).
If your laptop has only one slot populated, the other will likely show “None.” This view is perfect for matching a new RAM stick exactly to your existing one for dual-channel performance, or simply for confirming you’re buying compatible memory.
Speccy: A User-Friendly Alternative
Developed by Piriform (the makers of CCleaner), Speccy presents system information in a cleaner, more visual format. It’s excellent for a quick, comprehensive overview.
- Download Speccy from the official CCleaner website.
- Run the application.
- The default “Summary” page will show your RAM type, size, and speed right at the top.
- Click on the dedicated “RAM” section in the left sidebar for even more detail, including channel configuration and individual slot information.
Speccy is less granular than CPU-Z’s SPD tab but often provides more manufacturer and model detail than Windows’ native tools, all in a very readable interface.
Method 4: The Physical Inspection (For Upgrade Planning Only)
Sometimes, software can’t tell you everything, or you simply want to see the components yourself before ordering parts. Physically checking the RAM modules is the ultimate verification method. Important: This should only be done if you are comfortable with basic hardware disassembly and your laptop’s warranty is either void or you’re willing to risk it. Always power down, unplug, and remove the battery (if possible) before touching internal components.
How to Safely Access Your Laptop’s RAM
The process varies by laptop model, but the general steps are:
- Research Your Model: Search online for “[Your Laptop Brand and Model] RAM upgrade” or “service manual.” Brands like Dell, HP, and Lenovo often have official guides. YouTube is an invaluable resource for visual teardown guides for your specific model.
- Gather Tools: You’ll typically need a small Phillips-head screwdriver. Some laptops use Torx screws. A plastic spudger or pry tool is also helpful for opening clips without scratching.
- Power Down Completely: Shut down the OS, unplug the charger, and if it has a removable battery, take it out.
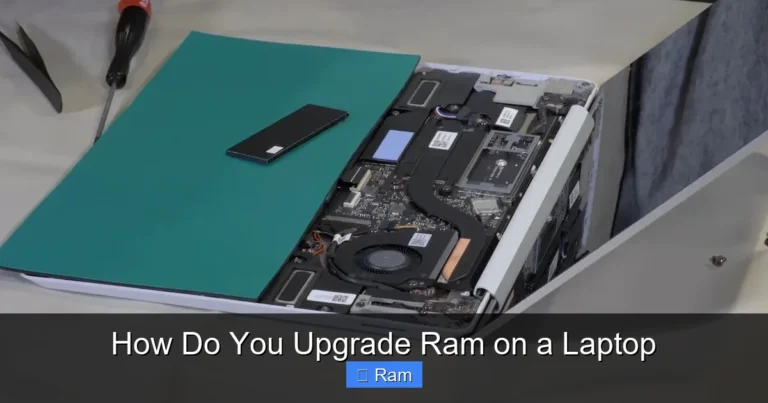
- Open the Case: Most laptops have a bottom panel secured by 8-12 screws. Remove them, keep them safe, and gently pry the panel off. Some newer laptops have screws hidden under rubber feet or require you to remove the entire keyboard bezel—this is why research is step one!
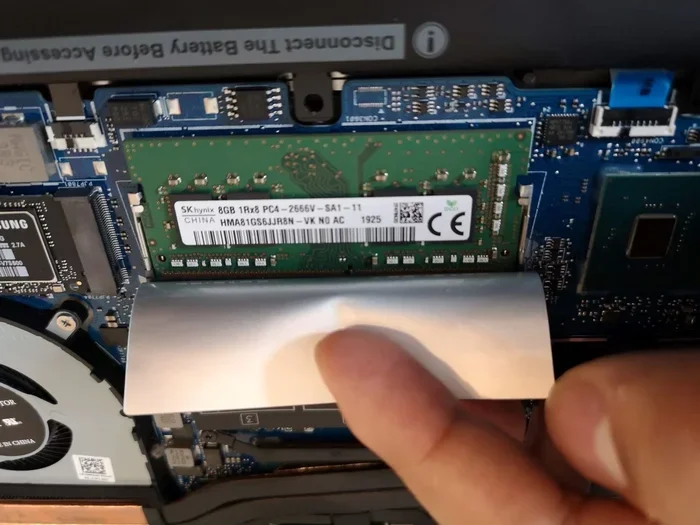
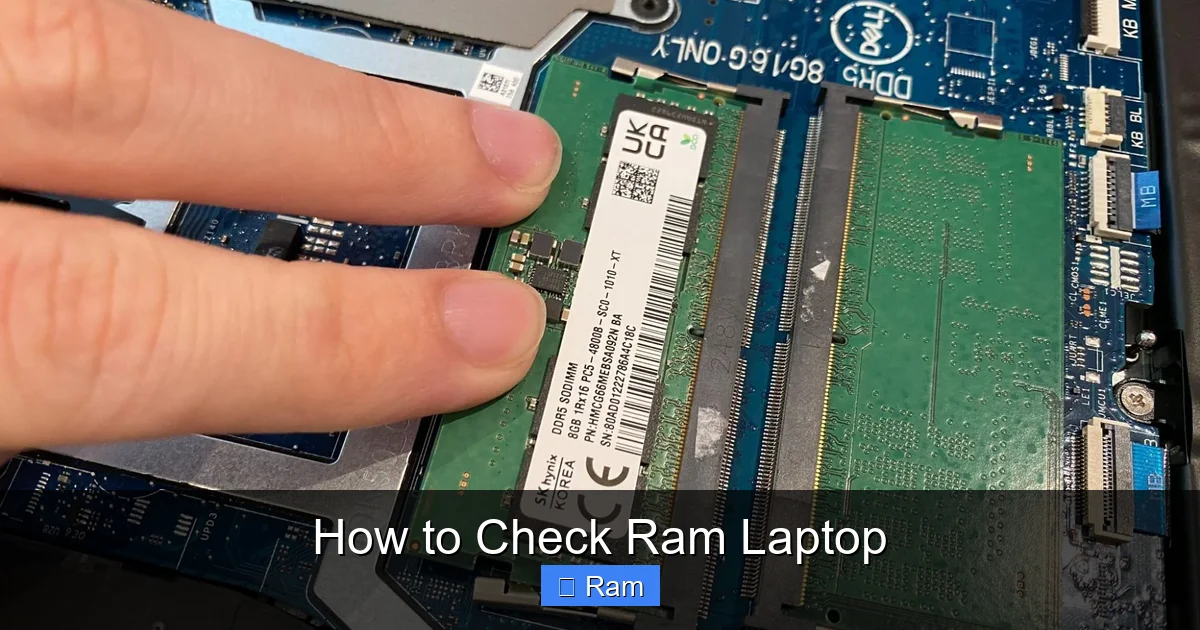
- Locate the RAM Modules: They are small, circuit-board sticks (SODIMMs) usually held down by one or two small metal clips on either side. They are often the most accessible component.
What to Look For When You See the RAM
Once you have the modules in view, here’s your checklist:
- Count the Slots: How many total slots are on the motherboard? Are they all occupied, or are there empty ones?
- Read the Label: On the sticker on the RAM stick itself, you’ll find the definitive information:
- Capacity: e.g., 4GB, 8GB, 16GB.
- Type: e.g., DDR4, DDR5, LPDDR4X.
- Speed: e.g., 3200MHz, 4800MHz.
- Model Number: The exact part identifier.
- Note the Notch: The position of the notch on the gold contacts (pins) is different for DDR3, DDR4, and DDR5. This is a physical key that prevents installing incompatible RAM. Confirm your laptop’s required generation.
- Check for Manufacturer Brand: Brands like Crucial, Samsung, SK Hynix, and Micron are common.
Reassembly: When done, carefully reinsert the RAM (if you removed it) at a 45-degree angle, then press it down until the side clips lock into place. Reattach the bottom panel and screws. Do not overtighten.
Interpreting Your Results and Planning an Upgrade
Now that you have all this data, what does it mean? Let’s synthesize the information to make a smart decision.
Understanding the Key Specs: Capacity, Speed, and Type
When you check RAM laptop specs, three numbers are king:
- Capacity (GB): This is your total workspace. For general use today, 8GB is the bare minimum, 16GB is the sweet spot for multitasking and light gaming, and 32GB+ is for professional workloads (video editing, 3D rendering, heavy VMs).
- Speed (MHz): This is how fast the RAM can transfer data. Higher numbers (e.g., 4800 MHz vs. 2666 MHz) are better, but the performance gain is often marginal for everyday tasks. The real benefit is seen in gaming and productivity apps. Your RAM will run at its rated speed or the maximum supported by your CPU/ motherboard, whichever is lower.
- Generation (DDR4, DDR5, LPDDR): This is the most critical compatibility factor. You cannot install DDR4 RAM into a slot designed for DDR5. LPDDR is soldered and not upgradable. Your physical inspection or CPU-Z will tell you definitively which generation you have.
Checking for Empty Slots and Dual-Channel Mode
Your physical check or CPU-Z/System Information will reveal if you have empty RAM slots. If you do, an upgrade is simple: buy a compatible stick and add it. For optimal performance, it’s best to install RAM in matching pairs (e.g., two 8GB sticks instead of one 16GB stick) if your laptop supports dual-channel mode. Dual-channel doubles the data pathway between RAM and the memory controller, significantly boosting performance. Most laptops with two slots will run in dual-channel mode if both slots are populated with identical capacity and speed modules. If you have one stick and an empty slot, adding an identical stick will enable dual-channel.
How to Choose the Right Upgrade RAM
Armed with your laptop’s exact specs, you can shop confidently:
- Match the Generation: DDR4 must be replaced with DDR4. This is non-negotiable.
- Match the Speed: While you can often install faster-rated RAM (it will just run at your system’s max speed), it’s best to match what you have for compatibility, especially if mixing with an old stick.
- Match the Capacity per Stick: If you’re adding to an existing stick, try to get one with the same capacity (e.g., add another 8GB to an existing 8GB). If replacing all sticks, any configuration within your slot limit works.
- Buy from Reputable Brands: Crucial (by Micron), Kingston, Corsair, and G.Skill are reliable. Crucial’s website has an excellent system scanner that will tell you exactly what RAM is compatible with your specific laptop model.
- Check Maximum Supported RAM: Your laptop’s manufacturer specifications will list the maximum RAM it supports (e.g., 64GB). Even if you have two slots that could hold 32GB each, the system may only support 64GB total. Don’t buy beyond this limit.
Conclusion: Knowledge is Power (and Performance)
Learning how to check RAM on a laptop demystifies one of your computer’s most important components. It’s no longer a complex task reserved for IT professionals. With the built-in tools in Windows and macOS, you can get a solid overview in under 30 seconds. For the hardware enthusiast or someone planning a precise upgrade, a free tool like CPU-Z provides the deep, technical specifications needed to make a perfect match. And while physical inspection is the ultimate truth-teller, it should be approached with caution and preparation.
Remember, the goal isn’t just to collect numbers. The goal is to understand your system’s capabilities and limitations. Is your 4GB of RAM struggling to keep up? Is your single-channel, slow DDR4 holding back a capable processor? By routinely checking your RAM usage and knowing your upgrade path, you take control of your laptop’s performance. You can make informed decisions—whether that’s closing unnecessary browser tabs, investing in a cost-effective RAM upgrade, or realizing it’s time for a whole new machine. So power up your laptop, open Task Manager or About This Mac, and take the first step toward a faster, more efficient computing experience today.
Frequently Asked Questions
Can I check my laptop’s RAM without turning it on?
No, checking RAM requires the system to be powered on and the operating system to be running, as the information is read from the memory modules by the CPU and reported by the OS. Physical inspection is the only way to see the modules without powering on, but that involves opening the laptop.
What’s the difference between “Installed RAM” and “Usable RAM”?
“Installed RAM” is the total physical memory capacity in your laptop. “Usable RAM” is slightly less because the system and integrated graphics reserve a portion of that memory for their own operations. This “hardware reserved” memory is not available to your applications and is visible in your OS’s memory details.
Does the brand of RAM matter when upgrading?
For compatibility, matching the key specs (DDR generation, speed, capacity) is more important than the brand. However, buying from reputable brands like Crucial, Kingston, or Corsair ensures quality, reliability, and often better compatibility. Using identical brand and model sticks is ideal for dual-channel stability.
How do I know if my laptop’s RAM is upgradable?
First, check your laptop’s specifications on the manufacturer’s website. Look for terms like “user-upgradable” or “accessible slots.” Second, use a tool like CPU-Z to see if the RAM is listed as “On Board” (soldered) or if it shows slots with modules. Physically, if you can open the bottom panel and see SODIMM slots with clips, it’s almost certainly upgradable. Many modern ultrabooks solder RAM directly to the motherboard for thinness, making it non-upgradable.
Is it better to have one large RAM stick or two smaller ones?
Two smaller sticks (e.g., 2x8GB) are generally better than one large stick (1x16GB) if your laptop has two slots. This configuration enables dual-channel mode, which can provide a significant performance boost (5-15% in many applications) by allowing the memory controller to access both modules simultaneously. If you only have one slot, you have no choice but to use a single stick.
Can mixing RAM speeds cause problems?
Generally, no. If you install a faster RAM stick alongside a slower one, the system will automatically run both at the speed of the slower module. This is called downclocking. The main risk is with mixing different generations (e.g., DDR4 and DDR5), which is physically impossible. Mixing brands or timings is usually fine, but for best stability in a dual-channel setup, using identical modules is recommended.