How to Find Ram of Laptop

Knowing your laptop’s RAM is crucial for performance upgrades and troubleshooting. You can easily find this information using built-in system tools on Windows (Task Manager), macOS (About This Mac), or Linux (terminal commands). For the most accurate details, especially about type and speed, physically opening the laptop or using trusted third-party system information software is recommended.
Ever felt your laptop sluggish when opening a dozen browser tabs or editing a photo? The culprit is often insufficient RAM, or Random Access Memory. But before you can upgrade or troubleshoot, you need to answer one fundamental question: how to find RAM of laptop? It’s a simple task that unlocks a world of understanding about your machine’s capabilities. Whether you’re a casual user, a student, or a budding tech enthusiast, knowing your laptop’s memory specs is an essential piece of DIY knowledge. This guide will walk you through every method, from the fastest one-click solutions to the thorough physical check, ensuring you get accurate information for your specific Windows PC, Apple MacBook, or Linux machine.
We’ll start with the easiest software methods that take seconds. Then, we’ll dive into how to verify and get more detail by looking at the actual memory sticks inside. Finally, we’ll cover powerful third-party tools and what all those numbers (like 3200MHz or CL16) actually mean. By the end, you won’t just know how much RAM you have—you’ll understand what kind it is and what that means for your laptop’s performance. Let’s begin.
Key Takeaways
- Built-in OS Tools: Windows Task Manager, macOS About This Mac, and Linux terminal commands provide quick, non-invasive ways to see installed RAM capacity and basic usage.
- Physical Inspection: Opening the laptop’s RAM access panel reveals the exact type (DDR3/DDR4/DDR5), speed (MHz), and number of slots used, which software sometimes misses.
- Third-Party Software: Tools like CPU-Z or Speccy offer incredibly detailed, user-friendly breakdowns of RAM specifications, including timings and channel configuration.
- Capacity vs. Usable: The total installed RAM shown may differ slightly from the “usable” amount due to system hardware reservations, especially on integrated graphics systems.
- Upgrading Requires Knowledge: Before buying new RAM, you must know your laptop’s maximum supported RAM, slot count, and compatible type/speed from the manufacturer’s specs or a tool like Crucial’s scanner.
- Check Both Software & Hardware: For a complete picture, use a software method first, then confirm type and slots with a physical check if possible, especially before an upgrade.
📑 Table of Contents
- Why Knowing Your RAM Matters
- Method 1: The Windows Power User’s Quickest Route
- Method 2: The macOS (MacBook) Way
- Method 3: For Linux Users and the Terminal Savvy
- Method 4: The Physical Inspection – The Gold Standard for Accuracy
- Method 5: Leveraging Third-Party System Information Software
- Decoding RAM Specs: What All Those Numbers Mean
- Putting It All Together: A Practical Upgrade Walkthrough
- Conclusion: Knowledge is Power (and Performance)
Why Knowing Your RAM Matters
Before we jump into the “how,” let’s quickly establish the “why.” RAM is your laptop’s short-term workspace. When you open an application, it loads from your slow storage drive (SSD/HDD) into the fast RAM so the processor can work on it instantly. More RAM means you can have more applications and browser tabs active without your system slowing to a crawl by constantly swapping data back to the drive. It’s the difference between a smooth workflow and a frustrating, spinning-wheel experience.
The Upgrade Decision
The most common reason to check RAM is to plan an upgrade. If your laptop feels slow and you’ve ruled out other issues, adding more RAM is often the most cost-effective performance boost. But you can’t just buy any stick. You need to know your laptop’s motherboard supports—the type (DDR4, DDR5, etc.), the maximum speed (in MHz), and how many empty slots you have. Guessing leads to wasted money or incompatible parts.
Troubleshooting and Compatibility
Even if you’re not upgrading, checking RAM is vital for troubleshooting. If your laptop is crashing or blue-screening, faulty RAM is a prime suspect. System information tools can help you identify if all your modules are recognized and running at the correct speed. Furthermore, if you’re buying a used laptop or a second-hand memory module, verifying the specs protects you from dishonest sellers.
Method 1: The Windows Power User’s Quickest Route
For the vast majority of users on a Windows 10 or 11 laptop, the built-in Task Manager is your best friend. It’s always there, requires no downloads, and gives you the critical information in under 10 seconds.
Using Task Manager
Here’s the step-by-step process:
- Open Task Manager: The fastest way is to press Ctrl + Shift + Esc simultaneously. Alternatively, right-click the taskbar and select “Task Manager,” or press Ctrl + Alt + Delete and choose it from the menu.
- Navigate to Performance: In the Task Manager window, click on the “Performance” tab at the top.
- Select Memory: On the left sidebar, you’ll see options like CPU, Memory, Disk, etc. Click on “Memory”.
- Read the Details: The main graph will show you usage. At the bottom right, you’ll see the key specs. It clearly states “In use (Compressed)” and “Committed (Cache)”, but the most important line for our purpose is at the very top: “X GB / Y GB”. Here, Y GB is your total installed RAM (e.g., “8.0 GB / 16.0 GB” means you have 16GB total). Below that, it also shows the “Speed” (e.g., 3200 MHz) and the “Form factor” (which will say ” SODIMM ” for laptops).
Pro Tip: The Task Manager is fantastic for a quick check, but it has limitations. It often doesn’t specify the exact RAM type (DDR4 vs. DDR5) and may not show if you have multiple sticks of different sizes or speeds. For that, we need a deeper look.
Method 2: The macOS (MacBook) Way
Apple makes it beautifully simple to find your MacBook’s memory. The information is front and center in the “About This Mac” section.
Using “About This Mac”
Follow these straightforward steps on any MacBook running a relatively recent version of macOS:
- Click the Apple Menu: In the top-left corner of your screen, click the Apple logo (🍎).
- Select “About This Mac”: The first item in the dropdown menu is “About This Mac.” Click it.
- Review the Overview: A small window pops up. The very first line under your Mac’s name and macOS version will state your “Memory”. For example: “Memory: 8 GB 2133 MHz LPDDR3” or “16 GB 3733 MHz LPDDR4X”. This tells you the total capacity, speed, and crucially, the exact type (LPDDR3, LPDDR4X, etc.).
This method is arguably the most complete and user-friendly of the built-in OS tools. macOS bundles the type, speed, and capacity into a single, easy-to-read line. However, it still won’t tell you the number of physical slots (most modern MacBooks have soldered RAM, but some older models had slots) or detailed timing information (latency).
Method 3: For Linux Users and the Terminal Savvy
If you’re running a Linux distribution like Ubuntu, Fedora, or Mint, you have powerful command-line tools at your disposal. The most common and informative is dmidecode.
Visual guide about How to Find Ram of Laptop
Image source: robots.net
Using the Terminal with dmidecode
This method requires a terminal window and, for most detailed info, sudo (administrator) privileges.
- Open Terminal: You can usually find it in your applications menu under “System” or “Utilities,” or press Ctrl+Alt+T.
- Run the Command: Type the following command and press Enter:
sudo dmidecode -t memory - Enter Your Password: You’ll be prompted for your user password. Type it (you won’t see characters appear) and press Enter.
- Interpret the Output: The terminal will flood with detailed information. Scroll through to find sections labeled “Size:” (for each module), “Type:” (DDR4, etc.), “Speed:”, and “Locator:” (which indicates the slot, like “DIMM_A1”). The total installed RAM is the sum of all “Size” values.
Alternative Simpler Command: For just a quick summary of total and used RAM, you can use the free -h command, which shows memory in a human-readable format (GB). But for specs, dmidecode is the gold standard in the terminal.
Method 4: The Physical Inspection – The Gold Standard for Accuracy
Software is convenient, but seeing the actual memory module with your own eyes is the only way to get 100% certain information about its type, speed, and physical configuration. This is the method techs use before upgrading or diagnosing.
Safety First: Power Down and Unplug
This is non-negotiable. Shut down your laptop completely. Do not just sleep or hibernate it. Unplug the charger and, if possible, remove the battery (many modern laptops have sealed batteries, so just ensure it’s off and unplugged). Ground yourself by touching a metal part of the laptop’s chassis or use an anti-static wrist strap to prevent electrostatic discharge (ESD) from damaging sensitive components.
Finding and Opening the RAM Panel
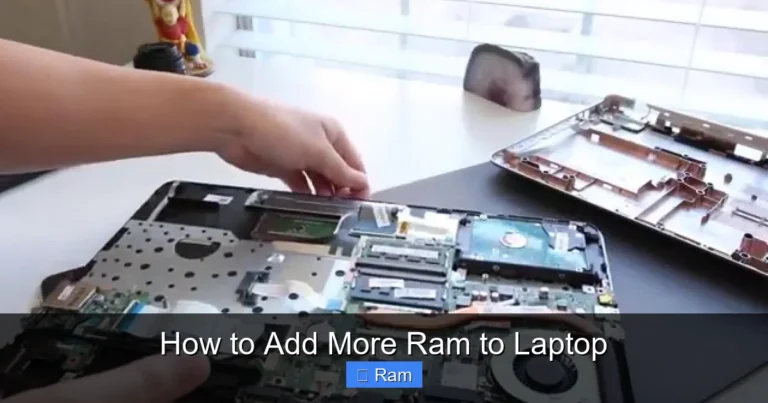
Most laptops have a small access panel on the bottom held by one or two screws. Look for a panel that’s roughly the size of a large postage stamp, often labeled with a memory chip icon. Consult your laptop’s user manual or a quick YouTube search for your specific model (“[Your Laptop Model] RAM upgrade”) to find its exact location and screw type (Phillips #0 or #00 is common).
- Carefully remove the screws and keep them safe.
- Use a plastic spudger or your fingernail to gently pry the panel up. It may have clips holding it.
- Once open, you should see one or two small, green circuit boards (the RAM sticks) held down by small metal clips on the sides.
Reading the Label on the Stick
Gently pull the clips outward (they may pop up) to release the stick. It will angle up at about 45 degrees. You can then pull it out. Now, look at the sticker on the top of the RAM module. It contains all the secrets:
- Part Number: A long code like “KCP426SD8/16” or “M471A1K43DB1-CTD”. This is the most precise identifier.
- Capacity: Will say “4GB,” “8GB,” “16GB,” etc.
- Type: Will say “DDR4,” “DDR5,” “LPDDR4X,” etc.
- Speed: Listed as a number followed by “MHz” (e.g., “3200MHz”) or as a “PC” number (e.g., “PC4-25600” which translates to 3200MHz).
- Timings: A series like “22-22-22-52” or “CL22”. The first number (CAS Latency, or CL) is the most important for performance.
Reassembly: To put it back, align the notch on the stick with the slot, insert it at a 45-degree angle until the gold contacts are fully in, then press it down firmly until the clips snap back into place. Reattach the panel and screws. Don’t force anything!
Method 5: Leveraging Third-Party System Information Software
For users who want a beautiful, detailed, and easy-to-understand report without opening their laptop, third-party system profiler tools are perfect. They aggregate data from all the methods above into one clean interface.
Top Recommended Tools
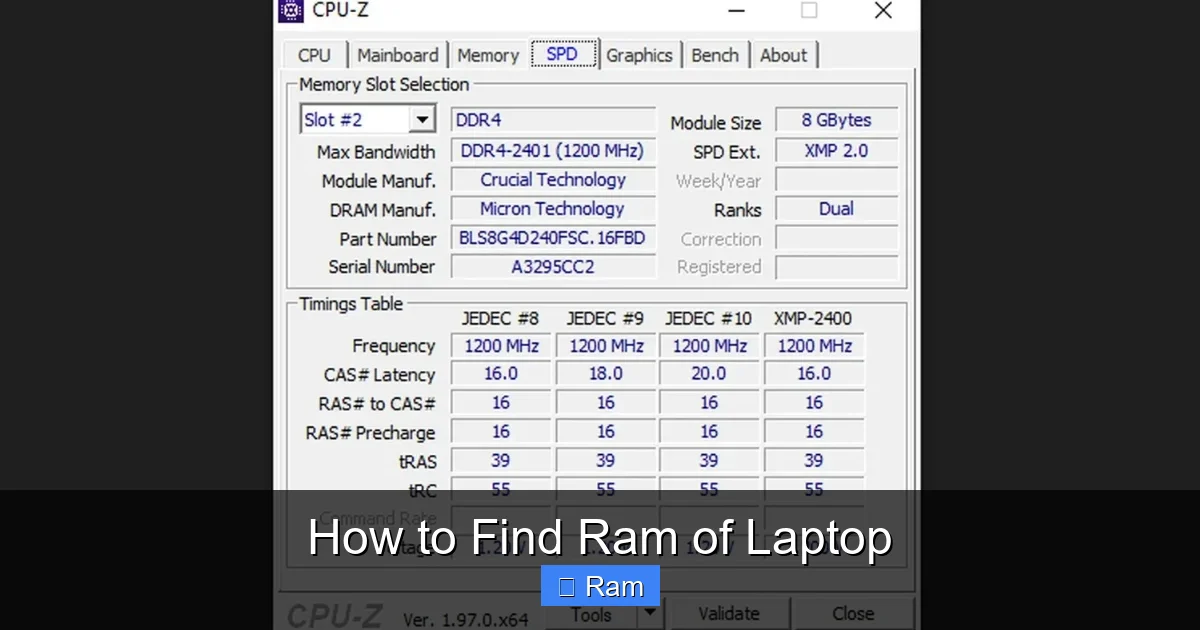
- CPU-Z (Free & Lightweight): This is the industry standard for hardware geeks. Download it from the official CPUID website. After opening, click the “Memory” tab for type and size, and the “SPD” tab. Under SPD, select each memory slot from the dropdown to see the full specs (size, type, speed, timings) for every individual module installed. It’s incredibly detailed.
- Speccy (by Piriform, Free & Premium): Known for its clean, colorful, and very readable layout. The “RAM” section on the summary page gives you capacity, type, and speed at a glance. Clicking into it provides more detail on channels and each stick.
- HWiNFO (Free & Comprehensive): A powerhouse for all hardware info. It can be overwhelming, but its “Memory” section is exhaustive, listing everything from type and size to voltage, manufacturer, and detailed timing information for each slot.
Caution: Always download these tools from their official websites to avoid bundled malware or adware. They are safe and reputable, but third-party download portals can be shady.
Decoding RAM Specs: What All Those Numbers Mean
You’ve found the information. Now, what does it mean? Understanding these specs helps you make informed upgrade decisions.
DDR Generations: DDR3, DDR4, DDR5
This is the physical generation of RAM. DDR4 has been standard for nearly a decade. DDR5 is the newest, offering higher speeds and better efficiency but is only found in very recent, high-performance laptops. LPDDR4X/LPDDR5 are low-power variants soldered directly to the motherboard, common in thin-and-light ultrabooks and MacBooks. You cannot mix DDR generations. Your laptop’s motherboard dictates which type it accepts.
Speed: MHz and PC Numbers
Speed is measured in megahertz (MHz). Common speeds are 2666MHz, 3200MHz, 4800MHz, and 5600MHz for DDR4/DDR5. Higher numbers mean faster data transfer. You’ll also see a “PC” number like PC4-25600. Divide the number after “PC” by 8 to get the MHz (25600 / 8 = 3200). Your RAM will run at the speed of its slowest module, and the motherboard may limit it to a maximum supported speed (JEDEC speed). XMP profiles (common on gaming PCs) allow higher speeds, but most laptops run at standard JEDEC speeds.
Capacity and Configuration
This is the total GB (e.g., 16GB). Modern Windows 11 ideally wants at least 8GB, with 16GB being the sweet spot for most users. 32GB+ is for heavy multitaskers, video editors, and engineers. Also note the configuration: single-channel (one stick), dual-channel (two sticks of equal size, which doubles the data pathway and significantly improves performance), or mismatched sizes (e.g., 8GB + 16GB, which will run in flex mode, partially dual-channel). For best performance, matching pairs in the correct slots are ideal.
Timings (Latency): CL and Beyond
Timings like CL22-26-26-48 represent the delay cycles between RAM operations. The first number, CAS Latency (CL), is the most important. Lower is better. However, speed and timings are a trade-off. Higher-speed RAM (4800MHz) often has higher timings (CL40) than slower RAM (3200MHz CL16). For most laptop users, speed is a more noticeable factor than tight timings. Don’t worry too much about CL unless you’re benchmarking or fine-tuning a high-end gaming rig.
Putting It All Together: A Practical Upgrade Walkthrough
Let’s say you checked your RAM and found you have a single 8GB DDR4-2666 SODIMM stick in a Lenovo ThinkPad T480. You want to upgrade to 16GB. Here’s how the information you gathered guides your purchase:
- Form Factor: “SODIMM” tells you to buy laptop memory, not desktop DIMMs.
- Type: “DDR4” means you must buy DDR4 SODIMMs. A DDR5 stick won’t fit and won’t work.
- Speed: Your existing stick is 2666MHz. You can buy another 2666MHz stick for perfect compatibility. You could also buy a faster 3200MHz stick; it will run at 2666MHz (the speed of the slower stick and the motherboard’s limit), so it’s a waste of money unless you replace both.
- Slots: A physical check or manual research reveals the T480 has two slots. One is occupied. You have one empty slot. You can buy a single matching 8GB 2666MHz DDR4 SODIMM to add for 16GB total in dual-channel mode (8GB+8GB).
- Maximum Supported: The manufacturer’s spec sheet says it supports up to 32GB (2x16GB). Your 16GB (2x8GB) plan is well within limits.
Armed with this precise knowledge, you can buy the correct, compatible RAM with confidence, avoiding returns and frustration.
Conclusion: Knowledge is Power (and Performance)
Learning how to find RAM of laptop isn’t just a technical chore; it’s the first step to truly understanding and controlling your computer’s performance. You now have a toolkit of methods, from the instant gratification of Windows Task Manager to the definitive certainty of a physical inspection. Remember the hierarchy: use software for a quick check, verify with a physical look or CPU-Z before any upgrade, and always cross-reference with your laptop manufacturer’s official specifications for maximum supported memory.
Your laptop’s RAM is its active working brain. Keeping it adequate and healthy is one of the simplest ways to extend your machine’s useful life and keep it feeling snappy. So, open that Task Manager, click that “About This Mac,” or carefully pop open that panel. Discover what’s inside, and you’ll be empowered to make smarter decisions about your digital companion for years to come.
Frequently Asked Questions
Can I mix RAM sticks of different brands and speeds?
You can physically mix them, and the system will usually boot. However, all RAM will operate at the speed of the slowest module, and running mismatched sizes (e.g., 8GB + 16GB) may prevent true dual-channel performance, leading to slightly lower speeds. For optimal stability and performance, it’s best to use identical sticks in matched pairs.
What’s the difference between DDR4 and DDR5 RAM? Can I upgrade my DDR4 laptop to DDR5?
DDR5 is the newer generation, offering higher speeds, greater capacity per module, and improved power efficiency. However, the physical notch (key) is in a different position, and the motherboards are not compatible. You cannot upgrade a DDR4 laptop to DDR5 RAM. The motherboard socket and controller are generation-specific. You must use the type your laptop was designed for.
My laptop shows 16GB RAM, but only 15.8GB is usable. Is this normal?
Yes, this is completely normal. A small portion of your total RAM (typically 0.5GB to 1GB, sometimes more on systems with integrated graphics) is reserved by the hardware and BIOS for system use, GPU memory (if using integrated graphics), and other low-level functions. The “usable” amount is what Windows has access to for your applications.
What’s the maximum RAM my laptop can support?
This is determined by your laptop’s motherboard and chipset. The best way to find out is to: 1) Check the official specifications on the manufacturer’s website for your exact model number, 2) Use a tool like Crucial’s System Scanner or Kingston’s Memory Search, which automatically detects compatible upgrades and maximums, or 3) Consult the technical manual (often found online) which lists memory specifications.
Should I upgrade my RAM or my SSD first if my laptop is slow?
For general responsiveness (booting, launching apps, loading files), upgrading from a hard drive (HDD) to a solid-state drive (SSD) is the single biggest improvement you can make. If you already have an SSD and still experience slowdowns with many programs open, then adding more RAM is the next logical step. Check your current RAM usage in Task Manager; if it’s consistently over 80-90% during normal use, an upgrade will help.
Is it better to have one large RAM stick or two smaller ones?
For performance, two smaller sticks (e.g., 2x8GB) in a dual-channel capable laptop is almost always better than one large stick (1x16GB). Dual-channel mode doubles the data bandwidth between the RAM and the memory controller, significantly boosting performance in tasks that are memory bandwidth-sensitive, like gaming, video editing, and scientific computing. However, using two sticks uses both slots, leaving no room for future expansion.